Lessons
Class Introduction
03:47 2Flash & Exposure Review
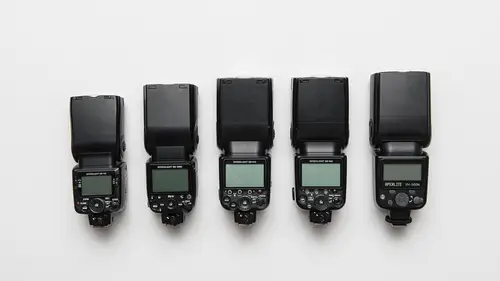
11:36 3Demo: Flashes Overview
11:54 4Demo: Manual Flash
12:16 5Triggering Methods Overview
15:39 6Demo: Mixing Brands of Triggers
17:45 7Demo: Defining Lights Overview
14:45 8What Modifier to Use with Multiple Flashes?
05:48Demo: Umbrellas
20:31 10Demo: Soft Boxes
12:57 11Demo: Octas
10:58 12Demo: Reflectors
05:47 13Demo: Beauty Dish
05:01 14Snoots & Grids Overview
04:15 15Demo: How to Setup Multiple Lights in the Studio
13:12 16Demo: Key & Hair/Rim Light Setup
04:59 17Demo: Key & Background Light Setup
07:53 18Demo: Clamshell Two Light Setup
14:39 19Demo: Key, Fill & Background Light Setup
17:42 20Demo: Side Lights & Background Light Setup
10:21 21Demo: Clamshell & Rim Light Setup
06:16 22Demo: Rembrandt, Fill & Hair Light Setup
07:13 23Demo: Rembrandt, Fill, Hair & Background Lights
20:40 24Demo: Clamshell, Rim, One Background Light
09:40 25Demo: How to Produce a Pure White Background
28:26 26Demo: Full-Length Portraits with Multiple Lights
07:28 27Demo: Still Life Example with Multiple Lights
10:22Lesson Info
Flash & Exposure Review
We'll start here with the review and I'm just gonna go through the camera settings and flash settings. We're gonna spend, I'm guessing, probably 20, 30, maybe 40 minutes on this, going through the basics. So, as a photographer you gotta learn the basics. If you're wanting to utilize multiple flashes, you need to really understand what the flash settings are, what the camera settings are, what does TTL actually mean, and what does TTL actually do. What does manual exposure mean and what does manual exposure actually do. Once you understand that, then you can start creating art. You can't really create true art in photography until you understand the fundamentals. That's been one of my mantras for years. My background is mechanical engineering and it's easy for me to do the gear side of things, the technology side of things, for me the difficult thing is art, but I know that creating art can't happen until I understand f-stops and apertures. So, I want to encourage you today to pay close...
attention to all of this review stuff, okay. All of our flash photography is a combination of two exposures; this is one of the most important concepts to learn. There's always two exposures when you do flash photography. There's the ambient light, and then there's the light you generate with the flashes. And you need to think of them as two separate entities. You need to think of them as two separate elements that you're gonna control, and you can control them to some extent. You can control flash completely. In terms of ambient light though, well, you're kinda stuck with what you got. So what is ambient light? Well, ambient light is anything that, any of the light that exists. Like here in the studio, I would call the studio lights that shining on me the ambient light. If I'm outside, well, the ambient light's the sun, or maybe it's a cloudy day. If I'm inside my house, the ambient light is my, are my light bulbs in my kitchen. So you need to think, do I want to include that ambient light, and incorporate it into the photo, or do I want to exclude it altogether. And I'm gonna show you today how we exclude the ambient light. You know, today it's all in the studio so I don't really want any of these studio lights influencing my photography, so I'm gonna exclude it. And just a little preview, you exclude it with a fast shutter speed, okay. A higher shutter speed, say a 1/250 of a second, that cuts out the ambient light. Okay, so if you cut out the ambient light what light do you have left to work with? Well, you've got the flash. So the flash from these little speedlights, you can make these flashes brighter, you can make them darker, you can put them inside of umbrellas and soft boxes and make them appear to big and make them appear to be small. So, with flash photography you really have ultimate control, but there's a lot of times when you want to include ambient with your flash photography, so just keep that in mind. All of your flash photography is a combination of two exposures. One exposure's for the ambient, the other's for the flash. All right, how about camera settings. Today, I'm shooting with a Nikon, it's an older Nikon, but it works with all the technology we have here on set. What I'm gonna talk about pertains to Canons it pertains to Sonys and Fujis, all of that good stuff. So, the first thing that I think about when I'm doing studio photography, is what's the ISO, what ISO do I need to be at? And I mentioned that we're gonna be focusing, in this class, more on the smaller speedlights. And one thing we need to know about these small speedlights is they don't have a lot of power on energy, they run on AA batteries, so you don't get a lot of oomph out of them. So because of that, I recommend shooting at ISO 400. ISO 400 in the studio, but that's gonna allow you to do, is to use a little bit more aperture, you're gonna be able to shoot maybe an f/5.6, f/8, maybe, in a pinch, even f/11. If you're using larger studio lights, and I have some pro photos here on set today, and we'll be using those in a little while, but with the bigger studio lights, you know the expensive ones, the ones that costs thousands of dollars, in those cases you can use ISO 100. So, for the studio setting, I generally, with the small flashes, we're gonna go with ISO 400 today. So I'm gonna set that here in the camera and I'll just show it to those at home. Push this, and you can see the ISO setting. So I'll set that for ISO 400. Next, aperture. Most studio portraitists, those of you shooting pictures of people, most of the time you're shooting one person. And f/5.6 is probably enough aperture, and when I'm saying enough aperture what I'm thinking through is depth of field. So typically I'm shooting in the f/5.6 at the studio, sometimes I go to f/8, if I end up shooting a group of people, maybe four or five people, then I'm gonna try to be at f/11. So your aperture range is f/5.6 to f/11. And these are all just if, ishy, kind of guidelines. If you want to shoot at f/2.8, f/2.8 gives you a very narrow depth of field so you kinda can blur out the background, fine. If you want to try to shoot at f/16 or f/22, well then you're running into problems. There's just, that small aperture in the lens is just not letting in enough light to get the exposure, with these little flashes. Shutter speed for the studio, I'm at my camera's maximum shutter speed, or maximum sync speed. So all our cameras have, what's called a maximum synchronization speed. On this Nikon that sync speed is 1/250 of a second. So I'm gonna set that for 1/ and pretty much leave it there all day. Why 1/250? Because that's gonna cut the ambient light out so that the only exposure that I'm really worried about is going to be from my flashes. If I shot at, let's say something like, oh, let's say like a 1/40 of a second or 1/30 of a second, in that case I'm gonna be letting in a lot of ambient light. So that's, you can start to see my decision process here. Do I like the color of the ambient light? Do I like how it's hitting my subject in the face? If so, longer shutter speed. Do I not want it? Do I want to exclude the ambient? In that case 1/250 of a second, gone. Okay, next. White balance. White balance is important if you're a RAW shooter, which is my last bullet point here. You should all be shooting RAW. If you are a RAW shooter, you don't have to worry so much about white balance, because you can fix it in post-processing. If the colors are way off, well, you have a lot of latitude, that said, most professional photographers working, creating great portraits, are doing a good job with their white balance. You want to set your white balance before you start shooting your pics, your pictures. So, you can use flash white balance, or you can do what's called a preset white balance to shoot off of a gray card or a white card to kind of give you a preset white balance. All right, so those are the camera settings, the general camera settings, for indoor flash photography. Well, let's move outdoors, conceptually, which changes if we do this stuff outdoors? Well, ISO becomes variable. You never really know until you're on-scene what your outdoor flash photography is going to be. I know, talking with some of you, I've talked to you in the past, that you do some outdoor flash photography portraiture. Well, it just depends. Sometimes you're shooting after sunset so your ISO needs to be way up there, maybe ISO 1600. Or sometimes you're shooting in the middle of the day so your ISO needs to be down around ISO or maybe even 64, so my ISO is variable when I go outdoors. Aperture, well, again, there's a lot of variability here. But keep in mind, that small apertures mean that your flash is just not gonna work so well, especially these small flashes. So I try to shy away from the f/16 to the f/22 range. Just because I know my flashes just don't have enough power to light the scene. So, generally outdoors I'm at f/2.8 or f/4. I like that because I can separate visually through the depth of field control. I can separate the subject from the background; that's good stuff. Shutter speed, again, lots of variability there. You have a decision to make. Your decision is do I want to include the ambient? Do I want to exclude the ambient? Do I want to make the ambient slightly darker or do I want more of like a high key photo where the ambient light's a little brighter? So, outdoors, you're thinking through is the background pretty? Is the background cluttered? And you can modulate how much that background impacts the photo by using that shutter speed. And then white balance, typically when I'm outside I either flash white balance or cloudy. Cloudy white balance is a little trick a lot of photographers use, it warms the photo up, a little bit, not so much that it's like, whoa, that person's way too orange, but just enough that they look healthy. And then of course RAW. You'll find me almost always shooting RAW. RAW allows you so much more flexibility in post-processing. So many times when I'm taking pictures, especially with flash photography, you're at the limits of the camera's capability and the flash's capability. Maybe the flashes are pumping out as much power as they can and the photo's just not quite bright enough, well RAW gives you that flexibility in post-processing to brighten it up a little bit without ruining the image quality. That's outdoors. All righty, so those are the basic, the basic settings on the camera. So what I want to do now is I want to start talking about flash settings and talk about TTL flash versus manual flash. And to do that, I'm gonna move over to the other side of the set and we're gonna start taking pictures and show you, kind of practically, what TTL means, when is it good and when is it bad.
Class Materials
Bonus Materials with RSVP
Bonus Materials with Purchase
Ratings and Reviews
Marty Walker
This is really a fantastic class and at an even fantastic-er price. Well worth the money, and is a great help. The instructor does a very good job explaining the methods, light shapers, and effects they create. One of my favorite videos!
Jeph DeLorme
Mike Hagen does a great job of presenting what could be a complicated process in a way that makes it easy to understand and implement. Not only does he make it easy to follow along, he presents alternative solutions that don't break the budget. I have viewed several instructors and various classes at Creative Live and this would definitely be one of my favorites. I have to say, this class would be a bargain at 10x the price!
Tim Stapenhurst
What can I say about this class? Mike is great- not only does he give a thorough break down of all the equipment one could need but he also includes wide variety of price options for those just getting started. Aside from his thorough knowledge of gear, Mike provides an excellent and easy to follow bread down of how to build up the light for your subject. His lesson plan is super easy to follow and very concise as he slowly builds up from using 2 lights to 5 lights. He also demonstrate what I think is a much needed trait in a photographer and that is being cool under pressure, dealing with issues and not getting rattled and simply going back to the basics. Creative Live Nailed it with this class
Student Work
Related Classes
Lighting