Lesson Info
14. Snoots & Grids Overview
Lessons
Class Introduction
03:47 2Flash & Exposure Review
11:36 3Demo: Flashes Overview
11:54 4Demo: Manual Flash
12:16 5Triggering Methods Overview
15:39 6Demo: Mixing Brands of Triggers
17:45 7Demo: Defining Lights Overview
14:45 8What Modifier to Use with Multiple Flashes?
05:48Demo: Umbrellas
20:31 10Demo: Soft Boxes
12:57 11Demo: Octas
10:58 12Demo: Reflectors
05:47 13Demo: Beauty Dish
05:01 14Snoots & Grids Overview
04:15 15Demo: How to Setup Multiple Lights in the Studio
13:12 16Demo: Key & Hair/Rim Light Setup
04:59 17Demo: Key & Background Light Setup
07:53 18Demo: Clamshell Two Light Setup
14:39 19Demo: Key, Fill & Background Light Setup
17:42 20Demo: Side Lights & Background Light Setup
10:21 21Demo: Clamshell & Rim Light Setup
06:16 22Demo: Rembrandt, Fill & Hair Light Setup
07:13 23Demo: Rembrandt, Fill, Hair & Background Lights
20:40 24Demo: Clamshell, Rim, One Background Light
09:40 25Demo: How to Produce a Pure White Background
28:26 26Demo: Full-Length Portraits with Multiple Lights
07:28 27Demo: Still Life Example with Multiple Lights
10:22Lesson Info
Snoots & Grids Overview
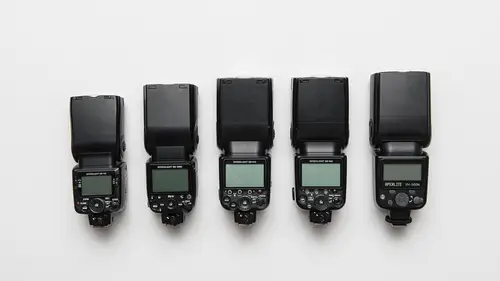
Snoots. Pull this away, actually would you hold that for me? I need three more hands to do all this. I'm gonna go over to my gear table and grab a snoot. I'm gonna show you a couple different types of snoots. Okay. Steal that back from you, and you get to hold the diffusion dome. Okay, here's what a snoot does. A snoot takes the light from the flash and columnates it, or basically makes it very small into a tight little column, and then that snoot basically goes onto the front of the flash, shoots through the end here, and now it can control very carefully and particularly where that light goes. I can use a snoot for the background, I can use a snoot for her hair, I can use a snoot for the key light if i wanted to, but oh, you gotta be really good, a really good photographer to do that well. Most of the time, the snoots come with, there's just a ton of different ways to connect the snoots to your flash. This one is just a friction fit, and I have my SB-910 here, and it's the wrong conn...
ector so it doesn't actually fit over there, so I have to get a different flash to show you how that's gonna work. In front of the snoot, you can put these grids, and the grid basically takes the light and columnates it even more, okay? You can put a grid in front of your softbox, you can put a grid in front of your snoot. The whole purpose of the grid is just to keep the light exactly where you want it, and have it go nowhere else. So that's one type of snoot. Here's another type of snoot. This is made by a company called Rogue, actually ExpoImaging is the parent company, but these diffusion panels are called the flash benders. I love them, I use them all the time, especially for my event photography, weddings, parties, that type of thing. Normally they go like this, and they allow the light to kind of go onto this big surface area and go forward, so you can actually put this on top of your camera and you get decent looking light, but one of the other cool things about this, alright, I need you to hold another thing for me, is that you can use these as a snoot. So they snap on here. There we go. And then you can Velcro the ends together like this, and now you've got a snoot. So this is another tool that I think photographers should own because its so versatile in a wide variety of venues and locations. So you can also use that as a snoot. Now if you don't wanna spend the money on these snoots, but you like beer, this one, this is a beer cozy, and I won't open it up 'cause there's a logo inside, but this is a cozy to keep your can of beer cool on a summer day. You just cut the bottom of the cozy out, and now put that over the end of your flash, and now you've got a snoot for the price of a beer cozy, works great. That's not as controllable, and obviously the quality of light's gonna be different than the higher end professional stuff, but that works. And then finally, you can just use paper, just use black Kraft paper and it works just fine. Snoots. The last one I have here is grids. I kind of talked about grids a little bit, but this is a grid right here, and the grid goes over your light source. Maybe it's your octa, maybe it's your softbox, and it just allows you more control, it prevents light from spilling over to places you don't want the light to spill to. I love grids, but they have somewhat of a specialized use, and again, today I'll show you how to use those grids.
Class Materials
Bonus Materials with RSVP
Bonus Materials with Purchase
Ratings and Reviews
Marty Walker
This is really a fantastic class and at an even fantastic-er price. Well worth the money, and is a great help. The instructor does a very good job explaining the methods, light shapers, and effects they create. One of my favorite videos!
Jeph DeLorme
Mike Hagen does a great job of presenting what could be a complicated process in a way that makes it easy to understand and implement. Not only does he make it easy to follow along, he presents alternative solutions that don't break the budget. I have viewed several instructors and various classes at Creative Live and this would definitely be one of my favorites. I have to say, this class would be a bargain at 10x the price!
Tim Stapenhurst
What can I say about this class? Mike is great- not only does he give a thorough break down of all the equipment one could need but he also includes wide variety of price options for those just getting started. Aside from his thorough knowledge of gear, Mike provides an excellent and easy to follow bread down of how to build up the light for your subject. His lesson plan is super easy to follow and very concise as he slowly builds up from using 2 lights to 5 lights. He also demonstrate what I think is a much needed trait in a photographer and that is being cool under pressure, dealing with issues and not getting rattled and simply going back to the basics. Creative Live Nailed it with this class
Student Work
Related Classes
Lighting