Lesson Info
5. Add Texture: Save The Date Card
Lessons
Class Introduction
06:54 2Document Set Up: Save The Date Card
03:05 3Create And Place Type: Save The Date Card
10:35 4Add Watercolor Clipping Group: Save The Date Card
08:23 5Add Texture: Save The Date Card
05:31 6Add Glyphs And Graphics: Save The Date Card
08:03 7Add An Image Save: The Date Card
06:35 8Layer Masks: Save The Date Card
08:24Lesson Info
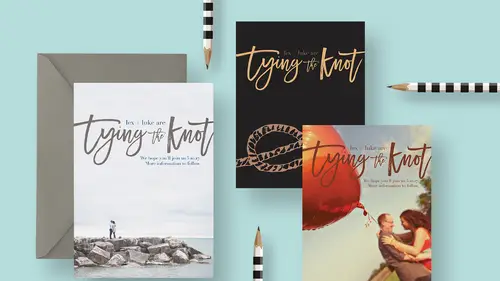
Add Texture: Save The Date Card
Let's go ahead and change these colors. We've got Lex and Luke here and there are these funny, (laughs) these funny colors that I think we should update if we're gonna go with this watercolor route. I'm gonna use my eyedropper tool by pressing I on the keyboard to get the eyedropper tool and then I'm gonna sample I think something from this darker pink area. If I go with the gold, I'm afraid it would might just be a little harder to read. I'm gonna grab something from down here and we'll go to Lex and Luke. I'll get my type tool again, so I'm just gonna press T. And I'm getting this question mark up here, if I look in the options bar. The question mark is because Photoshop's confused because this type layer has text with three different colors in it. We're gonna replace all those three colors with a single color by just doing a keyboard shortcut. On a Mac, the keyboard shortcut to fill your type layer with your current active foreground swatch is Option + Delete. Or on a PC it is actua...
lly Command + Delete. And I'm gonna do the same thing on this other type layer, where we have this other information. On a Mac, Option + Delete or Command + Delete on a PC, and there you go. I think this would be another effect and actually if you wanna kick it up one more notch, let me go over here and I'm gonna get this watercolor paper texture that I also happen to have that's also included in your bonus materials. I'm gonna open this, I'm gonna get my move tool and drag that in as well just to give it some more realism. And this piece is not quite big enough. Normally, if you have a asset that is not sufficient resolution, you would normally be up a creek. But, because this is just a texture, I'm not worried about the resolution and having to scale it up a little bit. I'm gonna press Command or Control + T to get free transform, I'll hold Shift, and I'm gonna drag this to fill the canvas area. We'll hit the check mark to commit it. And I'm gonna change the blend mode to multiply. And now we get this nice texture effect and I'll just reduce the opacity so it's not quite so strong. Maybe like 25% or something. And if we zoom in on that, look at that. We have this really awesome texture and this really cool watercolor effect and I think that looks pretty gorgeous and we haven't even added a photo to it. We wanted to really get fancy, we could also go get maybe these blotches or something. I'll Command or Control + click with the move tool to get this and we can drag that in here as well. And that's pretty large, maybe we'll just kinda put one over, maybe one like down here. And then I'm gonna hold down the Option key and drag to duplicate it and put something like up here I guess. Maybe something like that. I don't know, that's looking pretty snazzy. If I wanted to change the colors to match what we've got showing up here, I would probably just merge these layers first to avoid having to do this twice. To merge this layer down into this layer, if you right click and then just choose, where is it, Merge Down, it just melts those two layers together so now they're one. Now if I wanna change their color I only have to do it once. And I think the easiest way would be to do a hue saturation adjustment. I can find that under the Image menu, under Adjustments, Hue/Saturation. And I'm just gonna take this hue slider and drag it to the right a little bit. There we go. And then it blends, it matches the hues that we have in here a little bit better. Maybe I'll desaturate it a smidge just so it's not, ya know, stealing the show. There we go, that looks pretty good. All right, so there you have it. Now you've got some splotches and some fun color and some texture. Okay, so, what if we wanna add some graphics to this? Let's rotate the whole thing. I'm gonna actually rotate the whole piece. Sometimes when you create invitations and you're working to put together ideas for someone, you really have to experiment, you know. It's one thing for me to teach this class and for me to have all these fonts and just tell you, oh, choose this font and this color and make it just like this. And it seems like I'm just, I knew that that would look good and I wish I could tell you I was so gifted. But, the reality is I spent a ton of time preparing these examples for you, more time than you ever wanna know about. And I think it's important to remember when you are sitting at the computer and doing this, it takes forever to experiment and problem solve, right. Design is about problem solving. When I'm trying to solve these design problems, I try things and they don't work and then I try something else and hopefully that works better. Or maybe it also doesn't work, but maybe it leads me to another new idea. It's a lot of experimentation.
Class Materials
Bonus Materials with RSVP
Bonus Materials with Purchase
Ratings and Reviews
Nova
Khara is a brilliant instructor and I learned so much to improve my business. I'm running wild in photoshop with the tools and approaches that I gained from this amazing course! Thank you!
April S.
I have a Photoshop Bootcamp that encompasses a few weeks of learning but I just haven't had the time and focus to sit down and go through it even though I know there is a ton of useful stuff for me in it. One thing I have wanted to do for awhile is to design cards using some of my photography and graphics/lettering. Khara's Invitations in Photoshop class goes right to the heart of what I needed to know in PS for this specific kind of project. I am not a complete newbie to PS but seeing her use various functionality in this context hit home for me. I'm glad I picked up this course and look forward to working on some of my own cards. Khara's is well-prepared and direct, she speaks well, is clear, gets right to the things you really need to know. In my opinion, she's a very good instructor for the Creative Live teaching format.
user-f9ff5e
Khara packs a lot of info into this 2 hour class. She has the right balance of being friendly and conversational yet stays focused and on- topic. She shows several ways of doing actions or accomplishing a task. What I like the most is how she sometimes backs up and reviews what buttons she pressed or actions she just did. Even if you have been doing PS a while, you might learn some new shortcuts or new ways of doing a task. I could have written 4 or 5 pages of notes easily on tips. Sometimes she is a little fast and I couldn't see what exactly she did, but if you buy the class it would be great to pause and rewind a section several times. I would put her up there with Dave Cross as one of my favorite PS instructors who pack in info and won't put you to sleep.