Basic Left and Right-Slanting Decreases
Lesson 11 from: Knit Maker 101Vickie Howell
Basic Left and Right-Slanting Decreases
Lesson 11 from: Knit Maker 101Vickie Howell
Lesson Info
11. Basic Left and Right-Slanting Decreases
Lessons
Class Introduction
01:12 2What You Need To Get Started
11:48 3The Yarn Label and What is Gauge?
10:23 4How to Cast On
08:15 5How to Knit Stitch
06:09 6How to Purl Stitch
05:14 7How to Rib Stitch
05:02 8How to Seed Stitch
05:00Lesson Info
Basic Left and Right-Slanting Decreases
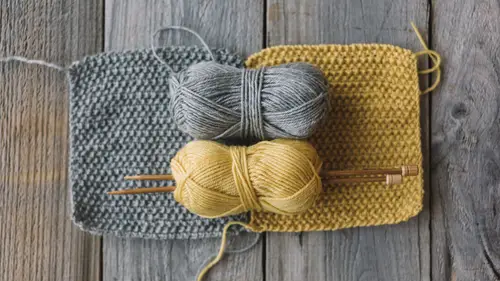
I'm feeling super confident that you guys have all of these knit stitches down, you're ready to work on a pattern, on your actual project, and maybe you're ready to work on something that's not just a rectangle or a square, which is awesome, so good job already. But to do that, there is shaping involved, and at the base of shaping, one of the things that you need to know how to do when you shape are decreases, which is just decreasing stitches or making a piece smaller. So, I'm gonna teach you how to do two decreases. One is called a knit two together and one is called a slip slip knit. The reason why you would use, why you couldn't just use them interchangeably is because they slant a different way. I'm gonna show you what I mean. So, I've created this piece, this swatch, and it started out in a uniform size. And then I started decreasing and I used two different decreases. This first one you can see over here, you can see this column right here of decreases, these are slanting left. ...
They're left slanting decreases. This is a slip slip knit and the abbreviation is SSK. Again, the abbreviations are part of the bonus materials. So, this really works well if you want something to be symmetrical. If you're working on a piece and you want one side to slant this way and one side to slant that way, you're gonna need to use a left slanting decrease and a right slanting decrease, which would be reverse for you, but you got what I'm saying. So, that would be an SSK and you could see that. So then there's a middle stitch here that's just hanging out, just knit in itself. And then on this side, you can see what the knit two together, and the abbreviation for that is k2tog, looks like. It slants the other way. It looks a little different because you don't have the stitch passed over that creates the line. It's a little less visible, but it is slanting right ways. And both of these are methods for taking two stitches and making them one. So, that would be decreasing one stitch. So, let's go ahead and learn how to do both. I'm not gonna try to make that perfect column for the purposes of demonstrating. I'm gonna probably do, let's do each decrease three times so you can really feel like you know it and then hopefully you will feel like the wind beneath your decrease wing is where it needs to be. All right, I'm such a dork sometimes. (giggles) So, I'm gonna just knit a couple stitches just so I'm not decreasing at the end. There's no reason for that, just knitting fun, yay. All right, so first, we're gonna do the left slanting decrease. This is the slip slip knit or the SSK. So, as slip slip knit in first, you're going to slip two stitches. So, for SSK, you're gonna slip the stitches knitwise. Normally in a pattern, when it says slip stitches, you would assume that they mean purlwise, which means coming into the stitch as if you were purling it. For this particular decrease, and this will be shown whenever there's a description of the decrease, which I believe is on the abbreviations, for whatever reason, it's just to orient the stitch as how it needs to be. You're going to slip them knitwise. So, that means coming up through the stitch as if you were knitting. So, slip it from the left-hand needle to the right-hand. Slip, slip. So, the reason why you're slipping through the knit stage, I said so it would be oriented, but now I'm gonna show you what that means. So, we're gonna actually be knitting these together but we're gonna be knitting them through the back loop. What that means is they're over on the right-hand needle, so it seems like they're done. Usually, the right-hand needle is reserved for stitches that have already been worked. But we've just slipped them, so we're gonna knit them to the back loop, which means we stick our left-hand needle through the front of the loops so that the needle is in through back loop. Yarn over, which means yarn around the needle. Dip, and you're knitting that. So, you've knit both of those stitches. You let both of those loops come off. And now you turn one stitch, or two stitches into one, okay? So, let's do that again. We're gonna slip one, slip two. Dip our left-hand needle through both of them. Wrap the yarn counterclockwise around the back. Dip it down. We see that new stitch form. And we pull the other two off. Let's do it one last time. Okay, ready? We're going to slip one, slip two. Knit two together. Through the back loop. And now we've got three really nice left slanting decreases. All right, so that's one side of our garment, let's say that we are ready to work on a little right slanting. Now, I should say that this next one that I'm gonna show you, often patterns don't, it doesn't really matter which way they're slanting for beanies. A great example is a beanie. Often, the decrease, in a less decorative decreasing, a designer might just choose just one straight-up decrease all the way around. It's usually a knit two together, and you would just do that all the way around. You don't always have to use multiple types of decreases. Again, this is just if you are working on a garment or something that really needed symmetrical shaping. All right, so for our right-slanting decrease, you're going to knit two together. This doesn't require any slipping or anything. You're just gonna knit as you've always knit, except for instead of just one stitch, you're gonna knit two at a the same time. So to do that, you're gonna slip your right-hand needle up through the first two stitches on the left-hand needle. And then you would knit them as if they were one together. So, wrap around, dip, slip. Thumbs up, that's all there is to it. So, you come up through two stitches, wrap around, knit them together. Let me show you one last time. Come up through the two stitches on the left-hand needle. Wrap around, dip. Let the old stitches drop off. And now, you have decreased two stitches into one multiple times. That's all there is to it, and now, you are on your way to being able to make cool shaped garments and projects.
Class Materials
Bonus Materials with Purchase
Ratings and Reviews
Claudia Quinonez
I have to say that I am a fan of Vickie Howell and I absolutely love the way she teaches this class. The way she teaches this class is so easy to follow and understand. I am a beginner and was having a hard time with adding a new ball and decreases and this course has helped improve my knitting skills.
Ashley Sarikaya
Very helpful class! Vickie Howell is engaging and easy to follow. Excited to be taking more of her classes :)
E.L. Bl/Du
Vicky, WHERE have you been? You are missed on PBS show. VERY much looking fwd to this class. Vicky is one of the BEST knitting/Crochet instructors I have EVER watched. You are guaranteed to learn how to knit easily with her easy to follow instructions. Her own knitting is the most beautiful Ive seen. She tells you how to choose yarn, needles and how to follow patterns. Your set with this class. Even a seasoned pro will learn something.
Student Work
Related Classes
Knitting