Lesson Info
13. How to Kint In-The-Round
Lessons
Class Introduction
01:12 2What You Need To Get Started
11:48 3The Yarn Label and What is Gauge?
10:23 4How to Cast On
08:15 5How to Knit Stitch
06:09 6How to Purl Stitch
05:14 7How to Rib Stitch
05:02 8How to Seed Stitch
05:00Lesson Info
How to Kint In-The-Round
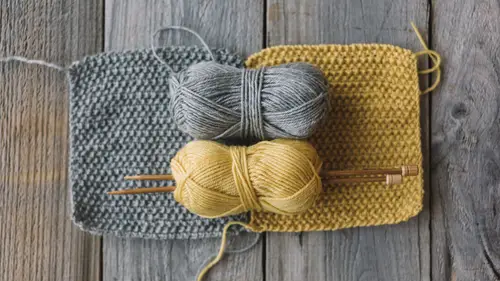
We've talked a ton about just knitting back and forth, but now we're going to step it up just a little bit and talk about knitting in the round. We have a pretty cool first time knitting in the round project for you as bonus material, a beanie, this is like a go to. For me, I think everybody needs a beanie. This is a solid project for everyone, but if you ever get guys that want you to knit for, I way way way recommend you go beanie route, rather than full throttle sweater because, frankly, they're going to wear it. It's more likely they're going to wear it. This is just straight up stockinette stitch with the ribbing. This is that 2 x 2 ribbing, which we already covered in the lesson, and then it goes into stockinette stitch. I love this particular yarn, this is, not this yarn, I'm using that yarn in a second, this yarn is by Lorna's Laces and it's Sheppard's wool, worsted, I believe. And, the cool thing is, is that, it's only one stitch the whole time, but, because of the color, like...
the yarn does the work for you, so you look extra fancy, but didn't have to do a ton of work, and to me, that's like a magic combo. So, the pattern for this will be in bonus material, so make sure and download that, for sure. This is the yarn that I'm using for step-outs today, to show you, to demo. So, what you need is a circular needle, which we talked about before. And, I've already cast onto the circular needle, you cast on exactly the same way onto a circular needle as you would for a straight needle. So, I've already done that. And now you're ready to get started and join it. So the first thing that you have to do, whenever you're knitting in the round, is join it in the round. So, to do that, you lay it on the table, move this out of the way for a bit. You lay this on the table, and you want to make sure that all of the bottoms of the stitches are in the same direction. In other words, if it's twisted like this, you don't want to join it then, because your hat's going to be all jacked up, and you're going to be super sad. So, you want to untwist and make sure, before you do anything, that everything is all laying properly. Then you can pick up your needles, or your needle, and join it. So, to join it, you would just work it as a knit stitch, you know, as if you were working straight but, I would recommend, need to make sure my stitches are the right way, I would recommend bringing in a stitch marker at this point, so that you know where the beginning and the end of the round is. I often just use the tail as my stitch marker, just to know, but really, especially when you're first getting started, a marker does wonders for you. So you would just place that marker on the right needle, and then you would knit the first stitch on the left-hand needle. Okay, so now the round is joined. See that? I'm going to show you something though, that's just a little tip: you might notice, here, let me knit the next stitch so you can see what I'm talking about, so, it gets a little bit, this is kind of nit picky, no pun intended, but, it gets a little kind of bulky sometimes, there's a little gap when you join a round, when you're knitting, and so, sometimes what I like to do, if I feel that way, is just for the very first round, I will knit the first stitch only, through the back loop, so I'm intentionally twisting the stitches. I put that on the wrong way. So, instead of coming up right here and knitting, I knit it through the back loop, I insert the needle through the back of the loop, and then knit it as normal. And for whatever reason, that just twists the stitches and kind of like seams up that gap a little bit. You don't ever have to do that again, and you, frankly, you don't have to do it at all, but I just like that as a little tip just to close that gap, and then you're going to just continue knitting. I'm going to move over to a different piece that has a few rounds worked, because what we haven't talked about is when you knit in the round, and you're working stockinette, instead of, we learned earlier, that stockinette stitch is knitting on the right side, pearling on the wrong side, when you're knitting in the round, however, you're never, ever working on the wrong side, which means for stockinette you never, ever have to pearl. So, it's still the same stitch, but it's achieved by only knitting, 'cause you're only working on the right side. So, this is the very end of this round, I know that because I see my stitch marker, so I knit the last stitch, I slip that marker right on over, and then just continue knitting. If you were working a project in the round that was garter stitch, you'd actually have to knit one row, and pearl one row, which is a little bit confusing when you first get started, but, just remember, when you're working in the round, you don't have to, you're never working on the back of the fabric, so you don't have to reverse anything. I actually love knitting in the round, especially stockinette stitch, it's super easy, and I also like that you don't have to seam, you don't have to run a seam up anything. It's fun, you don't lose your stitches, I really, I really dig it. So... It's actually, even though people get intimidated because there's a cord in between it, I actually think it's easier to work with circular needles than it is with straights. So, don't be intimidated to start this project, even though I say that it's stepping it up a bit, this beanie that we have in the bonus material is a solid first or second project, maybe if you make that cell phone cozy that you can jump on to one or the other. But you're just going to continue, you continue in this manner, for as long as the pattern calls for to give you the depth of the hat, or whatever you were making, and it gave you some other instructions. And you can see you're getting that straight up stockinette stitch by just knitting your little heart out, which is perfect. So, that's is what we've got today. Gosh, we've covered so much and I'm really proud of you for sticking through this far, I can't wait to see all of the bonus material projects knit up by you. Again, don't forget to tag @Vickiehowell and @creativelive with any pictures, we love seeing them. And if you feel like you've caught the knitting bug, and I'm pretty sure that you're going to feel that way, please check out my next course, which is Knit Maker 102, and we can just keep on keeping on with our knitting journey together. I'm looking forward to it, I hope that I have created a true knit-maker. Thanks a lot.
Class Materials
Bonus Materials with Purchase
Ratings and Reviews
Claudia Quinonez
I have to say that I am a fan of Vickie Howell and I absolutely love the way she teaches this class. The way she teaches this class is so easy to follow and understand. I am a beginner and was having a hard time with adding a new ball and decreases and this course has helped improve my knitting skills.
Ashley Sarikaya
Very helpful class! Vickie Howell is engaging and easy to follow. Excited to be taking more of her classes :)
E.L. Bl/Du
Vicky, WHERE have you been? You are missed on PBS show. VERY much looking fwd to this class. Vicky is one of the BEST knitting/Crochet instructors I have EVER watched. You are guaranteed to learn how to knit easily with her easy to follow instructions. Her own knitting is the most beautiful Ive seen. She tells you how to choose yarn, needles and how to follow patterns. Your set with this class. Even a seasoned pro will learn something.
Student Work
Related Classes
Knitting