Lessons
Class Introduction
01:12 2What You Need To Get Started
11:48 3The Yarn Label and What is Gauge?
10:23 4How to Cast On
08:15 5How to Knit Stitch
06:09 6How to Purl Stitch
05:14 7How to Rib Stitch
05:02 8How to Seed Stitch
05:00Lesson Info
How to Knit Stitch
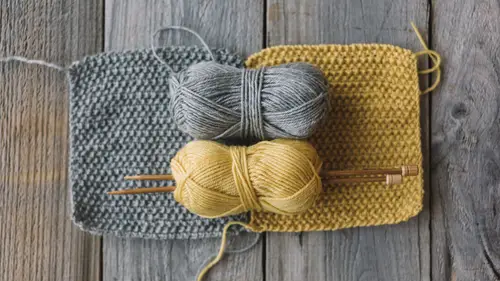
Alright, the very first stitch in knitting, the actual base stitch, and you could learn this and you could just knit it forever and you could still consider yourself a knitter until the end of time, is called, appropriately, the knit stitch. So, I'm gonna show you how to do that, but first I want to show you a swatch, which is, as I said earlier, is just a little square of knitting. If this is what a piece looks like that's knit every row, so knit one way, flip the piece, knit back. And together, when you knit every row, it forms a stitch called a garter stitch. And I love garter stitch, I actually have a book coming out of baby stuff that's called Wee Garter Stitch that's all super modern stuff. Because I think it's really cool, I mean there's sort of flack in the knitting community, that sounds so tough, there's kind of like a Jets and Sharks thing about whether you had just learned how to knit the knit stitch, 'cause it's lame, or if you'd wanna go hard core. I love it, I think it's...
modern and cool, it has a ton of texture, so there. But it's also super stretchy, which is awesome too. So this is what it looks like, this particular yarn I grabbed, I liked because it had a little sparkle in it. You don't actually need to know that, but sparkles happy, so there's that. So, to get knitting, you had your stitches already cast on, we learned how to do that, and you can always refer back to those videos later if you space. Then, I've actually worked a few rows here just so you could just see a few knit. So I'm at the point where I'm gonna knit the next row. So, a really important thing to know is that all the stitches that need to be knit are always gonna be on your left-hand needle. This does not change at all if you're left-handed versus right-handed. This is just the way knitting is done. So, all of these stitches on the left-hand needle need to be knit. So, I'm gonna set up. Now you'll notice that this is going to be alomost exactly like the knitted cast-on, so if you jumped on that bandwagon, then you're probably good to go, for the most part. So the first thing that we should talk about though is this working yarn. So a really common mistake that I get with students is that they start knitting and the yarn, the working yarn, is accidentally pulled this way, and if you can see what that does, I'll show you over here, that shows the bottom of the stitch, which actually looks like two loops. So that would make it look like two stitches when it's really only one, so what'll happen is it'll be like, err, like one of your pieces is gonna just go this way and get bigger and bigger. So to avoid that, at the beginning, the first stitch of every row, just make sure that your working yarn is pulled down. That's it. Just kinda think about that at the beginning. You won't have to think about that for every other stitch, it's just that first stitch of every row. Alright, so again, we've got our other needle in our right hand, we've got our pointer finger with the yarn wrapped around it, I also kinda use my other fingers to guide it, but again, I know many people that don't at all, they just let it go loosey-goosey and it works just fine, so whatever works, you should do. Alright, so we're gonna come up through that next stitch, so up, and you see that your needles are gonna make a little X, all right? So then you take your fingers and you just kinda hold them together like that, and you wanna take the yarn, the working yarn, and wrap it counter-clockwise around that back needle. From there, you want to dip down, and your needle will come out, and you can see that you've created that other stitch right there, you can see it right then, right? So the new stitches go on your right-hand needle, so you're golden there, but the old stitch needs to go away from your left-hand needle. So you need to let that slip off. So now you've knit one stitch. All right, let's do this again. So, up, around, dip, slip. Up, around, dip, slip. And you would just continue doing that all the way to the end of the row. And something to think about is that your first row especially, and 100% when you get started, I shouldn't say that, maybe you're gonna be loosey-goosey from the beginning, but like I said before, it's really normal for it to be tight when you get started, especially that first row, so if you're having to muscle it, like if you're having to ooh, don't fret, that's totally normal, and it won't be like that every row, it's really that first one. Fortunately you've got this needle to help regulate your stitches, so it'll get easier for sure. Alright, so I've knit this whole row, so now what? So I finished, there's no more stitches on the left-hand needle, they're all on the right-hand needle, so what I do now, I just swap. That's it. And then I start exactly the same way. I remember what I said at the beginning, make sure this working yarn is down again, and then I would just start again. And for garter stitch, as I said before, all you do is this stitch every row until you are done. And there is the very first project, let me grab it for you really quickly, the very first project that I have as bonus materials is the phone cozy that I referenced earlier, and all it is, is and this is, you can see, again with the gauge, this is a really great example of gauge, this is a much thinner yarn on smaller needles, than this is. Exact same stitch, but you can see how differently different materials and different sizes can affect it, which is really fun to play with once you're designing, or once you're just sort of being inspired by it in general. So, garter stitch, you'll learn, I hope that you will practice this stitch right away and kind of jump right into this project and make one of these and then tag me in a picture, take a picture of it, @vickiehowell, tag us, tag CreativeLive, I would love to see your very first project. Again, that's on bonus materials.
Class Materials
Bonus Materials with Purchase
Ratings and Reviews
Claudia Quinonez
I have to say that I am a fan of Vickie Howell and I absolutely love the way she teaches this class. The way she teaches this class is so easy to follow and understand. I am a beginner and was having a hard time with adding a new ball and decreases and this course has helped improve my knitting skills.
Ashley Sarikaya
Very helpful class! Vickie Howell is engaging and easy to follow. Excited to be taking more of her classes :)
E.L. Bl/Du
Vicky, WHERE have you been? You are missed on PBS show. VERY much looking fwd to this class. Vicky is one of the BEST knitting/Crochet instructors I have EVER watched. You are guaranteed to learn how to knit easily with her easy to follow instructions. Her own knitting is the most beautiful Ive seen. She tells you how to choose yarn, needles and how to follow patterns. Your set with this class. Even a seasoned pro will learn something.
Student Work
Related Classes
Knitting