The Yarn Label and What is Gauge?
Lesson 3 from: Knit Maker 101Vickie Howell
The Yarn Label and What is Gauge?
Lesson 3 from: Knit Maker 101Vickie Howell
Lessons
Class Introduction
01:12 2What You Need To Get Started
11:48 3The Yarn Label and What is Gauge?
10:23 4How to Cast On
08:15 5How to Knit Stitch
06:09 6How to Purl Stitch
05:14 7How to Rib Stitch
05:02 8How to Seed Stitch
05:00Lesson Info
The Yarn Label and What is Gauge?
Alright the first thing that you need to know before you get started on a project, if you don't know about this and you wanna just dive into knitting, you should rock it like you've never rocked anything before. This is just really helpful for you to know to get started and it is called gauge. So what gauge is is how many stitches and rows per inch that you get using a particular needle and a particular yarn. So I spoke a little bit earlier in the introduction about how you could have different yarns that are different weights. And what that means is that you could have a really thick yarn or you could have a thinner yarn. Some yarns are like lace weight, some might be super super chunky, and they all have, technically they have corresponding needles to go with them. Now if you're creative and you want things to look different then you can use whatever you wanna use but if you're trying to make a garment to fit, so it wouldn't matter as much with like scarf or like with a first project...
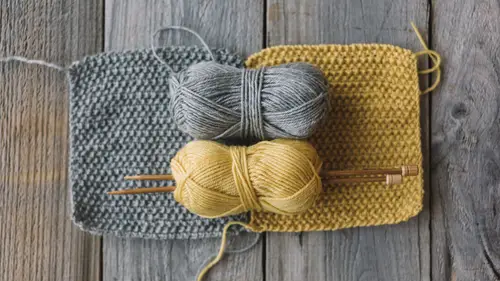
that we're gonna be making, I'll show you in a bit, but anything that you want to actually fit that needs to be a certain size, it's really important that you get the number of stitches per inch that is called for on the project pattern. And you can find that out on the label. But let me step back for a second, 'cause the first thing that we should talk about are yarn labels. So yarn labels are your sort of like key to knowing how to choose supplies. If you are at a place where maybe there's not the most helpful store clerks or yarn store owners, it happens, mostly though if you ask, especially if you're in a specialty store, they will totally have your back. But I just wanna give you the skills to know what to do. So you're standing in the yarn isle and just like go into a fugue state 'cause there's all this information. I know it, I've been there. What do you do? So let's say that you, I'm gonna approach this from two different ways. The first one is you have no idea what you wanna make, you're thinking maybe a scarf or whatever, but you just really love, you know, this turquoise yarn, right? So you grab it, you love it, you live it, but what needles do you buy? So all of these yarn labels have, they're supposed to have some you know, standard uniform symbols on them. I'll be honest though, from country to country, not everybody uses everything. The symbols are always the same, that's totally uniform, but they're not always included. But almost all of the time, unless you're working with a super sort of obscure, you know, personal line or whatever, they will tell you what size needle to use to get their gauge. So you can see it'll look a little bit different on this yarn, from let's say this yarn. But they're both telling you the same thing. They're gonna tell you size of needle, and they're also gonna tell you about how to care for the item and also what the yarn is made of. If you have a wool allergy let's say, well you really wanna know that you're working with maybe a synthetic fiber or if you're making a baby garment, you wanna make sure that there's nothing that might be, there aren't any chemicals or anything that you aren't super excited about putting on that babies skin. All of that information, it's kind of like looking at a back of a cereal box, right? You can find out what's going on, all the goods that you need to know by just reading it. So we've blown up this. We'll move these over here. We have blown up this, the label off of actually this ball of yarn just to give you kind of an idea. And also on the bonus materials that you can download online, I have pulled a page from my book Knit Aid and it actually breaks it down for you with the text next to it that explains what all of these charts and symbols make. So either way you can look here or nab that. So the first thing is what we were talking about, this is the size. So this is a US size seven needle or a 4.5 or four and a half millimeter. Depending on where you are, if you're, let's say you're in Canada, you're gonna probably call this a four and a half or 4.5 needle. In the states we go by the numbers, so it would be a US seven for this. That doesn't mean it's the only needle that will work for whatever, but this is the recommended needle size for this particular yarn. So if you're just walking into the store and you love this yarn, you just wanna see what you can make from it, just go ahead and buy those seven needles. Now the trick is though, if you are making something that you do want to fit, and again, this is a little bit more advanced than you even need to worry about right now, but just so you have the info, don't worry about if you're knitting, it's really natural when you get started knitting that your work is really tight at first 'cause we get really stressed and we're nervous we're not doing things right or whatever. And so you might need to go up a needle size. Go up a needle size, make another little swatch, which is just a little mini piece, measure it then. And I'll show you how to do that in a second. Okay so there's some other symbols that you can... So this is the gauge that I was talking about. Its standard is a four inch or 10 centimeter gauge swatch. That means the size of the piece that you knit or the amount of it that you measure will equal that, and that's how they tell you how big your piece is gonna be or how many, what your gauge is. Another word for gauge is also tension. You might see it written especially in the UK, I see that a lot, what your tension is. So gauge, tension, kind of interchangeable. Alright so this one says that you get 20 stitches and 28 rows and that'll give you 10 centimeters or four inches. So if you were gonna divide that, 20 stitches divided by the four inches, that would be five. So you're getting five stitches per inch. So let's say that you wanted to make something that was, you know, five inches wide, you would know that you would just need to cast on 25 stitches right? 'Cause five times five is 25. That is all the math that I'm ever gonna teach you ever because it hurts my heart. But it's just really good to know. Okay so the last thing that you might wanna know, right here it talks about, this is cotton and polyamide. So earlier I talked about wanting to know you know, if you wanna know what the actual fiber is, it will always tell you right there. No symbols to know, it's just pretty straight up. Alright and then lastly are the caring instructions. Really the only one that you probably are ever gonna care about is whether or not it's machine washable, and that is, this actually is machine washable. They've actually also written out machine wash but this is the symbol. And you can actually go to Yarnstandards.com and they list all of this stuff as well but we have also included some information in our bonus materials too online. Alright so, you can see all of this, it says dry flat, don't put it in the dryer. It's just all of your general care stuff. Really, mostly, nine times out of the 10, I just wanna know whether or not you can wash it. So that's really sort of the only thing that I really work on. So the last thing to go over about gauge is, and I'm gonna bring in, this is sort of the first project that you'll be able to make and the pattern for this project is in our bonus materials as well. This is a little, just you know, phone cozy. But this is a great first project because not only does it work with garter stitch, which is knitting every row, and I'm gonna show you how to do that in the next lesson, but it also is a way for you to measure your stitches. Now in the pattern I have told you how many stitches to cast on. I have a, this is an iPhone six but it works for most devices that aren't the bigger, the supersized devices. But if you wanted to be super fancy, new studenty, you can measure whatever your device is and this one is about three inches 'cause I want it to go over the size. And I know that my yarn, the particular yarn that I've, you know asked for you to use is about 4.5 stitches per inch. So you could just multiply 4.5 times the three. Now that's not gonna be an even number, so I would just always just round up, and that's how you'd know how to cast on. So how do you measure gauge on an actual project or a swatch to know that you are doing it right? You can take your measuring tape or a little ruler and you can just set it down. And you can either do it by inch, which would be one, two, three. One, two, three, four. This is actually four and a quarter 'cause this is a different stitch than... Oh I should also mention this. Whenever they tell you what the gauge is on the swatch, or I'm sorry, on the label, it usually, or unless they say otherwise and I don't think this is even a thing on a label, it will be in stockinette stitch. And I'm gonna show you what stockinette stitch is in a bit. Alright so you would just measure how many stitches this way, and how many rows this way. So I'm getting one, two, three, four, kind of almost four and a half. Like I said originally, four and a quarter maybe. And then stitches per inch. And then one, two, three, four, five, six, seven, eight. It looks like about eight rows- ish. So for this project you don't need to know how many, what your row gauge is because you're just gonna knit until it gets to be twice as big as your phone. But the width would be super helpful or you could just go by the pattern that we've put on bonus materials and because it's super stretchy it'll probably work fine. But that is the basics on gauge. Normally there's also gauge rulers that you can buy that are all ready for, you know the four inches, and you can just kinda stick it onto your project too. But whatever you have laying around town. Laying around town. (laughing) Laying around your house you should just snab. So those are all the basics of what you need to know before you get started and now you know them, which means now we can get started. So let's learn to knit.
Class Materials
Bonus Materials with Purchase
Ratings and Reviews
Claudia Quinonez
I have to say that I am a fan of Vickie Howell and I absolutely love the way she teaches this class. The way she teaches this class is so easy to follow and understand. I am a beginner and was having a hard time with adding a new ball and decreases and this course has helped improve my knitting skills.
Ashley Sarikaya
Very helpful class! Vickie Howell is engaging and easy to follow. Excited to be taking more of her classes :)
E.L. Bl/Du
Vicky, WHERE have you been? You are missed on PBS show. VERY much looking fwd to this class. Vicky is one of the BEST knitting/Crochet instructors I have EVER watched. You are guaranteed to learn how to knit easily with her easy to follow instructions. Her own knitting is the most beautiful Ive seen. She tells you how to choose yarn, needles and how to follow patterns. Your set with this class. Even a seasoned pro will learn something.
Student Work
Related Classes
Knitting