Lessons
Lesson Info
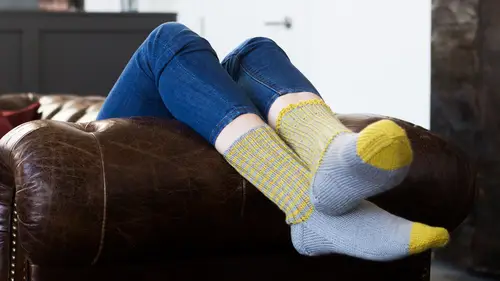
Gusset & Foot
Okay, so we've worked our heel, we've turned our heel, and now it's time to move on to what's called the gusset of the sock. And I'm going to bring in just the other sock so you can see the finished sock. The gusset is the little action right here. It looks kind of like a gusset. (laughs) Something. It's just a little bit of extra fabric and that's going to accommodate where on your foot you have basically your ankle bone. This area right here. So what we need to do is we're gonna be picking up some stitches. This is also going to be the beginning of where our foot will start. So, I'm gonna walk you through that now. Again, I'm working on a little mini version of the sock so it's going to look wee comparatively. Okay. So, we've got our sock done to where we just discussed. We also, I want to go ahead and take a minute and just show you how to get your stitches off of waste yarn, because we are going to be using those. We're going to be reuniting with our cuff stitches right now. So, I ...
usually just-- I either untie or... I just snip it. To the end. And I brought in a tray, because all of my stuff was rolling everywhere. And then I leave the waste yarn on the stitches so as not to drop them. And I just feed the needles... I'll just use one for now. Just so I'm not bringing in too many elements at one time. I just kind of slide it through all the stitches. I'm on there and then I just... Pull that yarn off. And that's all there is to it. Super simple. Okay. Now back to action. Alright, so the first step in creating the gusset is that I need to knit across all of the heel stitches. My heel stitches look funky. Let me make sure they're on right. Okay, so from here on we're going to be working in stockinette stitch. For stockinette stitch in the round that means that we're only knitting every stitch every round. Which makes that super easy breezy, right? So, we're going to knit across all of the heel stitches. Okay, from here we need to pick up stitches along what will be the side of your foot. Okay, this, remember we talked in the other lesson about how the reason that we slipped the stitches the first stitch on all of the... At the beginning of each row? That's because it creates this bigger loop than there normally would be if the stitch was worked properly. And that makes it really easy for you to see where you're going to be picking up and knitting a stitch. So... What I do... I'm going to actually take the same needle and I'm going to be picking up and knitting. So, I slip my needle under one leg of the loop. Yarn over, pull through. So that's been picked up and knit. So, I'm going to go to the next one. And you'll do this for as many stitches as the pattern calls for. It's pretty clear though, because you can see those slipped stitches where you're going to be going. Insert. Yarn over. And you've worked that stitch. Okay, so now we've picked up all of our side stitches. And then we want to work across what will be the top of our foot. And for this that just means we're going to knit. For this pattern we're just going to knit all the way. All the stitches. To the other side. Okay, so we've gotten over the top of the foot. And now we need to pick up stitches on the opposite side of the foot. I'm bringing in another needle at this point. And... We're going to do the same thing. We're taking the loop, yarn over, knitting that stitch. Insert through the loop, yarn over. Knitting the stitch. We're doing that all the way up what will be the opposite side of the foot. So, now what we're going to do is we're going to knit the first half of the heel stitches again. And this is really just going to even... The number of stitches per needle out. And so now you've got your stitches totally evenly distributed on three needles. Your top stitches will be your foot. And then this is needle number two. Needle number one will be the first half of the heel stitches and then the side of the stitches. Needle number three will be the other side of the stitches and the other half of the heel stitches. So now you've picked up all of the stitches that you need to have picked up. Alright. So, now we are ready to start working that gusset. So, we need to knit to three stitches before the end of needle one. Then we're going to do a decrease. This decrease is knit two together. So, we're going to insert our needle through the two stitches on your left-hand needle. Knit them together. Knit the next stitch. Alright. Then we work all of the stitches for the foot just straight. So, we're just knitting. I'm making the entire foot in the same, like, solid color, but have fun with it, you know? If you want to keep doing stripes, do stripes. Or if you want to work with the yarn that's variegated, just have fun with it. It's cool because you can let the yarn do the work for you in a lot of ways. You can use the same pattern with multiple different colors or color variations, or stripe patterns and it'll look like you have made all of these totally different things with the same basic skill. Okay, so now we're over to the other side of the gusset. Run away yarn here. So, now we need to mirror the decrease that was done on the opposite side. So, we're going to do a different decrease for this one. We're going to do that SSK that we've learned how to do. And in case any of you are wondering why you wouldn't just do the knit two together, again, it's because these two decreases that we've done, they slant in different directions. And so, it really makes it so it's an actual mirror version of each other for both sides of the gusset. So, we're going to knit one and then we're going to do a SSK, which is a slip, slip, knit two together. And then you're just going to work the stitches. The rest of the stitches. To the end of needle three. Okay, so that's our decrease round. In between every decrease round while we're working this gusset, you're going to work a plain round. Whenever I say work in established pattern, or work plain, or knit all stitches, it kind of all means the same thing. You know that we've already talked about this being a stockinette foot, so we know that if they ever say "work straight" or "continue as established," that for this pattern that means just knit all the stitches. So, for here for every needle all the way around, we're gonna just knit the stitches. And I've broken up the directions for this pattern, I've broken them up at this point so that you know exactly what to do on each needle. Just makes it a little bit easier if you get distracted or something. It'll be really easy to find your way back on the pattern because you know what needle you're working on from here on out you know that needle two is always going to be the top of the foot. They're just little cues that can help you stay on track. Alright, so I'm working all these stitches. I'm now on needle three, so I've got one more, this is my last needle that I need to work straight. And now I'm done with that round. And so, to continue in the gusset, all you're gonna do is repeat those two rounds again. If you'll bear with me, I would love to show you the decrease round one more time just so I'm sure that you are totally solid. Alright, so we know that for needle one we're going to work until three stitches before the end of that needle. Just pulled my stitches off my needle, let's get them back on where they belong. Okay, I'm at three stitches, so I know I need to knit two together. This is a right slanting decrease, just FYI. So knit two together. Knit the one. Then we're going to move over to the stitches that are on the foot. All the way across. And now that we're done with all of our stitches on our foot we know that we need to mirror that decrease for our last needle. So... We're knitting one, and then we're going to do the SSK decrease. So, slip, slip... Knit two together. And that is actually a left slanting decrease to mirror the right one on needle one. And then you work to the end. And then from here you're just going to continue as established. What you're trying to do with this gusset is you're trying to get from the number of stitches that you have from picking up on the side and your heel and your foot back to that original cast on number. So, for this particular pattern I believe it's 52 stitches, so we want to get back to those 52 stitches. And this accommodates-- I'm going to bring this sock in again. This accommodates because if you were to measure your own anatomy (laughs) right here would be the largest part. You need the most fabric because you're accommodating the heel, the ankle, and also the bend of the foot, right? So, once we've done the gusset, we've gotten through all of that and we're back to just flat foot land, right? So we need to get back to that same amount of stitches. So, once you're finished with the gusset you'll be back at those stitches. And from here on, for the next several inches, depending on how long your foot is, I put the instructions, the length in the actual pattern, but if you have a longer foot, just try it on. What you want is you want to be about an inch and a half before we move to the toe section, or an inch and a half shorter than your actual foot. You're just going to be working the stitches all rounds, all needles, straight for stockinette. So, I don't think I need to sort of show you any more than that, but you're just going to continue knitting and knitting and knitting until you have your foot complete.
Class Materials
Bonus Materials with Purchase
Ratings and Reviews
E.L. Bl/Du
VICKY is so awesome, and now Im ready to knit socks. Ive been wanting to for a long time, she is so great about encouraging us to jump in. She has a way of making what seems so complicated seem easy and do-able. I am actually super excited about trying. I really miss all her great tips on Knitty Gritty, and was so delighted to see her on CL, my 2 favorites together, what could be better....MORE PLEASE....
evilmiss
Love Vickie Howell and I love this class! I've been wanting to learn how to knit socks for awhile and when I saw that Vickie was teaching this class I knew I had to join!
Laurie Andrews
Really happy to have learnt how to make socks it's always been something I've wanted to learn for years thanks Vicky really enjoyed the video will be telling all of my friends about you xx
Student Work
Related Classes
Knitting