Lessons
Lesson Info
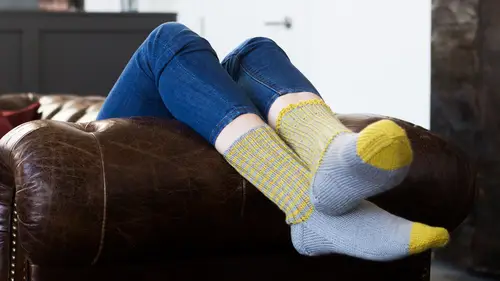
Kitchener Stitch
Okay, so now we've worked the entire sock and we're completely done with knitting at this point and now what we're gonna do what's called grafting. And usually with socks, you're gonna graft together using a method called kitchener stitch. So for this you'll need to introduce a tapestry needle of some form or another. I really like these ones by Clover that have the bent tip. It's not crucial, I just find that it helps out and it's a little bit easier. So, the first thing that you wanna do is you wanna evenly distribute so the front of the toe stitches are all in one needle and the back stitches are gonna be on one needle as well. So in fact, what I'm gonna do is I'm gonna go ahead and work the rest of the stitches that are on the back of the toe. I said you were done knitting but really you don't have to do this but I just want my yarn to be over there so I'm gonna work the rest of the back of the toe stitches. Okay, so, I've got that. I'm gonna go ahead and just kinda reach my finger...
s through and pull all of these tails that are left over down so they're just not in my way. So I need to make sure that I have stitches lined up in an even amount. So let me see. Two, four, six, eight. Two, four, six, eight. Okay, so I have exactly the same amount of stitches on the front needle as I do on the back needle. So we are good to go. Alright, so you are going to cut your yarn, leaving a significant amount of yarn to work with. And you're gonna thread your needle. With that yarn. Okay, so to work kitchener stitch you're gonna begin with a little sort of like foundation with the yarn. You are going to use the tail and you are going to bring your needle up through this first stitch. Leaving it on the needle. And then you're gonna come through the first stitch on the back needle also leaving it on the needle. This is just creating a nice little anchor. Okay, so now we're gonna come through that front stitch again knitwise. So that's coming up as if you were gonna knit the stitch. This time though we're gonna let that stitch fall off the needle. Then we're gonna work into the stitch, the next stitch on the front but we're gonna come in purlwise. But this stitch we're gonna actually leave on the needle so see that one just stayed on. Alright, so now we're ready to go on the back of the stitch or the back needle again. We're gonna insert the needle purlwise. But let that stitch fall off this time. And then we're gonna insert our stich knitwise. And the next stitch, but this time we're gonna let that stitch stay on the needle. Alright, now we're gonna move to the front needle again. We're gonna insert our needle knitwise. Letting that stitch just slide on off. Then we're gonna insert purlwise in the next stitch on the front needle. This time, letting that stitch or weaving that stitch rather on the front needle, move to the back needle. Insert your tapestry needle purlwise. Let that stitch slide off. Insert your needle knitwise in the next stich. On that back needle. Letting it, or leaving it on the needle. Insert kintwise on the first stitch of the front needle letting it fall off. That's step one, step two purlwise, leaving the stitch on. That second stitch on the needle and the front needle. Step three. Oops, insert the needle purlwise on the back needle letting it drop off. And step four. Inserting the needle knitwise but leaving that stitch on and you're just gonna repeat. You can see how it's seaming it up right there. Isn't that cool. You're just gonna repeat those steps until you have zero stitches left. Or actually you'll technically have one but I'll show you that. So just keep on keeping on. So we are, letting it drop off knitwise. Inserting purlwise. Inserting knitwise, letting it drop off. Leaving it on. So just keep on keeping on. And this is probably one of those techniques that is super invaluable but also can be a little difficult to remember frankly. So, I always keep a, still to this day and I'm like 14 years into my career, I still keep a cheat sheet. 'Cause why not? There are some things that you need to commit to memory. This may or may not be one of them. Alright, we're almost done. This is pretty exciting. Dropping it off. Okay, so I've got my last stitch on the front needle. Well, I almost ditched it. Let it drop off. Get rid of that needle. So now you just have that one stitch left. Feed your yarn through it. Ditch that other one. Then you have just grafted a toe. So you're all done. So from there you're just gonna feed your tail through and weave in your ends and you my friends have knit a sock. Completely, like totally from the beginning to the end. If you want though, I have one little added bit of flair that I'm gonna show you next.
Class Materials
Bonus Materials with Purchase
Ratings and Reviews
E.L. Bl/Du
VICKY is so awesome, and now Im ready to knit socks. Ive been wanting to for a long time, she is so great about encouraging us to jump in. She has a way of making what seems so complicated seem easy and do-able. I am actually super excited about trying. I really miss all her great tips on Knitty Gritty, and was so delighted to see her on CL, my 2 favorites together, what could be better....MORE PLEASE....
evilmiss
Love Vickie Howell and I love this class! I've been wanting to learn how to knit socks for awhile and when I saw that Vickie was teaching this class I knew I had to join!
Laurie Andrews
Really happy to have learnt how to make socks it's always been something I've wanted to learn for years thanks Vicky really enjoyed the video will be telling all of my friends about you xx
Student Work
Related Classes
Knitting