Lessons
Class Introduction
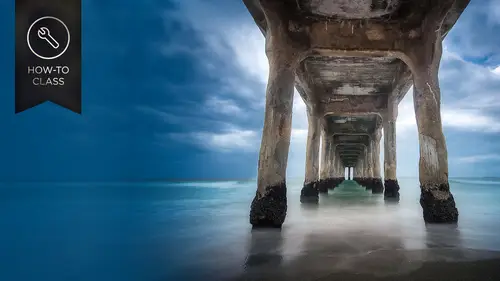
05:46 2Understand & Work with Sidelight
09:22 3Understand & Work with Backlight
11:14 4Understand & Work with Diffused Light
12:37 5Understand & Work with Twilight/Blue Hour
08:21 6Understand & Work with Cloudy, Stormy, and Blah Light
15:25 7How to Best Shoot into the Sun
06:38 8Understand & Work with Front Light
05:23Lesson Info
How to Best Shoot into the Sun
not my favorite, but another top contender shooting into the sun. This might be second, maybe third for me. I love shooting into the sun because it gives the photo a sense of time. It's a moment that happens in an otherwise static photo. All right, the sun hit that spot at that moment. So just kind of just gives me a sense of timing or an element of timing to the photo. What works? Mountains, trees, um, clouds. Anything that the sun is going to hit. So here's a few examples. Mase Arch in Moab at sunrise, and that's that's the classic shot you get. The sun right is it's going between the arches. You saw a variation of that before. Got the sun on the trees. Grand Tetons. You saw you saw the shot where the son of gun behind the mountain. This was right before that happened through the trees, Photo tip clouds and sun equal God bees. All right, so if it's any time you're sunrise or sunset. As the sun gets lower, you generally won't see it happen as much midday when the sun straight overhead...
sometimes will. But as the sun gets lower in the sky. Uh, and you so as a son going lower in the sky and you see clouds start thinking beams because it could happen. So start thinking, you know, if you're supposed to be shooting that way and the sun's over here, but maybe there's a mountain over this way and you see clouds happening over there, start looking for something to shoot over there, and the sky could really be your subject. That's OK. You know, you we could have gone to Mount Rainier to shoot matter near. And there's this some trees over here and he's got that could be your subject. There's nothing wrong with that. You can. You can have the sky beer subject if it looks awesome. And I mean in this example, look at it's like that's a bridge off in the distance. But to me, the the shot is these crazy God beams that were happening off in the distance. Another one. This was just driving along, driving on the side of the road, stopping, getting the camera. Put it on top of the car click because you can see the sun was going to drop below pretty quick, but that's that's crazy crazy light. Like when you see that that's something that you need to capture. Um, another photo tip. So position the sun near the edge of something to help subdue the beams are the burst that's going to come off of there? All right, So what happens is if you if you get the sun when it's too close to the everyone, it's too like Owens just hitting the edge of something. You're gonna almost overpower yourself with beams that come off of it. As it gets closer to the edge, it's gonna get a little bit smaller, and you're gonna be able to see a more defined pattern that comes off that. So try to position it near the edge of something. So here's a great example that nice little tight compact son. If I hadn't like, as I was standing there, I'm like moving around you, but moved too close to the tree. It went too small for moved out over power and had flair all over the shop. So try to position it in the end, take a few different photos, same thing position right on the edge of the trees. Wide angle. You're not gonna get what you're looking for. Okay? All those other shots are tighter, tighter in that 24 to 70 range. Super wide angle. So this is gonna be the 16 to 35 super wide angle. You probably can't see it, but way off in the distance, there is a little son, but you just lose it. You're not gonna get what you're thinking about. So if you're shooting wide angle and you see that starting to happen with son, you want to get that little son star. Just know that if it's wide angle, it's not gonna have the impact in the photo that you think it will, how to capture it. Overexposed. So everything isn't just a silhouette, remember, we're shooting into the sun. It's really gonna It's almost like things or backlit. Um, it's really gonna want to close down and not over exposed the photo your cameras automatically going to do that to take your exposure, compensation, maybe bump it up by stop. Maybe even higher that you get not everything is in shadows on. And then f 16 f 22 will get you that little son star. Okay, You're shooting at F eight. You're not going to see as much of that son start f 16 f 22 you will Okay, uh, little just random geeky tip for you if you if you go on to ah Web. If you're going to be an age photo dot com or out of ramen dot com and you look up a lens and it says the number of blades, that's the number off little Well, guys, you got that come off of it. So it's like I said, if you if you look at the specs fourth, and that's why you'll see some lenses produce a nicer one than other lenses. To me, the lenses that have more blades produce a nicer one than the lenses that don't. But that's just could be a personal taste, too. But just a little techie tip for you there. Post processing lots of shadows and warmth kind of almost like back Like, you know, we're doing a lot of shadow enhancement and a lot of warmth on it, so I don't need to do much here shooting right into the sun. You could see I'm kind of moving around trying to get it into that spot between the leaves and I will crank up the shadows, maybe even a little bit of exposure. Whites and blacks, Almost always. It's OK, The sun's white. We can leave it white, black. So this is really what this is is lacking. It's going to your photos going to be washed out because you're shooting into the sun. So go ahead and hold down the option are all key and get the blacks in there because that's going to give you a good base. Contrast in the photo. A little bit of clarity, but warmth is gonna really give us a nice feeling for it. And then, of course, if you guys insist, I will do a vignette, Erica. Okay, so that's before. After just more of the same, open up the shadows.
Ratings and Reviews
Trisha Davis
A lot of helpful tips and tricks to get the shot you need, even if you arent in the perfect location at the perfect time. There is beauty everywhere, you dont always have to travel to find it. Overall I enjoy Matt's classes because he stays on topic and speaks clearly.
Joann
Excellent class. I especially appreciated the specifics of what types of subjects work best in each light, as well as the Lightroom tweaks that work best with each. This is a very helpful guide.
GREG WARREN
I have been looking for this specific type of information. I love the outdoors and have always wanted to be able to capture it. Great course. The examples really helped and loved the part about blah weather. I really needed that because I would just stay home and not shoot on those days. Now I feel inspired to go out in any weather. Thanks.