Lesson Info
4. Understand & Work with Diffused Light
Lessons
Class Introduction
05:46 2Understand & Work with Sidelight
09:22 3Understand & Work with Backlight
11:14 4Understand & Work with Diffused Light
12:37 5Understand & Work with Twilight/Blue Hour
08:21 6Understand & Work with Cloudy, Stormy, and Blah Light
15:25 7How to Best Shoot into the Sun
06:38 8Understand & Work with Front Light
05:23Lesson Info
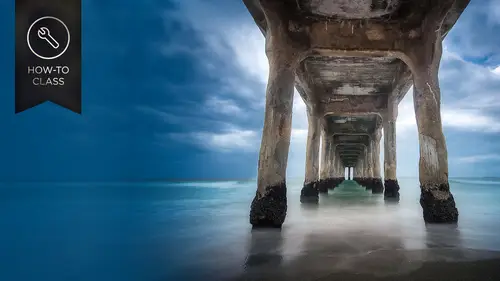
Understand & Work with Diffused Light
the fuse light works great for its soft. It's flat, non directional, so it's it's not. It's not really it's not really engaging light, but it's good for something. So what kinds of things were good for what works? Waterfalls is going to be your number one thing, all right, so if you get out somewhere and you were hoping for a nice bright sunny day or cloud or whatever, and you get somewhere and it's clouded over and it's just flat waterfalls or great anything with water, water streams fall colors again. I mentioned before falls coming up. Things with color tend the pop when it's flat. When it's cloudy outside, you can really see the colors inside of things on, and then flowers flowers. There's another one that's also nice to shoot when when it's fun, because you don't get harsh light on them. So waterfall example. What's nice about this? Is it naturally, because it's not really sunny out? It naturally will give you a little bit of a longer exposure, so sometimes you won't even need to ...
put like a neutral density filter too dark in the photo to get that long exposure. Sometimes you won't even need to do that because you'll naturally get a longer exposure. All right, you could see a little bit of cloud cover that was right over that waterfall. But, um, it just kind of just gives you a nice feeling for the water. Yeah, This shot, the shot would look totally different and bright, sunny, like you'd see dappled light everywhere, I would say dappled light. I mean, like, it's coming through trees. And there's little spots everywhere and all those little dap ALS of spots take our eyes away from things really contrast. It's hard to look at, so those things smooth out, and it really lets you just I kind of enjoy the water in the photo. Same thing with this shot. All right, get out there. You can really see the water because you're not concentrating on the light that's happening. And you actually get a good feel for the waterfalls. This one again? Look how the colors pop. This is a cloudy day colors, pop really nicely. Same thing on this shot. Um, and in this photo, you know, this photo is totally different on a sunny day, but because it's cloudy and everything's muted it's it's got this serene feeling to it. Okay, I put a neutral density filter on it and did like a 62nd exposure, and it really smooths out the water. And you get a really nice feeling, though Those are things that you can play around with the practice on those cloudy days. Eso photo tip on cloudy days on when you are just clouds and diffused light If if you can look for close up photos So, so true story I did Ah, couple years ago I did a class I was actually up in in Ranieri did a landscape photography class and did everything right Got up early like crazy early cause we didn't stay. Um, we didn't stay in the park so crazy. Early got up like 33 30 Got to Reflections Lake, which is like the spot that everybody goes to to shoot Rainier. But I just I wanted to go there. I hadn't been there yet and I wanted to get a shot from there. Gets a reflections leak and it's foggy. I'm standing there and I'm way and enough things happen. I'm doing a class so I'm like supposed to take a photo of the lake with the mountain behind and everything, and it just it never happened. So I'm looking at the time and sons Sunrise has gone by and you can't even see it like it's literally like behind me is just this wall of fog. Um, so I'm teaching the class and I'm like, What could I do? Like, I gotta pull something out of this and that's a perfect time to look at close up stuff. So if you have a macro lens, if you have that cloudy, foggy weather a lot of times, especially in the morning, you'll get do on things and it's a great time to just get close up. So all this stuff was right around where I parked to shoot Mount Rainier and Reflections Lake, all with the macro lens. Alright, are they Are they your portfolio shots that that are gonna win a word? Probably not, but I think they're cool photos that tell the story. Not every photo you take on a travel outdoor whatever trip you're taking, not every photo you take has to be a portfolio shot. You can take photos to help tell the story, and this helps tell the story. I make a photo book of this. You're going to see the Grand Majestic mountains and all these different things. But you're also going to see a different side of Mount Rainier. You see, all the things that exist that people don't see because they're looking up at the big mountain out there. So think about those things you're going on. Not every photo has to be the perfect portfolio shot. Think about taking photos that tell the story of your trip. Um and then as you're traveling So this was in Belgium, I think. But cloudy days air. Great. When you're walking down those little streets when you're traveling, whether it's New York or whether it's abroad, it it doesn't matter. Cloudy days air. Great Teoh really go in in some of those coins areas and get some nice photos. So how do you capture it? Um, aperture priority. So I'm thinking so we're talking diffused light, right? A lot of what we're gonna be shooting in this diffused light is gonna We're gonna look at what? For water. So what I do is I shoot an aperture priority and I set my camera toe Auto exposure bracket mood. What that does is it. I press the shutter halfway down it meters and it takes a shot. And then depending on how a said and I usually set them two stops apart, it's gonna take one that's over exposed by two stops and one that's under exposed by two stops. And when you're shooting water that two stops light room Photoshopped, you got plenty. You'll you'll be able to bring it back. But what that two stops does for you with because remember your cameras automatically setting the shutter speed is you get different water patterns. What? It was gonna be smoother when I was going to be a little bit more textured because it's it's a faster shutter speed, so it gives you a couple options when you get back. So whenever I'm gonna shoot things like that, I'm gonna auto use the auto exposure bracketing. So I have a couple to choose from rather than pick a set shutter speed and say, I will shoot my water at 1/60 of a second. I play with a little bit cause you get different effects each time. So I'm gonna do I'm gonna bracket nobody thinks polarizer for the sun's Not out. We think polarizer Absolutely. If there's reflections on something if I If here's here's a great thing to keep in mind, is the polarizer. We think we think the polarizer cause, especially with polarised sunglasses, is you know when the sun's out it is. But believe it or not, you could get yourself into a lot of trouble that you know this Sunday at a degree angle to what you're shooting. You can get yourself interest in trouble because I see it all the time. We get that pull it that circular polarizer on you. Ever have your sunglasses on and like you turn your head and you can you guys, don't you do it? She's looking at me like I don't I don't turn my head like that's number one. It's a good way to figure out if you're polarizer will work if you're wearing sunglasses and just kind of turn your head back and forth. But, um, what happens is is we turn that polarizer because we're cool. Look, it's making the sky really dark and you take the photo and it actually looks artificial so we could get into trouble. I use my polarizer mawr in these situations because to me, what a polarizer really helps with is cutting down reflections. You can't do that in photo shop. If there's a reflection on leaves and water, that sheen on a rock that sometimes is is almost overpowering. If there's reflections, you're not gonna be able to take that down and photo shop or light room you're polarizer. Is will help cut through those reflection. So they go polarizer for this, Um, and then if there's no water, everything's flat. Forget about the bracketing stuff if you're not shooting water, but you know you just got to start shooting. There's amount. Whatever. Forget about bracketing because it's so flat you don't have a dynamic range that you're not gonna need any type of bracketing with. All right, so let's look at oh, I was supposed to do another backlit photo. This one isn't easy where I'll do it. I'll do it really quick. This is the backlit one. Shadows, warmth, White. What's the sun? Should be white, so don't ever try to pull that back. So it's not. It's okay to make the sun white and then blacks the other way to get a couple little black spots, and I see this a lot. So I'm glad I came back up to this. I see a lot of times when people shoot into the sun, they take the highlight slider and they crank it down. And what happens is that you get this little ball. See, I'm back out a little bit, but there we go. The other son kind of compresses down into this little ball. It looks very, very artificial. The skies going to start to look artificial. You don't have to do that. It's okay for the sun and even the clouds and everything around it to be white. Okay, so it is white, so we don't have to make that go away. Diffused light. So what kinds of things do I do? Well, um, we got a little bit of that. Looks like the sun was poking out in back so I can kind of tone down the highlights a little bit, Bring out my exposure, and I actually should jump forward because there's not too much Not too much that we can do contrast. Contrast is gonna be your friends with these photos. Because remember It's very flat. There's not very much directional like so contrast. And how do we get that? Whites option. All click Blacks option are all click and some clarity. They've even warming up a little bit. Okay? And just for ah, grins. What photo can't use a vineyard. All right, so if you take a look, that's before that's after four. After, so a little bit of shadow enhancement. But contrast is really going to be your friend there, because that's what you were. The scene was usually lacking to begin with. Okay, Jim, we got any, uh, any questions? Actually, I was just looking, and I'll just throw one out for myself. When you're doing vignette ing. Do you mostly use it on darker photos or do you use it on? I sometimes find with brighter photos. It sort of looks a little awkward. Absolutely so, yeah, great question, cause I typically don't use on brighter photo, especially with lots of bright stuff on the edges, because it will, it will look like something's darkened. Great. And, uh, Michael Greenwood would like to know what different times of the year make a huge difference. Have you ever gone back to the same location based on the season? Absolutely, absolutely. So I think you can think. Think of a couple of different things. Obviously, fall colors, fall colors make a big, big impact on things. So I love you know, whenever I get out to Portland, I love to go out there and shoot the waterfalls, and they're a very different looking waterfall in the fall than they are in March, April May. Whatever happens to be so you'll number number one. You'll get a lot of fall colors and things. Number two. You know, it's like the magic happens and that one yellow leaf falls down onto the rock or you put it there and that one yellow leaf falls down onto the rock that's in front and you set that opens the foreground and sweeps back into the waterfall. So really different photos based on the different season, and then your son is going to be at all different points and you get very different shots. That way to just on time of year can be a great fantastic And, um, Theresa would like to know, can you explain a little bit of the difference between pushing the whites and pushing, pushing up the whites and pushing down the blacks as opposed to just doing contrast. Is there something different happening there? Um, it's contrast. Does something very similar for me? I use the whites and the blacks because you're actually attacking the whites and attacking the blacks. Where contrast is like it's just gonna do the whites and the blacks, and you don't really get much control with it, so I can be a little bit more fine tuned. I can look at the photo as I move the whites and maybe I look at it. You saw one earlier. I was like, Wow, I got to that point where I saw the specs, But then when I look back at the photo, it just felt too bright. So you pull it back, it's It's close to a formula, but it's not exactly a formula
Ratings and Reviews
Trisha Davis
A lot of helpful tips and tricks to get the shot you need, even if you arent in the perfect location at the perfect time. There is beauty everywhere, you dont always have to travel to find it. Overall I enjoy Matt's classes because he stays on topic and speaks clearly.
Joann
Excellent class. I especially appreciated the specifics of what types of subjects work best in each light, as well as the Lightroom tweaks that work best with each. This is a very helpful guide.
GREG WARREN
I have been looking for this specific type of information. I love the outdoors and have always wanted to be able to capture it. Great course. The examples really helped and loved the part about blah weather. I really needed that because I would just stay home and not shoot on those days. Now I feel inspired to go out in any weather. Thanks.