Lessons
Class Introduction
03:50 2Why Not Erase or Delete?
05:27 3Add a Mask
07:13 4Make a Mask From a Selection
04:18 5Select & Mask
07:33 6Automatic Masks
06:21 7The Magic of Overlay
09:39 8Mask with Paste Into
10:31Lesson Info
Select & Mask Button
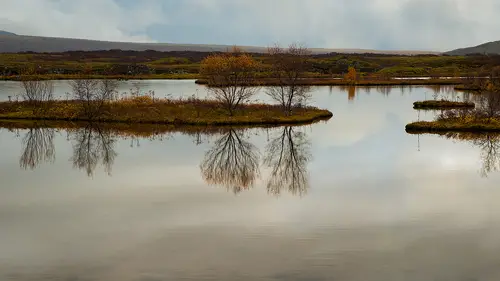
another important part of working with layer Mass is adjusting the mask in different ways. So I want to take this photo of this young lady and make it look like she's in this photo, one of the more challenging things to do. Ah, lot of people do compositing of people, and they only go like a waste up photo cause that's easy because there's no feet to worry about in perspective and all that. But I don't want to easy today, So the first suggest not have for you and this is again relate to. What we're doing is we need to make a selection. The mistake I think that many people make. And I say that because I used to do it too, is I would make the selection and the mask in this photograph and spend a lot of time doing it, then dragged her into the new background and sometimes realize I just wasted a lot of time because her hair blends in so well with the background. Why did I worry about it so much? So you want to make sure you're in context, and the way to do that is before we do anything els...
e this is my philosophy is I drag her into the new background before I do anything, and she's just a little bit too big here. So I'm gonna say I want her maybe to be like that big. So now as I move on and start doing things, I'm as you'll see as I go to the next step, I'm seeing it in the context of the background. And that saved me a ton of time because there've been lots and lots of times where I didn't used to do that. I would make the mask on its in this document, then dragged them both over and then realize again her clothing or something blended into the point where I didn't need to do quite as much detail work. So again, this is not a class on selective. I'm gonna do this fairly quickly to show you the idea here, once you have amassed or a selection that's getting looking like it might be kind of close to what you want to end up with than this button up here, Selected Mask has some really interesting options. It lets you view it in different ways, and I usually view it in this one called on layers. And as you can see, it's a perfect selection. There's absolutely nothing wrong with it whatsoever. But that's kind of the point is, before I was like, I'm not sure if I got a good selection. I can see that clearly. I've, like, missed part of her face completely, but this you called on layers is meaning. Show me a live representation of what the mask will eventually look like. So I have actually made a mask yet this is showing me This is a preview of eventually. Once you're finished, what your mask will look like you can see. Okay, there are some areas where not so good. So what? We have selection tools in here so we can go in and add parts that we're missing like the heel of her shoe, whatever it might be and try and adjust it. Okay, Now, this function takes a bit of time, so I'm not gonna be able to spend all that much Simon's When I show you the the I. D. Here. We also have tools cause, as let's go to this other view, that can be quite helpful to called onion skin because now see how we're sort of seeing the background. But we're seeing this overlay now. I can see. Oh, I missed some hairs here and there. So this tool in here the 2nd 1 allows me to try and let photo shop do it for me. So is he paint over? It's gonna be hard to see for a moment, but I'll switch views in a second. So we go now to on layers and see, we've got a bit more hair, but it's still not perfect yet. And this is the thing that I want to say about selecting mask. Often when you see this demonstrated by the manufacturers off the software that we're using today, it will. They'll go look and they'll paint and it will be perfect. And you tried on your foes and like oh, didn't work quite so well. So my belief is a lot of the time this isn't gonna work quite as well as demonstrations might suggest, But I have this expression well compared to the alternative. It's the way faster than me trying to sit there myself and paint. So as long as I'm getting close, here's what I do I click on this view called Black and White and look at the hair now it actually doesn't look that bad, right? I can see there some here that I can also see some missing parts. So that tells me once I go to the next step of making a layer mask, I'll have something to work with. If I just saw nothing there at all, or it looks looks like a really bad cut out that would tell me I have more work to do. Okay. So again, in this case, there's this is not the best mask in the world. Clearly, because of time, because it takes a bit of effort. But I'll show you how I would tweak it as we go. Excuse me. When you get when you move from select select mast and began working, I missed the very first feature. So I started by making a selection of some kind. I happen to use the quick selection tool. Once I felt like I was getting close. Then I went up to the options where I clicked on the button called Select and Mask. Right. And once you did that, then then this little button over here on the left allows me. It's Ah um find tool which allows you to tee It tries to determine between hard edge and soft edge. It was that so that's likely what got there. So at this point, I would say OK, clearly I mean, I need there's some more stuff here I can see, but it's a good start, so I come right down to the bottom and when the options is, add a layer mask. So when I click OK, now I have There's my layer. There's my layer mask. So now I can start tweaking the mask itself. So if I look a little closer, I can see Okay, I'm missing parts of her face still, So I still go use the very first thing we talked about. How does a layer mask Werth White shows black heights. So you take my paintbrush, get a much smaller brush, make sure white is my for one color, and I'm 100 capacity and say, Let's paint in some of these missing pieces that I completely missed completely. This part down here needs to be painted with black, as I don't want that hair there at all. and here's another little suggestion for you. Obviously have to be careful of this, but there are times I watch people try to get a little teeny tiny hairs because they were there in the original. I wouldn't be terribly upset if I didn't see the three hairs coming out behind her face. I would just decide not to do that over on this side. You can see the hair. It's it's okay. It's not bad. Let's look at the layer mass by optional clicking on it and you can see in here. We got a bit of an issue because really, what we should be seeing in an ideal world, I should see what effect is a white silhouette of her and everything else black right? That would be a like the perfect mask, but we look at it. There's light grey where it should be white and sometimes over in the black area. It's not happening quite so much here, but sometimes you'll see dark gray when it should be black. So the challenge is how do why get rid of that? How the white paint with white very carefully and the, um if you have a lot of time on your hands method is to zoom into, like 1600% with the one pixel size brush. Don't even think about it. That would take way too long. Instead, there's this wonderful function that someone realize. And I wish I knew who it was because I nominate them for the Nobel Peace price of photo shop. Because it's like over the years and saved me so much time I can't even imagine. So let me just show you what I mean by this. If I took a regular paintbrush and tried to paint with white right here, of course, if I hiccupped and went like this, I be I would ruin it. And I don't want to do that. I want to be ableto stay within those areas. So the simple solution is in the paint brush. You change the blend mode to overlay and this is like this magical mode That means when I have white is my foreground color It can Onley paint light grey It can't paint on black so you will have to just trust me. I'm gonna take my paintbrush. I'm attempting to paint right now. Nothing is happening because when you go over black with in overlay mode. White won't paint anything, but if I go over these areas here that are like this light grey, it fixes those completely. And I don't have to worry about being really careful about. Oops, I went into the black because it doesn't matter and it works the other way around. If you had areas of dark gray that should be black in overlay mode, black and Onley paint on shades of gray, not white. So when you're trying to tweak a mask, this is like the greatest thing ever. However, there's a catch in. Normally I wouldn't do it this way of looking at the mask. I just want you to see what's happening. But the problem is, if you spend too much time painting in this view, you lose context again because I'm not seeing the background. So I'm gonna step backwards a little bit and show you what I would actually dio is. Look at it this way. So I'm still on the mask painting and overlay, but I'm looking at it in the context of the photo. So now, as I paint with in overlay with white here and over here you can see Hoop only see what's happening is interesting A bit too much, so I wouldn't notice that if I was looking at the mask. So the function of overly is very useful, but I think it works best. First of all, if you lower the opacity a little bit and then make sure that you're working on the mask but looking at the view in the context of the new background and there are things that overlay can't do, like down in here, there's white poking through that just needs to be painted normally, because if I tried to do overlay, the chances are it kind of helping, but it would just take too long to fix. So now I'm back to painting an overlay mode in black because I don't want all those little white fringy things happening. And because I'm looking at in the context of the new background, it doesn't look that bad if the hairs aren't all there completely. Keep in mind, I'm also zoomed in pretty close. I'm gonna actually look at the photograph this big, So if I look at it that view and don't notice that there's missing hair or something like that. Now I know there's other classes at Photoshopped week about composited going toe way more detail, but this is the other very common way to make a layer mask To start with. The selection said it was clicking on the add layer mask button. Go to that select and mass because it lets you tweak it before you actually make it into a mask.
Class Materials
Bonus Materials with Purchase
Ratings and Reviews
artmaltman
Dave Cross is a superb teacher and this is a superb class. Very clear explanations, well organized, and the demonstrations are spot on. I thought that I already understood masking but really I had just scratched the surface of the topic. Learned a lot of useful techniques. Thanks Dave!
a Creativelive Student
Dave is an amazing instructor and even though this is for beginners he takes you to intermediate. Amazing class learned and learned. Thank you!!!
Tony Walker
Enjoyed the course. Now that I am of an age where I tend to forget more than I remember having this course will help when I want to mask something. I can always come back to a specific video for a reminder. How many folks out there follow a tutorial and think great, then a week later you go back and say how on earth did I do that. Having access to this course is great especially if you are not photoshopping everyday.