Lessons
Class Introduction
05:58 2Welcome to Leica
15:54 3Shutter Speeds
12:38 4Apertures & ISO
06:30 5Accessory Shoe
06:46 6Back Side Controls
25:30 7Bottom Controls
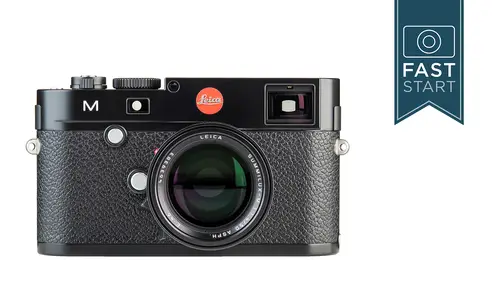
06:24 8Front Controls
04:56Lesson Info
Front Controls
Looking over the front of the camera, we have our viewfinder and our range finders. So you wanna make sure you keep that clean, so have cleaning cloths nearby to keep that nice and clean, 'cause if those are dirty, you're gonna have a difficult time focusing. It kinda blurs, and gives you less contrast when you're focusing, and so, if you're looking in through the viewfinder and and you're focusing and it just seems really tough, probably check those finders and see if they need to be cleaned. There is a little sensor on the front of the camera, the brightness sensor, and this is controlling the brightness of the framelines in the viewfinder. The traditional cameras used to have a little window out on the front of the camera that would illuminate these framelines, but on modern cameras, they use a built in LED light that can adjust in power according to the light levels that you are working in, and adjust the light levels appropriately for that brightness. They also have the option of ...
turning white or red, and so that's also an option we'll be able to choose once we get into the metering system. But this is a pretty good system, so that when you're under low light, those frame lines can still be seen, but they're not overpoweringly bright. At the top of the viewfinder is a little light, that is your self-timer LED, so when you have the self-timer ready to set to fire, that's gonna blink to let you know when it's going to fire. The focus button, as we've learned, is a focus aid when you are in live view, but it is more than that, it also works as an exposure compensation button, when you are not in the live view, pressing that button and turning the dial on the back of the camera. The sensor on this camera is a 24 megapixel sensor, it's about as close as we're gonna get to it, CMOS style, The lens release button is going to allow you to take your lenses on and off, there's a little red dot which you will match up with the red dots on the lenses. Those lenses are gonna connect up to the focusing cam, and that is how your camera focuses using the range finder system, so there's a connection between the lens and the body to let the body know where the lens is focused. And this is a very precision piece of equipment in here, dropping the camera may cause this to come out of alignment, if so it'll need to be sent back to an authorized Leica repair center, they're the ones that can really handle this sort of change, this is machine to a tolerance of 10 microns, and so it is something that you wanna be very careful of in getting damaged in any way. Generally it's a pretty robust system, it's not likely that you're gonna have problems, but if it is, send it back to Leica. You'll notice the shutter blades in there are colored, and that is the way that it is using the metering system. So it uses a center weighted metering system, with a sensor in the base of the housing in the box in here, and it's pointed at the shutter blades that are painted white, and that is getting a image projected on to it, and so that's how your camera is judging it's light metering. There is a six bit reader that will determine what type of lens you have on the camera. So in this case, this little reader will look at the back of your lens, and look at these six bits of information, and will read whether they're white or black, and that will lead it to remember what type of lens it is. This information is then passed forward into the metadata of the images that you shoot, and into the exif data. It'll tell you what focal length you're using, and the maximum aperture of the lens. Beyond that, it will actually make corrections in many types of images, according to the specific lens parameters, how much vignetting, or color shading it has, the optical imperfections that the engineers can fix in software will automatically be done. And so you'll find on the back of modern lenses, are these different six bit codes. Now one of the things you'll notice in the example here, is the 50 millimeter f/2, there are two different distinct models of lenses that are 50 f/2s, and they have different codes because they have different characteristics to the way they work. Leica knows about this, they build all the software into the camera to accommodate this. Now this became common on all lenses in 2006 and later that were designed for the digital M8 and going forward. So all of the modern lenses have this. If you have an older lens, it can be added retroactively. You can have a company do it, you can have Leica do it, you can do it yourself if you wanna try to hack it yourself. There are people who use model paint, white and black, to add the information in, if you go on the internet, look up Leica six bit codes, you'll find several places that have the full list of all the six bit codes for all the different lenses that they've made since this has started.
Class Materials
Bonus Materials with Purchase
Ratings and Reviews
nancy mercury
This class was very helpful as a new owner of the Monochrome 246, even though there are some parts not applicable, most of the basic "get around" the menu and set up was extremely helpful. Very complete overview.
Student Work
Related Classes
Camera Guides