Lessons
Class Introduction
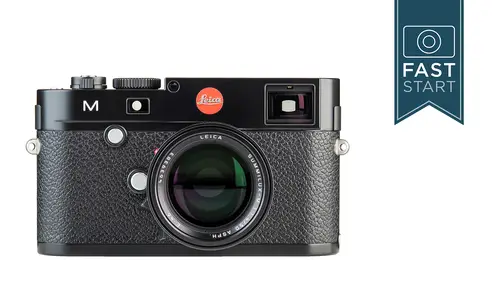
05:58 2Welcome to Leica
15:54 3Shutter Speeds
12:38 4Apertures & ISO
06:30 5Accessory Shoe
06:46 6Back Side Controls
25:30 7Bottom Controls
06:24 8Front Controls
04:56Lesson Info
Setup Menu Functions
We're working our way through the menu. We're on the third page at this time. So the Monitor Brightness. So you can control how bright the monitor is in the back of the camera. You can have this set to automatic, and there is this that little sensor in the back that will bring the brightness up in brighter conditions and bring it down in other conditions. I prefer to leave it at medium so that it stays very constant, so that I can judge exposure by just looking at the brightness of the LCD itself. You can do the same thing with the EVF Brightness. So if you have one of those view finders hooked up to the top, you can check that and see how bright it is and adjust it as necessary. I think Medium looks quite well on that. The Frameline Color. So, the frameline in the viewfinder, you can choose these as white or red. White is the classic setting. A lot of people like that, but if you like that distinct look to it, you have the red option in there. Focus Peaking allows us to see with kinda...
shimmering highlights what is in focus. And this is a pretty good way. It's not the best way in the world, but it's a petty good way of quickly adjusting focus using live view or the viewfinder on the camera. And you can do the magnified mode or in the normal mode. And so, one of the things to be aware of is that subject detail that are not completely in focus, but have a high contrast may also be marked. And that's why I say this isn't the world's greatest mode, and that's because sometimes things will show it to you in red, shimmering as if it is in focus, but in reality it's close but not exactly in focus. Let's do a little focus peaking here, and I'm gonna switch out to the 90 millimeter lens because I wanna be a little bit closer to our subject so that we can see with just a little bit greater detail. Switch out lenses. So in this case, I'm gonna go into the menu system. And we're gonna scroll down to the third page and go into Focus Peaking. And so we can choose different colors, we can turn it off. I'm gonna go with, let's see, let's go with Blue because I wanna focus on the green apples here. So I'm gonna hit set there. And so next up we're gonna go into live view. And so I'm looking like we're pretty out of focus here. And so let's zoom in a little bit. And I'm not even sure what we're focused on. So we can see a little bit of... See that blue there? Let's move the camera just a little bit so that we can see what we're focusing on here. And so as the subject gets in focus, you'll see that it shimmers in blue a little bit, and that let's us know that we're very close on focusing it. So right there Is where we wanted it. Let's jump into 10 times magnification, and actually let's go up to those apples that I was going for. Where are they? I'm gonna have to jump back out. Let's see. I was too high, so there we are. Don't want that. Jump in on this. Going over to the right, there is our apples. Okay, so now when we focus, do we get that little blue shimmering highlight. Not as visible here, but right at the top of the red apple and around the stem, you can see that little blue shimmering highlight and that's it. Plus 10, we can come back to five. Maybe we can see it a little bit more clearly there. But yeah, you get that little shimmer in there. And so that's a way of checking focus, either on the LCD or with the external view finder on the top of the camera. Alright, so the focusing aid on the camera, if you turn this to the Automatic setting, as soon as you start manually focusing the lens, it'll automatically jump in and focus when you're using live view or the EVF on the camera. And so if you really wanna check for critical focus on a regular basis, this is a good item to have turned on. The Histogram is a great way of determining if you have recorded the correct exposure. And so this is showing you the range of tonalities that you have recorded. And so, real quickly on the way it works is if it's bunched over on the left-hand side, it's gonna be really dark. And if it's over on the right hand side, it's gonna be too bright. So generally, what you kinda want is a mountain range in the middle now you can choose between standard and RGB, which is gonna give you the red, green, and blue colors, which is gonna give you just a little bit more information as to whether one of the channels might be clipped or a little bit clipped or a little bit brighter than that. And so I prefer the RGB just because it gives you that additional information. The Clipping Definition is going to show you when you play back an image, what pixels might be getting close or being exposed, overexposed or underexposed. The reds are gonna show you the highlights, the blues are gonna show you the shadows. And so, I think this might be worthy of another little demo here. And so what I'm gonna do is I'm gonna put this camera on live view, and I just wanna take a photo here. This is a pretty even exposure right now, and so let's just take a photo right here, and so let's play this photo back. And so, we are playing the photo back. And if I hit the Info button, here's our histogram. And you can see a little bit of highlights, not many, but just a little of them blinking here. So I'm gonna dive into the menu system. And let's go down to the Clipping Definition, and let's see if we can make some adjustments on this. On the lower limit, I can crank this up to 20, which means it's gonna start showing us pixels. Anything between zero and 20 in brightness, they're gonna start showing to us in blue colors. And on the highlights, let's go all the way down to just to see what this looks like. Right there. I'll hit Info, that backs us out of there. Then we're gonna go into playback. And now you can see those areas in blue and in red. And so in blue, they're at the lowest 20 levels of brightness, because brightness goes between zero and 255. And the red areas are getting close to being overexposed, but they're not over exposed because we saw that from the previous image. And so this is just warning you of situations that might be too bright or too dark. And so you would just set this wherever you want those parameters to let you know that you're getting close to the edge of the exposure range, either on the high end or on the low end. Alright, Auto Review. When you take a photo, do you want the camera to automatically play back an image. In many cases, it's nice to have. In some cases, it can be distracting. And so if you wanna save battery life, really stay concentrating on your subjects, you can turn this off. Onto our fourth page in the menu system, we're cruising through this pretty quickly. We have copyright information. So you can enter your information in here. Hit Menu to escape. Press the Set or Info to confirm your entry. And so this is a great place to put your contact information, whether it's your website, your email, your name, your phone number. In case your camera gets lost or stolen, or your photos, what you wanna have attached to your photos, a copyright notice perhaps, all rights reserved. And so this information gets recorded on the EXIF data of your images. Image numbering is gonna control the file numbers that are given to images as they go through the camera. So from a memory card, images are gonna be stored in a folder called the DCIM folder. And then inside that is gonna be a nother folder, and you can control the name of that folder. Perhaps you wanna have multiple projects stored on one memory card. You could choose different file names for that. If you wanna go in and change which name that your files are being recorded, you wanna put your initials in at the beginning of the file number of your images, you could do that as well. If you wanna reset those numbers to 0001, because it just counts up from one to 10, and then starts over again, you can reset it at any time you want. Generally these are things that most people don't get into a lot. The camera has a horizon line that we looked at before. This is a little bit more quickly easily accessed with the Info button at the back of the camera, but this let's you know if you got it level, if you're pitching it forward or pitching it backwards when it gets green, you know that you've done it right. Sensor Cleaning on this camera will take us into a little sub menu. First thing is dust detection. You can shoot a photo at F16 or F of a continuous tone subject, like a white piece of paper or a blank wall. And it's gonna show you an image of where that dust is on the sensor. So that if you wanna go in with rocket blower or a brush, you know exactly where to clean on that sensor. If you do wanna go in and clean it, you're gonna need to open the shutter. And in this case, you're gonna need to use one of two different systems. The first basic system that you would use is a rocket blower. This is not compressed air. This is hand-blown air that you're gonna blow air in, hopefully trying to knock off the dust on the sensor. Stage two, not everyone feels comfortable with, but this is some sort of sweeping system that you're gonna sweep off any sort of dust that's on a sensor. And so, if you have these, there's dry ones and there's wet ones. Not everyone feels totally comfortable doing it, but it does work quite well. Now in order to do this, you do need to have at least 60% power in your battery. You really do not want that shutter closing because you could cause major damage cleaning the sensor and having the shutter close on you. And so if you are using the swab system, swipe system, as I said, there's many different systems out there and you're trying to sweep off the dust. Hopefully you won't need to do that. The air blower will get most of the dust off. Next item is GPS. This is only for those of you that have the multi function handgrip. This will give you the ability to turn it on and off. It will use a little bit more batter power, so there is a price to pay for that. The Audio is another little control. We looked at this a little bit earlier. But under Audio Adjustments, you do have a Standard, also a Concert, and a Manual setting. So if you wanna get in there and manually adjust it, you can choose whether those levels are in there. I think it's the levels of one to 20. If you are shooting under strong windy conditions, wind hitting your camera is one of the worst sounds that a microphone can pick up. It's really annoying. And so there is a way that you can kinda buff it a little bit and muffle some of those sounds. It doesn't do a great job, but it's better than not using anything at all. And if you are recording video under windy conditions, you probably wanna turn that one on. Exposure Simulation. And so, this is gonna be different depending on how you wanna shoot. So let me show you how this works. When you have the camera in live view mode, and you start changing your shutter speeds, do you want the image to get darker because you want it to mimic exactly what your final image is gonna look like? Personally, I like the permanent option because it gives me a pretty clear idea if I am under exposing or over exposing. The other option is release half pressed. And that means it's only gonna show you the exposure. When you press down on the shutter release, it'll show you your underexposed or if you look down at the bottom, you'll see that we're gonna become overexposed on the right hand side, but we don't really see how overexposed until we press down on that shutter release. And the permanent option is good for anybody who wants to judge exposure by just looking at the screen. The release half press is better for people who are always wanting the best quality image, but they don't care so much about how the final image is. They're looking at the exposure indicator. The release half press is also really good for people working in studios and people working with flash photography. So I like permanent when it comes to exposure compensation. Alright, our last menu in here. Auto Power Off. How quickly do you want your camera to power down since the last time you've pressed the button on the camera. Two minutes is pretty reasonable for most. You can extend it. That'll wear into your batter life a little bit. Date and Time, obvious stuff that you're gonna be changing in here, choosing which time and time zone that you are working with, set appropriately. We also have a daylight savings time option, which is a little bit easier than resetting the clock when you go in and out of that. The date format can be changed to the different options, depending on what's common in your standard. I think for photography-wise, year, month, day makes a lot more sense. Images will be chronologically ordered when you look at them by date a little bit more easily in there. You can also go in and control the additional settings on the date for which year, month, date, and so forth. And then on the Time, you can choose formatting. You can either use 12 or 24 Hours. And then of course setting the exact time. Now the time is held in the camera by a internal battery which is charged when you put your regular battery in the camera. And if you were to take that battery out for more than two months, that other batter might lose power and you might lose all of your date and time settings. And so for long storage periods of time, you may have to go back and reset that. The camera does have an audio signal. And most Leica photographers take great pride in being very discreet. And so this is something that most people will wanna turn off, but this is something that we turn on, for instance, when you use the self-timer. It can be a little annoying to other photographers and people around. It can be a little helpful in some key situations, but I think most people like to leave their cameras as discreet as possible. Of course the menu is available in many different languages. Choose the appropriate one here. If you are using the special grip on the camera that does have the USB connection on it, you can choose how it communicates with the computer that it's connected up to. Some computers work on a PTP storage, some use a mass storage option. Very few people have the multi grip so it's not a big issue. And in most cases, I recommend downloading from the computer or from a card reader. So this is not something most people are gonna use. But if it doesn't help that right, take a look at the setting and adjust it. If you would like to reset the camera back to the factory default settings, that's what you can do here. We've already done that the beginning of the class, and you've probably already got your camera set up so you probably don't wanna do this now. But if you do wanna reset it, maybe if you're gonna sell your camera or if you just bought one, this is a good place to start to just get everything back to the normal setting. Alright, formatting the SD card. Remember, this is something that you should do when you first get new cards. If you're transferring card from a different type of camera into this one, it's best to have this reformatted so that you're starting with a nice clean slate for all of your images in the data directory and the file folders and everything else. The firm ware is the software on the camera that controls the operations. And from time to time, there are improvements that Leica makes, and you can get those for free by going to Leica's website, downloading the software, putting it on a memory card, and then installing it in your camera, and coming here into the firm ware and following the on-screen instructions. If they've had any changes or updates, you will get those for free. It just means going to the website, downloading the information, and uploading it onto your camera. They've already had a few firmware updates. They've fixed a few things. They've added a few features, and that's why we're at version 2.0.3.0. And it's possible that they have more coming down the road in the future. So, since those are free, there's nothing wrong with staying up to date with those.
Class Materials
Bonus Materials with Purchase
Ratings and Reviews
nancy mercury
This class was very helpful as a new owner of the Monochrome 246, even though there are some parts not applicable, most of the basic "get around" the menu and set up was extremely helpful. Very complete overview.
Student Work
Related Classes
Camera Guides