Lessons
Class Introduction
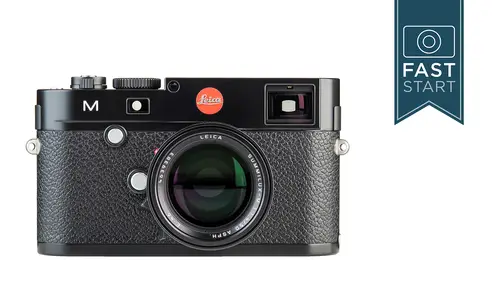
05:58 2Welcome to Leica
15:54 3Shutter Speeds
12:38 4Apertures & ISO
06:30 5Accessory Shoe
06:46 6Back Side Controls
25:30 7Bottom Controls
06:24 8Front Controls
04:56Lesson Info
Shutter Speeds
It's time to get into the camera controls, which is the big section of the class where we go through all the functions and controls on the outside of the camera. We're gonna start on the top and with our basic controls. So turning the camera onto the S setting turns the power on. We have our shutter release. The camera does like to go to sleep after a couple minutes, so pressing lightly on that will wake the camera up. When we get into the menu system and controlling some of the other features of the camera, we'll be using the directional pad in the back of the camera for going up, down, left, and right, and in the middle of that is an info button that we will use to press to confirm a lot of settings in many cases, but for some settings the info button is not a high enough level and so we do have a dedicated set button on the camera, so that when we are selecting items in the menu, you will often have to press the set button to confirm that you want a particular feature on the camera.
Alright, looking on the top deck of the camera. When you turn the camera on, you're gonna have a few different options, S, C, and the self timer option. So normally most people are probably gonna be fine being in the single shot mode. The continuous mode will allow you to shoot at three frames per second for 12 shots, and so it doesn't have the biggest buffer in there, so you do have to be very careful when shooting action photography, because you don't have too many shots that you can get to. We do have a self timer in here as well that can be set to either two seconds or 12 seconds. How do you set the two or 12? Well, you simply go into the menu system on page one, and there is a self timer option where you can go in and select which self timer option you would prefer, the two or the 12 second option. And so one of the things about being in the self timer mode is that if you do set the self timer, you activate it, and you would like to reset the time, you can press down on the shutter release halfway to reset the time. If you completely want to back back out of it, you can press the set or menus buttons, and that'll cancel the self timer. Alright, on the top of the camera, not too many controls. First up is our shutter release. And so when you press halfway down, it activates the metering system. It wakes the camera up. It activates the viewfinder display, so that when you look through the viewfinder, there is exposure and possibly shutter speed information in there, and this is also a good way if you're in the menu system, and you wanna return to shooting menu. Simply press down on the shutter release halfway. It's gonna kick you outta the menu back to shooting photos. Of course you will press all the way down to take your photo but it's that halfway down that you wanna be very very careful to know about. So the shutter release on this uses a standard tapered cable release on it. So if you wanna have a traditional cable release, you're gonna screw it directly into the shutter release. Leica also make a couple of what are known are soft release buttons and these are small little tabs that you can screw into the top of the shutter release that will separate your finger from the camera when you are shooting. There is another company and I'll be more than happy to talk about other companies that make things for Leica. Match Technical makes these soft shutter releases as well, and so the latest ones that I like are the ones that have an O ring and they have a little bit of a longer thread on it so that they stay in the shutter release a little bit better in here, and they have different names, and have a couple of examples here, and I'll show you what that looks like on the camera, so let's take a look at these little things here. So, the big one here is called the beep, and the little one here I think it's called the bip, and so I'm gonna take the big. I'll take the little one first, and so it just screws in to the top here, and this one I got with a short thread, 'cause I'm working with a number of cameras, and so that just gives you a nice place to rest your finger, and it's very comfortable and you're not touching the rest of the camera when you're actually touching that. So I'm gonna unscrew that guy. It's just about a half turn. And see normally when you're pressing down, you've got your finger kinda resting on that collared edge around there. Let's put the beep on the top here. Screw that in right here. And so now we have a nice, big, comfortable button for firing the shutter, and so there's a lot of people who like adding a little bit of bling to their camera. Little accessories. And this is something that might improve the shutter release. It's really not too bad to begin with. I've been perfectly fine with it, but I picked this up 'cause I thought it'd be just a fun little addition, and they do have a wide variety of other ones. They have ones called bugs and they have little paintings that look like a little ladybug right on there 'cause they're kinda shaped like it a little bit. So, lots of little accessories. That's just a couple to get started with. Let's talk about the exposure system on the camera. That's of course one of the most important aspects to it, and the shutter speed dial is prominent right there on the top. Things are gonna be pretty obvious in here. We have our shutter speeds, but we also have half stops. Now the thing to know about half stops is that not many other companies use them as their default system in the camera. So, you can set shutter speeds in-between the other shutter speeds. When you go to apertures, it's gonna be in third stops, and in ISOs that is frequently in the third stops as well, and so it's a little different having this in half stops. When you get down to 180th of a second, you get a red lightening mark, which let's you know that that is the maximum flash synchronization speed with this camera. So if you're gonna use flash, it should be at 180th of a second or slower. If you're working in a studio, or with really powerful strobes, you're probably gonna need to power that down a little bit depending on the types of power, and the duration of those flashes. We go down in half shutter speeds, and what's kind of interesting about the one between 60 and 30 is that it is 45th of a second, but when you decide to record movies, it automatically switches over to a 50th of a second. I'm not gonna get into the long sordid story as to why people shooting video like a 50th of a second, but trust me, it's one of the most popular shutter speeds when shooting video and it is a very good one to have, and so for shooting video setting your camera at that 45, which then switches over to 50 is gonna be a highly recommended shutter speed to be doing video at. We continue to have our half shutter speeds all the way down to eight full seconds. After eight, we get into the bulb settings. So in the bulb setting, you get to select how long you want the shutter open longer than eight seconds. So the way bulb works is that you can either press down on the shutter release or you a cable release, and when you press down, the shutter will open, and it's gonna stay open as long as you leave your finger on the shutter release or on the cable release, and it will end when you lift your finger off the shutter, and so that's a good system for doing nighttime photography up to 60 seconds in length. There is another variant on this. If you decide to use the self timer, it becomes a time operation. Now the way time operation works is just a little bit different. You're gonna press it once to start. Let's say it's the two second self timer. It'll wait two seconds. The shutter will open. Your exposure stops. And then whenever you want to go in and stop the exposure, you can go in and press the button, or press the cable release, and that will end the bulb exposure, or the time exposure in this case, and so if you wanna do a long exposure, you can do that. So the camera also has an auto mode for the shutter speeds and so if you want to put the camera in an aperture priority mode where the camera is figuring out shutter speeds for you, you can do that by being in the A mode. Now when you do that you press halfway down on shutter release. It's gonna lock your exposure, which means locking your shutter speed in. So if you take the photo, you can recompose and hold that shutter speed in there. Now if you want to get in and control some of the parameters on how this works as to it, you can go into the set menu, and in the ISO you can control what types of shutter speeds that it's going to select for you. If you're gonna select shutter speeds yourself, you're gonna go in and you're gonna select fast shutter speeds like a 1000th of a second, if you're going to be stopping very fast action. You'll have very slow shutter speeds if you want to blur the action. Might need a tripod with a long shutter speed like this, and then of course we will have the bulb and time modes for doing long time exposures where you wanna leave the shutter open for a longer period of time. So if you wanna set the shutter speed dial to B, there is kind of a little secret menu that a lot of people don't know about on this camera. If you hold the focus button on the front of camera, which we'll talk more about throughout the rest of this class, if you hold it in for two seconds while turning the back dial, which I have to admit is not the easiest thing in the world, but if you do that, you're gonna get this menu on the back of the camera that's gonna allow you to go in and adjust how long of shutter speed you are using in the bulb mode, and so let's do a little demo here on our camera. So, first thing is I have the camera in the bulb mode on the shutter speed dial, and then what I'm going to do is I'm going to press in on the focus button on the front of the camera. So we have our lens release button here, and this other one is known as the focus button, but it actually does more than that, but I'm gonna be pressing in on the button, but I wanna show you on the back of the camera. So, it's in the bulb mode. I'm gonna press in for about two seconds, and now if the button is pressed in, I can turn this dial and I can select specific links of shutter speeds, and so eight seconds to 60 seconds, and if I release this, I can't adjust this. I have to have that button on the front of the camera pressed in to do this. Now one of the things is that this is also limited by which ISO you have set and so if I have an ISO of let's say 1600 set you'll see that, as I get this pressed in here, a lot of the things are grayed out, and so it is limited when you are at higher ISOs. Let me change the ISO back down to let's say 400. Right here. Press in for two seconds. You can see now I can get up to 32 seconds, and if I go back in with ISO. Dial it down to 200. Press the focus button on the front. Press in on the focus button here, and I'm gonna have my full range. I can use the wheel or I could use the directional pad back here for selecting these things, and so in bulb I can select it as long as I want, basically their very specific time frame if you want, and so if you are doing night exposures, keep that in mind, because you can set little bit more specific times if you don't want to use a cable release, or something else on the camera. And so just keep in mind that if you are trying to use those higher ISOs, you will have a limited number of the shutter speeds that you can use. So when you do use longer shutter speeds, longer than two seconds, there will be a countdown in the viewfinder so that you can see it. So if you do a 30 second exposure, you can look in the viewfinder and see how much time is left on that particular exposure, and with all images shot at a 30th of a second or longer, the camera is gonna automatically go through a noise reduction system where it uses the same amount of time in order to process the image, to reduce the amount of noise. Now this is only gonna have an impact on JPEG images, but unfortunately there is no turning this feature off if you were to shoot only raw images, and so it doesn't help you with raw, but you kind of have to wait through this noise reduction system, and it does kind of warn you. It can't shoot. It's not doing anything. It's processing the image. And so just something to be aware for anyone who is doing longer time exposures with this camera.
Class Materials
Bonus Materials with Purchase
Ratings and Reviews
nancy mercury
This class was very helpful as a new owner of the Monochrome 246, even though there are some parts not applicable, most of the basic "get around" the menu and set up was extremely helpful. Very complete overview.
Student Work
Related Classes
Camera Guides