Differences Between Collapsible Reflectors
Lesson 20 from: Light Shaping Tools for Professional PhotographersTony Corbell
Differences Between Collapsible Reflectors
Lesson 20 from: Light Shaping Tools for Professional PhotographersTony Corbell
Lesson Info
20. Differences Between Collapsible Reflectors
Lessons
Class Introduction
05:22 2Categories of Light Shaping Tools
07:59 3When to Use Different Light
10:50 4Softbox and Octabox Overview
25:55 5Beauty Dish, Reflectors & Collapsible Reflectors Overview
27:55 6Pros & Cons of Small Light Sources
08:10 7Shoot using One Reflector
12:24 8Shooting with Two Standard Reflectors
08:53Shoot Using Grids with Reflectors
14:37 10How to Use Beauty Dishes
28:24 11Pros & Cons of Softboxes
12:30 12Common Uses of Softboxes
21:24 13Subtle Elements of Controlling Softboxes
20:33 14Different Techniques with Softboxes
29:32 15Pros & Cons of Umbrellas
07:25 16How to Control an Umbrella
12:25 17Uses of Umbrellas
08:27 18Different Techniques with Umbrellas
19:55 19Group Shot with Umbrellas
19:37 20Differences Between Collapsible Reflectors
25:36 21Shooting with Black & White Collapsible Reflectors
15:07 22Shooting with Silver & Gold Collapsible Reflectors
13:49 23When to Use the White Translucent Collapsible Reflector
33:18 24How to Use the Large Octa Softbox
20:50 25Shooting with a Large White Deep XL Umbrella
18:59 26Shooting with a Large Silver Deep L Umbrella
07:19 27Shooting with a 4x6 Softbox
17:05 28When to Use Specialty Light Shaping
04:40 29Shooting with a Hard Box
15:29 30Shoot to Incorporate a Fresnel Light
09:32 31Shoot Using Ring Flash
10:23 32Studio Lighting Photo Critique of Student Work
1:05:41Lesson Info
Differences Between Collapsible Reflectors
We spend a lot of time talkin' about light shaping tools, and we spend a lot of time learning our craft from books, and videos, and workshops and all the things that we do. And one thing that kinda rings true, to me, at least, comes light and clear. When you first start out in photography, and when you're first starting to learn the foundations of your craft, you get into a habit of following along with what the person does that you just learned from. And so, you kinda follow and do what they did. And so, your work, after you've attended a workshop, is usually a lot like the guy or the gal who taught the workshop. I'm gonna caution you against doin' that too much. Try to, as a great guy named John Paul Caponigro said, try to find your own voice, and when you do, people will seek you out for that and for that kinda work. Try not to copy too much. I do know that there's a very talented photographer from Down Under named Anne Geddes, and she's a fabulous talent, and right after she came o...
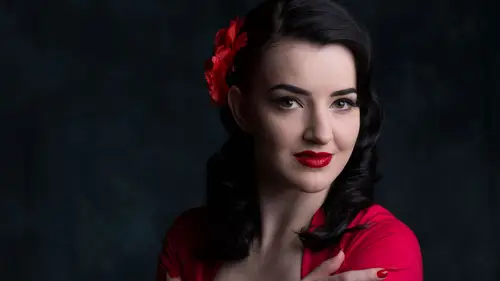
ut and got sorta popular, everybody wanted to copy her style, and they can't do it. You can't copy that style, and do it very effectively. I just wanted to start this morning by saying, you guys figure these things out. Learn your foundations, and then listen to the voice inside your head that says, "I need to go do this," and that's what you need to go do. And then, you won't burn out. You won't get tired of your job. You won't get tired of your work. 'Cause then you're gonna do stuff that you wanna do, and that you like to do. Try not to follow along too closely with what everybody says. One of the things about me is, in my teachings, in my books and things that I've done in my workshops, I really don't want anybody to have a recipe. In other words, I don't wanna put out a book that is: here's a picture; here's a diagram; here's how I did it. Here's a picture; here's a diagram; here's how I did it. People that are learning photography's gonna look at that, and copy that, and do the same thing. Well, then their work looks like my work. I don't want their work to look like my work. I want their work to be their work. That make sense? I'm not real big on telling you exactly where to place your lights. I'm pretty big on tellin' ya, here's what'll look like if you place your lights here, here, here, here, or here. But where you place 'em is kind of up to you and not me. I kinda take that part seriously. The rest of it's all fun. (laughs) Today, we wanna start on, I mean, we've been talkin' about light shaping tools, and understanding how to control light, as it strikes our subjects. It's funny, if you think about it, my great mentor, Dean Collins, used to say, "My job is to send the light. "The model's job is to bounce light, "and my job is to catch it." (laughs) He sends light, it turns around, it bounces, and he catches it. How you send that light is pretty critical, and as we've come to all learn, there's so many different tools to send that light. You can send a Raw flash head. You can send a bare-bulb light. You can send a strip light, a Softbox, an Octabank. (clears throat) Pardon me. You have so many different things that you can do, and there's so many tools that are made, and all of 'em have a right to exist, as I mentioned that yesterday. All of these tools, do somethin' very, very specific, and we need 'em all. That's the good news. The bad news is: we need 'em all. But anything that you need to accomplish, you can find the right tool for it. There is a product made just for what you need, and if there's not somebody's already in a garage making one right now. In the motion picture world, when they came out with the Kino Flo, that changed Hollywood. That changed the way directors of photography work, because it's that long, cylindrical tube, that's very, very bright. It doesn't have to go far, and it creates a beautiful light source. There are tools that are continually being made, because they just, there's one thing, that we need to do, and same with products, the same with camera bags, and straps and everything else. There's a niche somewhere for everything. Well, we all know about reflectors, and this segment is all about collapsible reflectors. Everybody has a white reflector, and everybody has a silver reflector, and most people have a gold reflector. And so, I wanted to spend a little bit of time talkin' about these, talkin' about placement of them, when to use them, and maybe go over in a little bit more detail, some of the extra things that you can do. Not everybody takes full advantage of these collapsible little items. It's more than just a reflector to add light into a shadow. That's one thing that one reflector can do. The black side of a reflector, for example, very few people ever use the black side of a reflector. First off, I'm not sure that you can say black reflector. I think that's gotta be black absorber. That's kind of an oxymoron, isn't it? A black absorber of light, not a black, It doesn't reflect, yeah, well anyway, negative reflection. (laughs) Some people call it a negative fill, when you take light away. And it's funny that cinematographers all tend to agree that often, on a scene that they're lighting, it's not about the light quality, but it's about the shadow quality. And so, sometimes there are instances where you need to take light away from a specific area of a picture, from your primary subject of a picture from a variety of places in the scene, but to do that, you have to understand the need for, and the use of the black fabric. It's pretty helpful, and it really does help create drama, and it does remove distractions, and it does make the lighted side of the face, for example, in a portrait, more powerful, seem to be more powerful. And so, don't discount the need for that. The black one's pretty important, and we're gonna talk about that today, and we'll show this. We'll do some things with that. Let's talk about the white, just a traditional white reflector, for a second. The thing that really is interesting to me about the white reflector is: in my studio, for years and years, I had fixed fill light in the back of the studio, as a lot of studio owners do, and we had five lights in the studio. When I was taught, everybody had five lights. You had a main light, a fill light, a background light, an accent light and a hair light. You had to have five, which is a lot. (laughs) It's a lotta lights. It's a lot to keep up with. But the fill lights, by definition, a fill light, if you look it up in any photo text, it'll say: a fill light is non-directional, nonspecular, meaning it's not very shiny, and it's non-directional, meaning that it's coming from the same position of the camera. Well, the problem with that is, that because the distance that the fill light has to be from your subject, it's gonna be specular, unless it is gigantic, it's gonna be specular. It's gonna be a shiny, contrasty, smallish-looking source, no matter how big it is, because it's gonna have a big throw, a big distance. What I found out was, that as I change my range of contrast, if I've got light comin' on my subject's face, and I just want the shadow to be a little bit brighter, so I pump up my fill light a little bit. I've gotta change my exposure, because I'm adding light with the fill light, it hits both sides of the face, not just the shadow, right? I'm adding light to the side that the main light's hitting anyway, so as I'm adding light to that, it becomes an additive thing, so my exposure's going up, so I gotta compensate for that. What I found is that, it was so much simpler for me, to just unplug the fill light completely, and just use a main light and a reflector. And then, I bring in my reflector till I like it. It's like, okay, right there, it looks great. That's about a two to one ratio. I'll back it up. Oh, that looks good. That's about a three to one, maybe a four to one ratio, Oh, that looks good. Let's back it up a little bit further. Then I can reflect to suit my own tastes, and it doesn't change my exposure, 'cause the subject still receives the same amount of light from the main light. Does that make sense? Does that gel okay? That to me, seems like a no-brainer. Now, somebody's gonna write in and say, "hey, wait a minute, Bucko, we're doing a family of 12, "and I can't have one light from one direction, "I need the fill light turned on." Then, turn the fill light on. If you need it, turn it on, but, for the most part, one, two, three people, I don't think ya need a fill light. I think a reflector can do a great thing, and, the good news is, it becomes what's known as a whizzy-wig. What you see is what you get. And so, for me, it's so much easier, to visually see that range of contrast, then to guess it with a fixed fill. With a fill light, you don't see what you're getting. You have to shoot it first, and for me, that's a little bit of a waste of time for me, not a waste of time, but it's just extra time, and sometimes you don't have the extra time. Does that make sense? The thing about the reflector too, is, it's about placement. What's interesting is, most assistants, Lemme me grab this white reflector. Most assistants out there, that work with photographers, when they first get started, when they grab a reflector, assistants are real big about grabbin' a reflector (laughs) and holdin' it up here like this, and just goin', (laughs) don't let 'em do that. That's almost never where it goes. But there is a thing about the placement of it, especially in a headshot, especially in a portrait, or a three-quarter length shot. There's a perfect place, where it kinda fits, and where it does the best job. It's almost never back here next to the face, where you would think it is. It's almost always ahead of that, in front of that area, and we'll talk about that, and we'll show this on camera in a bit. Oh, sorry, that silver, bam, forgot about that silver side. What's interesting about this is, and we talked yesterday about, in photography, the size of any given light source, is directly relative to its distance to the subject, right? Size relative to distance, that applies to a reflector too. If I change my reflector and I'm this close to my subject up here, who's sitting on this stool, that you can't see, if I'm up here, next to the face here, and then I pull this back here, am I changing the effects of the, I'm changing the brightness of the reflector, of course, but, it's also becoming a smaller source, right? And as I change that further and further away, it's becoming even a smaller source. Now, it's getting darker, and this is not a big deal, but I learned something from a fashion guy in New York one time, that I'd never heard anybody say before, and, in fact, I've not heard anybody say it since. He's got reflectors that are not just white, and not just silver, he's got reflectors that he's got, homemade reflectors, that are gray and different levels of gray: a light gray, a medium gray and a dark gray reflector that he just made with Foam Core and paper, background paper that he just taped over Foam Core, and the reason is, he said, "I want my source size "to be large, but I needed my fill to be darker," so instead of trying to move the white reflector back, he just moved it out completely, and put in a gray, and kept it big. What a concept. This is a guy that does great, great fashion work, and he doesn't wanna retouch anything he doesn't have to. I mean, he sends out tons and tons of retouching, for finished fashion work, but, the point is, understanding full well control of size of source and relative brightness, is enormously important. And he understands it really well, and I just had never heard or seen anybody do that before. And I thought, what an interesting concept, a gray reflector. The guy's just a genius. His name's Douglas Dubler, if you ever wanna look him up. D-U-B-L-E-R God, this guy can take pictures. He's really a big talent. He's been doing it for 30 years, well, but he loves to have that gray on set, so I think it's pretty important. The silver and the gold, I put the silver and gold almost in the same category. Their job is to reflect and redirect light. A lotta people use the gold reflectors outside, and sorta create that warmth, late afternoon sunlight time of day, and send it over to their client's face, I'm not a big fan of using the gold reflectors on the face. I'm a pretty big fan of using 'em in hair, on arms, shoulders, accents from behind, but I'm not wild about the color on the face. Sometimes, it's a little too yellow for me, for my taste. But it does work and it does have a great place, we do need the warmth often, when we're outside, and it certainly is easy, to sort of reveal a certain time of day when you do that, even if it's shot at noon. The good news about these collapsible panels, you can't just throw 'em all in a category of reflectors. They're collapsible, what would you call 'em, collapsible light shaping tools. They really are kinda smart and kinda clever, if you know how to use 'em. And the gold, is one of those that, imagine creating, I mean it's at noon, and we're redirecting, we're softening light through a diffusion fabric. We've got a black panel on one side of the face taking light away, and then from behind, we're sending gold back in, that's kinda lightin' the edge of the hair and the shoulders a bit, and it looks like it's late afternoon. That's the part that's just fun. And there are fun things about this. Understanding the light shaping tools, there's an awful lot of fun things that you can do with 'em. In addition to the gold, the silver, of course, is important, and I know, that a lot of people use silver. I use silver. When I'm doin' kind of a headshot, a glamour look, just from bouncing light from below, whether I'm shootin' with a grid on a big Octa or a beauty dish, somethin' like that, it works real nice to have it from down below, comin' back into the face. I don't use it much at all as a primary source on a face. I think it's just too specular, too bright, too shiny, but it's a great source. I have a funny story. There's a guy in the middle of the country, great photographer named, Fuzzy Duenkel, and Fuzzy, he was teachin' this group of students, outside of this man's home, and inside the living room, in the window, was the daughter, and he was doing a portrait of her, and he's like, "Well, we gotta get light in there. "The room's too dark," so he held up a silver reflector, and was gonna redirect the sun right into the window, and one of the students said, "Do you think it'll reach inside there?" And his response was classic. He said: "Well, it's been travellin' 93 million miles away, I think it can make another 30 feet." Yeah, you can send that light, with that silver, you can send that light a long way. I mean, even with just these studio lights on, I can move this around the building, and every one of you are kinda going wow, that's bright. It is bright. They're very, very specular surfaces, and because of that, they return a lot of brightness. They're very, very efficient in how they return light, but it also makes 'em very, very shiny, very, very contrasty, high specularity, shiny, so ya gotta be a little bit careful about that. And then all the manufacturers now, not all of 'em, but many of 'em, that make these, in addition to that gold that we just mentioned, have a soft gold, which is not quite as bright and yellow, and a little bit less reflective, but a little bit more warmy. Now, a friend of mine made his own reflectors one year out of peach-colored bed sheets. Go find cheap sheets at the discount stores, and get peach, because it's closer to skin tone, for most skin tones, than the gold is, and then you can just make a little frame for that, maybe put elastic corners on it, and pop that on, and you've got a very inexpensive do-it-yourself reflector, that's kind of a warming thing. I don't know why there's not commercially-available, in our industry, any reflectors that are warmer than yellow, but I'm gonna make one. (laughs) There was a great portrait guy, that we all knew years ago, named Don Blair, and he made one that was out there for a bit, but he never did sell it, really, it didn't have national distribution. It was called a Touch of Warmth, is what he called it, and it was a checkerboard pattern, and it was lines of magenta and soft silver together. And it was a kind of a cool idea, kind of a clever thing, but I think the peach bed sheet idea's closer, and I think it works, so that works pretty well. The next one that we've gotta talk about and introduce, and that we will use, we're gonna use 'em all today, and I'muna show you usage of all these in different ways, but the big one is the diffused fabric. When you have a diffuser, a diffuser, when you have a diffuser, diffusion, diffuser, translucent transmission, anytime light can go through this thing, you have opportunities that present themself to you, that you might not think about. If I am photographing you and we're in bright sunlight day, and I bring in the translucent diffuser, between you and the sun, clearly, I'm gonna get a softer light quality on your face, right? My quality of light just went up. At the same time as I have to adjust my exposure, for the loss of light, so I make an exposure, my fabric is usually about a stop and a half, so I have to open up that stop and a half, to bring that exposure back to where it belongs. What happens to my background? It just got brighter by a stop and a half, right? I have to know that's gonna happen, so, note to self, if I'm gonna use a pop-up diffuser, like this one back here, in a bright sunlight situation, I have to make sure that whatever my background is, is medium or dark to begin with. If it's light to begin with, I'm gonna clip my highlights, because I know I'm gonna go plus one and a half, from whatever my eye sees. I have to know this intuitively, guys. I can't wait and find that out when I've got a client on the set. I have to know this is gonna happen. Does that make sense? It's a term that we've come to call key shifting. I'm shifting the key of the photograph, based on what I do with my subject's face. If I need my background to be brighter, then I need to take light away from your face, and open up for the loss. If I need my background to be darker, then I need to add light to your face, and close down for the increase. Make sense? Same situation, instead of sunlight comin' in from the front that we diffuse, if sun's comin' from behind, then backlighting you, we all know what that looks like. I mean, if I open up and shoot you, and you're backlit late in the day, it's 60 at f/8, is what I'm reading, for example. Well, your hair is blown out, and your shoulders are blown out, but I got good exposure on your face, and the reason is, the difference between the brightness of your face and the direct sun that's hitting you from behind, is huge, six, seven stops, then bring in the white reflector in, and Ooh good, right there, stop, now take a new reading. Now, instead of 60 at 8, now, it's 60 at 11, so I can calm down the highlights and blown out hair and shoulders by a stop, by adding the light back into the face. Make sense? What's really interesting too is, is placement of all of this. If I'm shooting and the sun's comin' from behind, and I'm gonna use a reflector to put light back in your face, the question is: where does the reflector go? And the answer is: well, look at the ground, just look at your shadow from the light in the studio. See that shadow? If I'm shooting you and you're backlit, I'm gonna move me around like this, until I see that shadow comin' at a 45. Now, think about this for a second. If we really wanna fine tune our work, let's put myself in the position of that light comin' in at a 45, which means, when I use my reflector on your face, I'muna bring my reflector in right where your shadow is, right? I'muna put the reflector in the shadow position and raise it up and add the light to your face, and it's gonna be lighting you at a 45. Make sense? When you wanna figure out where the reflector goes, just look at the ground, find the shadow, if you put a reflector in a shadow, of someone, and hold up the reflector, they're gonna get bright. It's fun how that works. The fun part about this, you guys, is there's so many little, subtle controls that we have, and that's just one of 'em, just pay attention to the little details. And man, you can just sculpt life. There was a great, great photographer, years and years ago, that his idea was, go to work outside, under a tree, and take four black panels with him. That's all he would do, and I said, "How can you do that?" and he said, "There's plenty of light out there. "It's just in the wrong place, and I'm just gonna "take it away from where I don't need it, "and whatever's left is gonna be "a great light quality on the face." But you have to just take it away from where you don't need it. You know these things are disposable, right? All of these pop-up diffusers, all these pop-up reflectors and diffusers, and stuff, By the way, this was invented down in Orlando, at Disney, of course, I don't know if you noticed that set of Mickey ears, sorry. (laughs) It's just a little Disney humor. What's interesting about these is they're disposable. I can never fold 'em back up, so I just have to throw 'em away and go buy another one. (audience laughs) Oh boy, this is a tough crowd this morning. (audience laughs) You guys are rough. You guys are rough. The size of these, the ones that I'm using, here, today, and all this week, these are the large ones. These are the big ones from ProPhoto, and I do like 'em because of the handles. The handles are really great, and you really can get a hold on 'em. The ones without handles, you never know quite how to hold 'em. Are you? It just works better to have a good handle, and these are seriously good handles. And as we mentioned earlier, the student, the assistants, can hold these and when the wind hits and takes 'em off the set, and they're flying away, they got summin' to hold onto. Got that going for 'em. But the fabrics, they all come in a variety of densities, so this one is, I think, a stop and a half. And all the different brands are all a little bit different. You can find a decent density, I think you need to be more than three-quarters. There is some that are made that are three-quarters of a stop, and that's fine for some situations, but if you really need a diffuser, and really wanna have translucent light quality on the face, I think a stop, and a stop and a half are the ones that you wanna look at. This is about a stop and a half. And after awhile, you know that density well enough to know, that you almost don't have to use a reading. If I'm out in a bright, sunny day, I know what the brightness is of sun. I don't even have to measure the sun, right? Because of the world of Sunny 16 exposure. I know what the brightness is of the sun, and I know if I put this in place, I know what's gonna happen. I know that I'm gonna end up being at about a 4000th at f/4 at ISO 200. I mean, you can start figuring out formulas in your head pretty fast, and you have these built-in things that you can just put in your back pocket. And then you can move quick, then you look like a pro on the set, 'cause you know what you're doing. Now, I will say this, depending on the client, this is gonna sound really weird (laughs) there'll be notes on this one. Sometimes, you need to slow down and not be as efficient as you can be, because for some clients, you need to put on a show. (laughs) For some clients, they're about to spend a lot of money with you. You really need to slow down and put on a show. I have an assistant, Kevin Schumacher, who used to work with us all the time. Kevin was just the greatest assistant ever. Kevin was real big at goin' and gettin' a piece of equipment that we didn't need, and bringing it on to set just so it would be standing by. Oh, let me go get the such and such, and he'd go get it, and we just did, sometimes, busy work, so the client would look at how hard we're workin' for 'em. (laughs) Just consider that, sometimes ya need to put on a show, sometimes ya don't. Sometimes, you just need to get it done, get it shot, and get out, and they love that, sometimes, especially the busy clients. The executives, they want you in; they want you out. You can book off a half a day for a headshot in someone's office, but they'd like it if you're in there in three minutes and out.
Class Materials
Bonus Materials with Purchase
Ratings and Reviews
Stefan Legacy
Bought this class on sale for 19$ and it was a great buy considering it was my first class I purchased on CL. Tony is an excellent teacher and demonstrates extensive knowledge on lighting and different uses of modifiers. Overall this is an excellent course for any one who is interested in learning studio lighting, this will give you a great detail of information.
a Creativelive Student
This is my first time watching Tony Corbell teach and work he was great! I am a natural light photographer and this class made me think about picking up some lights and umbrellas! You can tell he absolutely loves what he does. Thank you for sharing your knowledge!
a Creativelive Student
Important information if you want to be a photographer. Great teacher, good pace!!
Student Work
Related Classes
Lighting