Different Techniques with Umbrellas
Lesson 18 from: Light Shaping Tools for Professional PhotographersTony Corbell
Different Techniques with Umbrellas
Lesson 18 from: Light Shaping Tools for Professional PhotographersTony Corbell
Lessons
Class Introduction
05:22 2Categories of Light Shaping Tools
07:59 3When to Use Different Light
10:50 4Softbox and Octabox Overview
25:55 5Beauty Dish, Reflectors & Collapsible Reflectors Overview
27:55 6Pros & Cons of Small Light Sources
08:10 7Shoot using One Reflector
12:24 8Shooting with Two Standard Reflectors
08:53Shoot Using Grids with Reflectors
14:37 10How to Use Beauty Dishes
28:24 11Pros & Cons of Softboxes
12:30 12Common Uses of Softboxes
21:24 13Subtle Elements of Controlling Softboxes
20:33 14Different Techniques with Softboxes
29:32 15Pros & Cons of Umbrellas
07:25 16How to Control an Umbrella
12:25 17Uses of Umbrellas
08:27 18Different Techniques with Umbrellas
19:55 19Group Shot with Umbrellas
19:37 20Differences Between Collapsible Reflectors
25:36 21Shooting with Black & White Collapsible Reflectors
15:07 22Shooting with Silver & Gold Collapsible Reflectors
13:49 23When to Use the White Translucent Collapsible Reflector
33:18 24How to Use the Large Octa Softbox
20:50 25Shooting with a Large White Deep XL Umbrella
18:59 26Shooting with a Large Silver Deep L Umbrella
07:19 27Shooting with a 4x6 Softbox
17:05 28When to Use Specialty Light Shaping
04:40 29Shooting with a Hard Box
15:29 30Shoot to Incorporate a Fresnel Light
09:32 31Shoot Using Ring Flash
10:23 32Studio Lighting Photo Critique of Student Work
1:05:41Lesson Info
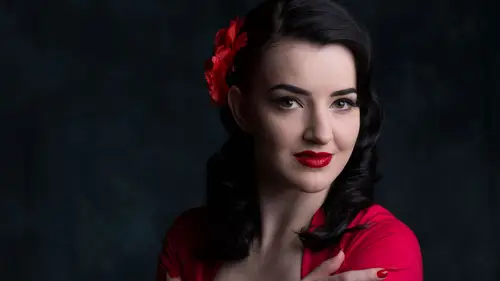
Different Techniques with Umbrellas
Let me do one of these real quick. Just the same set up, I wanna do one with you. Just to look at the difference in the face. So, let's turn you that way a little bit. A little bit more. Yeah, yeah and I want all of your weight on your left foot. Yep and just push your right foot away from you like that. And I'm just gonna drag it in like that. Stop freeze right there you did it. And bring your head this way. A little bit more. Ah, there you go, there you go, good. Right there. I'm coming in closer. Hang on one second. Can this come down a bit? Yeah no we're good. Actually we can drop this a little bit. Just a little bit. Good, good, good. Turn your head a little bit more, right there. Great. Good. That's real pretty. Okay so. Here's what's fun for me. I'm trying to come up with this idea of some way... I don't know how to come up with, I'm not sure how to define this. This is something new that I've kinda figured out. To me it's brand new and I'm the only person in the history of th...
e world who's ever done it. Now, I know other photographers have probably done this but I don't know who they are. But I've never seen it before. I was trying to come up with a way one day, to use the minimum number of lights for the maximum amount of control. What I came up with is, John, let's put that umbrella on light number, that, that light. And we're gonna put that back there in the background. And you might, oh you've got an extension, oh good. Okay. Oh that's awesome. So let's pout this reflector, this umbrella on that light. Yes indeed, yes indeed. And here's what we're gonna do. This is a really silly thing. But I figured out if I can aim the these lights at each other and not aim them at her and not aim them at the background, here's what happens. So, let's move you a half step forward. That way. Maybe even a little bit more. Okay. So here's the trick. The trick is to split the difference between your subject and the background. Okay. So I'm gonna go halfway back and I'm gonna put my light right in the middle. That's probably about halfway, wouldn't you say? And I'm gonna aim 'em, I'm gonna aim this light straight across over there at it's big brother. Okay. So this one I'm gonna put right here. And they're both set to the same output. Are they about matched? Something like that. So here's what's happening. And I hope that this comes across to the people that aren't in this room. When this umbrella fires, about half of this exposure from this umbrella, is gonna come around the corner of this parabolic shape, about half of it's gonna forward and it's gonna light up her hair. The other half is gonna go back there and light up half of that background. This umbrella, about half of that's gonna light this side of her and the other half's gonna light that side of the background. So with two umbrellas, I'm lighting my entire background even all the way across and I'm getting two accent lights. And guess what I call it. Tony's twins. (laughter) That's so stupid and that's so lame. Right? But it is a silly little great, I lost Jamie on that one, she's checked out. It's just a silly little, stupid, great, fun, clever way to work and it works. So let's just take a picture and see what happens. Shall we? Wanna measure just for fun? You want me to? Sure. Aim it toward the, the other way, the other way, there you go right there. 16 Oh good. What do you got in the middle? 11 eight. That's almost 16. What do you got there? 16, 11 five, sorry. There's a dead spot there. This one might wanna come in just a little bit this way. Yeah maybe just a tiny bit. Eek, don't go too far. I need my accent. Actually I need to move you over a half step. That way. There you go, a little bit more. Right there. Good. Now let's measure the accent on her cheek and her hair on both sides. Here we go, ready set. Eight and a half. Okay. What's the other side? Wanna guess? Eight and a half? 16, because it's reading some of this. Oh yeah, stop that. 11 It's eight and a half. It's gonna be the same 'cause there both set the same exact output. Right? So what am I shooting at? This one's a little closer. Yeah, that's what it is. Actually, leave it where it is and bring those ones closer 'cause I like the extra oomph. Oomph. Oomph. Yeah that's some photo term, it's called oomph. I learned it in Sweden. Yeah it's a oomph. Yes? Can we use that technique on a white background and still get the white? Absolutely. So beautifully, thank you for asking. Thank you for playing. Yes you can. And in fact you have to power it up pretty good to get it good and clean and crisp and white. And if the accent starts to get too bright then just feather the umbrellas a bit more on the background and pull the trigger and go home and don't fight your high key ever again. See? Another nugget. Thank you. No problem. No problem. Okay, so, eight and a half back there and up here I'm shooting at 10 or so, here we go. 11 and a half. Well let's pull this down, 'cause that was eight and a half back there, I don't want that to be a minus two, let's pull that down. One stop down. Perfect. So let's measure it again, real quick, just to be sure. Here we go. Eight and a half. Heh. Heh. You guys are gonna love this. Kim is like, oh he's such a weirdo. Do I have to host him ever again? She doesn't know it but I'm going to Cuba with her. (laughter) Okay let's take a look at you kiddo. (mumbles) that's right. I need you to get your shoulders that way a little bit, just turn, turn, turn yep, your feet, hips everything. Just a little bit that way. Yeah. Now bring just your head back. Just your head, leave your shoulders over there, that's it. That's it, that's it right there. Good, good, good, good, good, good. Here we go. Here we go. Right. One more, oh that's good. Umbrellas. Twin umbrellas. Oh, we're down in the front. What did I do? Oh, duh, I didn't make the adjustment on the front. Sorry let me fix the front light. Sorry, sorry, sorry. My bad. Here we go. Here we go, let's do this, it should be more accurate. Here we go. Sorry, sorry, sorry. Ready? Go. C'mon. There we, c'mon, you should be there. You can do it. You can do it. There it is. There we go. Make any sense? How's my background look? Pretty stinkin' even. The highlights look pretty good? Highlights might be a little bit bright, on this side. Great. Let's do this. To fix the highlight brightness, all I'm gonna do is this. I just fixed the highlight brightness. I just brought it down a half stop. Get it? You guys can use the same techniques you know. You video people. Can you pull that one back too? Feature that one also. Just so we're even. Just so we're consistent. I need the twins. They're twins. They're twins. Here we go, here we go, here we go. Good, good, good. Chin over this way right there. Great. That should be a keeper. That should be pretty close. Oh, I got, I hit her on the tip of the nose from something. Yeah she turned a little more this way. Oh, I see it. I can see it from here . Yeah so, bring that back, yeah, just bring that back this way. Right there. Here we go, your eyes here one more last time. A little sparkle in your eyes, c'mon Mona. There's a new product on the market, that just hit pretty recently, for these guys that's called Spill Kill. It's a little, you know about that? It's this little round thing, that snaps on the B1's and the D1's and it's called Spill Kill and it's about that long and all it is, is like a cylindrical Gobo, that prevents that from happening. When you're using umbrellas, that little highlight coming off the edge there, you put this thing on front of it, and it prevents that light from spilling over the edge. So it's a real clever little tool. So many of these kind of tools and so many of these kinds of techniques, work and are effective because somebody, somewhere along the way, made a mistake somewhere and needed something. That's, that's where some of the best innovation comes from. Is from places like that. Right? So, let me just take a look at this. Yeah, I wanna light this again. Lemme shoot that one more time. John that looks still a little...let me try it. Is that the last one? Really? I thought we cleared that. Good. Let's just double check that again and make sure that, that doesn't happen. I'm perplexed. Can you pop the flash? I don't think so. Yeah I can. It's 11 and a half. Okay. Turn it more to the background, oh, here let's do this. Let me push the umbrella through a little bit more. Okay. Let me get myself a little bit more of a blocker. On top and now let's just spin it more, like about that and see if I can just a little bit of it and see if that did it. The opening for the umbrella shaft on a Profoto it's a free wheeling friction thing. So you can put it in that far or you can put it in that far. And your focusing and de-focusing the light value, basically. I've always kinda liked it being pushed in enough to where, if I'm standing directly side by side with the light, I kinda like it pushed in enough to where it just covers that brightness. So that's kind of a comfortable spot for me. It might not be for you. Right, now I'm just trying to figure out this, where this hot spot's coming from right now. Here we go, 'cause that doesn't make any sense to me at all. That doesn't compute. And sometimes that happens. Stuff just happens sometimes. C'mon. That's it. I had that happen ina home studio once and it ended up being, there was a mirror on a wall across the room. Oh there you go. There you go. Okay, so. So let me just take a look at this. Get the idea? I mean that big screen's a lot more sharp than it, than we need to see it out here for a client, but you get the point. You get the idea. I've got this, I've got the control to try things with an inexpensive lighting tool, that just does some very cool things. You know? There's a guy, that years ago did a ton of celebrity work, named Merritt Smith. He was really big in the 70's, 80's and the early part of the 90's and he did something with umbrellas that I'd never seen before. And he would stack them together. So, what I'm going to show you is how this, what this does and how it makes a normally harsh light bigger and softer. So let's just move that guy out of the way and bring these two right together. Right there where the main light is. In fact you can just pull that, that shaft out and leave that head right where it is. And I'll just bring this head around there. You okay the for a sec? Mm-hmm. Okay. You guys good there? Are the chat rooms burned up or is anybody even left in there? Did everybody bail out? All Over The World Okay. Just bring it back toward, just as flush with the back of that unit there. Yeah, come back a little bit further out. What are we doing now Tony? So, we're gonna stack these together and let me show you. C'mon. There we go. So we're gonna go to five there and five there. So, she's not very tall, so I'm not too concerned about the positioning of this but what basically the idea is, to stack two umbrellas together to create almost a vertical wall of light. And it works pretty well at giving me an extra kick on the lower half of my client if they're three quarter or standing full length. If I was gonna shoot full length of her I'd probably bring all the, in fact we could bring 'em both down. That ones too high anyway. Let's bring 'em both down, eight inches or so. Kinda like that. It just give us one more little, tiny little silly control that we have with umbrellas that we didn't think about before. And there are places where this really turns out to be a great use of the product, of the tools. Okay, here we go. Eight point eight. Go ahead and go down to her, up a little higher. Right there. Eight point five. A third of a stop. So I'm losing three tenths of a stop. Not bad. Right? So, here we go. Let me get that dialed in and I'm going to come down a little bit and I'll show you why when, I learned when I was shooting brides quite a bit, that the optimal portrait position for a bride, for anybody, seems to be for a head shot you're up pretty close and your up here up in this area, you're fine. But as you start backing up your camera, and so you come back to like a three quarter length is to bring the lens down to about here. And as you back up to a full length, for a full length of a bride, I want my camera right where her bouquet is. And the idea is this, I don't want my camera to be dipping up and I don't want my camera to be tipping down. I don't want to force shorten her or elongate her. I want my camera to be level. Make sense? When you're shooting your brides at your weddings and their arms are down here holding their bouquet get you lens down there where the bouquet is and you're gonna love the pictures and she won't look short. I see bridals, portraits all the time where people made their brides look really, really short. And it's just them being lazy and they're shooting from up here and they're shooting down on a five foot one bride. Stop doing that. It's not going to sell very well. Actually, it'll sell fine they just don't know that it, they don't know what they don't like about it but something doesn't look right. And especially, the worst is the shorter the lens the more it's exaggerated. Or the closer you are to the subject. Right. As you back up that difference is less. Okay, so we're at nine for this, ought to be close. Good, good, good. I'm gonna back up and do that again and show more of her. There we go. Now, of course we would want to deal with whatever we felt we needed to do with the background or if we wanna light the hair or if there's an accent involved or whatever. But for the most part, I just want to get back and feet in and, hit that space bar for me there John. If I get back, if I get back here and I'm looking at a full length or three quarter length, I'm gonna be back here somewhere at this height. And that's just kinda the best way to do this, I think. She looks great. Bring your hands together in front and let your fingers kinda cross, yeah, yeah, and maybe let your fingers kinda point downwards slightly, just a little bit, yeah just kinda like casual like. I don't like that, relax and do whatever you want. (laughing) I have learned that over the years, do you know, I'm not a great posing guy. I'm great friends with a guy named Roberto Valenzuela, Rob, Roberto and I are buds and I see him all over the country. He's such a good and fast poser and he's really terrific and he's high energy and he's just a fun guy. But I noticed, for me, I'll just have my models or my subjects or my clients... Just stand right there for a second, just get comfortable for a second I'll be right with ya. And within ten seconds they will strike a pose that's perfect for them, that they're comfortable in. And that their family sees them in. It's like a woman that I photographed one time who, when she stands and when she's standing relaxed she's always like this. One hand is just like this. This goes against every rule there is in photographing a female hand. A female hand you should never, you know, the rule says don't ever show the back of the hand. Show the edge of the hand and you've gotta create an S curve and something more feminine with the hand. Well to do that you have to do this. Slide the hand down, let the hand go behind and do this. Great. Except they all look the same when you do that. This is what this woman looks like. Why would I not photograph her doing what she most naturally does? I'm not doing this for a judge or for somebody elses opinion or a photographers approval. I'm doing this for Mrs. Johnson, who just paid me a lot of money to come into the studio into the studio to shoot. Make sense? Let me shoot a couple more things here. Good one, good one. Just turn your head this way a little bit, yeah, right there, good. Okay, so now exposure wise, just look at from her head all the way down to her leg, all the way to the ground. I'm not gonna run over these guys and get to show the full length but you get the point. In fact even you can even separate those a little if you want to. I know that sometimes, I've seen photographers where, when they double them up like this and they do these twin stacked umbrellas they'll have them in such a way that you got a silver one on the bottom and a white one on the top. So light sometimes falls off on the bottom anyway. So if you put something a little bit snappier on the bottom, it kinda helps a little bit and especially with shoes. You know, the bottom of the jeans and things like that. So, this is a really clever way to work and people do it all the time. Now we've got bigger umbrellas. We've got some mondo umbrellas here and we're gonna use those, when we get to the mondo light source section tomorrow. But for using small umbrellas that are in your bag, there's a handful of little thing like this that you can do and just make it work all day long.
Class Materials
Bonus Materials with Purchase
Ratings and Reviews
Stefan Legacy
Bought this class on sale for 19$ and it was a great buy considering it was my first class I purchased on CL. Tony is an excellent teacher and demonstrates extensive knowledge on lighting and different uses of modifiers. Overall this is an excellent course for any one who is interested in learning studio lighting, this will give you a great detail of information.
a Creativelive Student
This is my first time watching Tony Corbell teach and work he was great! I am a natural light photographer and this class made me think about picking up some lights and umbrellas! You can tell he absolutely loves what he does. Thank you for sharing your knowledge!
a Creativelive Student
Important information if you want to be a photographer. Great teacher, good pace!!
Student Work
Related Classes
Lighting