Pros & Cons of Softboxes
Lesson 11 from: Light Shaping Tools for Professional PhotographersTony Corbell
Pros & Cons of Softboxes
Lesson 11 from: Light Shaping Tools for Professional PhotographersTony Corbell
Lessons
Class Introduction
05:22 2Categories of Light Shaping Tools
07:59 3When to Use Different Light
10:50 4Softbox and Octabox Overview
25:55 5Beauty Dish, Reflectors & Collapsible Reflectors Overview
27:55 6Pros & Cons of Small Light Sources
08:10 7Shoot using One Reflector
12:24 8Shooting with Two Standard Reflectors
08:53Shoot Using Grids with Reflectors
14:37 10How to Use Beauty Dishes
28:24 11Pros & Cons of Softboxes
12:30 12Common Uses of Softboxes
21:24 13Subtle Elements of Controlling Softboxes
20:33 14Different Techniques with Softboxes
29:32 15Pros & Cons of Umbrellas
07:25 16How to Control an Umbrella
12:25 17Uses of Umbrellas
08:27 18Different Techniques with Umbrellas
19:55 19Group Shot with Umbrellas
19:37 20Differences Between Collapsible Reflectors
25:36 21Shooting with Black & White Collapsible Reflectors
15:07 22Shooting with Silver & Gold Collapsible Reflectors
13:49 23When to Use the White Translucent Collapsible Reflector
33:18 24How to Use the Large Octa Softbox
20:50 25Shooting with a Large White Deep XL Umbrella
18:59 26Shooting with a Large Silver Deep L Umbrella
07:19 27Shooting with a 4x6 Softbox
17:05 28When to Use Specialty Light Shaping
04:40 29Shooting with a Hard Box
15:29 30Shoot to Incorporate a Fresnel Light
09:32 31Shoot Using Ring Flash
10:23 32Studio Lighting Photo Critique of Student Work
1:05:41Lesson Info
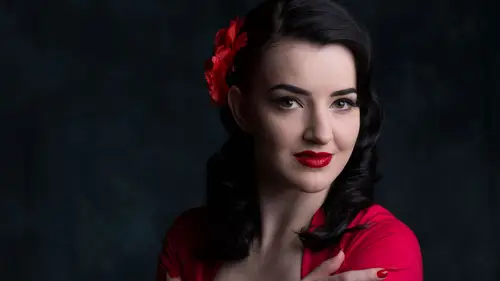
Pros & Cons of Softboxes
Let's talk about softboxes. We've talked about this earlier in the day how important softboxes are for our general GP work. As a general practitioner, you've got to photograph people in your community and in most cases the softbox is gonna be an answer for you. We'll talk a little about the octas also as we get through the couple of days here. And we'll identify what's going on with the good, the bad, and the ugly there later on. But the softbox really does have a really unique place in our photographic lives and in our photographic histories. It's an interesting light because it really does create almost the appearance of a window light. And, you know, again, if we talk about the world of size relative to distance, think about the size of a port hole on a cruise ship. You've all been on a cruise, probably. I went on a cruise out of here once to Alaska. The port hole on a cruise ship is about that big around. Now is that big source or a small source? But if I was photographing little g...
reen army men for Mattel, and the little green army man's right next to that window? Size relative to distance. In that case it is an enormous light source. But if it's me, full-length, it's a tiny pinpoint light source. So we have to make sure that we... You sort of have to selectively grab the right tool for the right job. And as you can see right behind me over here we have (laughs), we have quite an assortment of softboxes. We got every size and shape there is! And thanks very much for Profoto for supplying all this. I mean, we've got a lot of gear here. And the idea here is that we can talk about anything we need to talk about. For me, for a general purpose small softbox for grip and grin kind of pictures, for running and gunning kind of pictures, if I'm on the move following a politician which I have been known to do, it might be that I take this small little guy. This little two by three, and put him on a head and have an assistant just follow along with me and carry this thing all day. And we might put that, if it's gonna be in a portable situation, it's so lightweight, it doesn't weigh anything. But it does help break up that sharp edge of the shadow. And it does open up that highlight just a little bit. Well I would put that in one of the B1 heads, the battery pack heads so I'm not tethered to it. I'm freewheeling and then you get yourself from Home Depot or Lowe's, you get yourself one of those adjustable paint roller sticks. Don't get the wooden one, get the fancy one that's fiberglass and has a push button for an expansion thing, get one of those. Then you go to your camera store and you ask for the Kacey's Paint Roller Strobe Adapter. A guy named Kacey in the Midwest made a design that screws right on to every paint stick in the world, it's a universal thread. It's a really weird, fat thread. But every paint roller you've ever used in your life has that hole in the bottom of the handle. It's the same thread. So this guy made an adapter that will screw on to the paint pole and on the end of it you can adapt and put your strobe. It's 19 bucks. Put that on an extension, nice, fiberglass pole and you run around with your assistant, and you're in. Tell us again what it was? For the folks at home. It's called Kacey's, K-A-C-E-Y, Kacey's Paint Pole Adapter. You can just Google that and it'll send you to the closest camera store for it. Camera stores all over the country have it. And it's the stupidest little product that fills a great niche. And as soon as I discovered it, it was like ahh the heavens opened up and I heard the choir, it was great. Because now, John can walk around with me. (laughs) Pick that up there, John. And instead of doing that, he's got this thing that mounts right here and he's got this expansion stick that can go seven feet, and he can walk around, I can from here, I can light you, from John right over. John, bring it in, over, over, over, right there John. A little closer, yeah, right there, good, good, bam, bam, bam. And I'm shooting the B1s on TTL. I don't have to think, I'm not taking meter readings, I'm just shooting and going. So it's turned out to be a really great product and it works great with the smaller and medium-sized softboxes. It works great. So, check it out, see what you think. The small softboxes have a great right to exist for subtly changing the size of the source. It also works great if you're on a small product set and you're trying to do fine art work, if you're trying to do still life products for a catalog, something like that, it works really, really nicely for that as well. And as you start going up, and as you can imagine, the shape, the shapes are all different and they're different aspect ratios. This is the two by three, which has become one of the more popular sizes for a lot of the headshot folks. But if you're gonna use it for head shots, it seems to be that it's a really good position is to bring it in close enough right here, here, here, here. Oh, whoops, you're in the shot, back up about an inch, there you go right there. It seems to be for a headshot this is a real nice source fairly close to the client, for a headshot. I wouldn't want to use this for full-length. But for a headshot this has a lot going for it. Okay, the three by four, the three by four is sort of my normal go-to guy And I use this probably as much as I do my five foot octa and this has become a good friend. And I'll often, there was a guy, there was a musician, some of you are musically inclined. There was a guy that was the producer of a lot of great music in the 60's and he also produced the last Beatle album, Let it Be album, named Phil Spector. Phil turned out to not be a nice guy and he's in prison for the rest of his life for doing some bad things. But he invented something that was kind of clever in the world of recording arts and that is he created a thing called The Wall of Sound. The Wall of Sound gave him a feel and a sound of his recording music that nobody had. And this Wall of Sound was literally that, if you can, can you audibly kind of imagine this? This, all this, all this great sound as if it was big sound coming from one direction. It was kind of cool and I thought well I want to create a wall of light. My three by fours will allow me to create a wall of light. Think about this, Yulia, if I'm photographing you, if I'm doing a portrait of you, I can't get over there because I'll block you but, okay, sorry Tom, I'm picking on you again. (audience laughing) Actually, John, get up here John, sit up on the stool for a second. So if I want to photograph knucklehead John. (laughs) If I photograph John, I can put my three by four at a bit of a horizontal position, maybe even forward over here so I've got some good light over on both sides of his face. Then I can take another one, another three by four and butt it right up against it and it goes back even further, then I can put a third one and butt right up against that. So I've just created this big ring of light that goes all the way around. All of a sudden what happens is, he is encased in this light and based on what we know about light direction and how light quality, quantity of light increases as you move light beyond 90 degrees, so in other words from my camera to John and from me at 90 degrees here, once my light goes past there it starts becoming more efficient and it becomes more bright going back to the camera. Well what that means is instead of having a second light back here for an accent, I've got one continuous big old mondo sized source that back here is a little bit brighter, giving me a great highlight and then it comes around into a little bit more normal and a little bit more normal and pretty soon it's just a great softbox on his face right here. Make sense? It's pretty cool how this works. We'll set this up, we'll do it. In just a minute. I don't have multiples of these, but this a three by four and I do have a four by six. Great! So I'll turn it to the four side so I'll have a nine foot by four foot source in just a minute. And we'll just make, we'll just wrap it around and we'll show you, it's a cool look. And it gives you the ability to do something that your competition can't do. For me, it's all about putting out fires and problem solving. I heard a guy one time at a seminar say, "Sales of any type, if you're trying to sell anything, "any service or good, it's overcoming "objections and creating a desire." That's it, if you overcome objections and create a desire, you're gonna have a sale. Does that make sense? Sure. So what might the objection be to using a photographer? They're too expensive. So overcome that by showing the other side, which is create the desire. You gotta create the desire, the work's gotta be there. You need the relationship with the people and we know about that, we talked about that last hour. But you have to have a way to create the desire and you overcome the objections because you are separating yourself and what you deliver to your clients so far beyond anybody else that there's no way they could have you confused with other photographers in your community. Good friend of mine in Kentucky is a wonderful black and white portrait guy named Tim Walden, and Walden, Tim and Bev Walden, have the best black and white, gorgeous fine art portrait studio and he said, "You know what photographers need to do, "if you want to work at the higher end, "you need to create more gaps." And I said, "Gaps, what are you talking about?" He said, "Well between you and the new guys, "and the other guys and the up and coming guys. "You need a bigger gap." I said, "What do you mean?" He says, "Well you need a gap in your pricing. "Make a gap bigger, you should charge more, "now's a good time to raise your prices." This is in the worst of the economy, he said, "Now's a great time to raise your prices." Create a bigger gap, create a bigger gap in your marketing materials. Make sure that your brand is identified easily, make sure that your brand messaging is consistent. Make sure there's a difference in gap in how you deal with the client. Make sure there's a difference in the gap when they walk into your studio versus walking into a dirty house when you have to move a sofa back. Make sure that there are gaps. Make sure there's a gap in your quality between their quality. Make sure there's a gap in what you deliver and how you deliver it, and hang it in their home. And go with an assistant and do the framing and the leveling and all that. All of it is all about creating gaps. So, but it all starts with this, it all starts with image quality. If I can make the image quality as high as I possibly can everything gets a lot better. And I don't have to defend my position. The work speaks for itself. I heard a guy one time say, "If your work speaks "for itself stop interrupting it." (audience laughing) Right? Don't keep telling everybody how great you are, just let them look at the work. Nick Vedros in Kansas City says, "There is not one thing in this world "as important as your portfolio." You can't explain it, you can't talk to people. I didn't mean to leave that in my book. Stop it, if there's something that doesn't belong, get it out of there. But your portfolio speaks volumes about who you are. So you gotta, the work's gotta be there. It's got to be great work. Okay, so the three by four, again, big, big help for me. All of these, these three lined up right here, these are all strips. This is a one by three, a two by three, a one by six. And these are all tools that have very specific uses. The big strip, this is what I showed earlier, this is what I used overhead on the dancer shot, with the grid in place and so it allowed that light to light her, it didn't allow it to go anywhere else and if she were placed, here's my camera, if she were placed right about here, it was slightly behind her, maybe about that far tipped forward slightly. Just enough to where it didn't light any of her neck or her back, I didn't want to spill over light at all so I had to go just slightly past her and tip it back. That's where that light quality came from. So it just works when you do that.
Class Materials
Bonus Materials with Purchase
Ratings and Reviews
Stefan Legacy
Bought this class on sale for 19$ and it was a great buy considering it was my first class I purchased on CL. Tony is an excellent teacher and demonstrates extensive knowledge on lighting and different uses of modifiers. Overall this is an excellent course for any one who is interested in learning studio lighting, this will give you a great detail of information.
a Creativelive Student
This is my first time watching Tony Corbell teach and work he was great! I am a natural light photographer and this class made me think about picking up some lights and umbrellas! You can tell he absolutely loves what he does. Thank you for sharing your knowledge!
a Creativelive Student
Important information if you want to be a photographer. Great teacher, good pace!!
Student Work
Related Classes
Lighting