Lessons
Chapter 1 Introduction
01:26 2Why Just One On-Camera Flash
04:22 35 Reasons to Use Flash
10:37 4Common Flash Myths
06:51 5What Makes Flash Challenging?
04:56 6Chapter 2 Introduction
01:36 7Flash-Strobe vs. Ambient-Constant Light
08:19 8Flash vs. Ambient Light Exposure
03:07Flash vs. Ambient Demo
06:42 10Flash and Ambient Balancing for Natural Effect
07:11 11Flash and Ambient Balancing for Dramatic Effect
04:19 12Flash and Ambient Balancing for Creative Effect
07:10 13Understanding Flash Duration
08:37 14Chapter 3 Introduction
01:34 155 Common Key Light Patterns
08:38 165 Common Key Light Patterns w/ Diffusion & Fill
07:42 175 Common Secondary Light Patterns
08:28 183 Primary Subject Patterns
05:27 19Light Qualities
09:56 20The Inverse Square Law
07:50 21Inverse Square Law in Practice
08:21 22Corrective White Balance
10:02 23Creative White Balance
05:47 24Chapter 4 Introduction
01:58 25On Board vs. Hot Shoe Flash
05:57 26Full Feature vs. Manual Flashes
08:59 27TTL vs. Manual Control
08:12 28TTL vs. Manual Recycle Times
04:43 29Flash Power & Zoom
09:18 30HHS vs. ND Filters
12:29 31FCS vs. RCS
07:11 32Chapter 5 Introduction
01:38 334 Tips When You Must Use Direct Flash
06:00 34Bare Bulbing Done Right
11:42 35Grid Snoot + Direct Flash
06:43 36Mini Beauty + Direct Flash
06:08 37Ring + Direct Flash
07:52 38Understanding Modifiers
09:24 39Direct Flash + Shutter Flash
09:07 40Chapter 6 Introduction
01:55 41Ambient vs. Direct Flash vs. Bounce Flash
14:27 42Silver Bounce
14:27 43More Light Silver
11:02 44Soft White Bounce
15:41 45Overhead Bounce
11:39 46Overhead Bounce + Fill
09:42 47Event Bounce
12:42 48Chapter 7 Introduction
01:38 49Natural vs. Dramatic Light
17:43 50Filling and Refining Existing Light
08:44 51Coloring Light for Corrective Effect
13:33 52Coloring Light for Creative Effect
10:27 53Chapter 8 Introduction
00:43 54Case Study 1 - Dramatic Sunset
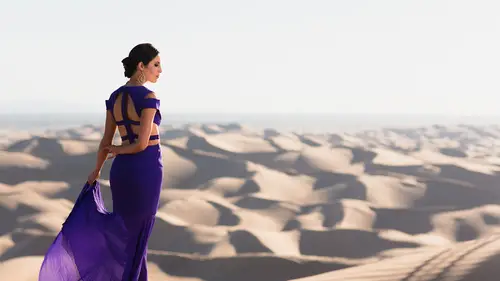
09:45 55Case Study 2 - Desert Sunset
10:04 56Case Study 3 - Sinister Headshot
09:40 57Case Study 4 - Family Portrait
08:21 58Case Study 5 - Athlete Portraits
11:19 59Case Study 6 - Working Angles
07:22 60Case Study 7 - Drag + Composite
08:09 61Case Study 8 - Less is More
07:16 62The Good Karma Jar
01:41 63Favorite Feature Flashes
05:52 64Favorite Manual Flashes
21:35 65Favorite On Camera Flash Modifiers
21:21Lesson Info
Case Study 3 - Sinister Headshot
case study number three. The sinister had shot sound like the Kool Aid man? Oh, yeah, Wait, no, that's not the equipment. That's the That's the slim Jim guy. Or does the Kool Aid man do that to Oh, yeah, I know you guys gonna let me know? Write me an email saying, Hey, pie, that was cooling manner those whatever. Let's get back to this whole sinister head shopping anytime out an issue. I always ask my clients if there's any shots in particular that they might want or need. Now. Generally, we cover that also in the mood board discussion. But it's a little bit different when we're out on a shoot, because sometimes certain things might pop in their head or there might be a specific shot in a particular location that they're thinking of. In this specific instance. Matt and Laura they're both actually actors and will an actor and actress. And when I asked Matt, he said, You know, I would love tohave, kind of a more cinematic headshot, and I just played the part of Scar in an upcoming Lion K...
ing production, and, uh, you know, he's like, for some reason, I keep getting cast is this, like, kind of villain and sinister look, and Matt is like one of the nicest guys I've ever met. Okay, so when when you talk to him, you totally wouldn't get that vibe. But when he gives you that deadpan stare, you're like, Yeah, did you could play the part of the bully? So he's like, I want that kind of a dramatic cinematic headshot. That kind of conveys that I go OK, no problem. So in my head, what am I thinking? Well, if we're thinking about the lighting set up, what are we gonna have the key light do for this kind of a shot? The first thing that should pop in your head. Dramatic, sinister. I want more shadows. OK, we end up needing to go to the shadow side of the spectrum where we're shooting with split lighting or, say, Rembrandt lighting. That's what's going to convey that type of darker emotion, leaving part of the face in shadow to kind of convey the duality of personalities. So the first thing I'm thinking is I probably need to be in a location. I need to be in a spot where it's maybe not dark, but it's dark enough that on on camera flash balanced into something could be a primary light. And I could darken down everything else were ITT's, you know, midday right now. So I can't do it in just a outdoor spot. I wouldn't have in a flash power with just an on camera flash to be able to pull down that back on enough. So in just glancing around after he says, I notice a bridge and I've shot under that bridge before. I see. I think, Okay, that bridge actually has a decent what we refer to as an up ground. Okay, And up ground is a background that's above you. So when you get low and you shoot, you have a nice up ground on that bridge. And I thought, you know, is the perfect the other thing I need to do to make him look sinister and dramatic. I need to have a looking kind of down on the camera a little bit, so I want to get a little bit lower than him and shoot a little bit above kind of shoot a little bit of kind of bottom up on him so that he has a dominating presence over the camera. So we go over the bridge now, once we're under the bridge, Um, I have my beautiful ceiling. That kind of has these silver lines and stuff. We have little lights in the background. Which look will look fantastic. I know. Broke it out. Okay, so at a very shallow depth of field, we have this really nice look. Now it comes down to positioning. And this is again getting to that refinement side, being able to see and notice these types of things before you start shooting or after you take the first shot in and make an adjustment. So what do I want? I have my on camera flash here, and I know I want this as my main light, but I also want some other lights in the scene. I want there to be a kicker. I want there to be a light on the side of his face or on the back just to kind of fill and create detail there. So I noticed that off to the left side. If we're looking off the camera left, there's actually, like, kind of Ah, concrete opening. Okay, Concrete window. Whatever. and it's allowing daylight to kind of come in. So I have mass stand in a way that that daylight basically, if Matt standing here, the daylights kind of right there and it's coming through and hitting him right on the side of the face right there. What is that doing? Well, I just found my kicker. Deny the kicker hits him right there. I exposed for the background. What do we get for that? Exposure were at 1/50 of a second F 1.6, and so were on the 85 millimeter mark to lens the cannon version of it. And again, we're F 1.6 because I don't necessarily want Teoh have to deal with focus issues. I know 1.6 already getting a ton of okay, and it's gonna be already difficult enough to focus. I don't wanna go down to 1.2 and get too soft on an image. I could have gone up as high as I wanted to. Honestly, if I had more time, I would have liked to shoot this same shot at a higher Apertura as well at F seven F eight. But this is at least that one basic shot. I need tohave. Before I went over to get Laura side, and then we had to go on to the rest of shoot. So once I do that, I get this shot and I look at my kicker and I look at everything I see. Okay. Is the kicker the right brightness? If not, I can adjust my shutter speed in my eyes. So to kind of add additional brightness to the kicker and the background is the background where I want it. Yes. What am I going for? Dramatic. I need the background to be darker, okay? And it looks dark, but I have some detail there. That kind of is nice. It kind of separates the background from him. Fantastic. We have a two light set up right now, and we have background lighting as well. Great. Now let's add our front light for this. I'm using a white over silver reflector, my assistance holding it. And I'm saying, think thinking myself, I'm gonna do two things. I'm gonna go for split lighting, which means the lights gonna be right directly to his right. And I'm gonna so also gonna play with his chin a little bit just to get a little Rembrandt lighting as well. And I'm going to see which one I like better in post I take a shot and I noticed that we're getting a little bit flash spill. So what I do pop on a grid pop the great on So that way when I bounced because at this point, if you guys are Matt, that reflector is right next to you a raft aside and once again if I don't put this on well, if I leave this off, you're going to see that the flashes going to spill into you guys. Okay, so you can see that flashes going to spill with this on the flash goes right towards the reflector and you guys won't see it. So we're flashing at about 1/8 toe. 1/16 power. If I was at 56 f 71 I could easily go to, like, say, 1/2 1 quarter, even upto 11 power and still get enough flash power in this type of a scene for a dramatic shot with more background and focus and so forth wind up getting these shots. I haven't kind of play with his cufflink a little bit and kind of looked down on the camera. Make a couple adjustments, move the chin off to the right side a little bit so that we get a little bit of Rembrandt on this side of the face and I love both of them. Now, the subtle differences in the shot that really in my mind put it together and make it work Is this little bit of a kicker on the left side of the face? Okay, little kicker. Right here. Without that light, we want to show duality of personality, right? We need to show the light and the dark side to kind of get this type of a look in an image. Without that kicker, we don't see any form in the dark side of the face. We just see it go pitch black, Basically, with the kicker, we have a little bit of form and a little bit of drama. Like extra kick has this blue touch to it. It just looks absolutely wonderful in that. That small, little bit of highlight is what in my mind, truly makes this image. And it's something that you could totally go unnoticed. Very simply, if you're not looking for it, if you're not intentionally setting up, So what in all the gear, what do we use for the shot? We used our grid. You can use the mag money can use that bellow. You can use whatever you like. We have a grid to prevent spill into our subject. Once again, we're in a dark, dark scene where, yes, you could be using a manual flash, but it does help to be using a full feature flash that has autofocus assist were on the 5 80 x two. We're doing a Westcott. We have to West God's 1 inch white being held over a 40 inch silver. So that way we get a little bit more like kick from it. But it's still kind of a software light. And one of the reasons why I wanted a silver light of more dramatic light would have worked in this scene. The only thing was, Matt doesn't have makeup on right now, okay? And without makeup, a silver might end up being too harsh because we've been walking around for a little bit. Our skin's a little bit oily. We've been kind of sweating a bit. I don't want to accentuate that in the shot, even more so. I go for the white. So that way it's a little bit more of a diffused light. So we don't accentuate those features as much because it had he had makeup. A silver would be totally fine. It would be great. But otherwise it's gonna accentuate things that we don't want to or that we would later need to fix in post production. And I want to prevent that. All right, final steps. Get your background shot first. Figure out where you want to shoot what the position of your subject is gonna be. And look at the lighting that exists in that shop. Then from there, add light to the shot as needed. One thing I want to mention you notice that the kickers coming from the left Well, if I added my light from that left side, what would have happened? The kicker, It would have gone completely away, so I set him up for the kicker and I bring the light over the other side. Otherwise, I'm gonna be overriding the existing lighting, overriding my kicker. And on this side have a dark face, right? Decide There is no light. So I take that shot. And then I work with the existing light, placing my life to accentuate and to complement what's already there. That's it for our sinister headshot. And I'm gonna leave you with one last Oh, yeah.
Class Materials
Bonus Materials with Purchase
Ratings and Reviews
Sid
The best class for understanding light and lighting there is bar none. Pye is an excellent teacher and the quality of the material provides for a rich and very informative experience. Pye breaks down the fundamentals in easy to digest packets and then elaborates as needed. If there is one class that you watch this is it! Worth purchasing and saving for future use. I would also HIGHLY recommend downloading the saving the PDF of slides that accompany the videos. Again, and can't say it enough, this is THE BEST video to lighting on Creative Live. A must watch for the novice and the expert.
Petra
Great course, I highly recommend it if you want to become a more confident flash user. Pye is a wonderful instructor and just such a nice guy, it's a pleasure to listen to him
Simon Metselaar
This is the best thing that happened to me since I've been into photography. What a lifesaver. Unfortunately I already payed for some courses that are not Pye, but Pye just nails it. Amazing, and kind of a life hack. Thanks again :)
Student Work
Related Classes
Lighting