Lessons
Chapter 1 Introduction
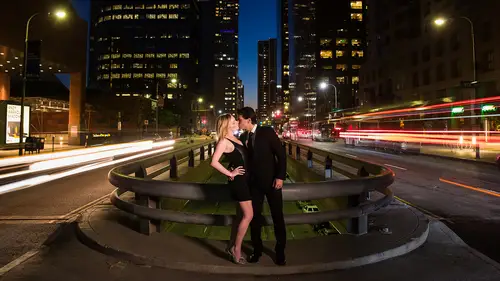
06:59 2Welcome to Lighting 201!
03:16 3OCF = Anytime/Anyplace
06:49 4Chapter 2 Introduction
05:11 5Wired, Infrared or Radio?
15:03 6“Pocket, Medium, Full Strobe?”
13:23 7Our 3 Favorite Flashes “Pocket Strobes”
09:26 84 More Flashes “Pocket Strobes” Worth Looking At
14:33Our 2 Favorite Medium Strobes
12:55 10Understanding Radios Part I: Channels & Groups
11:04 11Our 2 Favorite Radio Triggers
07:59 125 Simple Steps to Trouble Shooting Radios/OCFs
15:10 13Fantastic ND Filters at Any Price Range
09:03 14Our Favorite “Sticks”
11:01 15Our Favorite Ultra-Portable OCF Light Modifiers
19:38 1612 Mounting and Must-Have Lighting Accessories
12:28 17Gear Setup - Setting Up a Light Stand or “Stick”
08:14 18Gear Setup - Setting Up a Monopod Light or “Boom Stick”
09:30 19Gear Setup - Setting Up a “Medium Boom Stick”
12:15 20Gear Setup - Setting Up a Manual Flash “Big Boom Stick”
13:30 21Gear Setup - Setting Up a Full Feature Flash “Big Boom Stick”
09:40 22Chapter 3 Introduction
04:12 238 Steps to Perfecting Each Scene & Image When Using OCF
12:30 24Over Powering the Sun - Part I
16:42 25Over Powering the Sun - Part II
12:42 26Slow Down! Watch the Details
08:32 27More Power Without The Power
11:03 28Adding to Existing Light - Part I
10:52 29Bare Bulbing with Large Groups
14:36 30Back Lighting to Create Interest
13:33 31Getting Crazy with the “Whip Pan”
17:27 32Chapter 4 Introduction
03:44 33The Flash Modifier You Already Own
12:05 34The Oh-So Powerful Umbrella
11:13 35Large Group Shots with an Umbrella
11:21 36Exposure Balancing via Lightroom
04:20 37Portable Softboxes - Westcott Apollo
10:22 38More Light Control, Just Grid It!
12:53 39Dusk + Modified Pocket Strobes
13:51 40More Power? Medium Strobes FTW!
12:37 41Perfect It In-Camera. Then Photoshop
05:23 42Adding to Existing Light - Part II
12:00 43Adding or Enhancing Light Direction
11:17 44Our Ideal Group Lighting Technique
12:58 45Incorporating Flares with Flash
10:39 46Cutting Light, Grids and GOBOs
10:29 47Chapter 5 Introduction
03:34 48Fog + Flash + Grid = Dramatic Change
08:56 49BYOL! The 3-Light Setup That Only Requires One Light!
12:07 50What About the Fill Light?
12:15 51Backlight + GOBO + Fog = Magic
08:36 52Drawing Attention via Light Shaping
08:29 53Visualizing Lights & Color Shifts
09:17 54Mixing Ambient + Gobo w/ Flash
11:37 55Better Light Can Change Everything!
09:47 56Chapter 6 Introduction
01:57 57Subtle Refinement = Massive Difference
11:31 58Great Light Changes Everything! Part II
11:50 59Manually Triggered RCS + Shutter Drag
11:29 60The Right Power for Each Scene
14:24 61Dodging and Burning via Light In-Camera
07:23 62Subtle Light for Natural Portraits
09:14 63Light Modification & Simple Compositing
10:16 64Expanding Your Photographic Vision
11:37Lesson Info
Better Light Can Change Everything!
Better light can change virtually everything and so this is our last video in the whole visualization chapter of seeing liken artist but thinking like your camera why do we have this video anywhere? Because again this is another scene that unless you visualized what it could potentially look like you would absolutely skip over it because in reality this is what it looks like in reality when I took my my shot there this is what the scene looks like based on ambient light but I knew it was a great background I knew that we had a beautiful wallpaper there I knew that everything there looked great it was just that the light wasn't good so in visualising I thought you know if I put a clean blue just my regular fifty five hundred degrees kelvin flashlight over this area it's really going to reveal all the color in the scene the color that's currently being muddied by that kind of yellow tungsten light that we're seeing so we visualize and I go okay I think there's something here let's go ahe...
ad and just take a couple shots and see if indeed we do have something so the whole compositional idea here is I have her in this red outfit and what I actually asked her to do was I saw the background and the back was this kind of nice blue wallpaper and I told her I was like you know what this background is really cool you mentioned that you have a red outfit we haven't shot you in that yet why don't you go get changed into that because I think it looks really great over this background in contrast really well kind of the complimentary look to it it looked really nice so she went and changed and she came out we took this one shot right here so this is the eighty five millimeter one point two l canyonlands this is the signal version again I'm dying sigma come out with the eighty five art already across the board I've replaced all of my primes with the signal art crimes but they still don't have an eighty five and the signal eighty five is a current eighty five is a great lens but it still doesn't quite match my candid eighty five one well so I'm using that guy I have one fiftieth of a second used for my shutter speed fto I sew sixteen hundred fifty six hundred degrees kelvin just so you all can see this ambulance so there's no flash fire this is just exposed for skin tones and again, if we weren't to visualize anything, we just be like poop let's just move on from this and by the way when you're shooting with especially when you're doing like buddha and bikini and fitness and got kind of stuff where your subject is very vulnerable even when something's not working say it is okay, so if I take the shot michael asked gorgeous all the beautiful I love it I always throw out those kind of words on set because you want the person toe always feel confident and happy and so forth if something's not working just say that's beautiful if we want to another shot okay don't say oh that's not working because they're going to think of them and it's gonna really ruin the overall kind of mood on set is going to ruin their confidence, so I put a westcott I'm sorry I put a faux takes metro's inside of the west kind of paulo strip and I used the diffuser and the grid and I have it being held off camera left, okay, so off camera left, we adjust our camera settings to one one hundred a second f to eight and is a one hundred why? Because we're trying to kill that ambient light, so basically I'm not worrying about sink we're indoors and not to worry about anything synchronization wise, but what I'm trying to with the annual exposure is cut it away that nasty like that I'm seeing up here, I don't want it, I don't want any of it, so we bring it down what is that four stops? We went to six hundred, eight hundred, four hundred two hundred one hundred so four stop so we brought the after up one stop so we went from f two two two eight so that's five stops total now and then went from one foot to the second toe one one hundred of a second so that's six stops we have reduced lightness scene by six stops which basically means that whatever existing light was there is gone that's no longer there we flash at around I think this was around like half power or no I think this is maybe one quarter power because we have the diffuser on we have the grid on and this is placed very close to her face right now. So it's it's just right about there you know, like write just barely out of frame and it looks great but what I notice is that it's very, very hard light still it's very dramatic um and so immediately I go you know what the light source is still not not doing it for me so I asked my assistant toe open it up further now how do you take a light source that's already soft and opened up even more? I always say opening up because you're taking a smaller source and you're making it larger step number one and opening this guy up was to put it inside of that soft box inside of the west kind of polish strip step number two in opening up even further was to put the diffuser over the front of the strip okay, so it hits the back it opens up a bit used the diffuser opening things further step number three is to use well, you can use basically anything you can use another westcott five and one scrim so you can grab the scream out of a five one reflector and used that you can use just basic diffusion cloth that you pick up from your local cloth market for ten bucks. Whatever you got in you place another diffusion fabric in front of the light source. Okay, so now it goes off the westcott apollo strip that's going through the initial diffusion and now it's going through another diffuser which is held right between the flash and the model and look at the difference in quality remember that whenever you go through added layers of diffusion you're cutting light every time you open up that light source further you're cutting light so now we're probably around one half to one quarter power to get enough light onto her. Okay, we also it looks like way dropped the shutter speed or we increase the shutter speed to one hundred second we open up the aperture why do you think that wass we increase shutter speed? We opened the aperture so opening the aperture basically gave us one stop more flash one stop more ambient light keeping the shutter speed up or boosting it by one stop, tio one, two hundred second decreases that ambien exposure and leaves us with just brighter flash. Okay, so we decrease the exposure while increasing the amount of flash that's added with that little adjustment that neutralizes basically the fact that we just put in another diffuser. Okay, so now we have that additional diffuser there and now the quality of light is gorgeous. And look at this. Look at the blue tones that we see. Look at the clean colors that we see. Look at the skin tones. Look at that wonderful shadow in the way that it kind of reveals everything hurt her body, her form her chest. Everything looks beautiful. This shot is because the shadows that air revealing her shape her form. Compare that to this one massive difference in these two shots. Now that we have that set up, this was essentially our test shot. And I just took a special kind of like this. I kept it. But now that we have that said, if we actually move her nor pose, this was the final pose that we did for the shot I wanted to kind of again look up, look away, close the eyes. Bring the hand up again, it's all about form and figures so we're creating that curvature of the spine we're letting the hip open up right here towards the bottom the frame and then close up as it goes out of the frame we're leaving space between the arms and between the face to show that form and this is this's right out of camera people there's no work done on this. We could photo shop and make everything you know we could do whatever we want to it, but she looks incredible. The scene looks amazing. Our light looks fantastic and everything is just has been improved and something that we would have normally thought was just garbage. Just a scene that was normally just garbage. We visualize that we thought, you know what with the right light with better light we can change everything and that's what we did from this shot over to the shop. Last thing I want to mention for this particular shot we still had our roscoe many v and for scenes like this, I oftentimes like to just create a subtle amount of hes just a very soft amount. We didn't kick any extra fog into the room. This is basically after that go bow shot that we were using to kind of create those lines and so forth, so we just had a nice bit of fog in the room just a very subtle amount and what that does is with a little bit of kind of smoker font particles in a room those air particles create points too basically bounce light off so it opens up and creates an image that's just a little bit less contrast it with a little more fill in the shadows has a very very nice and organic look to the image so it doesn't look so I don't know high death you know coming straight at the camera it doesn't look so like just perfect contrast and everything that it has a little bit more of organic and natural look but either way you know it's a very subtle amount whether you chose to add it you know on set or whether you chose it just kind of create that lack of contrast and post you could do that too, but that is our final image so last take away from this remember whenever the light source whenever something's not soft enough just simply open it up another step it's going to kill a little light power so when light power is not an issue, you can always open up that light source again with additional diffusion and you could do it as many times as you want when we do hollywood when we're on hollywood sets and we're filming for commercial, sometimes we'll open up a five thousand you know what agent. My light will open up four, five times across, you know, multiple screams just to create a softer and softer and softer and more natural look to the overall life source. So open it up. I love that word, too. Doesn't it sound cool? You can tell your assistant opened up, man, and then they're like, cool. What does that mean? And then you go, yeah, I know what that means, and you don't let's go the next day.
Class Materials
Bonus Materials with Purchase
Ratings and Reviews
Student Work
Related Classes
Lighting