Nude Boudoir Retouching
Lesson 23 from: The Portrait Lighting Challenge: Natural vs StudioSue Bryce, Felix Kunze
Nude Boudoir Retouching
Lesson 23 from: The Portrait Lighting Challenge: Natural vs StudioSue Bryce, Felix Kunze
Lessons
Day 1
1Class Introduction
13:10 2Shoot: Natural Light Portraits - Maisie
21:29 3Shoot: Natural Light Portraits - Katie
25:45 4Shoot: Natural Light Portraits - LaQuan
15:36 5Shoot: Studio Light Portraits - Maisie
39:40 6Shoot: Studio Light Protraits - Katie
14:39 7Shoot: Studio Light Portraits - LaQuan
16:49Shoot: Natural Light Nude Maisie
37:27 9Shoot: Natural Light Nude Continued Maisie & LaQuan
28:47 10Shoot: Studio Light Nude Maisie
36:05 11Shoot: Studio Light Nude Maisie & LaQuan
18:43 12Studio Light Q&A
24:57 13Review
31:13 14Shoot: Natural Light - Backlight
17:50 15Shoot: Studio Light - Backlight
34:57 16Shoot: Hollywood Glamour Shoot
42:51 17Shoot: Low Budget Hollywood Glamour
14:47 18Post Processing: Sue's Style
17:44 19Post Processing: Felix's Style
27:34 20Post Process Q&A
33:07 21Shoot: Studio Backlight and Lens Flare
17:48 22Shoot: Studio Light - Strobe
25:28 23Nude Boudoir Retouching
15:29 24Contemporary Portrait 1
09:57 25Contemporary Portrait 2
05:12 26Contemporary Portrait 3
04:40 27Film Noir Male Retouching
06:35 28Film Noir Boudoir Retouching
11:07 29Nude Male Retouching
03:48Day 2
Lesson Info
Nude Boudoir Retouching
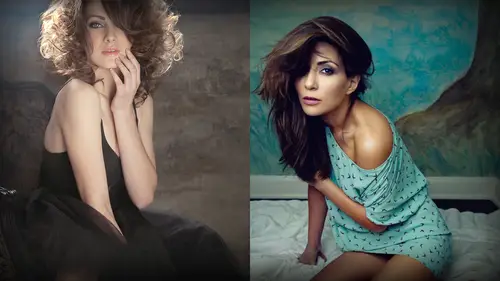
as you can see we have our natural light image on the right we have our strobe image on the left we've got very good consistency I feel like we only took four shots if we had spent a little bit more time I feel like we could have possibly nailed it right down although I love both for different reasons so what I'm going to do is work both images as similar as I can to see what sort of consistency I'm going to get now this is a line that I removed on pretty much all of my chutes I'm going to go the clone tour I do everything on clone I clone and one hundred thirteen hope a city and the person flow um you're first up were naturally default to thirty percent capacity and one hundred percent flow and most people don't realize that it's meant to be the other way around uh it changes the way you clone and a lot of people have problems with cloning and when they do this understand why because it's the flow of the brash I also work on a nice soft fitted brush always I take this line off the amp...
it because I do not like it I'm just going to quickly go around and clone anything I do not like uh any little bumps or whistles that I don't think belong I make my brush bigger when I'm just doing general soft skin because I'm just feeling a very light finish up around there I'm just going to smooth out on her highlight it's me that up onto that highlights through that shadow and on her face I can see this little highlight here on this ridge I'm just going to come up to take this out nice even I'm not going to flat now therefore head I'm not going to remove that highlight because we don't wanna flatten her face face has to be uh you know round so it starts looking really weird when you flatten out the highlights I'm just gonna go up under her eyes I'm just gonna soften the lines around him out and I am gonna soften down who my oldest to touch but you'd never do that to me you wouldn't remove it for a client and they asked you to that was it so I think I was probably two minutes there uh I can still see from this distance they just need to soften up three here so let me just like that perfect now I'll go to this one I'm going to do exactly the same math so I go to my clone tool is the short cut I met thirty percent always thirty percent flow one hundred percent open today I use a mixture of taps and taps in and rubs on the waken tablet I have a medium pressure constantly I feel like that's something you just find your own groove with have to work with the wakame tablet I couldn't possibly click a mouse that many times I just want to go up I'm going to follow it down uh they strobe hairs less um it's a little bit more forgiving on the skin interestingly enough um the natural light has picked up a lot of bumps so it's nice to see that there's a difference there and so at the stage here um this might be the first level of my client viewing so I want to be quick but at the same time I want to make the image bidder she has the same line on her forehead zay come from the highlight down to that bridge because we don't want to create a heavy brow and then I push back from the highlight so keep my clone stamp there it has come up I take off little bit little bit under her eye existed and both photographs I take that little uh nasal labial line that goes down the side and then soften the cheap stuff in the mall either side and then I'm out so at this stage that's my first general run through I've got two choices here one of them is I kid come to the natural light image create a lay a mask over the top go to layers turn off the top layer look at the bottom and control the kurds to try and get my background to match the image on the left because the image on the left has mohr beautiful more blue highlighting the backs and now I'm matching it and so I'm just going to try this and then I'm going to go to here and then I'm going to go to my racing till att se sixty percent and I'm just going to hopes sorry and just going tio go to my layer and go to the top layer tune it back on and erase it back so that you can see that nice like highlight and you can see it's just jumping up I'm matching you see and you notice the first thing I'm doing is trying to make the natural light what looked more like this dr ha ha ha I came and then I'm gonna flatten it down the most obvious thing is the temperature is a little bit colder I actually really like that so I'll make this strobe looked more like the natural so I'm going to control the color and I'm going to add more cold okay which is going to make it bluer I prefer my image is called the one and then I'm going to lay a mask the strobe copy and paste I'm going to go to the second layer ten off the top layer and I'm going to use my uh curves and I'm going to make her face brighter because it's brighter than the natural light it's sorry duller than the natural light and then I'm going to turn it back on I'm going to go in my arrest or twenty percent and I'm just going to further in in a race so it pops up nice and light here it doesn't actually look like you're doing much until you go back in your history and you can just see a subtle bounce up so I loved both images I feel like they're very close very close and pose I think they both have a beautiful mode um now I'm going to take them into alien skin and sort of given their final look so the first thing I'm gonna do is let in both um that and I'm just going to save off both images as retouched first so that you have an example of retouched and then alien skin and then I'm going to save uh the onions khun separately and then you'll have an un retouched image every touched image and means can image to see how we get out finally on and off okay now this image there's something about this image that banks may and that is I feel like this is a little darker than the other one sound it's gonna soften this and as you're recording it does slow down your computer so sorry about that is this little here actually kind of likes me mostly win it back off her face so I'm just going to clean it out because I don't want it there I'm looking at it and if I'm looking at it then it shouldn't be there all right so I'm just gonna smooth that out make sure I've done a good job off the cloning here follow the line of the shadow on her face for the line of her blush always big difference okay and now I'm not looking at that cheek right okay so now what I'm going to do say that I'm going to open this image here which is the strobe image in n you'd skin I used alien skin to create a mood and the idea ofthe creating a mode is taking away from looking like a normal photograph I want to create something really beautiful and ellen skin exposure five big loud allows me to choose multiple styles off emitting than a very beautiful so I'll show you my go to the ones that excite me that I go to every single time now the fist when you're going to see oh I've got exposure foreman's supposed to have exposure five leaven exposure five because it's different exposure five has got lots of new stuff on it all right first thing I need to decide is whether I loved the image in black and white or color because there are so many variables in the black and white times that I go through and to me some images just big to be in black white in some don't this one doesn't I find the more contrast between somebody skin in the background the better black white looks if they're all very even tired doesn't tend to look strong um but I do go there first because there's something magical when you now a beautiful black my image and you feel like it's meant to be part ofthe you know they're processing the second one I go to is color their two sittings and alien skin that I love one of them is fade all leave strong rains now the reason I like this is in tim's off skin tone it d saturates but it keeps this read bounce that lines up the skin and it just is my epps and luke favorite like I like that enough to get out of there now um my stick and go to if I need more contrast in color is noon day sun noonday sanders might another favorite it's dropped the reeds away that you saw and keeping the strong raids but it's up the contrast so that was the reds so what I love about that keeping the reds is it lightens up the background lightens up the skin keeps the warm tones were they meant to be what takes them away from everything else so if I just apply this because I really like it then it's going to apply the layer and of course I can go to my layers and minimise it and take it back of it's too strong because we don't want a filter to be overpowering now what I'm gonna do is I'm going to apply the same filter by just going filter exposure five and it will hold the last layer so I'm just going to try both the same filter so interesting it's popped up the colors are sitting really beautifully it's very close we've got differently more light on the natural light more directional light um we could have spent a little bit more time wrapping this light or cutting it back so I think it was a little bit more direct from this angle but overall I'm really happy with that and um it's a side by side I like it a lot I just want to go into my layers in just chopped out I'm going to take it down to what I'm just gonna take it down to seventy percent my aliens can land and that's what I would do so at the stage I can flatten and safe this is where I kind of decide to start going off on a new tangent it was it's where I would flatten this image and I'm gonna flatten this image and then what I wouldn't do is I'm going to open them again now if I'm sort of in the mood around want to start really playing with images I flatten them and go back into the skin and what I do is I can either start again um because justcause I liked one filter doesn't mean I'm not gonna like alice and sometimes I just it's just a habit I want exposure just because I liked one doesn't mean it's the best one so let's go back in keeping the filter bubble layering which is kind of exciting and it's look around at what's here oh that's nice and now I've got two really strong layers and then I start to play in the color fading there's a few go twos that I adore I love color photo because there's a warmth to this image that is so beautiful um felix uses split layering he also uses uh any skin and a lot more ways than I do I simply apply the filter and then dropped the layer back and then I doubled multiple layers so I use it probably the the easiest most rudimentary way and when you get a filter like this I love this filter but I hate the aging on it so I'm just going to go down to uh the sorrow slight this town borders and textures and I'm going to take them off I'm sorry I'm going to take the agent ofthe dustin scriptures off I just love that light now it's got two filters on it they're both quite colorful I'm going to apply this and then what I'm going today let's go to my liars take mike layr down to such not so purple I can change the color and even if I take it to their I'm still outside of at a thirty and forty percent is still enough to tone and I'm still I'm now getting to a stage where I've made it look different than a normal time and there's something in taking about it I'm taking it more into my style you find your little waste a piece that really work um and everybody has them but what I like is that I'm making it different and I'm I can't lie I keep it keep it light keep it simple just work on times instead of trying to create borders and scratches and thinks that let work on all of your tones and three find tones that you love um I'm going to sit with this and save it is my final in that stage is I really like this and so that's my before and after
Class Materials
bonus material with purchase
Ratings and Reviews
Aliah Husain
I loved this course! I purchased it as a beginner photographer, unsure of whether to shoot natural or studio light and how to get the best results. After watching the course, I am fully confident in my ability to use both natural and studio lighting in my photography. And most importantly, I feel I have the knowledge base to be able to experiment with lighting in any situation. I am both grateful and inspired by these two amazing teachers sharing their technical knowledge and a personal piece of themselves. It is clear that they genuinely care about making their students better photographers. Thank you, Sue and Felix!!!
Geri
This is the best lighting class I've done, including several in-person ones. Covers so much, and the contrast between and dialogue about the two styles (natural vs studio) was so helpful. I didn't think there was anything at all negative about how Sue spoke with Felix, which a few reviewers said. Clearly she has great respect for him, which she sincerely says at one point, and explains why. Wonderful to see specifically how they both shape light. So many topics are covered. Loved Felix's clear and specific explanations about studio lighting. This class is worth every penny.
Wasabi Ben Kenobi
This was a fantastic introduction to studio lighting, and one of the best courses I've watched on Creative Live. I've only ever done natural light photos, but I want to learn more about studio lights because I'm creating a basement studio. I'm already a big fan of Sue's approach to portraiture. Now I'm a fan of Felix's soft lighting approach, too. In this course, he demonstrates how to replicate natural light portraits with a simple lighting setup. With a big scrim, a strobe or constant lamp, and v-flats, you can do so much! I'll be watching this course again.
Student Work
Related Classes
Portrait Photography