Post Processing: Felix's Style
Lesson 19 from: The Portrait Lighting Challenge: Natural vs StudioSue Bryce, Felix Kunze
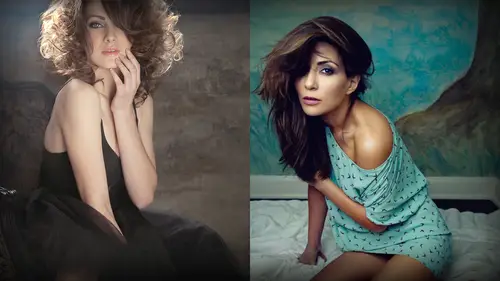
Post Processing: Felix's Style
Lesson 19 from: The Portrait Lighting Challenge: Natural vs StudioSue Bryce, Felix Kunze
Lessons
Day 1
1Class Introduction
13:10 2Shoot: Natural Light Portraits - Maisie
21:29 3Shoot: Natural Light Portraits - Katie
25:45 4Shoot: Natural Light Portraits - LaQuan
15:36 5Shoot: Studio Light Portraits - Maisie
39:40 6Shoot: Studio Light Protraits - Katie
14:39 7Shoot: Studio Light Portraits - LaQuan
16:49Shoot: Natural Light Nude Maisie
37:27 9Shoot: Natural Light Nude Continued Maisie & LaQuan
28:47 10Shoot: Studio Light Nude Maisie
36:05 11Shoot: Studio Light Nude Maisie & LaQuan
18:43 12Studio Light Q&A
24:57 13Review
31:13 14Shoot: Natural Light - Backlight
17:50 15Shoot: Studio Light - Backlight
34:57 16Shoot: Hollywood Glamour Shoot
42:51 17Shoot: Low Budget Hollywood Glamour
14:47 18Post Processing: Sue's Style
17:44 19Post Processing: Felix's Style
27:34 20Post Process Q&A
33:07 21Shoot: Studio Backlight and Lens Flare
17:48 22Shoot: Studio Light - Strobe
25:28 23Nude Boudoir Retouching
15:29 24Contemporary Portrait 1
09:57 25Contemporary Portrait 2
05:12 26Contemporary Portrait 3
04:40 27Film Noir Male Retouching
06:35 28Film Noir Boudoir Retouching
11:07 29Nude Male Retouching
03:48Day 2
Lesson Info
Post Processing: Felix's Style
I'm going to cover now the things that I do differently same with photo shop I can't hold a candle to sue and photo shop on dh so I said look let me just show alien skin you do the photo shop that's the best value we can give I have my various recently used the settings up in here so I you know this is not so pros aren't supposed to say this right but I just go through and go right what what do I like let's see if I have something here already and so when I did the fetish videos last night with the guys with the students um I have some go to favorites that I really adore do you have any go to where you go to yeah I go into the film the polaroid presets know I love the polaroid see I have some presets here I won't share them out because of what we have client names but so these are my recently used and I'm just going to go through and kind of find where I want to go with this and I think this with a darker shadow is going to be quite nice so let me let me see if I can take this from you...
have all these black and white presets here um cinema presets color color fading and I'm going to go to where's the polaroid on here that's good that color films polaroid and you have various options here now I want the first time I used alien skin I went through these and I saw I think it was this one and it's like there's such a beautiful cross kind of split toned it what is it color balance on my and my priest my recent news sorry that wasn't that one this one this magenta split I said what's going on here they this is a preset it has lots ofthe grain and lots of contrast so I was over here in the it was my split turning in I thought right this is going to change my life and I started playing around with this commune and orange wasn't one I really liked but I went to the indigo blue and that gave me like a basis I've seen this a lot in fashion work and I thought right let's start with that wait a minute you just went over my head okay my image is open you're going to find out all right yet while I wanna lend it I'm going to give you and you won't go to split turning and where does it say that right what have you got in your if you could select a polaroid kept the preset is pola crumb and magenta split go teo then I'm picking um I'm picking something different oh I see it comes up right here and it should be in your what's a cold weather gone tone moved to split turning its under tonkov yeah yeah yep I'm going to make so if suit can follow along then and I can literally this little spider here the color one that's this that's I'm modifying the shadows mostly so I can then slide it to different color tones and this is not we're going to take this image to black and white so I want to show it to you with one of the other images I selected so I'm going to quit and discard those changes and show you because I think on him it's not this image isn't as high contrast and I think it's going to show up a little bit better to show you what happens when we split the the color in the shadows and the color in the highlights and it's already selected this last precept that I've used but I'm going to go up here color film polaroid and I'm you know if I wasn't teaching this I would be doing this and looking through each of these and seeing what works best and also remember if I if I do a shoot and I have I've done a mood board before I have a theme I have closed all of that is going for my decision of how I want the final color to be right now we're just playing around you know um right so I'm going to go down to my tone curve adjustment I uh I think there's too much contrast on this so I'm just going to dial that back right off the bat and I'm also going to take the grain off because I want to show you guys they go switch that off so split toning I want indigo blue that's a little bit intense let's see what we can get from akron and orange indigo blue and I can also take the strength down so I'm just doing a little bit that's a much more subtle how did you hear that yeah on the strengths lie I'm going to take that down to forty ever wants to know numbers don't I'm going down to forty three forty okay yeah right if you click on this little color here you can actually change how intense it is on the color slider and if you click on it you see its color one right now if I click on this one over here it's going toe change to color too so you can selectively change how those colors affect the image so I'm in this kind of blue shadow I'm wondering if I go into a green make it look like a cross process film I kind of think that's nice you know the texture of the shirt kind of makes me think that it would look good in in this green split maybe we can make him look you know each of these would evoke a different emotion actually kind of like that and when you change this you'll notice under the same type of tone curve as the contrast adjustments and if I take the shadows up a little bit see what happens let's not let's not mess up that curve sorry he's going psychedelic as I just bring that up it makes it much softer and we're just getting a hint off that color in the shadows and that you see I've got a red coming into that shadow as a split curve the top is going to be usually kind of white and I can take it to a place it's like if I took it where was that yellow I just had there you see it starts to look kind of like we have a fashion image I could go back here and go to blue and this is kind of approximating what a lot of people look for in in fashion photography that blue curve creamy highlight and I can then adjust the strength quite easily to you know this is too much I think I'm going to be a wrap around there and room it's in the same tab as your curve adjustment which is another adjustment in the curves in alien skin I'm not destructive like they are in photo shop I don't know why I trust them and it blows my mind so there's a couple of quick brenda was asking do you not worry about the color change affecting the color of the clothing now that you're a fashion image you wouldn't do that right but portrayed it doesn't bother that's right and you'll find that in fashion photography as well they'll do colors like this for fashion editorials which are just stories for campaigns it's going to be you know the high fashion campaigns you can't trust the color anyway if you're spending ten thousand dollars on a dress you better go look at it first but if you're shooting for catalog you want those colors to be utterly precise you know think about it this way if you're shooting a story and fashion that story's going to be set in a setting the studio outside everything has a different color cast so you can you do have some creative control over that even though it should be you know I'm not trying to sell this t shirt in this case I'm trying to sell in the portrait right if you go here to your color you can either adjust the curve like this you get your contrast or what I like to do is I'm going this seems to just do it so subtly take those shadows down I can say exactly that shadow on the right of this office on his right cheek I want it to be about there and then I can bring them it turns up just to lighten the whole image and you see how we've gone from this to something like that that looks like lighting genius how did you do that right and it's just in the split split curve split toning and then the highlights I don't usually mess around with that too much because you get these kind of blown out highlights right here so I just leave that down and I always play around with this and you'll see it kind of does to curves don't ask me the technical background on that but it's subtle and it's beautiful so that's what I'm going to do then you know one way I can be lazy or quick and spend more time with my imaginary children is to go back to go into grain then I don't need to do is much work on the skin in other words I don't have children your future my future children exactly here that sounds better than imaginary so let me zoom in on this oh god sorry soon back out where is that there they were all right and you can see the overall grain strength makes a lot of difference and this is going to be kind of a dirty grain I don't like that so I'm going to keep that quite low actually for demonstrations sake I'll keep this at one hundred what I love about alien skin is you khun say way you want the grain do you want it in the shadow right there take it anyhow so you could take another highlight so in film the grain is in the highlights and in digital the grain is in the shadows so you can make it you can cheat the trained eye to going out that was shot on film and obviously this is for demonstration I wouldn't leave it like this but it gives me so much control to put the grain just in the shadows to take it down in the highlights for images that are high key over there's lots a fight going on you can hide if you if you don't want to retouch your highlights and there's lots of you know lots of things in your highlights that you were treating by a tree you could just put lots of grain there you know if you have let's say there was a light coming in behind him people look at the face that's where they look so I could hide lots of stuff that's going on in the highlights by just putting grain only in the highlights it's a bit cheeky I'm not told not to do this but I sometimes put grain over an image to hide hide my sins you khun adjust the roughness and the color variation the color variation is going to do that kind of which is you can do it monochrome or or the regular way and photo shop and that's the only control that's the only thing that changes is this so I kind of tried to keep the color saturation lower if you add color sari color variation if you add color variation you end up with a little more saturation in the image if you take the color variation you get a little bit off that de saturated look this one the push processing ends up just giving me a film look in an instant you see that I'm goingto go back here I don't know if you can see on the screen so I'm going to do it really pronounced that's going to give me like a film look that's before that's after we're in a completely different place and that pushed processing was one of my favorite things I'm going to leave that a little bit subtle and then go to the focus they call it focus on here on the sharpening so you have various presets but I'm not going to use any of those I'm just going to go into my amount of sharpening and again I have the option to sharpen brightness only so depending on how your image how high I q images how much off the images highlights and how much of it is shadows that can work really well to focus your attention in the right place if you sharpen the highlights only it might only get the catch light in the eye and make that really crisp to do this in photo shop to only shop in highlights you can do it but it will take you ten fifteen steps on dh same with blur I won't use that but you have a lot of control and that's really the things that I use and I'll show you let's just go zoom out on this again we're out before and after before after and violence unless you also compare it kind of like this and I've done a bit of more of an exaggerated version then I would do if I was get delivering this to a client but alien skin is so great to give me that inspiration to see where I'm going to go with an image and that's why I really love it so I'm going to save this and just run through really quickly making that hollywood shot that soup asked me she's retouched on making that into a black and white some saving that where's my hollywood and mitch one second drag that onto here should open up in a million's khun exposure it's a standalone apa's well this was a plug in oh I looked at that and was like oh we must be back on soon screen but you see now it's already gone into that last pre set I used which I don't I don't want to use it like this let's just go to a whereas the neutral there is a neutral option now show you how I do it from nothing neutral so I can change that to black and white on dh this is great because you have the color filter option here you add density and you can put you khun do color filters as if you were doing that you know you can do your balances and photoshopped between the rgb and you can just go like with hollywood I'm going to go kind of more here because I want that lip to be pronounced and again you can do cool warming out this is doing the adjustment in the color as if like that obviously that doesn't look good I can take into black and white and achieved this then and you can also change the color sensitivity so you khun increase the reds just like you do when you do regular black and whites if you want to get really technical you can do that one day I won't go into that I'm going to go into the tone here I want to bring out some of these shadows and again alien skin is going to do that so beautifully if you try to do the same thing in photo shop somehow that curve always destroys it mid tones I'm going to come down just a tad and bring those highlights up to give me a lot of contrast not doing the best job at this right now but I can just take those shadows back down over there and we go to that hi key black and white image oops sorry she's going to the disco again just take that out just gonna increase the contrast but you see I've retained a lot of the detail in the shadows over here that's I've done by increasing if I just did the curve it would be like this can you does that translate onto the screen you guys to those subtle changes okay and then for a hollywood image again I would go I wouldn't necessarily shop in it but back then they had thirty five millimeter film I don't think it was that shop on dh I'm going to go on my overall grain strength and this is where I'm really going to use that push processing and I'm gonna zoom in on her face let's see if I could do that perfect on dh use that push processing with increasing my overall grand strength and there we already have sorry we already have that kind of hollywood look if I zoom back out now that looks more like a hollywood image high key lots of grain and that's really fast to do this will save as a preset and your recently used option over here as soon as I save this image it'll save it as my last option to save that's goingto save it to the desktop and voila there's my last option so you can then apply that to all the images you've shot felix you mine if you show us the before and after yeah for this I'll do the split screen that's the before our let's see if I can get this on her face understood this so that's the before and after and that's you know for hollywood I'm going to go to like a high key high contrast place at grain I would probably do this a little bit more subtly and just you know I really went overboard with those sliders but that's what I would go and that's what the type of control I really love I would maybe take some of the grain out of the highlights actually to make that skin look less grainy they had they used to have that on film right on dh lots of grain in the shadows I think it's going to take it to kind of that soft hollywood place and speaking of overdoing it sometimes I know that some people when they do overdo it I have problems with banding yeah the background o r just in lighting in general do you have any suggestions of how to avoid banding when you're working on your images I feel like I'm making deals with the devil here by giving these I am banding is for me I always handle ingrain by adding noise and actually if you have banding in the sky using alien skin you can add grain only to the highlights and that's really unique so your whole image doesn't have to suffer oh I get anyone anything else to save this is how heck I am to save image banding species back when we didn't have as good a cameras I would clone it out yeah or I would take the background off another image that was similar less oh cut it out and drop information on top of and just a race back it's like I would like literally drop in a fake background or grady int o ver bad bending but I don't get it anymore but yeah it's not really used to have a team day built my business on the teen day so I had to abandon everything banding happens if you use kind of those slides too much and I think especially in photo shop on the curves that aliens can curve has so much control that I've never had a problem with banding when using alien skin photography that's okay I was gonna ask question from my about saving an rgb or c m y k do we want to get into that right now the same way k is for professional printing so when you go and get goto a printer profile they're gonna ask for seeing my k and it's a different color profile we work it's photographers and rgb so our red green blue tones is different from the ink that they print with the science magenta so yellow and so um you have to convert it but your bid to convert it before you retouch it so it really depends whether images for you know if it's going to be printed on a brochure or it's going to be printed by professional lab you goingto rgb but if it's going to be for brochure business cards they're gonna want it and see him okay so if you re touch it and I g b and then convert the profile you will get a shift in color but not actually by much so I rechecked all my work and I d be but then I've gone to print from printers and they're like oh we need this and seem like a I just went for bishop seem like a profile on literally transferred it to a same like it and it doesn't shift it that much but and I haven't been asked for seemed like a on a long time that might be a hecky I'm a bit of a heck yeah I will so can we come back to my screen nico because well uh felix has been teaching that I was trying to follow along and what I came up with wass I chose presets because this is how my mind works I bought alien skin they opened it up there's so many precepts I go goody and I don't study it I don't watch any tutorials online I don't go early it's in website I just make it work with what I've got and it's only when you go to teach it that you think he goes oh I do split screen and layering and say uh doesn't do that you know and until I have to learn something I just hacked my way through it so if we go to my screen I wanted to say one other thing about and someone asked me this yesterday privately and I think it's this is the relevant point to say how do you make decisions between all the different presets and this is actually a very large question how do you know that it's the same question is how do you build a style on what I said is when you have a shoot let's say you come back from a wedding or a sitting when you call through if you look at every image you analyse that light and blah blah you're never going to end up with the best images so everyone learns I'm just going to go with the ones that connect with me in here in my heart you do the same thing when your face between you go through those and you have to learn to listen to your own taste in a way too what do you want and if you answer that question honestly back to yourself every time you will whether you like it or not develop a style I feel like the question should be how do I get this look then I want but if what if you don't have if you can visualize what the final look is that you want everybody hasn't look they want because they see other photographers and they emulate them nothing we do is original it's come from all around you it's a piece of everybody does everyone know immediately what they want when they go into software to edit the picture so I wanted to look amazing yeah but I think if you have if you have various choices in front of you try to do that same thing what is it you like not what will someone else like hang on if you walked up to a buffet would you turn to the person next to you and go tell me what to eat exactly how makes that eight think analogy just try try a bit of food and see what you go with and go back for seconds if you don't like it don't eat it again and I think that's that's the perfect analogy but what people want is recipes what they wanted to go to what they want his favorite and you can't do it because it's so different image but if you wantto be a chef you can't just go oppressive piece you're gonna have to try on things I went off press it I still got presets I mean that's all over my head still and are we watch it but you know the truth is is at the end of the day the appreciates are amazing and I chose for this one I keep them open for you this is my go to black and white it's the digger type c p a or the daguerreotype black and white just the plain one the cool thing about alien skin five is it now opens I'll go to a raw image is when you open ellen skin five as opposed to four forehead no option for black and white and color whereas five does so when you open the black and white film and let's say were invented so a lot of people said to me when I wrote that block post you didn't say um it didn't work for me you remember I did this image of my blogged off katie and the night I erased it back and the color started to come through that's because you hadn't clicked black my or color here and kept it in color when you put the black and white filter over the top so that when you race beckett stays in color but as faras preset too concerned I really love these digger type is my go to and what I do is when I turned it on and off that's what I started with that I didn't need to do anything to that I put a little highlight in her eye that went black um I'd not the grain down a little bit and it's sitting at one hundred percent right now if I take the opacity down to minimise the amount off filter on there the color is going to come through unless I go to the image underneath and take all of the color out and then I'm going to d separate toe a normal black and white image right so that then I can control how much of my alien skin layer is going on top and how and isn't it beautiful is that folio with the all right so here this shop I used kodak technical pan I tried I tried to choose a film that I used to shoot on in thirteen years that I loved best film ever four hundred and also the thirty two hundred but take the grain down it had a very specific look good for documentary dark gutty imagery nudes and dances absolutely amazing big thick grain thirty two hundred film we shot just about every winning in the nineties inside natural light and city two hundred was so funny and I tried to match his image on a priest it as quickly as I could so I use that and then I actually preferred this I cannot get away from the polaroids the color fading and then the normal color when I re tucked the video's last night I put every one of the images into alien skin chose a preset chose a look that I wanted bought back the layer flattened it retouched it in front of everybody or retouched it first always retouch and safest okay retouched and save and then then try different filters I will open an image like this and I will duplicate it multiple times and I will work on a finished image before I choose one of those into mae I am so in love with this color image that I wouldn't pull into black wine I just couldn't put it into black might uh I just I really adore it and then this one here I used the six six nine yellow in polaroid so the six hundred yellowed has an aging around it I go to the dust and scratches and removed the cross to take the aging off because I don't want aging and in the six six nine it's less yellow green no aging but have a look if I take this off it's twenty put seven percent now if I just swipe along the word hope a city until it comes on it comes on really strong and I like that but I just took my layer down until I just liked it and I don't watch the numbers I watch my eye and then I'm like oh I like at the then I look to see around what I pay city I've dropped it back in and it's just amazing it's there for me straight away I also do something which I did a show on the videos last night that not many people does I flat in the layer now I work in one layer I don't work and lamb ask her weaken one layer so I flattened saved multiple images because I like to weaken one layer not for any other reason and then I re open the image that I've already laid into alien skin and I put a second filter on and what I love about this is I suddenly can go from um I can go and pop reds and then I can dissect rate I can go into fades like this in the significant difference from multi layering or using two filters and then having them at different filters gives me an entirely different look may you might get to do that manually and I'm doing it the heck way so he's gonna take my original image and just change the color curves whereas I'm like claire I'm just going to flatten it reopen it and add something else I can add three or four filters to an image um two one flat image and just keep making up my own so when people go what filter did you use it's like uh e mean because I died
Class Materials
bonus material with purchase
Ratings and Reviews
Aliah Husain
I loved this course! I purchased it as a beginner photographer, unsure of whether to shoot natural or studio light and how to get the best results. After watching the course, I am fully confident in my ability to use both natural and studio lighting in my photography. And most importantly, I feel I have the knowledge base to be able to experiment with lighting in any situation. I am both grateful and inspired by these two amazing teachers sharing their technical knowledge and a personal piece of themselves. It is clear that they genuinely care about making their students better photographers. Thank you, Sue and Felix!!!
Geri
This is the best lighting class I've done, including several in-person ones. Covers so much, and the contrast between and dialogue about the two styles (natural vs studio) was so helpful. I didn't think there was anything at all negative about how Sue spoke with Felix, which a few reviewers said. Clearly she has great respect for him, which she sincerely says at one point, and explains why. Wonderful to see specifically how they both shape light. So many topics are covered. Loved Felix's clear and specific explanations about studio lighting. This class is worth every penny.
Wasabi Ben Kenobi
This was a fantastic introduction to studio lighting, and one of the best courses I've watched on Creative Live. I've only ever done natural light photos, but I want to learn more about studio lights because I'm creating a basement studio. I'm already a big fan of Sue's approach to portraiture. Now I'm a fan of Felix's soft lighting approach, too. In this course, he demonstrates how to replicate natural light portraits with a simple lighting setup. With a big scrim, a strobe or constant lamp, and v-flats, you can do so much! I'll be watching this course again.
Student Work
Related Classes
Portrait Photography