Lessons
Lesson Info
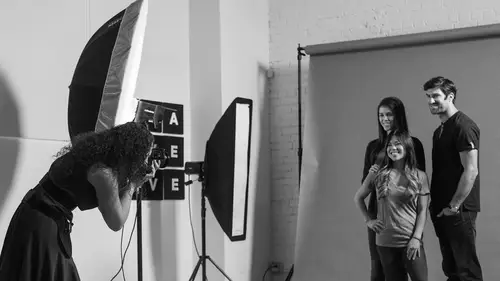
Depth of Field
Okay, so number two, and I'm gonna give you an assignment to play with in a second, but the second thing to consider when shooting groups is your depth of field. I loved shooting families in, like, when I... My old studio. I lived in upstate New York, so we had a lot of parks, and we had a lot of beautiful trees, and fall foliage. And so I loved photographing families where I would have the trees, and whatnot, in the background, and shoot a really narrow depth of field. But no matter what I did, I'd always notice that maybe the person in the front's in focus, but the parent's directly behind her out of focus. And that does not work if they blow it up to a large print. So I'm gonna tell you some of the things you've gotta consider if you are photographing groups, and decide to go with a narrower depth of field. I will say, for the most part, I shoot groups in the studio. Not exclusively, but most of the time. And I might be shooting them, say, on the brick background that we have here. ...
Or maybe on a gray seamless. And so if I'm doing that, I just shoot with a smaller aperture. I shoot at F/11, I shoot at F/13. I usually, if I'm in the studio and I'm not trying to blur out the background, I go for F/8, F/11, somewhere around there. Because then I know I'm gonna have enough depth of field. But I understand that that's not always the case. And maybe you're shooting group shots, in a venue, on a location, and that background is heinous. Like it's terrible, and you just want it to go away. So, shoot with a small aperture if you can, but if not, let's look at our other options. This is just a little note. Have you ever shot with a wide-angle lens, and you look, and there's a lot of depth of field. There's a lot, I mean, like everything's in focus. For the exact same aperture, and you back up and you take a similar frame and you use a longer lens, and there's less depth of field. Like, these rules, your focal length actually changes your depth of field. And also, your distance from the subjects actually change your depth of field. So for example, if I take a portrait of you from here, and then I take the exact same thing, four feet closer, there's less area in focus when I get closer. So there's several variables going on here. And if you're new to this, definitely check out some of the beginner photography classes that talk about how you control depth of field. But I do have kind of a quick tip thing for you to try out in a second. So let me give you the summaries, and then I'm gonna give you that tip. So for depth of field, A. You want to avoid really wide apertures, and I'll explain what I think about that. And then second, if you're going to shoot wider aperture, you have to get everybody's face on the same plane. Everybody's face needs to be the same distance, or as close as you can get it. Same distance from camera. So let's take a look at this. Alright, so for me, I usually try F/5.6-F/8, or narrower if I can. I avoid 2.8. But here's a fun little app, it's 99 cents if you're curious, I've got it here. I downloaded it on my phone. Let me bring this up. And what this is going to help you do is it actually shows you all of the variables you have to consider with figuring out how deep your focus actually is. Because for example, I'm going to type in a couple figures. And let's say I have a group, and it's three rows, right? And I have the person in the front, their eyes are about three feet from the person in the back. Like, depth-wise. And I do my calculations and it tells me at the aperture I'm at, the focal length I'm at, the distance I'm at, I have a half a foot of area actually in focus. So I would be totally missing focus on this group. My recommendation to you is not necessarily that you're on a shoot, and say, 'Hold on guys, I'm eight feet," and like type this all in. But it's actually really interesting to see how everything plays around. And then maybe you're testing this, and it actually gives you an idea. So, let's say, for example, I decide that I do want to shoot at an F-stop of 2.8. I want to shoot nice, narrow depth of field. And then my focal length, you know what, I'm gonna use my 85 millimeter 1.4, 1.2, okay? So I'm gonna use an 85 focal length. But, because it's an 85, and I'm shooting the group, maybe I need to back away a little. So let's say I'm gonna back away like 12 feet. So I'm gonna put that in, 12 feet, hit okay. And it tells me I have 0.68 feet to work with. So a little bit over half a foot that I can work with that will actually be in focus. So if I've got three groups of people, and their first row is three feet in front of the last, That is not gonna be in focus. But then I say okay, you know what I'm gonna do? I'm actually, I'm gonna switch over to my 50. I'm gonna switch over to my 50, but I'm gonna back up... Wait I'm gonna lie. Let's switch over to, I'm gonna compress distance. Because I said, if you use a longer lens, the front row appears to be closer to the back row. So let me say I'm gonna switch over to my 24-105, and I'm gonna shoot all the way at 105. So I'm gonna put in 105. I still wanna shoot wider aperture, but my 24-105 is a 4.0. So I'll put in 4.0. And because I'm using a longer focal length, I gotta back up. So I'm gonna back up now to 15 feet. And it's telling me I got one foot. So it's a little bit better for compressing people. I go uh, okay, you know what? I'm gonna have to go to 5.6 to get everyone in focus, right? Put in 5.6, now I have one-and-a-half feet. So all these things actually work together: your distance, the focal length you choose, the aperture you choose. So don't necessarily do all this, but it shows you what you have to work with. I know if I like to shoot with an 85 millimeter lens, and a family of four, and I wanna shoot at 2.8, I can totally do it. Because I'm gonna line up the kids right here, the parents behind them, and just lean them in. It's zero distance between the two of them, so I totally can shoot at 2.8, no problem with my 85. But then if I'm shooting a group of, you know, three rows of people, it's not gonna work. So play around. It's fun, but play around before someone's paying you to do it. That's my recommendation, because that's how I messed it up. So check out that app, I think it's like 99 cents. It works well. Alright, so if you are trying to figure out the whole depth of field thing, I showed you those three variables that I'm working with, the distance to the subject, and I'm working with my focal length, and I'm working with my aperture. I mean, these are some of the things that do affect your depth of field. So if you need to try different ones. Having a narrower aperture will give you more depth of field, being further from your subject, and then also, the wider your focal length. But then your wider focal length, in that case, makes people look bigger, so I'm balancing between these things. I use a longer lens, and I usually shoot somewhere, 5.6 or up. Okay, now this is the much more important one. As I already said, for perspective purposes, you wanna get everybody's faces on the same plane. But even more importantly, it's for depth of field. So whatever you can do for posing, just imagine, when I say same plane, it just means the same distance from your camera. And so I picture like, a sheet of paper that's running parallel to my camera. That's the plane. And I want everyone's faces to be as close to lined up to that piece of paper, that invisible line, that invisible distance from my camera. So that could be parents leaning in, everybody squishing together, whatever it needs to be. And you saw that in the last example when I moved people forward. So you'll usually hear me saying things like, 'Okay now lean forward real close. 'Line your eyes up above their head. 'Perfect, nice and close. 'No, real close. 'Like, this is gonna be real close.' And they squish together, and you hear things like that. But, that will be appropriate for a family, perhaps. In not like a portrait of like a corporate business portrait where there's groups of people. And so in those examples, I know, okay, I'm gonna go with more depth of field, I'm gonna have an aperture that's maybe F/11, and I'm gonna back up and zoom in instead of really having everyone lean on top of each other. So depends on what group exactly it is that you're photographing. So, one other thing. I dunno if anyone has ever tested this out. Maybe you heard of rules like hyper-focal distance. Basically what it means is, if you guys have ever tried this, if I focus on our group here and I focus on the front row, there's gonna be a little bit in front of you in focus, and then it will fall off behind you out-of-focus from a narrow depth of field. And actually, if I want the whole group in focus, it actually doesn't do me any good to focus on you. Because I'm wasting a little bit of focus in the front. So if you're in a group, you might not focus on the very first person in the first row. Maybe you wanna focus a third, or halfway in. There is math to this as well. Actually in that app, there's some information on that as well. Approximately how far from you you should focus to get everything in focus, but I don't know how many people are gonna be like, 'Okay that's 7.2 feet right there.' But just know, actually photographing on the first person, you're wasting some focus. So maybe, half or a third in. I would still make sure that you check that you have enough focus, though. Because then, maybe you only had a half a foot, so if they're two feet back, you're out of focus, I've missed it anyway. So, check how much focus that you have to work with. How much distance.
Class Materials
Bonus Materials with Purchase
Ratings and Reviews
joanne duncan
I got do much out of this course, not just for shooting, but posing myself! I’m getting old, it’s hard to get a good selfie! Seriously though, this starts with epuipment, goes through settings, clearly shows what doesn’t work and why, and what does work and why. This is the second Lindsay course I’ve watched this week, and I’m anazed by what I’m retaining. Lindsay spells it out for anyone to understand, I highly recommend this class, and any class Lindsay teaches. I already have another lined up to watch! Simply brilliant, value for money even if it wasn’t on sale.
Dave Hogan
I have several of Lindsay's course and was lucky enough to see her at the Photography show in Birmingham (UK) earlier this year. I think this course is one of my favorites and has so many "group" shot tips & explanations that it's a no-brainier to any photographer to buy this it. It's great 10/10.
Rebecca George
What a brilliant, fast, well-organized, packed-with-useful-info class!! Lindsay is amazing.
Student Work
Related Classes
Lighting