Lessons
Lesson Info
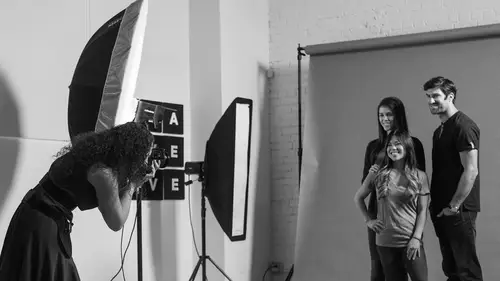
Shoot: Building a Group Photo
Alright, so, now I am ready to shoot. So let me, let's sort this. Thanks, John. And move a few things, give us some space to work with. So I'm gonna start off with focal length first, and then we'll do posing and lighting. Backing it up. Okay, I think this will be okay. Cameras, let me know if that's alright. Good, okay. So I'm gonna use this modifier because this is what I use for every group shot that I do, is this particular one. And we'll put it on the left-hand side of the frame, I guess. Okay. Get out of people's way. Great, okay, perfect. That's gonna be super bright. So of course, I do have to raise the light up. How I think of it is, if you are looking at any normal lights you encounter in life, it's not low, or it's not eye level. It's usually a little bit higher. But having it higher up is actually super helpful, especially if you're photographing groups with lots of different body types. Cuz hither up puts shadow under here, right? And it also carves out cheek bones. So...
for most people, a little bit higher is gonna be carving. Great, and I'll angle it. Okay, this is not the posing section, so I'm just gonna grab a couple people, okay? So can I have, I'll save you, because you're wearing a dress, I'm gonna save you. One, two, three, I'm just gonna have you come pose for a quick minute. Do you wanna take a seat, because you're wearing a skirt? Yes. Perfect, great. I'm gonna face you towards the light. We're gonna demo something. Perfect, and will you guys come pop back in our triangles? It's not the posing section yet, but, Come over here, okay, scoot up. So you guys are best friends, so you're just gonna hold onto her arm. Exactly, perfect, and lean in nice and close. Okay, now, the camera behind me I'm sure can see this. I said it's not the posing section, but if the pose sucks I feel bad, okay? What I want is I actually want you both to take one step back. We're gonna make this bad, and then just put a hand on her arm. Good, just like that. All right, so watch what happens. We're gonna take a look at focal length. John, will you take a meter reading? Do you have, oh, perfect, great. And I'm gonna be showing you an ISO 200, if that's cool. My goal is to shoot at F11 in this instance, because I wanna make sure everyone's focus, and I'm shooting in the studio, I'm not trying to blur out the background, but to do F11, you're gonna see what he's doing, he's cranking it up. The reason is the lights a little bit further away, and it's into this big umbrella, which divides and spreads the light, and diffusion. Diffusion cuts like a stop. It cuts the power of your light in half. So, if you're shooting with really low power strobes, you might actually have to bump up your ISO. You're probably gonna run into that. Nine? I mean, nine's fine, somewhere around there. Up a little higher now, 10. Perfect, 10's great. It doesn't need to be, somewhere around there. So, for example, if I come up and I'm real mean, Sorry, okay, I come up close here. So, I'm gonna be shooting at 35. Oh, wait, gotta turn my trigger on, right? That'd be helpful. Perfect. Okay, oh, so glorious, okay. Oh, let me double-click. Sorry, guys, okay. So, that's at 35, and so she looks so much bigger. And then even, let me see, is she in focus? Okay, I was shooting at F10, She's not in focus. She's not in focus even at F10 when I did this. So, not only is it good to compress the group because of that, but also, I gotta compress the group for my focal length, because it's looking crazy. So, I'm gonna go from 35 to, let's say, 75. Okay, so same place. Yeah, so for 75 I've gotta back up just a bit. Okay, and you're gonna see, thanks, John. All right, ready? Okay, so that was from 35. I mean, they look like they're moving, but all I did is backup and zoom in. Now, let's see, thinking, thinking, thinking, okay. So, it's still kinda out of focus. Not terrible, but still a little bit out of focus, not gonna be good for a giant print. So, then I'm going to compress them, not with my lens, but I'm gonna compress them with themselves. So, I'm gonna have you guys come up close, and try to line up your head like your eye is the same place as her, perfect, and I'm gonna scoot you in a little bit further, so it's nice and balanced, perfect. All right, so same focal length, same everything, in a little bit more so it's even, perfect. Okay, great. So now, thank you. So, let's take a look at the shots. You're such cuties. (laughing) Okay, so 35 with distance, 75 with the distance between them, but backed up and zoomed in, and then moving just them. It looks so much better. So, that's the basics of the focal length, and then of course, of my depth of field. If I wanted to, whatever reason, John, can we put this at four oh? So, now I'm gonna try to shoot it if I wanted to blur out the background on purpose. And so what John's doing is, he's metering the light for me so that I don't have to guess, but I know I'm gonna be shooting at ISO 200, one 200th of a second, and F4, because I'm shooting with a 24 105, which only goes to F4. But, if I come over and do my little calculator, this is not what I actually recommend you do on a shoot, but let's say I wanna be at four point oh, focal length I'm gonna be around 75, and then, okay, I'm bad with distances, how far am I? Five feet, six? No, I'd say it's six. Okay, John says six, and he knows everything, sorry guys. (laughing) I have point three feet, at four oh, this distance, and 75. So, I have a third of a foot, so they need to actually be lined up for this to work. So, you know your jobs. All right, lean in nice and close. At four. Thanks, John. Good? Let's see, and squish, just because there's a, there you go, great. Great, so let's check my focus at the third of a foot. So, let's see. See, she's lovely, in focus. I mean, it's maybe a tiny bit out, but it's really not. It's totally fine. I'm zooming into several hundred percent. But, if I do the same thing, and I have them four inches back from here, gone. I wanna just do one more of those to show that. Can you just do that exact same thing, but just don't lean in? Perfect, okay. Let's see, and it's more out of focus, like it keeps progressively getting more out of focus. So, don't do that. All right, so now, let's go to lighting. I'm gonna be a pain in the butt. Can I switch it to a small umbrella? Yeah. We're gonna start off with bad, and then go to good. Smallest one is great. Oh, yeah, you're not done though, sorry. (laughing) Sorry. Sorry, not sorry. Okay, now when I say sorry, not sorry, I have to sing that song, right? Even if I don't want to. Can I have you come sit? I just need a little depth here, and then I'll have you come stand. Okay, nobody judge these poses yet, we're not in full pose mode. We're in light mode. Okay, just take a seat, be comfortable. Okay, I'm switching you though so that you guys are more even. Will you stand up real quick? Yes. Thank you. Sorry, John. All right, there you go. Back there, yeah. Okay. Perfect, better, great. Okay, so now you guys smoosh in just a little. And what are you giving me? Six three. Okay, so he says six three, do you hear me go (mumbles), because I'm doing my math, and I'm like, I mean, if I make them lean in, it depends on are they business, or are they family? Like, how far am I leaning them in? Can I go a little bit more? Yeah, where do you want it? Let's go to, if I can do nine or 10. Okay. I'm going nine or 10. Wait, hold on. I'm gonna do bad first. Bad first. He knows, bad first. Okay, so let's say I'm in my small space, and I know that if I bring a small modifier close, it gives me soft light. So, we're gonna you bring it in nice and close, so it's nice and soft, okay? That's perfect, John. Thank you. 16, let's go down a bit. I can also drop my ISO. At 200, I'm at 11 now. Perfect, okay, 200 and 11. So, 11, I feel confident I can get these people in focus. Like, not have to worry about leaning them in that much. Perfect, now, although you guys, like if you look, they've got their triangles going on here. Okay, so if you look, backing up while it's coming in. Okay, so they've got their triangles. They certainly do not look like a family, or like they're friends. (laughing) They are most definitely business associates at like a bank where they don't like each other. Like, this is what I get from this, okay? But anyway, so if you look at it, you can tell on the left-hand side, whoever's closest is getting the most light. And how it actually works is, this is how I think, you guys ever heard for the inverse square law, when you double the distance, you quarter the power? Have you heard that whole thing? I think of it, and this is just a complete semantics, just like another way to say this, let's say that this is two feet from her. If I take that exact same distance, okay, double the distance, quarter the power, the other way to think of it is, I lost 75% of my light. I don't know, when I say it that way, it seems like a heck of a lot more. So, if I go two feet, another two feet, I've lost 75% of my light. So, how it works is, right now, I don't want to be able to double the distance so quickly. So, if I back this up, let's say to here, if I double that distance, it's actually past her, so I'm not losing 75% of my light until way after her, so that's kinda how I think of it. It's like, "Oh, okay, if I pull it back, "it takes a further distance to double the light, "a.k.a., it takes longer to lose 75%, "they're gonna be more even." Roughly how I think of it. How did it work? So, I will make it better at the end, I swear. I can test it for you, John. 16 now. Okay, I'll do 11, and then drop it to 100. Okay. Okay, great. All right, now, so in this one, all we did is back it up, and it gets a lot more even. But, if you look, I mean, it's definitely a lot more even on them, but if you look at it, I mean, she still is closer, and so one of the things I could do is I could keep backing it up further, keep backing it up further, and it keeps getting harder and harder, so one way I could bring the light closer to her is not distance, it's moving it this way. So now, relatively, the distance to her has stayed the same in the front, but the distance to the girl in the back is actually decreased, it's gotten closer. So, I can flatten out my light a little bit, sorry, John. It's okay. Sorry, I think it should be okay. Do this. Thank you. If you were so inclined, I mean, you could use extension cords, but this is one of the reasons people use like B1s in the studio, it's the battery-powered strobes. These ones, I think we're using D1s, right? D1s. D1s. So, if you don't like to deal with cords, but then you gotta change the battery. All right, so same thing, lovely people. Okay, so now light is going to be more even, because I moved it around front, so the people on the right are gonna get a little bit more even light. But then, can I compress your distance, and bring you up real close? Okay, perfect, and squishing a little bit more. So then, this is going to be better, more even light. And so now, as you watch, I made it so she was even closer in the back, and now everyone has a lot more even light to them. Now, the next thing I run into looking at this is, okay, I improved the evenness of my light. If you look, there are shadows on the right-hand side of the face. If you wanted more even light, like no shadows, you could bring in fill, but don't make it the same power as the main light, or just flattens the crap out of it. What I would do in a studio shooting space is, I would bring in the big, large white reflectors right here. I'd bring in the white reflector right here, and it would just fill in the shadow side of the face, that's what I would prefer to do. But, the next part of this is, it's not bad, but let's say there's more of them. Let's say we double the size of this group, the light's not gonna be as even. Like, it's gonna have further to go to the sides, further to go to the back, so I'd have to keep backing this up, and as I do it, the light gets harder and harder, which is why I switch to a larger modifier. So, can we put that when here now? Mm-hmm (affirmative). I'm difficult, but John loves me. I say John knows everything. Anytime I've ever wanted to know some random thing, he always knows it, it's totally true. So now what I'm gonna do is I'm gonna back this up just a little bit more, sorry it's in front of your guys's monitor. I'll show you later though. Okay, so back it up just a little bit more, great. I'll change the angle just a tiny bit, and I'll probably have to pump this up. All right, John, let's hit test. 11. Oh, see, I know my lights. (laughing) I do. Remember how I said I use this all the time for a group shot? I knew, and I was trying to impress you all. That's at 200. At 200, yeah, exactly. Okay, here we go. And so now, I know you people in the audience can't see it, but it is softer light, more even light, and the shadow that was hard behind her on the right-hand side is not visible anymore. There's a shadow, but it's not as defined, and it's not as distracting. The smaller the light source was harder, created a more distracting shadow, and again, if we back them up towards that background, and expose for that, the background would also get more light, and it would also be a little bit brighter. So, this looks good for a group shot, but not so sold on your body language. So, sorry guys. You're cute, but don't like each other super much. Do you at all know each other at all? No, we all just met. I can tell. (laughing) So, let's say that, let's do the work thing first. Let's do like work like you like each other stuff. Okay, so that one actually wasn't too bad, it's just I wanna make sure that everyone looks good, so I usually actually pose everyone separately, so it flatters everyone. So, for example, for her right now, front left, sitting straight on towards camera, this is a pose without any shape, and when she has her arms next to her body, it actually makes someone look wider. So what I'm gonna do, I don't want her to do this, because that doesn't make sense, so I'm actually gonna rotate you. I'm gonna just rotate you this way. Perfect, just like that, and I'm gonna have you lean forward just a bit. Okay, note before I forget, you look like you have, will you look up to this light real quick? Are they non reflective glasses? No, they're cheap. Oh, they look pretty good though. I was gonna say, one of the things I watch out for in groups is glasses, when I'm posing people, because usually what I don't wanna do is pose the people in the glasses looking straight at the light, and then towards me, because what happens is it hits the glasses, and bounces off directly into my camera, and you get the reflection. What does usually help, and so we'll see, because I'm not seeing a reflection, so you might be okay, is changing the angle of that person. So, in this case, if I'm getting the reflection, I might actually switch those two, because here's what happens. Let's say I'm wearing the glasses here, and I'm looking over, the light hits the glasses, and that whole, you know the math thing, angle of incidence equals angle of reflection, so whatever angle it hits, it bounces off at that as well? So, if I do this, it comes in, and bounces off that way. So, instead of here, if I'm looking, it goes back at the camera, so I will change the angle of the people with glasses if necessary. All right, so I think you're okay though. Like, I really don't see any reflection. This is why I like to use my modeling lights as well. Okay, so same thing, I'm gonna have you poll your other shoulder back, good. Can you come in and put your hand right here? Perfect. I'm skipping, because of time, straight on to friends. All right, and so come on in real close, and I'm gonna have you put your hand here, and you're gonna put your hand here. Put it on the other side, and then put this hand here. You guys are married. (laughing) Surprise. Yeah, you look good and married, perfect. Great, he's like thrilled. Okay, but sit up real straight, put the top of your head, rotate a little bit that way. And you're looking a little bit separated from the group, so just make sure when you come in, good. I'm gonna have you been in this way just a little. All right, great. So, what I did is I kinda closed up some of the negative space. And you three are sisters. Great. Whatever. Sisters. So it's basically, you're sisters, and you're the only other sister, that got married. (laughing) So, that's what we went within this time. And that hand on the right-hand side, can you actually put it behind your other sister's back? Yeah, okay, good, perfect. Great, perfect. Okay, now, all right. So, it's a relatively static pose. I'm gonna and by just doing a bigger group, okay? That's how we'll wrap it up. So, I'm gonna have you guys step out, I'm gonna pull you in one by one, but I'm gonna, so again, yeah, whoever doesn't want, don't come up, okay?
Class Materials
Bonus Materials with Purchase
Ratings and Reviews
joanne duncan
I got do much out of this course, not just for shooting, but posing myself! I’m getting old, it’s hard to get a good selfie! Seriously though, this starts with epuipment, goes through settings, clearly shows what doesn’t work and why, and what does work and why. This is the second Lindsay course I’ve watched this week, and I’m anazed by what I’m retaining. Lindsay spells it out for anyone to understand, I highly recommend this class, and any class Lindsay teaches. I already have another lined up to watch! Simply brilliant, value for money even if it wasn’t on sale.
Dave Hogan
I have several of Lindsay's course and was lucky enough to see her at the Photography show in Birmingham (UK) earlier this year. I think this course is one of my favorites and has so many "group" shot tips & explanations that it's a no-brainier to any photographer to buy this it. It's great 10/10.
Rebecca George
What a brilliant, fast, well-organized, packed-with-useful-info class!! Lindsay is amazing.
Student Work
Related Classes
Lighting