Lesson Info
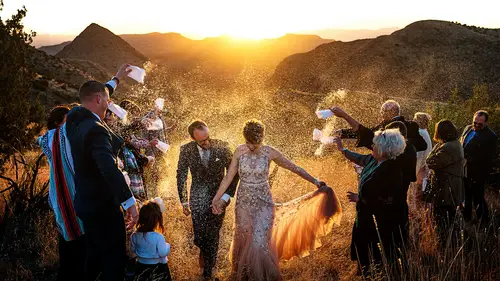
8. LIVE SHOOT: Creating a Silhouette
Lessons
Class Introduction
01:33 2How to Analyze the Light
06:53 3Leveraging Video Light
03:26 4The Portrait Formula and Maximizing Opportunities
08:17 5Scouting Best Practices
10:55 6The Importance of Playing
09:32 7LIVE SHOOT: Safe Portraits and Creating Reflections
08:06 8LIVE SHOOT: Creating a Silhouette
06:30Lesson Info
LIVE SHOOT: Creating a Silhouette
All right, so, what we're doing here, with the two of them, is we have a very strong light source, and we're in a much darker environment here. So, we're gonna have them in a silhouette, and again, we're gonna start very, very simple, just silhouette them against the window, and then, start incorporating interesting elements in the form of these light bulbs here, maybe some of the reflections, and really let it evolve into something a little bit more interesting. So, what's important is you guys are gonna face each other. All right, Katie, you're gonna pass your arms over his shoulders. Good. Now, if you could pass your arms around her waist. Good, and get your bodies really close together. Good. You're gonna stay profiled, so, towards me, so, really looking at each other, and then I might adjust you a little bit. Bring your bodies close together. Yeah. There you go. Good. All right, so, now, what I'm looking at, is just the way that they are framing within the windows behind them, and...
I want to try to get as much of a clean background as possible, so, together, Mark and Katie, you're gonna take a little step back in Katie's direction, so back, but stop. Right there. Perfect. So now they're framed perfectly in that one window, which is what I want. I'm going to draw up my eye soul, and then increase my shutter speed, so once that's figured out, good. So first photo that I might take would be something like this. And, as you'll see, this is showing a lot of the literal elements. I'm seeing too much of the wall, too much of the floor, too much of the light bulbs. The elements are there, sure, they're silhouetted against the window, but, I can tell where they are. I can tell that they're in a locked space, that they're standing in front of this window, and it takes the viewer out of that creative abstract mindset. So, let's try to clean up the frame a little bit, and make it a little bit more interesting. So where you guys are is perfect. I'm going to simply zoom in a little bit on the two of them, eliminate any of the literal elements. (shutter clicks twice) And then, so frame number two, you guys can see how we've eliminated any of the literal in the photo, and we're really just focusing on the two of them, making it a little bit more mysterious by eliminating anything that's irrelevant to the frame. So now our next step, we're gonna just try to perfect the frame a little bit. So you guys are gonna come in just a little bit closer together. Good. Keep looking at each other. So, Katie, bring your face a little closer. Good. Chin down. Mark, you're gonna chin up. Not so much. Come back. Good. All right, come closer, closer, almost touching, but not quite. Mark, just chin up, ever so slightly. Good. There you go. Good. And just a little bit closer. Chin up, just a bit, Mark. Wonderful. The reason why I'm making these tiny adjustments with the "Closer" and "Chin up," "Chin down," "Chin up, chin down," and "Closer, closer," "Chin up, chin down, is that I'm trying to almost create like a puzzle piece shape between their two faces. All right? To demonstrate sort of the bad version of this, so, you guys, look at each other, move your faces close, nose to nose, good. So this is what we wanna avoid doing. When we have the hose to nose, it creates a very tight space between their faces at the nose level, but then a very wide opening around their mouth. And it creates this visual imbalance in the photo. So by placing chin up, chin down, and really close together, we create this even space all through between their faces, so that's really what I was looking for. So, again, we're in a good situation. Let's see how we make it a little bit more interesting. Maybe, let's add a little bit of a reflection. I'm also gonna go vertical on this one, which isn't my natural instinct as a photographer. I love the horizontal frame, it's just how my mind sees. But, what I do like here, is that we have so much height with the windows, and it emphasizes some of that negative space. So, let's switch to a vertical frame. So frame number one, maybe a little bit, to a little, I'm seeing too much within the room. I'm gonna go a little bit more abstract, remove some of those distracting elements. All right, when you guys are ready, just bring your faces a little bit closer. A little bit closer. Chin up a little bit, Mark. You as well, Katie, just a little bit. Chin up a bit more, Mark. Okay, get closer. Good. Hold it right there. (shutter clicks) Okay. So now we have a clean vertical frame, with interesting highlights. And let's add a bit of a reflection to really bring it home. Move your faces closer together. Closer, closer. Chin up. Good. All right, good. Beautiful. All right, and you guys hold there, you're perfect. I'm just playing around, just trying to perfect my frame. What I'm doing here is, I'm moving my reflection around, really, just try to make it as interesting as possible. (Click) Chin up a little bit, Katie. Get a little bit closer. Good. Hold it. (2 Clicks) (Click) Beautiful. So, what tends to happen when a couple holds the pose for a long time is the energy drops down. What we really want to make sure that we cover is that their pose is believable and that we feel that they're connected. So, what I did, my mental state was to first figure out my framing within the camera, and then give them the directions. So, get back to "A little bit closer," "Chin up," "Chin down," which really recreated, ever so slightly, that bit of connection between the two of them. All right so, here you guys are, you're gonna stay there, we're just gonna turn on the lights on the back wall over here.
Ratings and Reviews
Sara NAomi
So love the way Daniel explains the thought processes for the images. Calm mental state...so very very helpful. The D+D pair are an amazing photographic team from the feelings, experience, teaching and the results of their vision. So want to take a class with them in person.
Carlos Rosa
Amazing, very short compared to other classes that I have, but it's really relevant, he goes straight to the point and there's a lot of great info, and that's what makes this class so good. I really like his style of teaching, very simple and clear, and that's what we need.
Iris
Excellent course! Daniel explains in details how to take the pictures and how to retouch them later. I like his easy and clear approach and the use of a lot of examples. I recommend this course to anyone.