Light Painting Processing
Lesson 5 from: Lightroom and Photoshop for Landscape PhotographyRandy Van Duinen
Light Painting Processing
Lesson 5 from: Lightroom and Photoshop for Landscape PhotographyRandy Van Duinen
Lessons
Class Introduction
08:18 2Luminosity Mask Image Enhancement
15:50 3B&W Conversion in Lightroom
04:48 4Using Lightroom and Photoshop for Great HDR Images
12:19 5Light Painting Processing
05:58 6Panorama Processing and Correction
10:12 7Sky Replacement
06:52 8Smart Objects
14:26Lesson Info
Light Painting Processing
And the next one we're gonna work on is light painting. So with light painting, I love light painting. I go out west, I teach it. It is one of those things that is just fun to do. You can do it with inexpensive lighting. Again use a flashlight that I can buy at Walmart for $35. I mean, it's great. And you can go in there and really play with it, get creative, and do a lot of fun stuff. I paint landscape. I also paint architecture that I do, I light paint that. Do tabletops with it that come out great. So there's a lot of different things you can do with light painting. And it's pretty much all the same process. We're gonna go ahead and light paint different areas and then we're gonna go ahead and blend them together using the lighten mode. So let's go ahead and start with our three images. That's one I shot just for the sky. That's for just kind of overall. I got inside, and a little bit more inside. So let's go ahead, select all three of those, and open them up in Photoshop. So photo,...
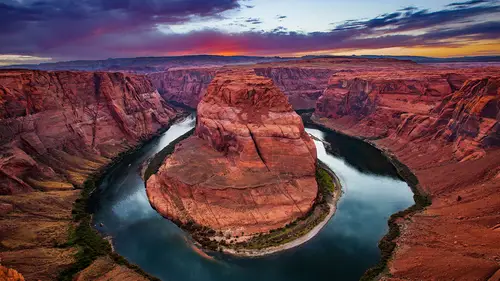
edit in, open as layers in Photoshop. Now we got four images, so this might take a minute, but hopefully it won't take too long. Glass of water. And I think we're almost there. All right, there we are. Was that the last one? So there's our sky, our kind of flat one, and a little bit more dramatic. So I'm gonna go ahead and take this one right here and say that's my base unit, so I'm gonna put that on the bottom, that's what we're gonna use. But first of all, I wanna get the sky in. Now, some people like black skies and white stars. I like mine a little bit bluer. I think it adds a little bit to it, so when I process these in Lightroom I probably adjust the color just a little bit to make it a little bit bluer than so much black. So I'm just gonna use my quick select tool, I'm gonna come up here and select the top part, select this little window, and this little window here. And, if you didn't know, this is Double Arch, it's in Canyons National Park just outside Moab. It's a great place to photograph, there's just so much. I love going out there to photograph. So now we have this, all I'm gonna do is create a mask. Just gonna create a new mask. Yep, and guess what? You need to be on the right layer when you do it. So go ahead and click on it, and there we go. That came in really, really nice. I like how that's working. So that's our top. Now we're gonna go for our next one. Now you see how this really kind of did some lighting around here? So we're gonna go ahead and click on this and just change the blending mode to lighten. So by doing this, we're bringing in some more interest in the rocks and bringing this arch a little bit more prominent over here. Few other things. Now the last image we have here is a really flat image. I just wanted to have something that I had so that if I needed to fix a few things it was just add light evenly all over it. I don't want it to be overpowering, so what I'm gonna do is change the blending mode to lighten, and then I'm gonna go ahead and add a mask. So I'm gonna hold the Option or Alt key and create a new mask over it. It fills it with black automatically, and now I can go ahead and use my paintbrush tool to paint in where I think it needs a little bit of help. So I'll make sure we're on our brush. We have our white. I'm gonna go with 50% and a big brush. Now one of the things I didn't like was how dark it was on some of these edges over here. So let me zoom in a little bit. So I'm gonna take this brush. Actually I'm gonna use 100%, just so you can see. And you can see I can start brushing in some of that shadow. Now that's way too much, so let me go back and use 40%. I can just kind of paint in a little bit more detail in some of that area that was getting kind of dark there. I'm gonna do that along the edge, along the whole thing here. And that to me, made it look a little bit more natural. Next thing is, I thought these edges were a little dark. So I'm gonna go at 20% and just brush in a little bit more lightness. So this is, by doing a flat painting too, you can go ahead and do a little bit of this that kind of helps sell it a little bit. I'm gonna take those off a little bit. So this right here is just helping us blend it in a little bit more. Really helps on the tops. I'm gonna take that down. So we got this and I like my sky, but I think it's too bright, and I don't think it's contrasty enough. So I need to adjust that. I'm gonna go ahead and hold the Option key down and click on create a new layer. I mean, adjustment layer. And I'm gonna go to curves, and I'm gonna click Use Previous Layer to Create Clipping Mask. And now you can see a little arrow here and it's pointing down here and it's saying, whatever you do on this layer will only work on the layer below it. And first of all, I'm just gonna take it down a little bit. I think it was just way too bright. I still like the color so I don't wanna change that. But I'm gonna change just a little bit to bring it little bit more together, and that's how I'd do this image. Light painting is a lot of fun. If you haven't done it, go out and do it. You will just enjoy the heck out of it. And it'll stir some of your creativity.
Ratings and Reviews
Tim Cooper
Fast paced but excellent demonstration of enhancement techniques