Lesson Info
12. Library Module: Picking Winners
Lessons
Class Overview
05:48 2What Is Lightroom Classic?
03:18 3Lightroom Classic vs. Lightroom vs. Photoshop
07:34 4Shortcut Keys
08:33 5An Overview of the Interface
11:48 6The Catalog System
09:34 7A Look Under the Hood
11:04 8Workflow and Presets
02:42Library Module Overview
07:44 10Library Module: Importing
50:13 11Library Module: Organizing Your Images
27:57 12Library Module: Picking Winners
20:18 13Collections and Collection Sets
23:52 14Develop Module Overview
11:14 15Develop Module: Global Changes
34:36 16Develop Module: Local Changes
42:37 17Virtual Copies
14:19 18Building A Develop Preset
14:38 19Exporting and Export Presets
32:32 20Creating a Watermark
17:53 21Creating an Import Preset
10:28 22Photoshop/Lightroom Integration
32:30 23Catalog vs Lightroom Preferences
21:35 24Managing Catalogs
30:08 25Tethered Shooting
14:37 26Publish Services
13:52 27The Map Module
12:32 28The Book Module
15:38 29The Slideshow Module
25:50 30The Print Module
20:15 31The Web Module
11:03 32Creative Cloud Integration
11:03 33Class Wrap Up
01:13Lesson Info
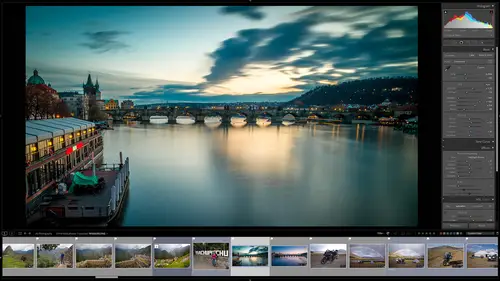
Library Module: Picking Winners
now we've added all that metadata. Everything's in our library. It's time to pick the winners. And I say picking winners. We can look at our photo shoot, our sets are vacation photos, whatever we've done that wedding that we just shot and we want to go through now and look at all those images, group them together. We did that with stacking and then inside of those stacks are inside the groups inside of the different sessions that we've done. We need to say, okay, this one is okay. This one is okay. This one has to go get that off the hard drive. Um, and then of the ones that are good. We might want to say, okay, these are all good. We've got 10 of them that are really good. How do we decide which one is the best of these 10? Sometimes it's hard to decide that. And light room classic has tools to help us make decisions and then we can help do things like categorizing things. Things maybe you have been published or not published or things are private. How do we add that kind of data? Wel...
l, we're going to do that right now. Let me show you this chart that helps explain the workflow of what we're going to be doing. The first thing we're going to do is we're going to add flags. Flags are going to save your bacon. These are the things that will allow you to choose and un choose different photos. Then we're gonna use some tools, the survey tool and the compare tool to take our flagged photos and figure out which ones of those are the winners. We can even add some star rating. So it will be the winners of the winners. We can add color labels. And then finally, we're going to talk a little bit more about creating collections and why you want to do that. So think of this sort of like as the playoffs. So adding flags says, okay here, the the pictures that made it to the playoffs and then using the survey and comparing star tools, those are the ones are saying, okay, here are the winners of the playoffs and then finally adding color or whatever you want to those images, it's like, and here's the grand champion. So you're culling the herd, you're calling those images until you finally get to that one that's ready to be put on a poster or on the cover of your wedding photo album, whatever it is. So we're gonna hop into Light room Classic. We're still in the library module, which is great. We have so much fun here and we have again this Casey all these Casey photos. How did I get to the Casey photos? So what I did is I'm in all photos. I just went up here into my text. Search any searchable field that contains Casey and I enter and when I did I got all those files, I didn't have to go over here and find the folder. That's the joy of adding all of those keywords. So now we have all of these images and we can start working on them. So for this we don't need this uh all these little thumbnails down here, we don't need that. So I'm going to hit shift tab to get rid of all of my panels and then tab to bring in the side panels. So I have that done. And then what I'm going to do is I'm going to go to the left here, click on this triangle to get rid of that left panel. So now I have a lot more room to sort of work with I guess I don't even need this right panel for this. We can kick out all the panels. Why not? I could have just hit shift tab. Boom, get rid of that. Okay. So what we want to do here is we have these sorted by our stacks. We did that previously. What I want to do is go through each stack one x 1 and figure out which ones are the winners. And so we can do that. So I'm going to go instead of right clicking and going to stacking. I'm going to go to the top of the screen, way up here to photo and then stacking and then expand all stacks. Mm That expands everything. Okay, so this first group right here, um what's this first group right here? We want to choose if there are any good ones in this. So what I can do is I can I'm going to double click and it's going to open this uh to a full screen view. I'm gonna hit t to hide that toolbar, we don't really need that. And so all I'm gonna do here is I'm going to use my arrow keys right and left To go through these one x 1 if you want, you can see your thumbnails here on the bottom or you can hide that so you can have more room to see it. I'm gonna leave this up just so we can sort of keep track. So what I'm gonna do here, it's one at a time. I'm going to go through these images. So this one I like it. So what I'm going to do is I'm going to hit P. And P. Is going to flag that as a pick. So that is how that works. P I'll go to the next image. This one. I don't like that one. This one. No she's out of focus. This one has got some something in the background So I can just quickly go through these 1x1 and say okay I like that one. P flag as a pick. If I accidentally Flag one is a pick, I can hit the keyboard. Shortcut you to remove the flag. So p pic you remove. So just remember up unpicked pick unpick but so we can do that. The other thing we can do is I'm going to hit G to go back to the grid view. We can go in and there's a little flag in the upper left hand corner. If I see an image I like, I can just hit that as well. I almost never use this because the image is so small. It's hard to know. Is that a pick or not? So that's one way to look at these different things. You can do it 1x1. But this looking one x one, you sort of lose your spot. Like I don't really know, there's a better way to do this. So if you're looking at a group of images, it's hard to do that one at a time, one at a time because you end up, you'll just start picking everything and then when you're done you're going to look at your grid view and go like, okay, I picked everything except for three images. There's a better way to do this. So the way that I like to do it is using something called the survey mode. This is fantastic. So let's go back over here. So we have, let's say we have this next stack of images is the next group of images, they're all very similar. So I'm gonna click the first one. I'm going to click the shift key and hit the last one and that's going to select all of those images. Now what I want to do here again, I need to turn on my toolbar so I'm gonna hit t to turn on the toolbar. You can see down here we have some little icons. So the first one is the grid view, that's what we're in right now. The second one is the loop view. So that is the view that you would see the image full screen. And then the next one is the compare view. The next one is the survey view. And so notice at the end of these there's a little letter in parentheses. That's the shortcut key. So I'll be using the shortcut keys. So we're gonna go to the survey view. So in is the shortcut key for that. So before I forget I need to remind you shortcut keys are going to save your bacon. So if you've already forgotten what the shortcut key is to see the shortcut keys, remember it is, we'll go back over here, command or control. So commander control and then forward slash. And that will show you the library shortcut keys. So if you're going mark, you're going so fast. I don't know what shortcut key you're using. Don't forget the command forward slash or control forward slash. That will show you all of these shortcut keys. You'll use these a lot. Okay, so we've selected all of these images now. We want to narrow them down. So what I'm gonna do here is I'm going to go to Survey View. So again I'm way down here there's this little icon right here that I can use or I can hit the I can hit the shortcut key which is in so I'm gonna hit in and it gives me this new view here. And for this, I'm going to hide the filmstrip so we just see this and now take a look at each of these images. There is a little X in the lower right hand corner, there are some dots in the center. There are two flags to the left and to the right. There's a little icon there. And so what we can do is we can quickly go and either pick them, delete them or rate them. And so what I normally do this is my workflow, you can do it however you want. I look at all the images and the first thing I do is I say what images are so similar that I don't want them as a candidate for being picked. So this one her face looks weird in that angle. So this little X. If I click that it goes away now, here's a note, something that's very important to understand in the survey view. When you click the X. It's just removing it from that view is still in the catalog is still in the library. Nothing has changed about that. It's just this special tool that we're using to look at the images. What we're trying to do is remove things that aren't winners. So we're just removing things until we get it down to the one winner. So let's go back. So I've removed that one. That was obviously not the winner. These two here, actually, these three are so similar. I don't see really any difference. This one has too much headroom. Get rid of it, it's in here, what's out of focus, her eyeballs out of focus and get rid of that one. Um That one is a little bit better than this one so this one can't be the winner. And this one here I don't like that expression, this one her eyes out of focus, let's get rid of that. She's out of focus there. I sort of like that I like that these two are similar so I like this one better than this one. Get rid of that one. This one's just not calling out to me so let's get rid of that. This one's a little soft and the focus and now we're down to four right away. And so for me this one is soft focus but right now this one right here is already jumping out at me as the best so I can click on that and then I can hit P. So that is flagging as a pick. So again I hit P. To flag this one as a pick. And we can also add star ratings. We can add one star two stars three stars five stars. So we'll get to that a little bit later. Um I just double clicked on that and it opened it up full screen but we can do that kind of stuff. This one here lets say that I don't know she's blinking or yawning or something. What we can do is we can uh we can hit X. And set that as a reject. And if I said oh no I didn't mean to reject that. I can unpicked by hitting you, takes that reject away, I'll show you what rejects do. But anyway you're just in the survey mode removing until you get to that winning image. So this is the winning image. I like that I've hit P. For pick and so now if I hit G. To go back you can see that we have one image picked. So there's another image. If I want to say just show me the ones that I've picked. I've already selected Casey but now I can go to attributes And flag and it just shows the one that we have picked. And so those flags are fantastic. Now this I just hit none and it I should have kept my text filter which was Casey which is really cool. Alright let's let me show you one other tool here. So that was the survey tool. There's another tool called the compare tool and it also is a lifesaver when it comes to that situation where you have a lot of really good images and you have to pick one or maybe two. So you're like, how do I do that? So here's how this are the compare tool works. You have a select, so that's the one that you've selected as potentially the best image and then you have a candidate. So this one comes up next to it and you say is the candidate better than the select. In other words, is this new one better than the existing one? And it says no, then you get rid of that one and you bring up another one, you're like this one better than this one, nope next. And you compare them side by side. And if this one is better than it now becomes the winner, and it's the one that everything is compared to going forward. And so what that does Is you can look at these one x one and by your own judgment, you've selected the best one image out of the group. Let me show you how it works. Okay, so we have this next set, and for this I'm going to bring up our film strips, so you can see how this is working. These are all very very similar. Okay, We have all of these images that look so similar and we have to pick a winner. So what we're gonna do is we're gonna go down here and we have this compare view, it's right down here. I'll zoom in and it's compare view X and Y. So you can either click on that or you can hit the shortcut key, which is C. I mean is click on this by the way, make sure you select the first one in the group, and I'm going to collect that. So now on the left hand side notice this says select in candidate. In other words, this one on this side is right now what you consider to be the best image and the one on the right hand side you're saying is this one better than this one? And so that's what we're doing. So what we're gonna do here is and you can sort of see on the on the film strip down here that we have a open dot open little diamond here. And so that is the select and the filled in diamond is the candidate. And as we go forward you'll see those icons change. So on the candidate. Is this better than this? No it is not in my opinion. And we have these little arrows right down here. So what we're gonna do is we're gonna hit the right arrow and go to the next image. And notice down here now the dot is on the next image over. Is this image this one on the right? Is it better than this? It's not next. Is that one better know? How about this? Is that better know? Is that better? Know this better? No, nope, nope, nope, nope, nope, nope nope. None of these are better. Oh I like that one. Let's say I like that one better. I don't, but let's pretend like I do. What I'm gonna do is I'm gonna say now this candidate, it wins. It's better than the select. So down here we have some icons. So it does a really cool thing. So this one if I zip over and hover over it, it says make it the select. So in other words, what it's saying is take this one over here on the right hand side, put it over here as the winner. So that's what I'm going to do, click. Okay, now that's the winner. We can continue our journey of seeing. Is there anything better than that, nope, nope, nope, nope no. Oh I sort of think I do like that one better. Make that one the winner. Okay. And that's the end of that bunch. So this one right here one so I'm going to hit P for pick and now we have a winner of that group. So there are two different ways that you can call your images or three, so you can just look at them all one by one and if you see something you like hit P to pick that, say, yep, that's a good one, yep, that's a good one, You've got a group of images, you're not quite sure which ones of those groups, You can use the survey tool to bring them all up. and then by process of elimination you can say this is one or two of the best and hit P to pick those. Or you can use that compare tool to say is there anything better than this? This one? No this one. No this one. Yeah that was better. Okay, how about this one? And you just go one by one until you have the winning candidate. It's really really cool. Okay, now that we have all of these things picked, let's go and take it one step farther. So here we go, we're going to go on to the very top here. We've already filtered these by Casey. The next thing we need to do is go to the attribute and then select show me the flagged images. So now I have Undo this to make sure. Yeah. So now we have four images. Okay, these are all good images and I can hit in and see all four of these side by side if I want to end again. Um So you know that it's there or G to go back. So which one of these is the best. They're all pretty good. But maybe we should rate these from best to worst are from best to really best. So what we're going to do here is I'm going to go back into survey mode. So again, I'm heading in to go to survey mode and then what I'm going to do here is which one of these is the very best for me? This image right here is the best. So I'm gonna rate that five stars. So I can do that by clicking these little dots and it'll say five. Or the other thing that I can do is I can just hit five on the keyboard, I hit four, it's stars 321 zero. And so just by hitting the number, you can say That is a five star image. That's a four star image. That's a two star image, That's a one star image. Now, if I go back to my grid by hitting G. I have pics and I have ratings. Now, I can even filter these even more. And so if I said I want to see all this stuff by Casey have done that that have a flag stuff that I've picked. Okay, I've done that and I want to see the best of the best. So just show me anything that's four stars are greater. And so now we have our two images that were the winners of that batch and that is how all of that stuff works. And so once you have all of your winners, you're ready to take those winners and do some developing and processing them and getting them out to the world. And you'll see as we go through and are starting to get into these different modules that I have used all of this sorting um extensively. But one of the things that we would like to do is make some collections. So what if we had a great year? So 2020 was a great year for photography. And we had a bunch of winning images. And he said, you know what? I'd like to have a collection of all of my pics that were scenic photos. And I'd like to have a collection of all of my pics that were in the studio. I'd like to have a collection of all my best uh wedding photos or whatever that is. I want all my night shots, I want my star shots, I want my whatever you want, you can make collections and you can add and subtract things to collections. You can do it in two ways, you can do it automatically using smart collections. You can do it manually by manually creating collections, and so we're going to do that next.
Class Materials
Bonus Materials with Purchase
Ratings and Reviews
Karen Sessions
Great class - excellent content, excellent presentation. Thank you Mark, through this class, I finally understand the difference between Adobe Lightroom Classic, Lightroom and how they work together. And how excellent, there is so much more available to learn - photography essentials, lighting, Adobe products.
user-d55dc6
This is an excellent class to learn about Lightroom Classic. Since it's not the same as Photoshop, I found Lightroom Classic to be confusing and difficult to intuitively figure out. Mark Wallace is an expert and exceptional teacher for the program and I learned so much today in this free class presentation that I am planning to purchase the program so I can continue to have a solid understanding of Lightroom Classic basics. Thanks, Mark, for inspiring me to get back into computer photo editing with LR Classic!