Lessons
Lesson Info
Eyes Section
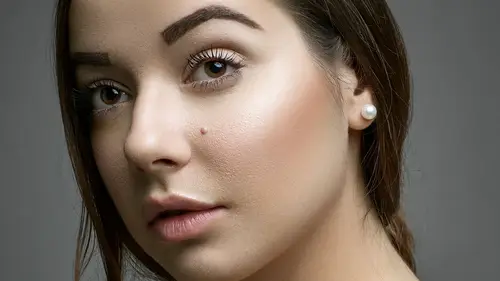
I wanna talk about the area under the eye, and I wanna talk about color theory a little bit. Because these brushes have a really powerful option, and that's the color overlay for these brushes. You can add any color to any brush that you have which is awesome, okay. If you wanna create blue eyes on a green eyed person, you can do that because you can add blue color to this brush. I'm gonna get really advanced in the next couple of sections, which, and we can talk a little bit more about that color. Color is important to kind of understand as we move forward. So the area underneath the eyes, when it comes to under eyes, there's something that happens with the blood capillaries, the capillaries under the eyes. The skin under the eyes is much thinner than the rest of the skin on the face. So what happens is, sometimes if people aren't very well slept, like I am right now 'cause I have an eight month old, you end up with blood, oxygenated blood that's pooled under the eyes. That is blue in...
color. So I don't have, if I got any nurses or doctors out there like, cool for you, because it's blue in color. So blue and pink. So if you've ever kinda, if you're one of those make-up obsessed people and love playing around with make-up. If you go into a make-up store, and you ask for an under eye concealer, it's generally gonna be a little bit more yellow and a little bit more red in tone, to offset the color underneath it, and to neutralize it and make it match the rest of your skin tone. So that's why I'm talking about color theory, that's why it's important. Because if I come up here and I click my New button to start a new brush. Then I come into my, come into my... Aye yai yai, I got lots of brushes here. Eye liner, eye shadow, eyes, eye whites. Maybe under eyes? Oh, yeah, under eye. So if I look at my under eye max brush, you can see that there's a little bit of a color that's been added. This is the opposite color of the blue underneath the eyes that usually there when you have under eye circles. So what that'll do is it'll neutralize the color that blue under the eyes. So let's come in here, let's use our brush. I'm gonna pull down my flow so that it doesn't go very far. And I'm just going to paint that under the areas that are blue and dark. So, can you guys see the before and the after there? So a lot of people just think that changing the lightness darkness value is all that you really need to do in retouching, but you really gotta kinda think further than that and think about color, and think about how different colors react with each other. So if you've got something that's bluer and you wanna make it more like the skin tone, you need to add the complementary color. So I have this super nifty Adobe color wheel thing that I just found the other day on Adobe. And so you can come in here and you can talk, what, okay, complementary color. So if we go to like maybe a skin tone. Anyway, so let's talk about yellow teeth, right? Teeth that are maybe a little bit too yellow, if I wanted to neutralize that, and I'll show you this as we move into the mouth section, but if I wanted to neutralize yellow teeth in Lightroom, maybe what I'd do is I would add a little bit of a blue tinge to that yellow, whiten teeth brush, which is gonna neutralize that yellow tone and make those teeth look more white, okay? Cool All right. Go back to Lightroom. So same thing with the under eye brush. I'm adding a color overlay, to kind of offset the bluish tone under the eyes. Now, I've also done a few other things to this brush as well. I've increased the yellow, and I've increased the tint to make it a little bit more I guess a little bit more pink. I have increased the exposure to brighten up the area under the eyes. I have increased the shadow areas, because they need to be brightened as well. I've decreased the clarity, because I wanna get rid of the under eye wrinkles, right? Decreased the sharpness. So all of these different things, are being applied to that area with one brush. This is where the power of using these adjustment brushes really comes into play, when you're retouching portraits. Okay. Let's talk about brows. Let's click our New button up here. We are going to add some shading into the brows. Aye yai yai. Brows, medium. 'Kay, I got my brush here. So for this brush, for this application, let's use our tiny little detail brush, but let's, actually and I do wanna use a kind of an extreme flow for this example. So I'll come in here, and I'll just go ahead and paint over this area. Bear with me please, guys. All right, so I've just shaded in this brow and that looks pretty darn crappy, if you ask me. Okay, so instead of coming in here and going whoa, that is way too much, I need to decrease all of these different sliders. How many of you would come in here and you would decrease this slider, and then you decrease this slider, and then bring this you bring this slider back more, and this slider back more? I mean that takes a lot of time, right? Just to decrease the effect of a brush? If you come to this brush disclosure arrow up here, and you close that brush disclosure arrow, what that's gonna do, is it's gonna take all of those different sliders for that effect, and basically mesh them into one slider. Then instead of pulling in multiple different sliders to make the brush less strong, you have one slider to click, and it's going to decrease all of the effects down to something that looks natural for you. Then if you want, you could open this disclosure arrow back up, and then all of your sliders have been decreased back to a more neutral effect, okay? So, when I learned that, I was like, what? I just can't even imagine all the time that I have spent taking each one of those sliders back in. 'Cause time is money, and time is valuable. So anything that I can teach you to kind of increase your time, and the amount of value you get from your jobs, is definitely something that I want to try and teach you guys. Okay, so. Let's look at the before, and the after. So under eyes, irises, and brows have all been fixed. I know it's pretty natural, you can't really see it. Oh, and it totally zoomed out. You know those under eyes just need a little bit more help. So what I can do is I can go back to my Spot Removal tool. I can use Heal or Clone at let's say 30%. Sometimes it's just the funniest areas that this thing thinks is good. So, let's bring that down a little bit more. And then, come in here. Just soften that area as well. 'Kay? Let's talk about accentuating iris color. So we've got an image here. Let's hit K to bring us immediately over to our Adjustment Brush tool. It's activated our Adjustment Brush tool. Let's use, let's talk about increasing the saturation in these eyes here. Which brush did I use, green, dark iris green. So if you see here I've got a few different brushes. I have brushes for dark irises, okay, where I'm going to increase the saturation where I'm lightening the existing eye color. But I also have light iris brushes as well, because the changes that are needed to change an eye color for a light iris is going to be different than the changes I use to change a dark iris eye color. 'Kay, so for her, she's got darker irises, so let's do dark iris, green. And you can see that I'm actually taking all of the natural saturation out of this brush, and adding my own color back in. So can you see that? So this saturation is completely pulled down, and then the color is being added back in by the brush itself. So she's got pretty interesting eyes, where it's green around the rim, but it's brown in the inner sections of the eye. So that's definitely something I'd like to play up. It's not something that I would wanna flatten, and just make the whole eye green. So why not use two different brushes? So we can do that. Let's switch over to my A brush. So we have a little bit of feather. Let's increase our flow to 80, so that we can see some of this effect. So I'm just adding the green color around the edge. Then I'll go ahead and accept that green color, then I'll come back to my dark iris, hazel brush, and add this brush into the inner sections of the eye as well. But again, I think that's a little too strong. So why don't we choose our trusty disclosure arrow, and then pull that effect down. Wrangle it back down a little bit. So the before and the after on the eyes. Okay? Definitely extreme, but remember, if you want to decrease that effect, just come to this disclosure arrow and pull that effect down even more, okay? Now if I wanted to change the effect of the original green color, I could do that easily by going back to my access pins, and clicking back on the access pin, to activate the original adjustment brush. So this access pin is adjusting the green color, and this access pin over here is adjusting the brown color. So I wanna go back to my green color, and I want to decrease that effect, 'cause I think it was a little bit too strong. So we'll decrease that effect as well. All right, hit return, it's gonna accept your changes. Then H key to hide your access points. Then the before and after. That's looking a little bit better. Lemme just add in some lashes. Just throw in some lashes in there. You guys like adding lashes? Have you ever had a client that has kind of a clumpy lash, and all of a sudden you're like, uh I gotta fill in that area, I guess I gotta go over to Photoshop. Nope, not anymore. All right, so I'm hitting New to bring up a new adjustment. I'll come to my brush here, and I'm gonna use it says eyeliner, but it's basically the same thing. Okay. So what I'll do is use my B brush, I'll make that brush super small. Then I'm just gonna add in those lashes, to fill in that area. Then if I feel like they are too saturated, right? Our trusty disclosure arrow again, bringing down the opacity of those. Then you can see the before and the after of those lashes. 'Kay? All righty, so any questions before I move on? So when you zoom into her eye, the white part, I notice there's a little blue in there. I'm assuming it's reflection from sunlight, or it must have been shot through a window or something. It's very subtle. Is that something you would touch up, or do you just kind of let it be? So interesting thing about eye whites. I spoke to a doctor, there was a doctor sitting in one of my classes, and he's like, the technical word for eye whites is sclera, and funny thing about them is, when you're younger, eye whites actually have a blue tinge, and as you age, your eye whites go from blue to yellow. So if you look an elderly person, their eye whites are much more yellow in tone. But if you look at a baby, they're actually blue. So a really subliminal way of making your client look more youthful, is gonna be taking that eye white, and actually tweaking it to be a little bit more blue. It'll definitely clarify the eyes, and make them look really, really nice. So that's something I probably wouldn't change. Could have been her contacts, could have been a lot of different things. It's not something that I would personally change.
Class Materials
Free Bonus Material
Ratings and Reviews
Cheryl Jones Schindler
This is an excellent class. I have covered over half of BenWilmore's complete guide to Lightroom, which I needed as I have mostly played around with the obvious sliders in Lightroom until now. So fortunately I had a little familiarity with brushes. This is so helpful for me to now use what I learned with more detail and more skills specifically for portraits of my family. I am so excited to use all this! Thanks!!!! She is an excellent teacher.
Lesa Wright
I very much appreciated Kristina's energy and concise instruction. She was very easy to follow and remained focused on each lesson without being repetitive or random. I learned great time saving tips that will not be difficult to implement. Thank you, Kristina!
Stacey Feasel
This was a fantastic, easy to follow course! So glad I took it!!!