Lessons
Lesson Info
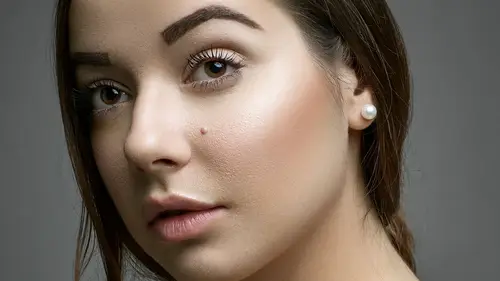
Retouching Skin
Different skin tones require different brushes for skin smoothing. All right, so for a darker skin tone, I may use different settings for skin softening than for a lighter skin tone. So let's hit K to bring up my adjustment brush. We'll choose our new feature here to get a new brush, and then we'll go to... So I have Skin High brushes, which are gonna be high skin smoothing. Then I have Skin Low brushes, which are going to be lower intensity skin smoothing. But I have one for dark skin, and I have one for light skin, because the settings are gonna be a little bit different with the way that light plays with skin. So we'll use Skin High Dark. Then this is the time when I like to use a visible mask when painting in the effect, because I think it's important to avoid areas of high contrast when painting in skin smoothing. I think that a really telltale sign of, oo, I have Auto Mask on, whoops. I think a really telltale sign of over-retouching is going to be when you have creases on the fa...
ce that look super, super smooth. So you can see that I'm kind of trying to avoid the crease of the nose and the nasolabial folds. There's your vocab word for today. From the skin smoothing. I don't like to smooth those areas, just because it just ends up looking too soft. We'll hit O off. Then we'll go back and forth between the skin smoothing. 'Kay? So the skin looks softer, but it doesn't necessarily look fake. Because the areas where there is detail was protected from the skin smoothing. So if at any point you feel like, so let me do skin on a man, so that I can show you one of my other tricks. So we'll come over to this guy here. We'll hit K to activate our adjustment brush. Let's use Skin High Light. Then we'll paint in, hit O so that we can see our mask. We're painting in this skin smoothing, 'cause we want nice smooth skin. Whenever I see stubble, I try and stay away from skin smoothing over stubble. I'll give you a quick tip for getting rid of stubble in a second. So hit O off. If I hit my before and after, that's pretty soft, right? For a guy? That skin is pretty soft for a guy, right? Little bit too far. So you could take your disclosure arrow up and decrease the skin smoothing. But what I like to do, is any time I can divide the color and the texture of skin into two different components and tweak them separately, I like to do that. So, you might think, well that's not possible in Lightroom. It's possible in Photoshop, you can do frequency separation in Photoshop, but you probably can't do it in Lightroom. Well, you kinda can. Kinda. It's kind of a work around. So we've got our skin smoothing access point right here. If you double click on the skin smoothing access point, you have the option to duplicate this whole mask and effect. So I'm gonna choose to duplicate this, and send it real smooth, way too smooth. Then I just like to click and drag it slightly to the side, so that we have our two different access points doing two different things. So this first access point is our skin smoothing. Then we have the second added skin smoothing. So if we go ahead and double click the word Effect, that's going to basically remove any changes for this second adjustment brush area. So what I can do now, now that I have this second mask. 'Cause who wants to paint in the same mask twice? Might as well just duplicate the mask, and then remove all of the settings from it. What I wanna do now, is I want to add back in some texture. So we have our noise slider here. So what this usually does, is it decreases noise from your image, but if we use this the opposite way, and we pull the noise slider down, we can actually add noise into an area, all right? So I'm adding noise into that skin, and I'm also gonna increase the sharpening quite a bit to bring back some of that texture. See this texture that's been brought back? That is a way to bring back that pore structure to an area of smoothed skin, okay? So you've kind of ostensibly separated the color, by decreasing the clarity, decreasing the contrast of the color, but then you've duplicated that effect, you've erased all of the changes from that mask, and then you've added noise and added sharpness to the second, and then together they give you a smooth tone, and smooth color, while still having texture. So that's a way you can really protect your skin texture when you're retouching in Lightroom only. Okay? Does that make sense? This is super important when doing skin smoothing for men. Definitely making sure that you duplicate that skin smoothing layer, and adding the sharpness and adding the noise back in to make sure you still have that skin texture. Let's zoom out and see what that skin texture looks like. So before, and after. So we've still go our pores, even though the skin is smoothed. So the skin looks smoother, but we still have our texture there. All right. So if you want to, there's this random little hint for getting rid of stubble. Has anybody ever been asked by a client, hey can you get rid of that five o' clock shadow from me? Did you just laugh in their face and say, no, there's no way to get rid of that. (laughs) Well, there, I don't know, it's weird. It's not meant for this, but if you take your Dehaze slider, and you decrease it by like negative 20, it kinda works to get rid of that. I don't know why, and I don't know how, but it kind of decreases the effect of that five o' clock shadow. So what I tell my clients is, I can decrease it, but I can't eradicate it completely. 'Cause if you wanted to eradicate it completely, you'd have to go in and get rid of each one of those little pores. Nobody's got time for that.
Class Materials
Free Bonus Material
Ratings and Reviews
Cheryl Jones Schindler
This is an excellent class. I have covered over half of BenWilmore's complete guide to Lightroom, which I needed as I have mostly played around with the obvious sliders in Lightroom until now. So fortunately I had a little familiarity with brushes. This is so helpful for me to now use what I learned with more detail and more skills specifically for portraits of my family. I am so excited to use all this! Thanks!!!! She is an excellent teacher.
Lesa Wright
I very much appreciated Kristina's energy and concise instruction. She was very easy to follow and remained focused on each lesson without being repetitive or random. I learned great time saving tips that will not be difficult to implement. Thank you, Kristina!
Stacey Feasel
This was a fantastic, easy to follow course! So glad I took it!!!