Lessons
Day 1
1Importing and Organizing Part One
55:47 2Importing and Organizing Part Two
38:08 3Tonal Adjustments
16:01 4Exposure and the Histogram
46:02 5Color Adjustments
35:06 6Fine-Tuning Individual Colors
43:15 7Maps
25:50Exporting
38:09Day 2
9Intermediate Organization
44:41 10Morning Q&A
38:53 11Localized Adjustments
1:00:57 12Image Enhancement
1:23:57 13Slideshows and Printing
1:13:47Day 3
14Shooting Tethered
30:52 15DNG Conversion and Keywording
50:15 16Keywords Q&A and Publishing Services
29:24 17Publishing to the Web
18:16 18Quick Collections, Dual Displays
13:12 19More Publishing Services
12:44 20HDR in Lightroom
23:18 21Advanced Adjustments
44:03 22Lightroom Preferences
30:02 23Sharpening Photos in Lightroom
31:02 24Book Module
15:02Lesson Info
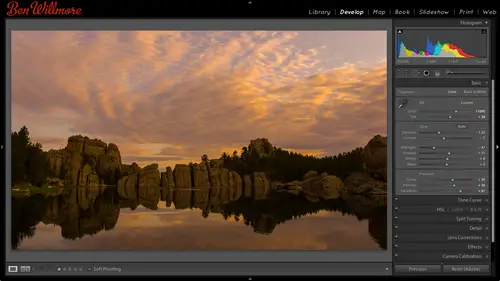
HDR in Lightroom
Hdr stands for high dynamic range and all that means is a wider brightness range than usual in your photo so here's an example uh when I was in southeast asia I shot these images in and this shot there's no shadow detail in the area close to the camera but I was able to get this temple in the distance looking fine well I set up my camera for auto bracketing and when I haven't set to auto bracketing if I push and hold the shutter it's going to take more than one shot and so those are weak progressively brighter here's the second shot that I got and here's the third shot that I got I believe the difference and exposure between these two stops on each so on this shot I have the shattered detail but the highlights out that out by the temple or just gone so I could try to take one of these other shots and just adjusted and I probably would do okay in fact let me see I would usually go for the brightest shot where you haven't really lost much of the highlights so this image I've lost a lot o...
f the highlights this image here if I've lost any highlight detail it's in relatively small areas let's first just see what can I get out of it in the developed module I hit the letter d for develop and let's just adjust it will take a look I'm gonna update the process to the new one has got the little exclamation point in the corner and I'm going to come in and bring up my shadows to see how much detail I can get amazing about detail comes out of there and my highlights a little bright, so I'll bring down my highlights as long as it's a raw file, I could get back detail where it looked like it was solid black or solid white, maybe a little, uh, clarity little, just a little vibrance and I'm just experimenting to see what I think I would like now, as I mentioned before, if there is a gap or a spike on either side of the history ram, I'll adjust the blacks or whites, and here they see a gap on the right side and I'll go to the whites and see if I want to get rid of that gap or not. Bring it over until it kisses the side. Looking at the history ram once it kisses the side, I'll stop thinking that's the highest I might want to go double click on the slider to see what it looks like without looks a little bit dollar I think I like it when it's up there. And with the blacks I usually like a smaller if black as I mentioned on the first day so hold on the option key ultima windows cracked my blacks and see if I could get a small area black okay, so to me this is just a single shot we haven't done hdr because we're using a single exposure and I'm able to get a pretty good image out of it. The reason I wanted to show you this before I get into hdr is to show you two things the first is people use hd arm or often than they need to there's a tremendous amount you could get out of your images without hdr, but then the second thing is if you do get a tremendous amount of shattered detail out of your image let's see the difference I'm going to hit the reset button. This is always started with that's what we ended up with least with the new process bird in there then the one thing you gotta look out for is an area that used to be dark you're gonna want to zoom up on it in in that area you're gonna want to look for noise because a lot of the times not so much on this image, especially with the texture of the brick in there if this was something that was overly smooth, you might be more noticeable but this isn't bad at all I'm actually rather amazed down here, I start to see it, I don't even see it in here or not, but I'm starting to see quite a bit of noise if I brighten the photograph. Mohr just so you can see what's here. Not that I actually think it needs to be brightened. You see the noise down there, and if we do hdr, we're going to not have that noise and that's, one of the big advantages. So if you ever take a single shot, you end up pulling out a tremendous amount of shadow detail, and when you're done, it looks really noisy, innit? Where it used to be dark, then you maybe wanted to have done hdr toe, avoid that noise. So let's, take this image, and I'm going to see if I can maybe make a virtual copy of it. I'll go back to the grid by typing g, all right, click and say virtual copy, and then I'm going to drag that virtual copy well, actually, is already in the folder called hdr, so that way we can compare this to what we end up getting when we do a true hdr effect were emerge multiple exposures, and you could see the difference between using a single exposure and multiple I'm gonna go back to the images that we have here and I'm just going to make sure there are no adjustments applied to them already because I don't know what I used these images images for last I teach a lot and I might have used him for odd purpose, so just right click on him, choose developed settings and reset that means act as if I've never opened them before it looks like that they had been adjusted and then let's talk about what we want to do to merge these into a single image where we can get that whole brightness range in one shot. In order to do this, you need to have something other than light room light room can't do it all by itself. If you own photoshopped, you could do it in to do it in photoshopped here's what you need to do the first thing you want to do is double check a setting, go to the light room menu and choose preferences in your preferences there's a choice called external editing and that means when I send this image off to another program what's it going to use for a file format and that kind of stuff all they want to do is make sure that this file format is set to tiff and not psd if it's set to psd, we would have to do ah wanted to extra steps uh in photo shop and in light room but if we use tiff it will be much more automated so I'm just making sure that stiff now I have these images if I want to do it with photo shop I go to the photo menu choose edit in and if I have photoshopped I should have choices in here for various photoshopped commands, one of which is merged two hdr pro so what's choose out I just downloaded for their seven point three I'll open anyway but it's interesting that it gave me that warning because I specifically went in downloaded updates when we're at lunch anyway it's combining these three images together into a single file that is going to present me with a large dialog box full of options where I could process the file right here using photoshopped you see all the sliders on the right side where we could process it I find these sliders don't give me is good oven end result is what I get from light room, so I'm not going to use them let's just take a quick look at what's in here though in the lower left these air the three exposes exposures were merging, I could speak and below each one it tells you how much of a difference there is between them this one is at the metered exposure like the default exposure you camera would give this one is too stops underexposed, this one is just over two stops overexposed the little green check boxes simply indicate that you're using all three images. This is a preview, but ignore that preview until we get into light room and we just need to do one thing in here and that is change a poppet menu that is called mode right there needed change it from sixteen bit to thirty two. When I choose thirty to all of these adjustments sliders that air down here, we'll go away in choosing thirty two means don't process the image yet just merge it together, don't adjust it, and if you haven't adjusted it yet preview looked pretty bad one other choice and here you might need to use, and that is if there's an emotion in your scene, if it's windy and there's trees that might be blowing in the wind or there's people walking across the scene or there's water that's in motion, then you'd want to turn on a check box called remove ghosts, and that would compare the images, and if there was any great difference between them, it would try to compensate for the motion by preventing you from having a little ghosted uh, areas in this image, I don't think there's any motion, so leave that turned off now going to click the ok button and it's creating a special file that's in thirty two bit mode it's not a file they used for most things instead it's a file that needs to be processed we could have processed it right here in photo shop, but we want to do it in light room because I think the results or better and it's easier to understand with the slider stew once it gets to this point where I'm in photo shop and it's just showing me the preview, all I'm going to do is choose save not save as where you type in a name just plain old safe since light room opened these images from a menu within light room it's smart enough to know that if I choose save it should save it in tiff file format because that's what um light room is set to and because I created it or started in light room it should automatically import it back in the light room right now I don't see my file names so it's hard for me to tell if it's here I'm gonna turn on my file names you see no if you want to see your filings around your image is go to the view menu and you have the choice of you options um and right now we're on compact cells we could expand them and we're ok they are up there just want to make sure I have get in here and that I'm working in the proper file so I have some raw files and hear that originally emerged but this one right here I can tell us the one that just got created because if I look closely at it I can see it's a tiff file whereas this one over here is a raw file kanan raw files and in cr to whereas this is our tiff so that's the file I want to optimize it just got created in here automatically I'm gonna press the letter d to go to develop and I'm just gonna optimize it and see what I could get out of it bring up the shadow see if I get some detail out of that uh maybe darken my highlights a little bit might bring the exposure up to just get even more out of it bring my highlights back down whole depends how much detail you want in this, uh, area little clarity. Ok let's say something about like that now let's look at the same portion of the image down and here remember when we saw a lot of noise previously I'm not absolutely certain that there's going to be no noise there but there's a much greater chance because one of the exposures that I fed photo shop was much brighter in that area and as you get a new brighter and brighter areas there's less and less noise so if it used that part then down here this should look much cleaner er I'll brighten the image up just like it did before to make that even brighter and don't tell or not but I think that is a bit cleaner before it was a lot more noisy I do see the texture of this and I do see a little bit of noise but I think it was much more pronounced on the other one so let me just find two not so I like it and then I'm gonna g to go back to the grid so now we can see two images side by side move them over here okay first this one which is an hd our image meaning it was three exposures that we merge together with photo shop and then processed in light room then this image is the same uh image but created from a single file in visually they don't necessarily look all that different and I could have possibly adjusted them differently this one's a little bit darker maybe I go back to develop is brighten it up a little bit to make it look more like the other so they're closer to matching now let's see put it in survey mode singh seem side by side and so one is a merged h t r the other is a single file let's see if we can see it when we look at the image zoomed up okay, I just gotta wait for itto load, all right? This one if I look in here and I don't know how well this will come across in the compressed video that's going out on the interwebs but in here I see a good amount of noise I know if you guys can see that yes, I could see that there and that's a single file whereas this is the hdr image and if I compare the two one looks dramatically noisy, the other one looks relatively clean. Can you see that difference? Can you guys see it out from the interwebs after it's all compressed so it's not that we always need hdr is often is a lot of people think sometimes you'll see people out shooting, you'll hear every single photo they ever take his click click click there taking three shots I was guilty that for a long time and I still do it quite a bit, but you can get quite a bit of detail that's raw file it's just going to be noisy in the shadows. We'll talk about noise reduction and maybe we can see how much we get out of that now. The problem with that what we've done so far is that, uh the software we used to merge our picture costs how much he may know what photoshopped costs I'm guessing five hundred bucks do you really need a five hundred dollar program? Just emerge three images together and save it back in the light? Um, sounds kind of ridiculous, but if you already own photo shop, why not solution? An alternative to using photo shop? I'll see I'll select the same three images in this time I'm going to go to the file menu and I'm going to choose plug in extras and that's where I'm going to find merge two thirty two bit hdr now you guys out on the interwebs won't find that unless you've already purchased a little plug in plug in, I think we're going to give away later on, and this is a little plug, and if I remember correctly, it cost about twenty bucks. So instead of like a five six hundred dollars photo shop, you're spending twenty bucks it's, a one trick wonder. All it does is merge together images and just say no if you purchase it and download it, let me first show you how you can install it. This is what I did when we're on break because I needed to type in a serial number didn't want you guys to see it, so I went to the file menu, I went into plug in manager and when the plague in manager came up, in the lower left, I chose ad when I chose add it brought up something for my hard drive, and I located the file that I downloaded. The website where you can buy this plug in is hd are soft dot com, and I chose add plug in. Then it showed up here I click the done button and that's when if I went to the file menu and shows plug in extras, I could find that particular entry. Then the very first time I used it, once I clicked merge, it asked me for a serial number that's what I didn't want to have you guys seen me type in so that's why I didn't do the installation. So anyway, here it says, you've selected three photos to be merged, uh, and it wants to know some options. First align images that's almost always good to have turned on because there's usually some movement in your camera, unless you're using a cable release mirror lockup and a tripod all three together there's usually movement in your camera, and this is going to align with three images to make sure that that they're nice and crisp. You need to turn on crop of line results, because if there was any misalignment. And the image is needed to be shift oh shifted to lined up you need to throw away a little info to get him in there if you turn that off you would end up with an image it's exactly the same size as your original whereas trained on you'll lose a few pixels on each side when it aligned it uh this one here uh horizontal and vertical shifts I think that's mainly good for on a uh tripod if I remember the one below is if your shooting hand held and you think there's a lot more motion remove ghost means if there's any motion in the scene you want to turn that on and it tried to reduce any weird looking artifacts dude, emotion and then finally we can say reduce noise so that we can have an even cleaner result from what we might have gotten a lot of photo shop because right here it's going to try to reduce the noise so it's only the underexposed images that really would show all the noise that's the dark ones and that's where the noise is lurking but if you don't mind your computer spending more time you can say all source images it will give you a cleaner looking at the result it's just gonna take a lot more time for to do it where is this is the one that would get the most done for the little list time then here says what you want to name the files merge file names I believe we'll take the first file name of your image and then we'll just add on to the end of it the numbers just like what the differences was in the files and you can add a suspects if you wanted I'm going to call it just hdr uh all right, so I'm not gonna do that you khun you don't really have to use most of these others if you use use half floating point format that's not very obvious your file size will be a lot smaller uh and I don't think you're going to notice really a difference quality wise and this little check box here is going to just make it so the brightness in your image looks relatively normal when you start instead of looking overly bright or overly dark uh it's kind of weird the names they give some of the stuff they were going to merge now it's going to take those images and just like photoshopped did it's gonna merge it into a single file when it's done it's just gonna plunk that single file right back here into light room it should have a file named the same as the first image that I used uh plus a little bit more text on it and hopefully it'll end up in this collection and we'll see it in a minute have you have you checked the quality of the nori's reduction of the plugin compared with light room and compared with photo shop? No, I haven't spent the time teo to go through that I mainly if I want if I'm worried about the noise and the darkest part of the image, I'll haven't do toe do it to all the images, but if it's something where I really want to get the utmost and I'm really worried about an image all adjust noise reduction in each image individually in light room, but I haven't done extensive testing to know exactly how much I'm gaining. I'd rather be out shooting, emerging and other things than, uh, doing a tremendous amount of testing let's see if it ends up getting reloaded in here if it doesn't get reloaded for some reason, it should in general, come in uh, then there's either something called previous import here or you can go to come on, we're usually you can right click on an image in, view it in its original folder and then choose synchronized folder and it would go look for one but let's see, because I've not seen it in here. You guys see our tears here to you, there's a tiff, so I'm going to go to its folder in the library to see where those photos really existed and it looks like right there, I see the picture here so it looks like it might not have been smart enough because I was working in a collection, uh called hdr, and it just might not have been smart enough to read or to place that in the collection. Instead, what it did is it looks like it placed it in the original folder, which is where it should be stored and just wasn't smart enough to say hey put it in that collection I was working in, so I'll go drag it in there myself, bring it up here and see what kind of result we can get these look like they got out of order. So anyway, I have it here, I'm gonna hit d to go to the develop module, and I'm going to process this one as well. If you want a lot more control than what you have here in light room hd arse off the same people that make this plug in also make a full blown hdr program called automatics, and if you're going to do a lot of hdr it's a good thing to have and I don't know the normal price for it, I'm assuming that might be either ninety nine or one forty nine somebody'll have to look it up ninety nine dollars. If you want to get it for a little bit less, you can visit my website, which is digital mastery dot com in the resource is section of my website I have a discount code that you could apply and that would give you some savings so anyway here it might be my end result let's zoom up on the shadowy area I'll brighten this even more just so you can see what kind of noise we might end up with and it's kind of a medium amount in this particular case I think okay, so anyway we have that as an alternative uh let's see if I can get these in an okay order again for some reason it's in user order I'm gonna put it in my file name the bottom my screen is where I change the sort order and let's see if we can then find this tiff file I'll put at the end and then somewhere in here I'm not sure why I don't see the ones I didn't previously not sure where they ended up but I don't want to spend too much time on that. I do want to though let you know that you can do this with extreme images I have one where I started this isa slot canyon that's a blue sky up there and I had to take a lot of exposures all the way down to like this to get into the really deep parts of this, and I was able to merge those together and get the blue sky and what's down here. Um, I believe you can see those on my website. Uh, the website for that one would be the best of ben dot com in the slot canyon gallery.
Class Materials
bonus material
Ratings and Reviews
Gordon
Since most photographers give classes on PS, it's just great having such a great teacher teaching LR. I don't have the time or money for PS and teachers like Aaron Nates work only with PS like most others. They all are great teachers and I watch even though I can't use what they teach, I don't consider it all a waste of time. Bill Willmore is one of those great teachers and goes into great detail. I would love to have the money to purchase this class as it's impossible to retain all the detail that he goes into.
a Creativelive Student
This presentation was awesome. After going through two versions of Light Room, I still learned more in three days than I learned in 3 years doing self study with hundreds of dollars worth of books. Ben Willmore works magic in Light Room and shares his expertise with all. This is a great course and a real bargain. Not only is the course valuable, but so is the PDF as a bonus with this course. Thanks, so much. See you tomorrow for Photoshop masking.
Rico
Ben Willmore is a fantastic teacher. The PDF download is superb and worth the price of admission. If there was a way for me to do the techniques that Ben is teaching, with him, while he is teaching the technique, then that would be a perfect learning experience.