Lessons
Day 1
1Importing and Organizing Part One
55:47 2Importing and Organizing Part Two
38:08 3Tonal Adjustments
16:01 4Exposure and the Histogram
46:02 5Color Adjustments
35:06 6Fine-Tuning Individual Colors
43:15 7Maps
25:50Exporting
38:09Day 2
9Intermediate Organization
44:41 10Morning Q&A
38:53 11Localized Adjustments
1:00:57 12Image Enhancement
1:23:57 13Slideshows and Printing
1:13:47Day 3
14Shooting Tethered
30:52 15DNG Conversion and Keywording
50:15 16Keywords Q&A and Publishing Services
29:24 17Publishing to the Web
18:16 18Quick Collections, Dual Displays
13:12 19More Publishing Services
12:44 20HDR in Lightroom
23:18 21Advanced Adjustments
44:03 22Lightroom Preferences
30:02 23Sharpening Photos in Lightroom
31:02 24Book Module
15:02Lesson Info
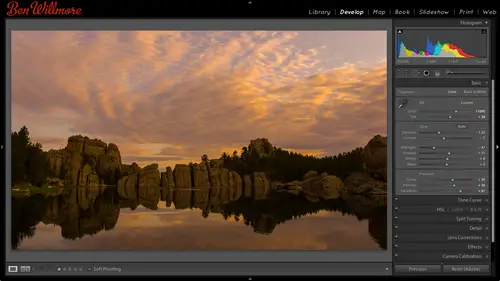
Importing and Organizing Part Two
So here under the library menu I can say filter by flag uh and I can also choose filter by rating to say only show me images that have I have certain status is like that all right uh any questions about what we've gone through so far we'll be going through those things again and again yeah it's just a matter of uh you know, prioritizing them to the most important element questions what do you know her wei have a couple that would probably I'm not exactly sure you may cover it later but just maybe just kickstarted max fellow like no why do you use folders rather than collections and how are they different uh we haven't talked about collections yet which is the only reason I'm not using collections uh in the case of using folders for iceland it's a personal choice if you want to use those or collections will talk about collections in another time in collections air like a virtual folder change is that I'm making collections don't affect what's on my hard drive changes that I make in fold...
ers are reflected on my hard drive so let's say I wanted to give a bunch of files to a client's I could do it with folders or just just how I like to structure my files like for iceland one thing I might want to do with folders he is I often create a different folder for each day I'm there iceland is the main folder than within it, says day one day, two day three and sometimes at the end of the name of that day, I will put the general location with a name of a town or east iceland or something like that, but I use collections, ah lot, we just haven't got into the concept yet, so you basically just asked carpaccio is question who said, I'm curious about how ben recommends organizing your photos in light room by event chronologically or something else. So you do event and then chronologically? Well, the way my folders air structured is on my big drive, which is the one that contains the majority of my photographs. I have folders based on year, so it will say two thousand nine, two thousand ten, two thousand eleven, two thousand twelve I open up any one of those, and then I have folders based on what shoots that I did in the way I name those particular folders is I start with the year, and then I put the month, and then I put them a general name for that shoot in light room organizes your folders alphabetically, and so if I put the year first and then the month, they're going to be sorted in chronological chronological order. And then just a general title like iceland or uh, it's a certain kind of shoot like with a model or something, I might mention it just a description. Descriptive title if it's a long thing, like when I went to russia was there for a week, then I might have sub folders inside of that a day, one day, two day three and it might have, like, the name of the town or something that was visiting on that particular day. It's a personal choice. There's no right or wrong answer, but that's how I do it great way have a bill has a question. Um, so I actually use a different utility to pull pictures off my car and put him into my pictures. Boulder, right? But what I find is when I import those in the light room, I always have to navigate down to that my default folders air away to set that as sort of like whenever you do import, it starts there. I'm not sure because I haven't needed to do that, so I'll have a look er one thing are you on your honor, mac? Uh, one thing you might be able to do what? Just try real quick, something I do in other programs uh, I usually have it since I'm not a mind machine here there's a setting on a mac where you could make it where if you move to a particular corner of your screen, it would like hide the current application and show the finder your desktop kind of thing usually I haven't set to my lower right corner and I haven't where if I go there in this case, I'll just go to the finder, I think making assumption and we'll see if that's the case or not that if I can find it on my hard drive, I should hopefully be able to drag it to right here. And if I drag it notes, not working in life in ninety eight percent of all programs on a mac, you'd be able to drag it there and it would bring you their, uh but anyway, that's something I could look into, I'm not certain, okay, also there, when you talk about why you might create separate catalogs and how you I mean, I'm sure separate catalogs versus one it depends how you shoot and how you think about your image is as faras if you should work with one catalog or multiple for me personally, I shoot for my personal use and for fine art purposes, which means it's, not for clients, and so for me, when I work with my images, I usually want to be able to look at them all so that if I want to look for files of waterfalls like right now I'm working out an e book about waterfalls I want to be a lookout every shoot I've ever done and find the waterfalls um my mindset would be different if I do client chutes all the time where let's say I'm a wedding photographer and when I'm done working on a particular wedding in that uh client has chosen the prince that they want and everything I don't want to see their files again because I don't need to work with him maybe I only need a few select images to have my portfolio uh if that was the case, then I might create one catalog for each client and so when I archive those images where I have a folder containing the photographs may be in there is a folder with that contract with the client I would also have my light room catalog sitting right there and so if I did client work I might work that way if you need to come back all the time let's say it's a client that you do a large cat along for and you also do little mailers for them and everything else in there a constant client coming back to you all the time probably wanted one catalog so I could get to at the moment they call I can have it sitting there but if it's kind of client where when I'm done with the shoot and I've delivered the goods, they're probably not going to talk to me again or if they do it's going to be something where six or eight months later they might call and ask for a photo I could just go and open their catalog again, see their photo and get it to him but I don't need to see you every day does that make sense so really depends how you shoot for me I'm shooting mohr for fine art for personal shots and for me it's one catalog them in older versions of light room it used to be if you bloated your catalogue full of a bunch of images that would slow down dramatically but in the newer versions of light room it's much faster and that's not really the case anymore so it's not as much of a problem to have one catalog for everything you want take a few more questions about twenty five minutes looks like let's take a few more. Okay, um question from sfx um can you sign keyboard shortcuts to match photo shop keyboard shortcuts? Uh can you assign keyboard shortcuts? The match photo shop? I don't believe so what they have trying to do in light room is trying to uh, keep it simple and try not to blow it with features and oftentimes they'll be a feature that really makes sense tohave like being able to get them to match, but they won't put it in just because they want to try to keep it a simple is they can because photo shop was so bloated with features, it makes it harder to use and so that's a feature that if they put it in, they'd put it under the edit menu and it would usually be called, uh edit keyboard shortcuts and I don't believe it to be there. I'm not sure you ask this question, but the question was, if you keep images in a cloud or drop like dropbox dotcom, can you use light room to catalogue and work with those files? Light room doesn't usually like working on a server or a drive that's not connected directly to your into your machine, and so I haven't tried to work on it with drop box, but since dropbox khun b just a folder on your hard drive meaning dropbox just there's a folder on your hard drive called dropbox and it sinks with server it might be able to deal with it because there is a copy of that information on your local hard drive and so you could have it catalog it haven't tried it though, to see how it works with the sinking and if you made any change to the drop box contents from another computer light room wouldn't reflect it you'd have to do that synchronize remember synchronized where you can right click on a folder synchronize the folder and that could take a fresh look so you have to experiment right there I think with drop box there's a chance it can work but with remote servers that are not physically on your machine it doesn't usually like it as much and then when when I work on my heart off my hard drive it's a lot slower than if I were just import the files to my desktop uh say that again when I work off my hard drive it seems like it's a lot slower than if the files are actually on my computer okay meeting on an external desk external hard drive it just in general that shouldn't mean normal. What it could be is that your external hard drive is simply slower than your internal one because when you buy a hard drive you'll see that it'll list if rpm's like seventy, two hundred or even higher than that then the higher that is, the faster the hard drive is or if you ever see the letters ssd, that could be your internal if you have what you're on right now that says for solid state digital ssd drives are amazingly fast and if that's what's built in your computer then external hard drives are going to feel a lot slower if you have more of a traditional laptop though not the mega thin kind then it should be pretty comparable. Okay, perfect. Thank you. Thanks for that. Yeah. Um all right. Any others real quick? I'm sure. Is it too early to ask if you where you found the size of the image there trying to find that the other day and couldn't could you mention the size, the image and they were trying to figure out how you knew uh oh, the signs the reason I knew is because earlier today I'd open an image and photo shop and that's where I saw it. But if I want to know the size of an image, I could click on an image and on the right side of my screen is a panel that I can open you remember that little arrow on the edge of your screen if I'm in the library and I go to that aiken scroll down in one of those choices in there is something called meta data in in there on the right side it can tell me the dimensions of the picture in pixels and so this is a big image it is sixteen thousand nine hundred five pixels that's a lot with that so that's where I could find out how big file is it's under metadata and it's in the right panel if you expand that but I just happen to have had that image open and photo shop earlier today and us and bill asked me, uh, how big is that file? And so I went to the image size dialog box and take a look so that's that's why, yeah, so then there's, just so many questions seems to be a lot of specific questions, so I think that maybe you want to continue a little sugar content, then we'll do a little bit more q and a before we take it, we just want to make sure don't go too far now. Let's go step back a little bit when it comes to light room and, uh, when it comes to light and let's, think about the others, the foundation ideas because I didn't want to cover absolute everything at once, because if you do, your head gets to be too full on one category. I mentioned that in order to see something in light room, you need to import it, and that in the lower left is the import button, or you can go to the file menu and that's, where you'll find import photos and video. But one other mindset change you need to think about here, you might have noticed already, is that there's no such thing is opening and saving in light room. If you're in photo shop and that's where your mind set is it's what you're used to, you always have to open an image, make changes to it and then save it. If something happens like your computer crashes before you get a chance to save it, you've lost the work you've done right in light room to see her where everything you do is instantaneously saved the moment you click on the flag but it saved on your file the moment you movin adjustment slider and you let go of the mouse it's saved there is no open, there is no safe there's just switching between pictures so that's one concept to keep in mind also everything that you do when it comes to adjustments in light room is completely undoable, so you can experiment to your heart's content because any adjustment you've ever applied khun be taken away and you can always get back to your original picture. So there's no, never any caution there when it comes to working with that. You also have a complete history of everything that you've done to your picture so that if you ever want to go back and see what it looked like ten minutes ago will be able to do that and I'll show you how to do that when we comes to adjustments also anything I do tow one file can easily be applied to another so if you end up experimenting with one file let's say that with one file you create an interesting black and white look where it's a tinted black and white with maybe dark edges on it or something like that and you're like cheese I really wish I could remember how I did that and apply to a different image with light room you can just say take the settings from this fall and apply to the other because everything you do in light room is saved as a little text file that just tells it what settings have been applied every time you open an image it just reads in that text file it moves thie adjustment sliders back to what it told it to use within that file and it doesn't permanently change your original file so there's one change I want to make my preference is that relates to that let's take a look at it if I go to the light room menu we have preferences and we also have catalog settings preferences will apply to all alight room if you close one catalog and open another one that stuff in preferences will apply to both of them any um any catalog you open but then there's catalog settings and catalogue settings are specific to this particular catalogue so I could have one catalog with one set of settings in a different catalogs set up differently so I'm going to choose catalog settings in here we have little tabs at the top, different categories of settings and what I want to do is make sure I'm on the right most tab that's they're called metadata and there's just one check box I want to turn on that I don't believe is turned on by default and that isthe one called automatically right changes to ex mp that's not very self explanatory is it automatically right changes tax empty but for me it's important that that is turn on hi after train that on I'm just going to close this dialog box and others talk about it a little bit if you adjust your images within light room, it needs to keep track of those adjustments somewhere you can keep track of them in one of two places you can keep track of it in a central database that light room maintains that affects all of your images were all of them are kept track of the problem with that concept is that database could get corrupt or it could be on a separate hard drive than your pictures and suddenly you take your pictures and connect him to a different computer in your office and you don't see the changes you made in light room because those changes are instead in your light room catalog what you left on let's say your home computer and you're now at work and you can't see those changes or the other thing it can do is save it as a little bitty file. The little bitty file would have the same file name as the files you work with. It'll just end with letters. Ex mp so if you ever look in a folder of images with outside of light room, if I can find a folder of images here you will find once you turn on that check box that if you have an image here's, a raw file there's the preview of the file that if you've adjusted the image within light room and you've turned on the preference that I just mentioned, you should get an extra file right here. It's got the same file name as the original image, but it ends in the letters x m p that's, a tiny text file and when I mean tiny, I mean let's. See how big it is? It's eight k eight k is like the size of your resume on a word processor without any font specified. You know, just the text inside that little bitty file called the ex mp file or all your adjustments in all it does, is it? It writes down what adjustment sliders you've moved on, what the positions where when you got him there and if I copy this file and that ex mp file together I'm copying the adjustment with it so if I brought these images home connected that hard drive there and I imported these in the light room or I used another adobe product like I used bridge it would reflect the adjustment I've made because the adjustment is in that little file if I didn't have that preference turned on that I showed you a few moments ago then you wouldn't get these little files called accept peace all you would have is your original picture with no adjustment applied to it and if you just move that hard drive to another computer and tried to preview those images they would look like the originals they wouldn't reflect what you've done light room but as long as I use light room or another adobe product to view this if it's got a little x mp file then it knows what I've done in light room any adjustments I've made are contained in that little bitty file you can actually open that file in a word processor and look a little jumbled because it's not designed to have you view it but inside it will say like the names of sliders and what the positions were after you've adjusted your pictures so that's one of the few changes that I make to the general settings and light room is I go to the light room menu I choose catalog settings go to the metadata tab and that's where I find automatically right changes tax mp that automatically creates those files and any changes that I make are automatically updated within it. So if you want to see what that's going to help me dio let's go outside a light room I'm gonna hide light room and let's go to another adobe product let's say I have somebody in my office that doesn't own light room, they do other things they do the high end retouching and other things of my company and I use light room to do the initial adjustment and organize my pictures. But then when I'm done, someone else in my office makes changes and photo shop and they don't own light room, so if they own photo shop photoshopped comes with a product called bridge and if I use bridge to view one of these folders, I can see all the images and let's say I made a change to this image this image here remember what it looks like I'm gonna double click on it, make it black and white just so it will be obvious that a change has been made when I open a raw file in photo shop, it brings up camera and in here I can say I would like to robert gray scale and I'm just gonna hit done that's all had done so I made a change outside of light room using photoshopped in bridge you can see that that event right there looks black and white you see it make a little bigger looks black and white let's hide bridge and go backto light room that was in the folder I think called iceland I think it was you see it right think it's that one but and I in my light room it doesn't look black and white because we mentioned this before light room if you do anything outside of it it won't be aware of it if you delete a file if you move a file if you rename a file it won't know that you've done it and so in here it'll just show you what you had before there was a way though to have light room look at my hard drive and say hey look for changes and if so make sure that light room reflects them and that was to go to the name of a folder right click on it and that's when I find a choice called synchronize folder and that just means make sure light room reflects what's on that folder in my drive so when I choose synchronized folder this comes up and it says right here scan for meta data updates do you see that checkbox those little ex mp files could be considered metadata so it can look for him synchronize and now on if you see that image up there but it's black and white because it went looked on my hard drive to say hey is anything changed on my hard drive and if so let's make light room reflect what's there and it was able to pick up that change even though it was made outside of light room now that change though is something that was recorded in that little bitty file called exam p because both light room and adobe camera which comes with photoshopped can record things in those little files and so therefore someone else yet my company if they work in a different department they don't have light room is long as they're using adobe camera it can edit those little bitty ex mp files which contains your adjustments and if I synchronize my folder to update it I can see the changes that they've made so that could be kind of cool so let's go and look at one other thing when it comes to ex mp files remember this is black and white I'm gonna go find it on my hard drive but I don't feel like navigating my hard drive to really find it I want light room to help me if I right click on that image you get a menu one of the choices his show and finder that means find it on my hard drive outside of light I just write clicked on the file to choose it and it has highlighted the file right here in my operating system right below that you'll notice there's an ex mp file that's the file that keeps track of our adjustments I'm gonna take that file and throw it away not there anymore I did that outside of light room, so light room doesn't know what happened yet light room doesn't know until you tell it to synchronize synchronized means deduced look at what you did outside of light room so I'm gonna now synchronise the folder it says there are no new images that's why that's great out there are no missing images but it's scanning for metadata updates metadata just means let's say you had could have image data or you can have meta data image data is your picture itself meta data is text related to the picture like your shutter speed, your aperture setting the camera model or in this case adjustments and so that's what that means hit synchronized and then that emit should change in a moment once it realizes the ex mp file isn't there anymore and it might take a moment to see if it'll update it looks like this particular image was originally changed before I change that preference in light room and remember the one that, uh that mentions my adjustments let me go do it in bridge so you can see that it wouldn't know about it there here's the image and enbridge what you see is each image we'll have a little trying or not triangle a circle in the upper right with some sliders in it that tells you if it's been adjusted or not in this one here, it doesn't think it's been adjusted the little ex mp files missing light room, though, can still track it in its database, and so it it still has the adjustment the little ex mp file is gone. So now if I want to try to see that in another adobe product it's not going to show up, and so I need to have photoshopped right, those little files, if you find that there's a file, it doesn't have one, but you know, you've adjusted it in light room, maybe had that preference turned off and therefore didn't create them, you should be able to go to, uh, one of the menu's up here, and it will be called save metadata uh, to file that means create that little bitty file manually, so if you need to give it to somebody else, then if I go look at my hard drive, it'll have an accent people. So anyway, I like train on that setting, tio save my stuff and ex mp files that way, I'm able to open it another adobe products, and if somebody else makes a change within that adobe product and kameron I can synchronize the folder and have it updates so I can see the changes they've made and I find that to be a useful thing to do. The other thing that it does is if I end up archiving my images let's I did a wedding shoot I've adjusted all those images I've saved him on an external hard drive I know that within that folder contains all the adjustments it's not just in my catalog file my catalog file that mike it corrupt or might get lost or something else it's in the same location as the images themselves and so that's why I like the ex mp files it is ah technical detail than a lot of people just don't like to deal with but it's a convenience feature if you know what they do they contain your adjustments is there any downside to saving the saving next mp files by default? Since that is their default? It does slow down light room a little bit but it's if you have a modern computer I find slow down to be uh not overly noticeable it's not like you're like dreading that it's updated if you were to adjust a large number of images let's say I selected every image that's in my iceland folder in then went to adjust them it might take just the a few moments more for it to finish the adjustment to actually say about those files uh then the other thing is just a simple management is you gotto copy those with your images and it's just looks weird to have more files than you thank you need because you have twice as many now you have a little accent piece, but otherwise no, I use them for everything I do. All right. Uh, quick questions. Yeah, anymore. We have a couple of minutes. Several people are starting to ask questions about ex mp files, so I j bauer says if you were to take if you were to export an image to a flash drive to work on your image at another location with light room do you include both here exported image in addition to the ex mp file? If it's a raw file? Yes. You get to files the original raw file and the ex mp so in essence you have your untouched image and the adjustments you bring those to any other machine. If you import them and let's send into somebody else's cataloguing light room, you'll get the adjustments coming in with him or if you view them in adobe bridge same thing you will get them with him once I have an ex mp file, if I ever move that file or throw away that file or whatever of the original picture, I do the same thing with the ex mp treat them as if they're one of the same there's happen to be two different files I'm a question from c m d this clicking save as ex mp affect the dmg and the way it saves info internally okay, uh this one thing we haven't talked about yet? It's dmg files but I should mention in general uh, right now I'm working with raw files and everything that I'm doing I could mention briefly the advantage to that and then how it saves uh, information and different file formats uh, here's a little thing about rob versus j peg I can also had other file formats in there, but the main thing is your camera. Usually you can choose between ron and j peg uh and then I'll talk about tng right after that uh when it comes to this j peg is this file format that is small, smaller files. It is very convenient in that you have a small file size uh, karen, you gotta change just one hundred percent not ten percent uh here it says compatible jpeg files are one hundred percent compatible with all software meaning if an image, if a piece of software can open a picture, it can open a j peg files uh with raw files on ly about five percent of the software you run into an open it you can't open it in a database, you can't open it in a web browser, you can't open it in most other pieces of software, you mainly open it in photo shop or in light room and that's a disadvantage. Ah, when it comes, teo simplicity j peg files are simple. You can just give a client the file with raw files. Usually you adjust the image and you re save it out. It's a j peg or a tip for something else to give to somebody else, it adds more complexity. J peg files have two hundred fifty six brightness levels, which is enough to make your image look great on screen, but a raw file contains at least four thousand most of them eight thousand brightness levels, and that makes it so you can make radical adjustments without the image falling apart, whereas a jpeg has a lot less information so you can't get much out of it with adjustments. Jpeg files are compressed with what's known as lossy compression, which means it degrades the quality of your image when it saves them so it's. Not a good working file format to re save and re saved j pegs over and over because it degrades over time with more saves, raw files, air lossless you get every little bit that your camera captured you can do extreme color adjustments with raw files and the quality could be maintained where with jpeg file, you'll be limited in the main advantage of raw file. For a lot of things is you can recover detail in your highlights and shadows, and what I mean by that is if you look at a picture in the sky is solid white. If you have a j peg, it's stuck it solid white. If you have a raw file, you could move sliders and suddenly detail will magically reappear in the highlights. Same thing is true for the shadows on a j peg. If the shadows are solid black there's no, getting them back with a raw file, there's extra detail hidden in there where you can recover it so I know the person didn't ask about j peg, but a raw file is something special. That light room does not want to touch those files because they're proprietary. Each camera manufacturer has a different version, and they don't health adobe how all the data is saved in it, adobe instead has to try to reverse engineer an experiment to figure out how the data saved. So any change that they make to a raw file could screw up the raw file if you tried to open it up another software it could mess it up and so they try not to touch a raw file and instead they create this thing they call a sidecar an ex mp file they call it a sidecar cause anytime you move the main file you want to move the little file too so it could be called a sidecar with the other file formats like j peg in like dmg in like tiff in like photoshopped file format all of those file formats are not proprietary they're very much documented you could get like a pdf file that tells you exactly how the data is saved within it and because of that they're able to save these adjustments in things inside those files you don't need an ex mp file you don't don't have to have them with the j peg file it could be saved right in the file itself the picture with a d n g file same thing with all that so with dmg files you don't need the little sidecar file you don't need the ex mp it saved directly in with the picture itself you just work with one file that's one advantage to dnc and we can talk more about that one of the other days this meta data is non image data meaning it's not your picture it's stuff related to your picture that isn't the picture itself so non image data that relate to the image so examples would be your shutter speed the camera models something was shot with the serial number for that camera the adjustments you making light room that's all stuff that isthe meditated stuff about your image that isn't the picture itself that's what meditate ia's now some of that information is in your file to begin with your camera model your shutter speed your aperture all those kinds of things the camera itself attach is it to the file and so it's already there but light room there's one kind of file that it can't change or doesn't want to change because it could mess up that file for use for other purposes like other programs and things and that would be a raw file a raw file is proprietary meaning it's not documented if you goto cannon and you got a nikon and say how do you save your data in your raw file they won't tell you in adobe opens those files and just experiments with what senate to figure out how this stuff is saved if they add anything to that file they could mess it up in a way where if other programs try to read it like the software that comes with your camera it would look at and say what's this other data in there we didn't design this file format tohave it and so what adobe does is to not mess up your raw file. The raw file contains your image. The other thing it contains is metadata that your camera in order to change that or represent changes to it, it creates an extra file called in extent people it's just a text file ends with letters ex mp it contains all the adjustments and other stuff that you've done that weren't done in your camera because any of those changes anything you do to the raw file could mess it up because they don't know how you're supposed to save data in it on lee your camera manufacturers know that in those camera manufacturers won't share it with adobe and other people, so you could mess it up. Will you do that? So you make sure you don't mess it up, so this got our adjustments in it. This is god if we end up flagging something or adding met did other things keywords, other things it's all stored in there because we don't want to mess up the rafa having said that, these file formats j peg what's called dmg, which we'll talk about later tiff photoshopped those air very well documented file formats you could go and get a text file that describes exactly how the data is saved in each one of those file formats in in those file formats they allow for new metadata new information to be added that won't screw up the file because it's very well documented how to save it, so these file formats they don't need an ex mp file because the people that created those file formats said, hey, other people might need to add some stuff to these files, so why don't we come up with a mechanism for them to do that? And so that kind of stuff could be stored right directly in the file itself. So you deal with one file for j peg, dmg, tiffin, photoshopped, it's, only the raw file that we don't want to touch that's, proprietary and that's when we get these little ex mp files, so if we ever have an ex mp file, just think of it is all your adjustments, your ratings and all the other stuff you've done in light room related to that file it's in there don't throw that away. If you're going to copy this file and you wanted to be the adjusted version, copy that, too, and so those two files, then if you open it in another adobe product, the most popular one would be photoshopped, then you're going to see the adjustment when we're completely done with that image completely, totally done with it, we want to give it to somebody else, what we're gonna do is exported and when we export it we will get one of these file formats that are very documented that will incorporate all the changes it will actually change the picture so you can give it to somebody else they don't need an adobe product to open it and they'll be fine but internally with light room and with other programs that work with raw files you're gonna end up with two files except pee when you're done you export and you export toe a normal file format like j peg hurt if we'll get into that hopefully that clears up a little bit the main thing is metadata is any information related to your picture that's not the picture itself the only metadata stored in a raw file is the stuff your camera attached to it if we try to add more we could screw it up because we don't know how that file was constructed and so we make the little x and people wish we didn't have to and if you have the ear of a camera manufacturer and you can yell at them tell them to support the d e n g for file format that's what it's designed for but kanan and icon refused to support it it's a well documented file format that khun store raw data and if canon nikon would listen to their customers in actually implement that file format, we wouldn't have to deal with those ex mp files but for some reason, they are ignoring their customers in that area.
Class Materials
bonus material
Ratings and Reviews
Gordon
Since most photographers give classes on PS, it's just great having such a great teacher teaching LR. I don't have the time or money for PS and teachers like Aaron Nates work only with PS like most others. They all are great teachers and I watch even though I can't use what they teach, I don't consider it all a waste of time. Bill Willmore is one of those great teachers and goes into great detail. I would love to have the money to purchase this class as it's impossible to retain all the detail that he goes into.
a Creativelive Student
This presentation was awesome. After going through two versions of Light Room, I still learned more in three days than I learned in 3 years doing self study with hundreds of dollars worth of books. Ben Willmore works magic in Light Room and shares his expertise with all. This is a great course and a real bargain. Not only is the course valuable, but so is the PDF as a bonus with this course. Thanks, so much. See you tomorrow for Photoshop masking.
Rico
Ben Willmore is a fantastic teacher. The PDF download is superb and worth the price of admission. If there was a way for me to do the techniques that Ben is teaching, with him, while he is teaching the technique, then that would be a perfect learning experience.