Lessons
Day 1
1Backing Up Your Life
22:35 2File Organization
30:59 3Building Your Preview in Lightroom
29:24 4Library Module: Nuts & Bolts
32:10 5Sorting & Selecting Images
30:58 6Keywording
26:39 7Exporting Your Collection
29:47Manageable Organization
28:58 9Importing iPhone Photos
29:17 10Critiquing Your Own Work
34:10 11Storytelling with Images
16:55 12Image Quality
28:21 13Develop Module Basics
28:30 14Develop Module Controls
24:59 15Installing Presets
29:55 16Saving Styles to Presets
38:02 17Making Every Image Better
24:29 18Correction & Calibration
24:14 19Heal & Clone Brush
31:12 20Videos in Lightroom
32:13 21Adjusting Video
23:22 22Creating a Collection of Videos
18:06 23Intro to Print & Book Module
18:25 24Organizing Your Story
39:35 25Framework of Building Your Book
39:13 26Stylizing a Photo Book
27:52 27Power of Page Arrangements
31:02 28Making Simple Slideshows with Video
30:11 29Mobile & Publish Services
16:11 30Creating Catalogs for the Web
28:24 31Printing Your Images
21:35 32Printing for Scrapbooking
26:53 33Final Q&A
25:33Day 2
Day 3
Lesson Info
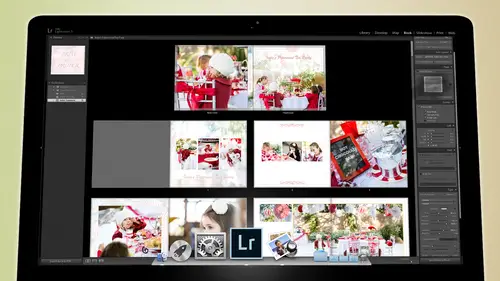
Exporting Your Collection
Now that you have your tags in place and you have people tagged you have the items tagged you have the concepts tag you of places tag oh and the other thing you can do this is where you would go to the map module now go to the mat module and everything except for I've already tagged it but everything except for this one simon a ntags I'm not going to tag this one because it's not in the same place but all of these you can see there's the there's the train museum see that's in the middle of all these fields so I'm going to tag that and you can see that I've already tagged those but the way you tag is you highlight all your images and you grabbed them and you dragged them to the place that they are and now you have fifty two photos at the train museum and then if you wanted to you could further drill down and say, well, I know that you know this set of photos so if you wanted to really really get specific, you could say I know this set of photos right here is actually right here it's bet...
ween these two trains but that's the red train there so if I highlight these sets of photos here and drag them they're right here in front of this train do you see how specific we can get so now you have like a map of where all your photos are and where you took them and and all of that however once you tag these do you see that geo location right there that's in your photo that is the gps location for anything that you are sending out so if you put this on facebook or you put it on a blogger whatever someone takes that photo and downloads it to their computer they can reverse engineer that and find out where it is meaning that you don't want to send that out to the world and this is for your use not for the world's use so and and by the way anything that you take with your phone already has geo tagging on it so the photo actually has the geo tag already on it and if you unless you turn off the if you turn the privacy on so that it doesn't then it won't but otherwise it's tagging it and so each photo will tell you where it was taken when you import it will already be on here automatically this is where the export dialog box comes in and you have to learn how to export stuff anyway remember we imported stuff in the morning now we have to learn to export stuff and exporting you have to get used to this dialog box because it appears not only in the exporting areas but it also appears when you're when you're publishing stuff so if you if you come down in the library module if you come down to the export box here the right below all their folders next port button you click on export here's the export dialog box these are all presets over here for what you can export the way you can export stuff I like to keep them and folders so that it's easy to find different types of exports and you can see that I've got a lot of different types of exports some of them are based on plug ins and things like that but here's one for screen and these are all the different so there's one for my anna moto stuff here's one for email here's one for facebook eccentric cetera but if I wanted to stew one for print uh say I want to take pictures to costco and have imprinted well there it is costco for by six proof and it automatically changes everything here to be exactly the way you want it to be the way you create this is you set up all your circumstances here and then you go and click ad down at the bottom of all these presets and when you do it you just simply name it and put it in a folder or create a new folder and that allows you to never have to do this again once you set up your your export, you're done so any time we want to take images to costco, we just click on this. It resets all of this to the correct thing notice that it puts all of the photos on the desktop in a folder called costco luster. So then all I take is that put it on the thumb drive, take it to costco printed or uploaded costco or whatever. Um, if I'm if I'm going to send him to a white house custom color, which is my professional lab, I click on that, and now it puts on the desktop calls w h c c for print. Once it is, once I have exported it, I upload it to a white house, they print it, and then I could delete that folder because it's just kind of an interim folder of prince so that's how you export but notice that you have all these options, you have the option to rename your photos. You have the option to change the file format to whatever you like to the quality the color space. Now most printers and I pay attention to this. When you want to print, you want to send it out to a costco or to walgreens, or took white house custom color or or wherever any photo printer is going to use s r g b s r g b is like a dumbed down version of color you're sending it to the web or if you're sending it to a photo printer ass rgb is where you send it the only there's only certain exceptions to that and white house custom color because it's a professional lab will accept the rgb nineteen, ninety eight as well, which is a better color space but most printers just be safe put in s rgb so it looks like what you want it to look like ok, so if you don't know anything about color spaces, just trust me on it use s rgb when you're going to the web or you printing otherwise uh you know you can keep it whatever it happens to be on dh then you couldn't imagery size in this case we could re size this to be whatever size wanted to be and then we can sharpen it a little bit but here's a warning on sharpening if you sharpened and you add a little grain to it, we'll talk about grain tomorrow, but if you add grain in light room, don't sharpen it because it will sharpen the grain and so the grain looks really looks like sandpaper after you sharpen it, so if you're using grain, don't sharpen the grain or don't sharpen it um but here's the thing I wanted to show you metadata you get to choose when you're exporting a j peg what kind of metadata you want to attach to it? You can remove all of the location information here so I always have this checked that way when I send images out to the web no matter how specific I've tagged them here and where they are it's not on the photo when it's on the web for two reasons for me number one is I want to keep all of my clients kids and my kids safe and so I don't want to just like promote where I am and where they are and we're like they like to hang out and stuff but number two and that's important for me and for my clients but number two I prefer to keep all of my, um locations kind of secret because it's part of my trade to know all these cool places and so people who, uh photograph need to kind of do their own research and find their own places because that's part of their style and so you know I'll share those locations with some people, but I'm not gonna break my neck to, you know, give people the locations because they should be doing their own research and finding their own places to shoot on def some of those places they're the same places mean great, but they ought to find them on their own um so anyway remove the location information for sure but you can also tell it on lee send out the copyright information and then that graze out because it's on ly sending copyright information out so um I I generally put all metadata but removed the location information and that gives all the meditated so that search ability is great but the that location always remove it there's no point to having it on there unless the only point the only the only reason I would put it on there is if I was having an export specifically for like I wanted google earth to be able to show these photos and I want you know so then that it was important cause I wanted search engines to be ableto show people where these photographs were then I would leave that information on but just make sure that you're consciously doing it. Um then of course you can water mark things and you can water markham and choose your watermark so you can have all sorts of watermark options but you just simply going and edit the watermark and when you're in there editing the watermark, you can either have a text watermark which will basically put whatever you type in here will be put right here so you can see you know my name is put at the bottom of the photograph or you could do a graphic and if you do a graphic, you just have to choose a png file type. Once you put the pea and find a png file type, you you could use a j pegs well, but j pegs are not transparent and so you can't like have it flowed over something? It'll just be a big square. But if you use the png, it will actually. So, uh, I'm not going to go look for one, but anyway, you can just put a p and g on there. No flow over the top of your images and then you can choose you know how much shadow you put on that and where positions itself always have it proportional to the size. That way. If you sport a big photograph it's this big and if yu export a small photograph, it's it's the same relative size, because otherwise it'll export it with a really big you know and look this big on the photograph because it's little so always do the proportional size and then change the size here. And then it will always, like cover half the photograph down there, whatever. So it changes based on how big you send it out so that's, how you create a custom watermark. And that's the export dialog box. The reason I went through that really in detail was because you're going to need to know how to do that when you create a published service, too, because it has all the same options in the published service because you're exporting a file every time he had published, um all that you just never see it. Okay, so now we've keyword are images, and now it's time to start playing with organization, and this is where it gets really tricky and kind of fun. So I have are I actually stole if my wife is watching? Um, honey, I stole your hard drive, so my wife has the hard drive attached to her computer that has all the family photos on it, and I stole it and I brought it here, so I have it in my bag over there on dh. Last night before I came here, I went through and created a couple smart collections toe whittle down, I swear there's sixty thousand photos or something in that hard drive there's a lot there's a ton of photographs, but a lot of them I can't show because they don't have releases for people or, you know, whatever, and so I just chose a small segment of those to show you, and so this is the small segment that I chose to show you and and the way I found them is I plugged in her tar drive I created smart collections as I'm going to do right now and those smart collection spit out um how many files let's see how many files they spend five thousand nine hundred ninety five files from her collection, but her collection is vast and so I spit out five thousand almost six thousand images for my collection here, and then I just simply exported those as their own catalog to the disc that I'm currently using. So you have a small, fake version of the family catalogue of all images that I can show and the way I did that as I simply made a collection tto find all of my kids over a certain period of time, and then once I had that, I could kind of hunt through it and look and see if there's any straight kids that shouldn't have been in there and I would highlight those and get rid of those and then I created my a hard drive full of images so that's how I did it. So now I'm going to show you so we're going to find images that we might want to use for a particular say spread or maybe we want to make an entire book of my daughter's life, so because we I think this this whole thing starts yeah that's kind of where I went with it so c that's her as a baby that's her is a little tiny baby right there getting a bath so this is all her so I started at her birth and I went to now and I only looked for photographs with my kids in them so let's start and say we want to come up with a set of images that would be great for a book so the way we're going to do that as we're going so you could go through each one of these folders you could click on a folder and say oh no that's just jackson oh no that's before she was born oh here's her first bath I'll choose a couple of those oh here's you know and and go through each one of please this is a very fun way to do it because it's it's like living memory lane but it's slow I want to do something right now and I want to get some images out so what I'm going to do as I'm going to go down here to the collections area remember we talked about folders folders aardvark are really places inside of your hard drive and all the things you do there are real and they will happen to those folders in those photos collections air completely separate completely virtual so anything you do to a collection is not really happening it's all virtual so I can make a cz many collections as I want, and it can have vert they can have versions of files in there you can have it one of every folder one photo from every folder in your computer in collection along the same time you could have two versions of that folder and one of them has some of the photos and one of them doesn't and it doesn't change anything about the photos photo stay where they are nothing changes to those so it's just a way of congregating those virtually so what we're going to do is we can create collections and I'm gonna show you how we created first thing I want to do is create a collection set that makes one of these little box looking things my wife is amazing organization so I'm really good at that digital organization, but I'm a mess when it comes to physical things my wife is super good physical organization in the way she does it is she has bins everywhere, toys r and bends, papers air and ben everything's in ben's so you walk into her office and it's like these cute little bends that you buy it like a pottery barn er I don't where you get him, but anyway those you know the wicker baskets and stuff, so she got wick wicker baskets full of things and it's super organized you can find anything that you taped us here and whatever so we're creating a bin in order to put things in that been different types things so we're gonna create a bin and we're going to call this andy's uh first book for years because she's four years old and I hit create and now you can see that I've got a little been here and it's ready to receive all of our images now I'm going to start creating the different cat collections within that bin so that we're all organized and the first one you could create a regular collection so we could create a collection and we could call this selections for book right if we did that and we put it inside so I can put it inside that collection set if I did that I've got this empty collection set right here they're zero photographs in it I then could go up here tto all photographs and I could scan down to say this photograph right here and I could then go over to here and grab this and dragon in there and now I have one photograph inside of there so that's the manual way of grabbing images and moving them into something you can also turn if you right click this and you tell it to set it as the target collection now that see that little plus button right there that plus tells you that it's the target now if I go back up here say to our little train depot and I say okay I want this one in the target collection I can see that little button right there that little circle I click it it turns gray if it turns gray it is now inside has been thrown into the target collection so now it's inside the target collection so I could go through this entire set here and just scan through even maybe come up to the attributes and sort by two stars so I get the very best stuff and then I could go I really like this one now it's in the target collection so this is still a very fast but much faster uh manual way of collecting images yeah just clicking the other thing you can do is you can go to him down to your handy spray tool click on that and instead of spraying keywords you khun now spray it into the target collection so now I could say oh well I want this one and that one so I click on that one could go on that one there in the target collection or if I wanted teo I could you know goto something where I need a siri's like say this one and just spray the siri's and now they're all in the target collection those air all very manual ways of doing it and that's very easy to do if you're looking at say fifty photos and you want to narrow it down to ten very easy to do it any of those ways not so easy to do it five thousand nine hundred and ninety images or whatever we have and it's definitely not easy to dio to sixty thousand images so what we're going to do is we're gonna do the tell the computer to do most of the work and then we will follow up and hone it down so we're going to go down to our collections again and we're going to create what's called a smart collection this is a collection that thinks for us we're going to click on that smart collection and we're going to call this andy first pass book selections so this is the first past we don't make the first pass the computer makes the first pass then we come in and start honing in so what we're going to do is going to put this inside of the collection so we got to go into indiesfirst yearbook and then we're going to start choosing our criteria the first criteria is that the rating has to be greater than or equal to a one star I don't want it if it's not at least once our next criteria and I can choose to have all none or any so when I was choosing for photos of my kids I put every single one of their names in there and said any of these so it could have just one of them it could have three of them it could have two of them as long as I had one of those names it was fine, but in this case we're going to say it has to have all of these has to be one star it has to in side of it's uh it's meta data has to have keywords and you can also tell it not just key words but you could tell it you know, any searchable metadata could have that name in it so then it would be looking at titles, descriptions, file names, anything that searchable it would look for it so you could do that as well, but we're going to just go for the keywords the keyword has to contain indy well let's just say I nd I because I know that that'll cover either india or indiana, okay? So it has to have one of those things all right has to have the beginning of her name and you can also say does not contain so it doesn't contain contains all the words contains just the word starts with any of those um you can by the way, if you if you if you're in a position where you know you have ski words but some don't have keywords, you can also create a collection that the key word here is empty if keywords are empty, it shows up in the collection and as soon as you keyword it disappears from the collection. So that's an easy way to find images that you need to key word so that you can just go on all que un key word and images show up in this collection, and smart collections are great because they constantly change as something gets keyword it he gets thrown out as you get a one start of this, it'll throw it in so it'll it'll just as we were working eso this will stick around forever and you'll be able to any time you want to go. Look, your favorite pictures of your daughter, you just click on that thing and hit a slide show and sit back and cry, you know? So because she's so cute, all right, s o we got keywords, we got ratings and then I'm gonna do a couple other things as well. So I want to make sure I want to make sure that it starts at her birth, so I'm going to go into the, uh, date captured eight is after two thousand ten think that's, right? Uh, two thousand ten oh four there, so it's within like it'll start at the month of her birth oh, wait, no that's o three there, so now I know that it's going to be after her birth, and so that if there were more photos before of, like kids and stuff like that, then it would kick those out, so I've got a target in time on dh, then the other thing I could do is I could say, I want to also look for, um, you know, images that were shot on ly with a specific camera or whatever, but I think I think the only thing I want to do now is that's good let's, let's, just go with that, right, create their radio so now, out of six thousand eight hundred fifty four images, so I pared it down pretty fast, so now I can just kind of scan through those images and see, you know what I've got toe work with, and right now I've got I've got the so I'm looking at eight hundred fifty before images, but then I have here in the attributes it's, sorting by flagged and start images. If I click, none now will start to see all of the images that are available from the beginning. See how the cia all my time that there is the beginning, right? And and then we're going to go all the way from the beginning, all the way down, teo just reason so now we've got all those photographs to play with and I think that maybe we're a little overboard on this and I'm thinking that maybe we should go for um let's see maybe we should go for two stars and above but I want to make sure that I get something there's two stars in there okay but I I think I want to add I think this would be a fun way to start so I'm gonna add that is a two star because I know it's not going to get it and then I'm gonna maybe ad where is the one we're there right there so I'm gonna put those those two stars and then let's see there's should let's do that one too? Because that's my wife looking at her they're okay so I've got two stars and above let's go for that so now I can just take this and add a criteria to it I don't need to go back and I could double click this and change that to a two star if I want or I could just simply add the criteria on top of it and say okay I only want to star and above so there's two starring above so now I can see all of that and that puts me down to three hundred forty seven images much more manageable so now I highlight all those images because I know that things will fluctuate inside of my selections here because this is a it's a constantly changing thing and so now I'm going to gravel these and drag them into the selections for india's book now I have surrender now this one set in stone it's it's there right? So I used the smart collection to grab the information and look and then I highlighted all the ones that I thought ok that's a good manageable set and I put them into the selections for india's book now what I can do is go through those and look for anything you know, just just kind of scant her and go okay, well, obviously there's way too many from this little photo shoot and somehow they all got tagged is forced five star images so like this whole set his five star right? So I'm in a I'm gonna help myself out here for a second and I'm just going to take all of these five star amazing images of the same thing I'm not sure how that happened, so they're all five stars I think maybe I think the kid's really yeah, the kids might have really loved these photographs, so I'm going to take them all down and put them back down at zero stars and then we're just going to kind of scan through and see if there's anything o si I've got some here that actually have adjustments and the others don't so here's how we can sort this out I think I found an even better way to do this I'm gonna click on this and I'm going to go up to my metadata and I'm going to sort I should have done this actually in my indiesfirst passed I should have done it here I should have come in here and said one of the rules let's add to this rule is that the uh hold on let me find it develop has adjustments is true now there's only five hundred and twenty six of these images so now if I go to my attributes and sort by two stars and highlight all of those I'm going to come here to this one highlight all of these and I'm going teo uh oh wait this one doesn't have adjustments and I want to keep it so I'm gonna I'm gonna do a quick adjustment watch this I'm just going to do brighten up the exposure see how the adjustment tag came in there and then I'm that's good it's got an adjustment on now now don't stay so I'm going to highlight all of these and I'm gonna now notice I adjusted this one it changed it and that puts it now into this one because this one changes with whatever changes I make so any time I change something this is going to change watch this number if I fired to reject one of these by you know, taking a image, and I was, too, to make it not adjusted. So, like, for instance, this one. If I go here and I take it, and I reset it, so I had to go to the develop module really quickly and reset it so that it has no adjustments, see how it disappeared. It took it out of that collection because it's, a constantly changing collection, it's, a smart collection it's still here in this one, because this doesn't constantly change the selection. One here is a normal collection, so if I again taken here and adjust the exposure, and maybe, you know, change the white balance. So that's normal at a little contrast and some clarity. Now, I've got, you know, my, my shot, the way I want it. So then, when I go back to the grid, it's, now in the smart collection, so smart collection is constantly looking for things.
Class Materials
bonus material with purchase
Free Bonus Material
Ratings and Reviews
Steve61861
I have spent a small fortune buying classes from Creative Live, and I have learned a great deal from many terrific instructors. This class ranks as the #1 best class I have purchased from Creative Live. It was done in 2014, and the changes and improvements in Lightroom since then are far too numerous to count. However, I just watched the entire class again (August, 2018) and I realized that the class is as valuable today as it was when I originally purchased it. The title says it is for Scrapbookers, but it could have been Lightroom for Everyone. Jared covers every part of Lightroom as it existed in 2014, not just Library and Develop! He has a marvelous teaching style that motivates and inspires one to grab a camera and go take great images. Yes, it is dated. Yes, it is a long course - but only because it thoroughly covers a vast amount of information about Lightroom. And, yes, it still has real value in 2018, and I plan to rewatch it once a year now for the motivation it provides and the incentive to bring myself up-to-date on ALL of Lightroom's latest and most valuable features in all modules. Thanks CL for bringing Jared Platt to us, and please bring more of his great classes soon.
a Creativelive Student
Good class. Jared is an excellent instructor and provided good information. I was more interested in Lightroom than scrapbooking and I think the mix was about right for me. While I found the focus on Trajen interesting and heartwarming ... I found that too much information was shared and too much time was spent on his story. It was distracting for me and I think would be hard to listen to over and over again if I were to buy this course. I think that some of the material was rushed because of the time spent covering this and other unrelated topics. I prefer a more focused approach. I was more comfortable when he was showing photos of his kids as examples the first day. However, I enjoyed the class and learned a lot. Thanks!!
cricutDIVA
Thank you soooo much Jared. I am an avid scrapbooker and still an amateur photographer, but you have given me so much helpful information that my pictures are looking really amazing now. I often share on Facebook and the compliments I have been getting since I started applying what I learned from you are astounding. I have never received so many compliments on my photos. Prayers and positive vibes for Trajan and his family and friends!!!