Lessons
Day 1
1Backing Up Your Life
22:35 2File Organization
30:59 3Building Your Preview in Lightroom
29:24 4Library Module: Nuts & Bolts
32:10 5Sorting & Selecting Images
30:58 6Keywording
26:39 7Exporting Your Collection
29:47Manageable Organization
28:58 9Importing iPhone Photos
29:17 10Critiquing Your Own Work
34:10 11Storytelling with Images
16:55 12Image Quality
28:21 13Develop Module Basics
28:30 14Develop Module Controls
24:59 15Installing Presets
29:55 16Saving Styles to Presets
38:02 17Making Every Image Better
24:29 18Correction & Calibration
24:14 19Heal & Clone Brush
31:12 20Videos in Lightroom
32:13 21Adjusting Video
23:22 22Creating a Collection of Videos
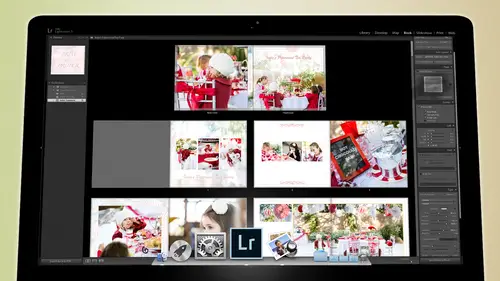
18:06 23Intro to Print & Book Module
18:25 24Organizing Your Story
39:35 25Framework of Building Your Book
39:13 26Stylizing a Photo Book
27:52 27Power of Page Arrangements
31:02 28Making Simple Slideshows with Video
30:11 29Mobile & Publish Services
16:11 30Creating Catalogs for the Web
28:24 31Printing Your Images
21:35 32Printing for Scrapbooking
26:53 33Final Q&A
25:33Day 2
Day 3
Lesson Info
Library Module: Nuts & Bolts
We are going to delve into the library module. We talked last session about the process of getting the images onto the computer. We talked about where they should go. We talked about kind of the general file path that we're going to be following throughout the process of looking at our photos. But now we're going to start getting into the nuts and bolts of it. So we did the thirty thousand foot view and now we're going to get into the trees and start working himself. Here we are inside the library module, over on the left hand side. We have different things. We have a navigator. So any photo that we happen to be looking at, we can waken zoom in on it. We can see the photograph. We can see what's coming up next things like that. I collapse that because it's not very useful to me, but it is there. Then there is the catalog area that talks about all of the things to do with the catalog. All the photographs. What was your last import? What was your last export? What photos are missing? Tho...
se kind of things are all in here. I always collapsed that because I want to save as much real estate as I can below that is folders. These air physical locations were looking directly at the hard drive if you were to right click any of these. So if I came down to, uh, this is the one we're gonna be looking at my right click this folder here. I can right click it and I can show it in the finder. And when I do that it's going to literally show me the position inside of my hard drive. You can see it's in the photos, dr in the family photos and there's, the phone and there's. That raw photo we folder we talked about and inside that rafel there have two different cards that I threw in there during this little shoot. Okay, so, that's, where we have all of our information it's on the secondary hard drive. So it's not in the computer, it's on a secondary hard drive. But light room is looking at it. Like, erm knows where it is, what we did to it. It knows what it looks like. All that kind of okay. So and then below that is something called collections in collections. It's not physical, it's virtual, but collections air so incredibly powerful, so incredibly powerful. So we will talk about collections next session and then also published services. Published services is another collection. It's virtual doesn't really exist, but when you hit published a copy gets thrown out somewhere and usually it's online somewhere, usually it's, facebook or it's smug mug or it's you know someplace like that, so it will broadcast stuff, but the cool thing is that published services keep track of that they keep track of the of the published photo. And so if someone makes a comment on facebook, it appears inside of your light room, so you can actually look at your facebook comments in light room rather than going to facebook. I kind of like that because that's a narcissistic way to deal with facebook because you don't have to look at anybody else's posts and you get to see what people think of your post so that's that's pretty narcissistic, right? So it is efficient, so that's the public services now below that are the two important export buttons. We'll deal with those we already showed you how to import stuff, and we went over the import dialog box that's important, but I'm also going teo show you how to import from your iphone as well, and so we'll have to go back to that import dialog box at one point below that is the this right here is called the film strips, so this area right here, down at the bottom, is the filmstrip. And it allows us to be looking at, say, one photograph so if we were if we were looking at this photograph by hitting the space bar by the way it takes you to the full size image and then if he had the space bar again it zooms all the way in and then he hit the space bar again it zooms back out so say spar kind of does three things but that the keystrokes and I'm gonna teach a key strokes in the library right now so gi is grid e is loop and that's one picture at a time and then z is zoom in and zoom out and if you're on the grid and you have z it zooms in from the grid zooms back out to the grid if you're in the loop mode and you zoom in and then zoom out zoom it always zooms in and out where you were last there's also the n ki for I don't know what that stands it's it's the survey mode and if you can find an end in survey, I will pay you um so if you click on an image inside of the film strip and then you hold the shift key down and then click on another image it adds all of them to the survey so you can compare things so if I wanted to compare this whole set of images it would be very easy for me to do that by going into the survey mode which is n the end kiis survey and then of course if you had zoom so if we want to see what she looks like his z that zooms in we can take a look at her and zoom back out yeah get rid of the side panels and just have it black and only tab tab if you had the tab key it pulls the side panels out if you had the shift and tab it pulls out everything and then brings everything back in if you want to do one panel per so like let's say I don't need to look at my navigator panel anymore so I can click on this little triangle and get rid of that panel but still keep this panel and I could get rid of the top panel and still keep the bottom panel so the more real estate you can get the better off you are for for looking at images and since that's what we're going to be doing we want to find ways to toe be ableto look at us as many images as possible is biggest possible while we're doing that and so the tab key is perfect for that just pull out all besides I'm gonna leave the top I usually kill ass it collapse the top but I'm gonna leave it because I want you to know what module we're in and so we're leaving that up there so that you can see what module we happen to be in um this area right here this grey area is called the tool bar if you had the tiki it will come in and out say that tiki pops that in and out and it shows you all your modes shows you your survey mode it shows you this is a comparative mode which you can get to by hitting c the compare mode allows you to choose between two photographs and then you can keep cycling this photograph until you find a better one um I don't use it all that much because I think it's an inefficient way to look at photos unless you're looking at family photos with like thirty people in them then it's really efficient because you can zoom in like this and then see how follows the two around so then you can compare faces back and forth between a family photo um and if they're not quite lined up you can line this one up and then see that little lock button right there if you unlock it then you can grab this one and move it until it's lined up and then lock it back up and then you can compare and it just they follow each other so that you can see exactly where you are it's really useful for family photos and stuff like that but not so useful for just random photos so um so we're not going to use the compare mode all that much today but we're going to mostly be in the survey mode the toolbar is also where if you're in the grid you'll see other things like colors so I can add colors I can change the thumbnail size there's a lot of other things that you can choose to put inside of your tool bar for instance your rating so there's the rate rating area your flags so now you can see but this is your adding and you're changing so if I'm clicking on this image and I click red it adds a red sea out red has a red frame around that so it's actually adding these things to it there's a difference between that and right below it you'll see here right in the filmstrip that there's flags here their stars here and then there's there's colors here those are actual sorting mechanisms so this is a filter down here it's not adding him if I if I zoom out here and I click on I want to see on ly flagged images, I click on that it's saying, oh, I can't find any flagged images here okay? Well, what about one star images you know they're one starring above so it's a it's called the quick filter so it's it's a quick filter um if you don't see some of those things down there it's because you haven't used them yet and so you come to this little drop down right here in the custom filter and you click on that and then you use one of them so like click on rated and then once you've got the rated up, then this little thing will stay there so it just has to know that you want to see it and once you show it that you want to see it, then it will show it to you also see the file name here and you can quickly jump toe other files and other folders that you've used, so see how I could quickly jump to a different folder without having toe I don't have toe tab out go find the folder up here. If I've already been at the folder, I can go and click on this drop down inside of my film strip and go to a recently used folder or toe all photographs or something like that so it's a very quick way to get back and forth between different folders that you've been to and then on the left hand side, you can use these arrows if you'd like to move between photographs and what not, but that doesn't make a lot of sense um or right here one and two this one into, um is a second monitor so if you happen to be running to monitors and you click on this too another the stuff light room will appear on the other monitor and so then you can use that other monitor for showing something else so for instance in this case you can see that I'm looking at the grid here and then over here I could be looking at a loop mode so then if I click on an image, it shows up full screen over here but I've got it in a grid on the left hand side so it's a real quick way to just go I like that image looks good and then you could see it full size over on this screen and then as soon as you don't want to use this anymore, you can just turn off that second screen and that way you could have you know something else playing over here so the two lou or whatever you you know you're watching a show or your you know, someone's emailing you or whatever you could be doing that over there now? Um if if there are people out there on the internet that have heard me speak before, you know that I have told you never to watch you lou and don't need texting and don't be emailing while you're working on your photos if you're a professional that's very true don't do it because it's inefficient and you're not paying attention to your primary task and doing your job so if you were my assistant and I caught you texting while you were supposed to be editing I would be very angry with you but because this is personal work and we're just having fun and it's it really is scrapbooking and and personal photographs and stuff it's it is for fun so if you like to have fun and watch you look at the same time I'm not going to be grudge you of that but you're just not to be paying as much attention to your photos I mean I I know that if I'm watching house I'm watching house I'm not doing my job you know so just be aware of that usually the best way to work on photos that's have music playing because it keeps you entertained but it's not visual you're not constantly distracted okay so that's what these down here for and then we're gonna go over to the right hand side and on the right hand side we have a history graham everybody should understand history grams this is really important and their history rams on your camera and their history grams here and they match the same thing the history ram here in the history am they're exactly the same because all it is is a detailed description of how many pixels there are at this level of brightness so if there's one pixel that's blown out or that super why it's goingto have just have one little pixel up here and then it's for instance if I go to this photograph here the history rams see how that let me let me get this full screen here so there's no blown out whites in this photograph and so you can see the history graham over here on the right hand side ends before the end of the photo before the end of the history graham see how it all drops down and then it's goes to nothing it's because there's no white there's no absolute pure blown out white however if I go to this photograph here to see how they pile up that's this area right here piling up so that entire section right there is this big pile that that crops itself on the line so that's a lot of white blown out white which is fine if you don't care about the sky then that's fine to let it blow out but the history ram is telling you what it's in the photograph and whether it's a properly exposed photograph if you read those hissed a grams while you're shooting you're gonna have a much better photograph when you come in here but that history ram will help you in determining now instead of if I'm going around selecting images and I find an image that's a little underexposed or a little over exposed or something and I don't know if it's fixable? I can click on the image and aiken briefly look over at the history graham in history, graham tells me whether it's a photograph that se va ble if the photograph is really dark and there's a bunch of stuff piled right here and there's nothing right there it's probably not save a ble, just skip it, but if it looks like this, then it's probably save a ble in fact, it's perfect. So you if you get to learn and understand a history ram and feel comfortable with it, you don't have to go to the develop module to see if you can save it and then come back. You just have to glance over the history ram say, oh that's fine, and then just keep moving or you look at and say, oh, that's trash! I can't use that, so get to know your history rams and if you get to know your history rams here, pay attention to him while you're working is the beauty of working inside of light room? Is that there's so much information being given to you about photographs that, as you're working on your photographs, you're becoming a better photographer? If you use it as a lesson, use it as an opportunity to become better, and if you look at a photograph that you love and let's say you like this photograph but then you say, oh, I really wish it was a little brighter and baba blah blah when you're in the developed module so when you're over here in the developed module and you're working on that photograph and let's say you brighten it up just a little bit see how it changes the history graham so let's say brighten it up a little bit and you take the highlights in her hair down see how those see these highlight it's here so I can grab the highlights in her hair and I can bring him back under control so if you work on all those photographs and you take the shadows up a little bit, see how it's see what it's doing is taking all of these the blacks that air here that are piled up here as you grab the shadow and raise it watch those blacks are dropping and then all of a sudden boom they start piling up here because now they've stopped being black and they started being grazed so they've shifted themselves and so that's that basically is telling you how many gray images are pixels there are now instead of black ones and so once you like the history graham and you say, oh, that looks good and this is what this looks like and it's a perfect image look over the history ram and get to know the history graham what does a hist a gram look like for an image that's exposed that looks like this that way when you're out shooting stop looking at the picture because these screens they're unreliable you know, if you're out in the bright sunlight they look darker and if you're out there if you're in a movie theater it looks too brights like oh that's so bright because your eyes changing based on your ambient conditions so these air unreliable screens but the hist a gram is perfect and so if you get to know this hist a gram and what it looks like when it's correct for this kind of photograph then when you're taking pictures, just make sure that history ram is always showing when you take a picture then looked down at the hist aground say yep, that looks like a great history graham for this kind of shot and then you'll know that when you get here it's perfect so pay attention to history am in here and that will help you become a better shooter when you're taking pictures. Okay? Yeah amount of variety of colors that is actually in the history gram that's telling you this is a good picture because you've got a good representation you can't when you look at a history and there is no good stir him there is a good history ram for this picture because every picture has to look the history am looks like the picture if you take a picture of a polar bear in a snowstorm it's gonna look like that with with some extra blacks right down here for the eyes and the nose but it's going to be vacant in the middle so that history and looks horrible for that that's a bad history um for this shot but if I'm taking a picture of polar bear in a snowstorm that is a good history graham so you you just that's why I say you have to get used to look at the photo look att the his scram and get to know what a good history ram for that photograph looks like come to know it this is the blacks this is the the dark grays this is the mid tones this is the highlights and this is the pure white so as you look at that if you get to know those areas and realize ok if something's blowing out this is what the history graham looks like then you will get to know your camera you'll get to know your chip and as you get to know them you'll be able to take better pictures then you'll be able to push your camera to its limits if you can't push your cameras to its limits because you don't know it then you're always going to be at the mercy of whatever happens to show up so the more you khun get to know your history ram the better off you'll be a za photographer at least getting good captures doesn't mean you're going to get good focus and it doesn't mean you're going to get interesting pictures you could still have really bad composition, but at least you're exposures will be correct and then that's just one of those things I always think of it as golf, you know, golf it's like you have to have the back swing right? And then you have to have your foot position, right? And then you gotta have your thumb position, right? You've got all these different things and they all have to happen at the same time in order for one good hit to go off, right? So that's gone, same with photography, so you've got composition you got exposure, you've got posing, you've got come, doris and composition you got timing? Um you've got shutter speed and aperture depth of field and all of those things are different elements of that golf swing and all of them have tto happen exactly right all at the same time for the photograph to work so it's a very challenging thing to do and I think that's why it's such a popular thing for people to do because such a challenge to get that shot that's so amazing because all those moving parts are constantly fluctuating but if you can nail one of them if you can get to the point where you really understand exposure and hissed a grams then that's out of the way you don't worry about that anymore now you can worry about the things that are moving in the the smiles and the moments and the compositions and stuff those are the things that really challenging to get at the moment so this is one thing that you can learn and you can get it under control so that's a really important thing to see now right below that you'll also see see how this one has original plus smart preview remember we talked about smart preview and if you build that smart preview on the way in then if this photograph is detached if we pull if we eject the drive we'll still be able to work on the photograph because it has the smart preview in it now watch what happens if I am going to take this the photo drive here and ejected it's not there anymore so now our photo drive is gone if I go backto light room notice what it says the original's not there anymore just a smart preview but I literally there is no photo attached to this computer that they're just the light from catalogue I could be on an airplane I could be wherever and I can still adjust this photograph, see that smart preview there, there's no photo, the hard drive's gone and we're working on a smart preview, but I can get all the information now the only thing I can't do is when I zoom in, you'll notice before when I zoomed and it went all the way into her hair, right? Because it was like a twenty three megapixel image. Now when I zoom in, it doesn't go quite as far because it's a smaller version of that same photo, which means that I can export photos from here. I can blogged from here, but I could only blogged about a five by seven ish photo as opposed to a sixteen by twenty but that's fine, because most of what I'm sending out is a smaller photo anyway, so I could literally send out proof for by sixes to my clients from the smart previews, but I can't print them a sixteen by twenty until I plugged the drive back in, all right, all right, so and and I could just keep working on this. I'm just going to keep working without plugging in the drive because I don't need it now. If I went to a different set of photos that hadn't built the smart previews for, then you would see something different, so if I go to the library, module and I go into see these are all photos that are not here, but if I go down to say ah, this one here and there's no smart preview now it says that the photo is missing I can still look at the photos so I can still look att this is my son scram on he's reading to grandma so there's a love this photo so this is a great photo, but I can't I can't go into the development see how that's it's all great out because I didn't build the smart preview for this photograph, but that doesn't mean I can't use it. I can do other things with it, I can increase the star rating to it I can pickett I can even come over here the keywords and I can type in key words to it so I can do a lot of stuff to it. I just can't adjust it because it's not there so that's why you want that's the difference between building a smart preview or not building a smart preview if you're always attached to the drive because you're on a you know, a stable desktop system, this will never be an issue, but if you're on a laptop and you want to be able to take your photos with you but not lug around a hard drive with, you just build the smart previous when you come in we showed you how to do that in the first segment um just build those smart previews on dh then you'll be good to go and you could just take your laptop with you and you can leave the photos at home. You don't even need to bring the hard drive with you. The exception to that is if you're trying to put new photos on it, you might want to bring the hard drive with you because you're going to put him on the hard drive itself. All right, okay, so let's, go back to our see how handy this is I don't have to go find it there. I just click right there and we're back where we were okay, so we got the history ram then we've got the quick develop quick develop is just really quick adjustment so if I'm looking at a set an image here and I want to quickly adjust it and it's a little too dark or a little too bright I just simply click on these buttons here so this is exposure just click it down one and it just pops down and that the centre buttons here are in third stops so one third of a stop each and then this these aaron full stops so exposure would be one full stop down or one third to stop down one third stop up full stop up meaning and for those of you who are not super steeped in what a stop is photography wise ah stop is basically double so if I am an ex exposure and I double the amount of light that's one stop if I half the amount of light that's wh one stop down s o cameras generally go in one full stop or they go in third stop so usually you're sl ours you click three times one third stop three clicks equals one stop which is a full double exposure double double the amount exposure so temperature and tent don't work in stops necessarily so this is just a lot warmer and a little warmer a lot cooler a little cooler um you also have access to all your pre sets right there just like we did on the import dialog box and you have access to all the different types of of white balance settings that you might have um and keep in mind that if you shoot raw versus j peg if you shoot raw you have complete access to decide later what the white balance is going to be because it's just capture and raw data and then it khun you can choose what kind of color balance you thought it should have been so if you accidentally shot everything on indoor uh you know uh cfl's or something like that and you had it set for that but you went outdoors and so everything was this weird green bluish tent or whatever all you have to do is come here highlight the entire event outdoor click on this white balance setting and then tell it I'm in daylight or I'm in shade or I'm in cloudy and then it would change to the correct temperature um so there's but why the here's here's a question that people ask why do I use quick develop instead of going to the develop module and the the answer is this the develop module is specific slider uh, positions so if you go to the developed module and you start sliding stuff around here so like like look at this and I grab this exposure and I go up tio you know, one plus one so one stop ix over exposed which is obviously too much um see that number right there all of these take you to a very specific number and the beauty of the developed module is that I can highlight a set of images like this and if I go right down here this is new to light room three, four and five I think or foreign five, three, four and five I think is this little toggle if I click on that it turns toe auto sync so now anything I do to this one photograph will be done to all of the ones I have selected so I grabbed this contrast and increase it. The contrast is have been increased all of these at once now, if I have let's say, I take the exposure on this image, and it's up a little bit, and I take the exposure on this image and it's down a little bit. So this one's brighter this one's darker, and I highlight both of them, and I move this exposure knob say too, one point five both of them just turned toe one point five c that number, because the position is exact in the developed module, anything that you do is an exact position number, which is not very helpful when it comes to in the grid module, when you have stuff that's all over the place, and you don't know where it is like, for instance, I shoot not a white balance, so I might walk inside and get something, and it goes, oh, I'm inside, so I'm going to do something under tunks, unbalanced so that it looks right inside, and then I go outside and it changes the white balance so that everything looks right outside, which is much more blue light, and so the the white balance is changing all over the places I as I shoot, but then I come here and I say, you know what they all look fine, except they all ought to be warmer. Well, they all ought to be cooler, but I don't know where the white balance is. If I were to go to the develop module and change them all to the to a white balance, like warm them up or cool them down, it would take them all to exact kelvin rating white balance, so I'd be like all in would get fifty, five hundred kelvin's, and so then anything that I shot outside, you know, would look all right, but anything I shot inside would look too warm, and it would be all over the place inside of the quick developed area instead of being exact, it is relative, so anything I do here is relative to what the photo is already, so no matter where the white balance is, if I click on temperature warmer, it will move them warmer by the same amount, but this one could be less warm, and this one could be more warm, and all of them get moved up in their warmth or down in their warmth. So it's just kind of a relative warming or relative cooling so that's where this is very useful, you could go into an entire job or entire event on dh travel, you know, from rome to cnn tow wherever highlight all of them and then add contrast all of them, and add warmth to all of them. And they would all just get a little bit more conscious, a little bit more warm, no matter where they were. As as for you know what you've done in the developed module. So that's why this exists. Otherwise, we don't use it all that much. We will use it when we gets to video, because these things can be used for video, whereas the develop module, you can't use the develop module for video itself. There's, there's, a workaround and a trick to it that you can use some of the stuff from the develop module, and we'll show you how to do that when we get to the video section.
Class Materials
bonus material with purchase
Free Bonus Material
Ratings and Reviews
Steve61861
I have spent a small fortune buying classes from Creative Live, and I have learned a great deal from many terrific instructors. This class ranks as the #1 best class I have purchased from Creative Live. It was done in 2014, and the changes and improvements in Lightroom since then are far too numerous to count. However, I just watched the entire class again (August, 2018) and I realized that the class is as valuable today as it was when I originally purchased it. The title says it is for Scrapbookers, but it could have been Lightroom for Everyone. Jared covers every part of Lightroom as it existed in 2014, not just Library and Develop! He has a marvelous teaching style that motivates and inspires one to grab a camera and go take great images. Yes, it is dated. Yes, it is a long course - but only because it thoroughly covers a vast amount of information about Lightroom. And, yes, it still has real value in 2018, and I plan to rewatch it once a year now for the motivation it provides and the incentive to bring myself up-to-date on ALL of Lightroom's latest and most valuable features in all modules. Thanks CL for bringing Jared Platt to us, and please bring more of his great classes soon.
a Creativelive Student
Good class. Jared is an excellent instructor and provided good information. I was more interested in Lightroom than scrapbooking and I think the mix was about right for me. While I found the focus on Trajen interesting and heartwarming ... I found that too much information was shared and too much time was spent on his story. It was distracting for me and I think would be hard to listen to over and over again if I were to buy this course. I think that some of the material was rushed because of the time spent covering this and other unrelated topics. I prefer a more focused approach. I was more comfortable when he was showing photos of his kids as examples the first day. However, I enjoyed the class and learned a lot. Thanks!!
cricutDIVA
Thank you soooo much Jared. I am an avid scrapbooker and still an amateur photographer, but you have given me so much helpful information that my pictures are looking really amazing now. I often share on Facebook and the compliments I have been getting since I started applying what I learned from you are astounding. I have never received so many compliments on my photos. Prayers and positive vibes for Trajan and his family and friends!!!