Lessons
Day 1
1Class Introduction
24:29 2Lightspeed Workflow Overview
39:04 3Skype Call Testimonials
16:13 4Backup Options and Safety
19:00 5File and Folder Management
16:36 6Job and Client Tracking
31:27 7Enhancing Presets
17:47Lightroom Preferences and Watermarks
32:11 9Renaming and Export Presets
27:54 10Basics of Making Presets
36:49 11Assigning Metadata and DNG Conversion
20:00 12Editing Workflow
24:33 13Overview of GoodSync and Kumu
31:38 14Labels and Quick Enhancing in Lightroom
32:53 15Editing with Lightroom
22:39 16Photoshop Integration
27:53 17Compositing in Photoshop
33:50 18Publish Services
20:11 19Slideshows and Orders
36:38 20Albums and Soft Proofing
19:57 21Portrait Workflow Part 1
32:22 22Portrait Workflow Part 2
24:56 23General Q&A
11:44Day 2
Lesson Info
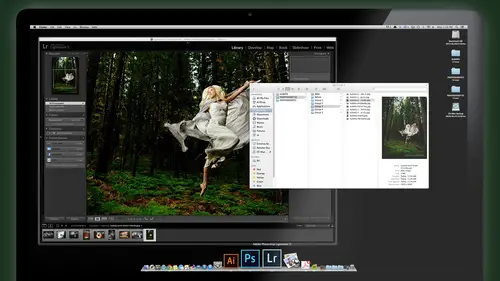
Assigning Metadata and DNG Conversion
presets are done. So I'm gonna do select all the images right now. Command a and do command shift our to reset all my settings back room. Okay. And we're going to now pretend that this is a fresh job. We just imported it, and we're ready to start editing. Okay. So, de select, then here's all over images and what's going on with this, you know? All right, so we're gonna go to the tougher images. Let's rewind our minds now. We just imported. Okay, so you get all these presets set up, you got, like, room. Set up your shortcuts, your collections, that you're ready to work. You imported your job. First thing we're gonna do If you guys can picture a little flow chart in your mind, let's go back to our flow chart for you. Here's our flow chart. So we're at this point here of important to light room, okay? And we're gonna jump into setting a client metadata and fixing and converting in factory naming at those steps right there. So we bring the images in, and the first thing I'm gonna do is to ...
put the metadata in the images. So I have all my images. Make sure looking all the images. Select them all command or control A on your PC, man. And make sure that what you do now affects all the images we're starting. Teoh. We're importing and going to go ahead and start setting the metadata for the images that were We're kind of resuming. We just brought them in. We imported them go and took a little side trip to talk about defaults and presets and all that. So now let's say that's all done. We're ready to This is what we would pick up and work on an actual job. Okay, so select all the images on the right hand side in library mode. On the right hand side, you're gonna scroll down to where you see your metadata field, and you're gonna make sure that this little option X if and I P T. C is selected. This is your basic meta data, and you'll notice already that you've got some information already embedded in there. The file name, um, status all about a camera information, but what you're looking for And here's remember, we first imported those. We put my name and copyright into it. That's where it's gonna be embedded in the image. We're gonna go a little further down now and look for the section that says Job I d. Job identifier. And we were what's gonna go in that section? F 0009 Or am I getting that from? Just peek over to the left side, right here under the folders that shows you the folder. And that's based on the folder F See it? All right. Like his glance over there get my job number entered into the job I d Field scroll down to source and put in the client's name. Also, that I peekaboo from that side and the folders on the left okay and hit Enter that information is now invested in every single one of those images. So it's now I'm pretty much I know I can always I d these images now what happens even if the name gets totally changed or screwed up or whatever? All right, so I select any particular one image. Oops. Sorry. I forgot to tell you one day we gotta turn on turn on Auto Sync. I turned that off for another demo. Is doing here? Auto Sync means that if I do it toe one, it applies it to all. If I've auto sync off, which I normally have it on, if you do it, even if you have all selected, it only does it to the one active image. And this is a good, uh, clarity point for a lot of you are new to light room. There's two things in light room. There's an active image, which is this one that's brighter. There's selected images, which is This one is brighter, plus the others that are highlighted and there could also be unsolicited. So there's three states active selected, these three or selective. This one is active. These air not selected light room calls it the TheStreet. This one's the Mawr selected image in the eyes of the selected images, more selective, which is funny, but I think it makes more sense to me to think of your active image and then you're selected images. Okay, Uh, and that's really important because the sink, if I have auto sync on than whatever changes I do here, applies to everything that's selected. If I have auto sync off, it only applies to the active. And that's what happened before. Had this turned off inadvertently. So it only applied it to the one image even though I had all selected. So I'll select all matter control a more time. Do this. Go to my job. I d f there's there's Scroll down to source. Anita put her in there, and now she didn't do it again, I think I need a super sweet. There were nine. Okay, on top. What? You're looking forward. This has set meditated on multiple photos to the top left right here. That means it's applying to all of them. Okay, two times with her eternal auto sync because I'm talking about I forgot it happens to the best of us. Okay, so now if I switch between any image in here, I should have that same metadata embedded. All right? Okay. So once we have that, we're going to rename the photos, so I'll back tree, name them, select all library renamed photos and check it out automatically. If I choose my preset that we made earlier this in the client tagged renaming scheme, it's automatically gonna name that with the job number Anita's name and a sequence number because it's pulling that from this metadata to build this format for the remaining her name, cause it's actually reading it directly at the metadata and redeem it. So I don't have to even type anything in all I do. Just pull this up, choose number three and go. Okay, So now each image has the the name that I want. Job number client named image number. Don't edit it on right down the line. All right. Now, if we're going to the DMG conversion, we could do that at this point. Select all, huh? Library convert photos to D and G. All right. And I have the option now to do lossy compression. These D three s files are not that big. It's not super high megapixel camera. It's just about right. So I'm gonna leave that off. But I could if this is a d put the lossy compression on here. Convert. And here's that option. You want to just be really aware of delete originals after conversion? I'm gonna go for it, baby. Living on the edge of a donkey on the edge. PNG format raw 71 medium size preview is just plenty groovy. Fast load data put that on there. It takes up very little space but helps your browsing and adjusting images go much quicker. Noticeably quicker, not much quicker on that's it. Those settings. What you want when you convert, hold your breath and go 272 images. I'm gonna convert and delete Oh, and it goes. That's working and one of time. You'll see little DMG icon appear the top and you have to start to disappear and they're swapped out with D and G files. All right, not so hard so far, right? No good. Okay, I get a question. Hahaha this, like, literally no difference between the DMG File and the Parrot Terry foul like whether I can so see, are you so there's no real justice? A smaller is just a smile like a smaller, more compact, So it's a little bit of space. Yeah, there's, um, it's a little there's a little confusing here, but at the very core level, no difference if you don't put on lossy compression. If you use that lossy compression option that we by passed on this one, Um, theoretically, there is a difference in quality because it's throwing something away to make that thing much smaller, but you will be able to compress it quite a bit. Um, again, I've done tests that I can't see a difference in normal size prints, so that may be a great option to save space on its. But if you don't use lossy compression and you just convert it to DMG, there really is no loss of anything. The original file to that, Um, if you downsize, it's a from A 20 megapixel to a year, obviously throwing ways to information to get a lower megapixel. But again, that's a that's a reasonable trade off for the huge file size differences that you're gonna get. Yeah, okay, even though you're deleting the raw files, they're still saved in your cloud storage, right? If I have Auto Sync on as this creates my d and G, that's actually getting swapped onto here, too. So those raw those any efs are being over written by D and G's right now, as this does this, it's also happening here. If I have live sink to my cloud, that's also going to be happening in the background to. Now, if you're scared about that, don't Don't do the delete. Just make the DMG and keep it alongside the other one. You've doubled, you know, 30 gigs, 40 gigs, whatever it is of raw files that you had for that job. Do that for a while. Do you feel safe? You know, if you like. I said, I've done that for how many years we've been converting to D and G, and I've yet to go back to the original Raw for anything, So I feel pretty good about it. But again, if you're not comfortable doing that yet, don't saved saved originals and make the D and G s for a while until you're comfortable that it's good, you can use it and you have to worry about it. Kevin. Specially clarification. I think you just get a library and encumber toothy n G. Versus. I think there's another way to do its export and in the end gear. So there's three different three D show. All come running to the same the Jesu. Three different ways to get your D and G's actually four different ways to get a D and G, um, the first way is to use Adobe D and G converter. It's a separate app that's free from Adobe. You can download it and that you can just It's a separate app. You can just dump a full folder of images on their raw files, put all the settings you want and it go and it just footers converts them. And that's one way to do it. You could just pre convert before you even get the light room and have that done by the converter. Um, the other three ways are in light room on import. There was a convert to D and G, but the that option doesn't give you the It doesn't give you the option to compress and make it smaller. It just a straight DMG conversion. The second way in light room is to use what I just did, which is the library convert to D and G that gives you the option to do the lossy conversion. The third option is the export method I touched on earlier. That gives you access to everything you could have lossy compression plus reduced the resolution, so I know it starts to sound confusing. But if you can't understand, there's two types of two ways. You can compress a file. One is to use lossy compression, which is like Jay pegging it. But the resolution doesn't change, just throws out pixel color bit information. And the other way is to actually take pixels out, make it a smaller file, which is what the reduced resolution is. So that export method that I talked touched on earlier is what gives you the most options as well as DMG converted the app. Just open it right now. Okay, sever the lap. And if you just look at it's pretty simple, you select the folder, you want to convert where you want it to go if you want to rename them. And then in the preferences you have here everything that you could possibly want, you can preserve the pixel count and loss to compress it down. Teoh megapixel, 10 megapixel. Whatever you want. Um, change the preview side. The fast loads pretty much everything that you have in life room is right here. It just doesn't all but without light room. And you can anybody can download this. You could, even if you're not using light room, you can download this app from Adobe. Okay, so pretty pretty, pretty nice the lap If you want to just quickly batch converts on Indian G and not do anything else with it now, before you edit them. Is that difference or Yeah, I just want to get it done Is part of my work flow because as I'm editing, you will be saving the metadata out to the files and in a D and G, that metadata gets saved with the original image. If my catalogue crashes right now, I can go to that D and G pop those in a new catalogue and everything that I did would be right there back up again into the catalogue. So my will just start with it. If you're gonna make a dingy just started beginning and do it, you couldn't do it at the end. It's just that is not the friends. There's no roads. No, just yeah, just do it and have him there so that, you know, from this point on, you're working with one single DMG file. Everything's right there, and it's also a little smaller file. You've got the fast load, and actually, you can edit a little bit quicker when you have the D and G with the fast load thing options that we checked, then if you're working straight off your raw file a little bit quicker, yeah, so our DMG conversion is done. You can see the Progress Bar has disappeared. And if we look at all of our files now, they stay D N g. And one thing I want to share with you guys, let people ask, How do I see this information on your thumbnails mind? Don't have that. Me Don't have that. So here's how you see that information. This is really good to know to you go to view view options and I think it's a good idea. Let's look at this image over here. Instead, both windows up, she was expanded cells for your grid extras that shows more stuff on your thumbnails. And, ah, most of stuff. You can leave a default to play with it, but one thing I want you to look at is down at the bottom of has expanded cell extras. This is where you can hide or show the headers, which is this that shows you that extra information and that becomes in handy when we start to fix capture time errors when we want to see one camera versus a second camera or want US exposure information, or we're gonna verify it's converted D and G. But later on, we don't want to see that. So here I can choose camera model camera serial number. If there's one embedded, there's a serial number on why you're going to see that. But that could be handy. Uh, camera model. If you don't really care about the camera model anymore, why not put in the common photo settings instead? So now you can quickly see all the settings for this particular image. If you want, I d that file name. Or you could have just the base name so you don't need the extension on there because D and G's shown over here on the right again. So so many options go through these and change them at will to suit how you're working, and I change what I see on here all the time, depending on what I'm working out. Sometimes I'm wanting to match up times that I captured an image so I'll show the time in the top right corner and then other times, I don't care about that. I want to see which camera they came from. As I'm comparing the shots that I want color match two different cameras, I might show the camera formacion. Other times I'm looking for exposure because I want to see why this image look that way, what with my settings on that at that time on the camera. That's a great learning tools to look at images at work and don't work and look at the exposure. Look at the settings and say, OK, this is why it may or may not have worked. All right, so there's a lot of different things you can set on the once you've got that. There's also loop view, which is the big blow up view here. You can change what shows on the window as well. Here up in the top right corner. This is really handy comes from Card one. Um, the common photo settings might be more important to you in this big blow up view. Camera model dimensions again, you decide. Once you've decided, here's a quick shortcut. I, for information will cycle between those threes to get up Three different sets of information. Nothing. Full camera information or just the car Did. It came from and back in the other view, you have the four corners to view, and you can. Here's another shortcut. You can right click on that piece of information and change what shows there. Say, I want to see the common attributes down there. But up here, I want nothing new here. I want nothing. Appear. I'm gonna want the common photo settings. Okay, so that's how you tweak it on the fly as you're working, you can change what you see in those things. Good to know. Good to know. And does it change it to all of the, um, even if you just have one selected, does it change it to the, you know, Do you need to select its a general view for all your images? Okay. Everything you're looking at that time. Okay. All right. So we converted to D and G, and we're gonna just double check here. We'll switch over to our hard drives. And this is the folder for the job catalogue. This is the folder for the actual images for Anita. Okay. And we converted them right there inside her folder. So all my used to be any f sent here are now DMG DNEs are gone. Okay with that, I am okay with that and we'll do a check. Now we go to special K are back up, and hopefully our backup is working. If it didn't crash in the background as well and there's all the d and G s or now have been also automatically throwing into the backup drive. Okay, so our systems working
Class Materials
bonus material with purchase
Ratings and Reviews
fbuser 471f6dc7
Amazing.... Amazing.... Amazing
smilies
This course has been more than helpful in the areas of organization and functioning more efficiently with my photography. Thank you for all you do Kevin Kubota and CreativeLive!! :)
a Creativelive Student
This course was really helpful for me to speed up my workflow. It gave me ideas about how to keep things organized and backed up, making me more efficient and my images safe.