Lessons
Day 1
1Class Introduction
24:29 2Lightspeed Workflow Overview
39:04 3Skype Call Testimonials
16:13 4Backup Options and Safety
19:00 5File and Folder Management
16:36 6Job and Client Tracking
31:27 7Enhancing Presets
17:47Lightroom Preferences and Watermarks
32:11 9Renaming and Export Presets
27:54 10Basics of Making Presets
36:49 11Assigning Metadata and DNG Conversion
20:00 12Editing Workflow
24:33 13Overview of GoodSync and Kumu
31:38 14Labels and Quick Enhancing in Lightroom
32:53 15Editing with Lightroom
22:39 16Photoshop Integration
27:53 17Compositing in Photoshop
33:50 18Publish Services
20:11 19Slideshows and Orders
36:38 20Albums and Soft Proofing
19:57 21Portrait Workflow Part 1
32:22 22Portrait Workflow Part 2
24:56 23General Q&A
11:44Day 2
Lesson Info
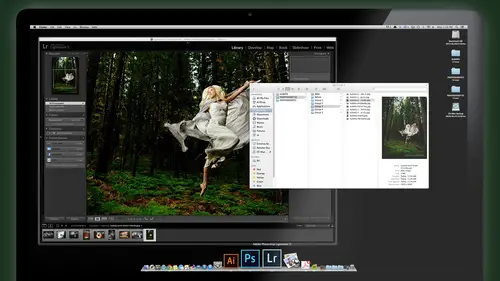
Compositing in Photoshop
we're ready to play with our little composite. So now I'm gonna select the main image, the background and all the books that might possibly use for this composite and may or may not use every single one of these books. But I'll just take him to photo shop and play with them first. Select those images. I could also go. And we made a smart collection for that or composites so I could go to the Composites Smart collection and grab those images all from there easily. And I'll use photo edit in open as layers and Photoshopped. It's like we did with the other composite mystic all those images into one file street to photo shop and put them on their own separate layer. Ready for us to start playing with, Come in. Any questions out there? Why were take just 30 seconds or so for this toe? Finish loading. Yes, we dio. So people are still a little bit. I want to get a little bit more of ah clarification on going back to light room from Photoshopped. Okay, what is sort of your favorite way to kind...
of then head back? Uh, yeah, it's actually easier than people. People always try making more complicated than it really is. You just closed the image on hit save and light rooms already sucking it back into their. So you just toggle between the two programs. You just switched the light room, and there it is. So it really is not even bringing us a separate image back into your again just to show that. So let's ah, go out of our composites, got all our images and just grab any image here. I'm in light room right now. Command E is typically the way you pass it to photo shop. It opens in photo shop. You do whatever you need to do on this thing. If you wanted to take your dashboard and go DJ for digital fill flash, maybe double click. This is similar to the one we created in light room, says paint. We need light. One more light on her face glow. There may be, um, at a texture to it. Take the texture off where you don't want it, the texture of the background on her. Let's take it off for that. Keep in the background room, so just have a just on this background area now little on the edges, and it's done. Talk going back to life room as simple as just closed image. I use command. W Shortcut again. File close. Don't do that. Use the shortcut. Command W for a closed window, and it automatically says you want to say this right And the default button is safe, which is, since that buttons glowing, you know you could just entering your keyboard. That's the default buttons I just enter. So just command W enter. Soon as images disappear from Photoshopped, you can switch back to light room. I'm just toggle ing the program shifting over to light room, and there it is, in light room already loaded up, stacked to the original raw file. This is the tiff file, and I just type s to stack it and hide it behind the Dylan. So that's that's the project's pretty seamless, and it's actually simpler than what people think. It's more complicated than it really is. It's just close. It goes back in there. Kula addendum to that If you the engine behind adobe camera and light room are similar if you make new miracle adjustments in either one and move it back and forth. Will those those numbers show up with the same numbers in the camera Raw? Yeah. Yeah, I should. When you go back toe when you go back, Teoh Lana's your long as your camera is up to date with the latest version. You keep your software all up to date, then they should match the ones that you do in light room. Great. Yeah. Cool. Thank you. There should be parity there. That's adobe goal anyways, to keep parity between camera along to keep it updated, because there's always like, an update. When the update light room, you get up to your Camerata match. Otherwise you may not get exactly what you seen. Okay, so let's go back to our composite. So we have girl jumping and we want her down below, some to drag her layer to the bottom right here in my layers palette. And I have plain old background my drag that down to the bottom, and then each of these we have are just books, and I'm gonna just turn the books off temporarily, okay? And if you want to, it's a good idea to help yourself keep things in order. If you select the bottom book clear and the top book layer with your shift key that selects all those. And I'll say from this little menu at the top right here, new group from those layers, that means just put them into a folder. I'll call it books. All right, So I opened that up here all the books, and that makes it easy for me if I them all visible to turn them all off and on with one click inside the books folder. So keep the book separate from the other. Image will get to the books later. Makes sense. All right now the same thing. My backgrounds. Not perfectly allowing. Notice what? I shift the background, but we can fix that quick, right? Remember that? Select both at it Auto align layers use auto and said, OK, being now the backgrounds lined up and we have our girl and same as we did with our previous exercise, will select the top layer of these two. Add the mask, get our brush. Black is a four grown 100% opacity. Make sure the brush has a soft ish edge. Okay, and we'll just get rid of the junk we don't want here. We want trampoline. And sorry, I don't want Alicia either. As much as I love her, she's out. Okay, Little late spill on the ground will clean that out as well. Now we have aerial. So then how do you clean up that little bit area here? All you do, you zoom in and just get progressively smaller on your paintbrush As you get closer to your head, you just keep making that paintbrush slightly smaller. I'm using the left bracket key on my keyboard to shrink my paintbrush size. Another little trick here if you hold your shift key. So click right here and hold the shift and click here at the end. It'll draw a straight line between those two points. So I'm just getting progressively closer and closer to the edge of the suitcase. Trim away. What? I don't want Alicia. There's a little bit of her fingers right down here. No, just you would even notice that. But I'm gonna take Grievous. I'm gonna click here and then hold the shift key Click there that erases in a straight line right across that spot. Okay. She's gone our good. So I'm gonna probably add books so I could crop this thing right now, but, uh, that's going to crop it now. Use my C for crop crop out the light panel. I'm gonna crop to there a little bit of flare from the light panel. But I can get that out by again, using my mask bay brush this time painted away. And this leg I can't paint away because it's on both layers. So remember we did before to get rid of those things. So I'm gonna select these two layers. I'm done with the Alicia getting her out of there. I don't need to worry about having two separate layers and I just merge those two layers into one and then I can use my lasso tool. Select the legs. You're the shortcut. Come on, kids, you can do it. Shift que shift dilly shift, delete shift, delete. And if you use content aware before it'll be right there in front of you again, if not, choose content aware and hit, OK, and boom, your leg goes away and it's filled in automatically with stuff that should have been there in the background. Priestly. Right. Um, actually take a little bit of this top. We got a little left over there. Select that shifted lead as well. Okay, so now we're ready to add the books. So what I'm gonna do is to start one by one and decide if I'm gonna use that book or not. And this is the 1st 1 right here that's visible. And here's how we're gonna do that. I'm gonna take my lasso tool shortcut. L and I'm gonna make a rough selection around the book. Okay? I'm gonna reverse my selection. Command shift. I control shift I on the PC and that actually see it. Now it's selected everything but the book. And then I'll delete get rid of that extra crap. And now I have just a book of the selected Get my move, Tool V, and I'll start to position that book where I think it might look good. Be right there in front of her face. Okay, then there's a little bit of edge work to clean up. Same way on that layer that's already selected. I add the mask right down here. Brush tool with the B. Make it small. Make sure it's got a soft edge. Okay. Hardness is all the way down. Make sure that the selective color is black, because on a layer mask in Photoshop black blocks, it's only a mere black blocks and white reveals, like Elmer Fudd would say white reveals in black blocks. So we're gonna block the edges with our stuff brush and blend them into the background. I just schooling right along the edge of that book. Okay, if you wanna get closer, he moved in with a smaller brush and get progressively closer. But because you're using a soft brush because the backgrounds or similar, it blends right in, Um, pretty darn easily. If you want to replace something that you accidentally like, I faded a little bit. This edge right here you switch to White with X because White who reveals and I want to reveal more of that original books, I'm gonna go right along that edge there. Boom! And there is there is my book floating in the air. Hey, bring it back. Where is my next book? That's a good next book. Here it looks like a different book. I wanted to look different, So select that layer lasso tool Quick selection. Inverse The selection command shift. I and delete it just gets rid of all the other stuff. Drop my selection. Commander Controlled D Get your move. Tool. Which is this one here. Shortcut V for a move. Move it. Okay, move that over there and decide where we want this book. Maybe that one's gonna be down here. Right? Zoom in. Make sure you have your layer mask B for brush, black for the foreground. Make sure opacity is worried at and just fly that sucker around the edges that you see and start to blend them together. Fear. If you're thoughtful about the backgrounds that you photographed, it should be an easy, fairly easy blend. And that is something that I purposely made sure that my background was gonna be a soft, blurry background so that I could blend these, um, priests pretty easily later on. Okay, so there is the next boat flying through the air. That's a cool book. Boom. L for last. So so locked it. Which inverse it. Delete. Move, tool. Drag it where we want de selected. Let's see this. Put that one over here. Maybe zoom in at a mask. Okay. Be for brush. Black is the foreground. It's already set up. Clean up the hard edge first, then shrink your brush and come in a little closer to fine tune it. Where needed. How long is done. Oops. Okay, next one. Let's see if we want this book. There's a couple of blue books in here. I'm gonna night. Let's use that. That one was a nice one. Yeah. Okay. Mask last. So select in verse. Drop it out. I hope I'm wrong. Earlier de select move, tool. Zoom in. Select the mask. Be for a brush and paint away. Some people ask, you know, to use a welcome tablet or and I don't. Although I've tried to use them in the past and nothing wrong with them. I mean, I think they're great if you get used to, but I'm just so used to painting. And I've used my mouse for so many years. I can paint with the mouse better than I can. Or as good as I can with a tablet on. Have access to a lot more shortcuts with the mouse and things. So I'm personally I don't. But I don't have anything against them. If you feel better working the tablet. Work it, baby. Work it. Just do one more book. I got a quick question. Why you working on those books? Are you able to actually turn those books into, like, different? Yeah, for sure. That's a great question. And we're gonna, um we're gonna kind of do some fine tuning on these books here once we get them all in there and I'll show you how we can do that. So select in verse. Clear way on that one elite. It's off. Move, tool. Take this book in this book. I want to do little were laughing there. I think that'll work. Better. Zoom in. Okay, So you said you were gonna turn the book. So let's just forsakes for kicks here. We'll turn this book a little bit. So command control T is the free transform. And if I move my little mousey outside, I can rotate position of the book. Uh, I can shrink grabbing the corner handle or grow the book. Okay. And then hit. Enter once I've got it set. Then I'll let me to clean up the edges here on this one B for brush, clean up the edge, But when a little bit off that going a little too fast year. We're gonna need to be a little more precise because it actually is overlapping. A second book. So I'm gonna get nice and tight with a small brush, right? That white in there. All right, that there make my brush a little bigger. As I get closer on this side there and I can see down here we gotta get definitely get rid this stuff so that the key to to doing this effectively and quickly is to keep a soft edged brush. And then as you get closer, when you want a mawr precision cut out, uh, just make a smaller brush and then we're straight lines. Use your shift key to draw a straight line so that you don't you have to try and draw a perfectly straight line the whole way across. That gives you a pretty clean cut. If you're using a soft edged brush, it should blend naturally with the they're resolved the jagged edges of that image when zoomed up. So you won't really notice that it's cut out. It won't look like a cutout at all. Okay, last part right there and the okay. So what? We're gonna do it? This one. We're gonna do this and do the same thing with one more book because they're overlapping. I wanna make this little moralistic and have one more book kind of just coming out of the suitcase. So let's find a good book for that. Let's seek we use that one or it is that one. I use that one. So I'll take this book to be our last one. Well, last. So it up your in verse it delete. Go back to the main image. He selected this when we want to kind of have, like, that kind of popping out of the suitcase at the same time. So put it there were going to do a pretty clean cut job on this to make it work. When it's overlapping a suitcase, it's not too hard to do at earlier Mask be Get the brush in here, get to the easy stuff first, right along with the rough edge. Okay. And what we're gonna do after this is to add a little bit of a cast shadow, so that matches the shadows. Normally, that would appear so it looks even more realistic. Zoom in. Do a little shift. Click down the line there around the corner shift click. Clean that up a little smaller shift click paint coming around here. Well, sh quick shift. Click. All right. And in this corner and shift click. Get rid of that stuff. Okay, So pretty clean now and we're going to do is to add a cast shadow, and I want to put a paint a little cash out onto the suitcase. But I don't want to touch the books. Is realistic. Eight aspects to be behind the book. Right, The shadow behind the book, but on the suitcase. So kind of Ah, good way to do that. If we select the suitcase layer, which is the bottom one here, we're gonna create our shadow with levels. And I want the levels to be affecting only the suitcase layer, not the entire image that we're working on. So that's why I'm selecting the suitcase layer first. Here, the bottom create levels and adjust the white slider down because he wanted basically a shadow is kind of a reduced in contrast and brightness right to create a natural looking shadow. So if you grab the bottom slider in your levels dialog box with the white point triangle and drag it down And don't worry about everything is going dark. We're gonna fix that. Just kind of keep create the shadow that you want that would be on the suitcase behind the book and we're creating the darkness that we would use then here on the mask for the levels. The mask is automatically white. Meaning what? Wow reveals everything I just did. But we don't want to reveal everything in that adjustment. We wanna block it so I can a couple things I can invert the mass just command I control. I makes it black. And then I will paint in with white to a veal Onley where I want it, right. So I get my brush again with white this time and just paint in some shadow. But normally I paint on the book. It doesn't affect it because the layers behind the book, right, I'll just cast myself a little shadow onto the suitcase. And I don't want any shadow outside the edge of the suitcase only on the inside. So clean up where I went over the edge here and make sure that effects only the inside of the suitcase white revealing? No. When doing so. I know this is not like a kind of retouching class anything. But when you're doing something like that, would you look for a shadow that somewhere on the book and try to match it with that? Or you could do you see, the shadow depends on how far it is from something. Um, you look at the general shadows in the image itself and what's in the image and kind of try to match the lighting of the shadows like that. Okay, so let's just go with that. You could spend more time on it. The other one is Oh, what about the other book? There it is. There is. That's the book. So this book, which is that book, is above this book, right? And we want to put a cash shadow onto this book, which is that book. So we put our layer here, but we don't want to put a cash shadow onto the background. That makes sense. So we think about your layers. If I put the shadow layer like I did with here right above this, I could accidentally paint, and it would shadow actually this background of the trees which wouldn't look right. That doesn't make sense. I want the shadow on Lee on this book and nowhere else but this book. So here's the trick to do that, make sure that books selected hold on your option. You're all key. Create your levels that your same thing we did before and then click on. Use this layer as a clipping mask. Use Bruce Layer to create clipping, mask and click. OK, now this whatever adjustment that you do here Onley affect that one book. Okay, so again, we're just kind of dark and down a little bit. Then we'll invert kind of take it away, temporarily get our paint brush with a B and white zoom in a wheel bit And we're just gonna kind of cast a little bit of shadow to that book. If it's too much, then you just fade it. Take that opacity slider and fade it. So that's real subtle. I think it needs to be a little bit le cleaner edge on a zoom in here, take black here and shrink that down and I'm gonna make a sharp bridge. Okay, Makes sense. So There's our little cast shadows on the books and our composite images pretty much there to go. We can call this free your mind? Uh huh. Cute. But it needs to have a little more feel to It needs some vintage fund or something like that. So let's let's finish it up with a cool effect. So I'm gonna go back to those bohemian effects that we had there in the actions panel. Go to Bohemia and try out some of those looks here. Beam me up, Waimea. Washed, washed pop are maybe criminal cream of criminal. The crime would look like or versus. Let's try this. I go to instal looks and do custard cream on this one. I like that, too. Yeah, well, keep it at that. And so she's done. The composite had done. And we'll send that back toe light room command w right. Save it. Yep. And back she goes to the light room. If I switched the light room, there it is. And I'm gonna get a stack her with all the other pieces of that. And the reason you want to do that as say you She actually orders that print or you want to make a wall print. I might go back and do a little more clean on the edges of those books. We went pretty quick on that, but not much time. But I'd spend a little more time just double checking my cuts and everything. That's nice and smooth that I didn't over ago any lines. I didn't leave any extras, so I might go back to it in case I needed to say, You know, I want one more book. I'll keep these books handy here because I could cut and paste another book into their So I just keep all those files that I used together. But I got it would just stack them, of course, and hide those 10 frames behind the one Now here we haven't in the final presentation. Let me just point out, Let's go back to photo shop. I might take one more image here. Let's take that one. Command E. Send it to photo shop and open up our tools Here. Let me just show you if you if you have your own actions again, how they work with the dashboard. So again the dashboard is totally free. You don't have to buy anything. There's no hook, no catch. Um, if you have your own the top secret, you can't see those eso you have. You have your own actions, right? So those those bohemia actions, they're all just in my actions palette. There's part of, ah, new set that we're releasing pretty soon, and but I still haven't just in my normal actions, pal. Which a lot of people right actions. And if you're not from the with writing actions again, this could be a whole day course in how to expertly right actions, but it's pretty darn pretty darn straightforward. But it does take some experience to get them to be where they work with almost every image. Well, so create inaction from your actions palate by hitting the record button, doing a bunch of stuff. Adjustments to your image. Whatever you want to do, stop recording, troubleshoot it. Try another image troubleshooter. Try another troubleshoot and fix it. Fine tuned whatever. So you finally get it the way you want. Sometimes people, just by actions, but just smart just get somebody else's actions that you already like. But the cool thing here is, once they're in your actions, palette and you've loaded up our dash. There's a little option inside the dash in the settings from the top menu at the top left, which says, Load user actions into the dashboard. You just make sure that's checked on okay, turned on, and that will load anything from your actions palette into the dashboard. And then what's kind of cool once you've loaded it, you could, of course, search your action, uh, by just typing the letters for what you want and making sure you're in the right category for it or type of star. That little trick we've added to latest after type star and it searches everywhere and then select your action. This is your user action. So say this one right here and go to customize and give it your own keywords. So here I have hippie vintage bohemian washed. You call it funky. You could say seniors, because you might use this on senior photos. Um, maybe it's on what else cut A key words could be used for this. Look here. It's a little warm you for warm, and then you can put your own description. Whereas best used on vintage styles and LAMAs whatever you want, mark it as a favorite. If you want my checking this box put into a category color effects and save, and now you have your description. You have your star for your favorite, a little star there. Which means you can also grab that from your favorites list in any time here, showing up your favorites on. But best of all, it's searchable, a pliable with one click undoable with one click paint. Herbal mean I can paint this effect only on her face if I wanted to. Uh, this is not a good idea, but I'll type in black and white and take a black and white effect and painted in a certain area again. I don't I don't recommend this. It looks stupid, but you could pain just her face, lacking way like dawn of the dead walking dead urge. But that's a good use of it. Not this effect here that don't don't again do not do this effect at home. It looks stupid, Okay, but for example, maybe it's painting on retouching. Maybe it's painting on skin softening. Maybe it's painting on a blur effect to see what it just on a certain part of the image in the air, the backgrounds, whatever. That paint tool comes in super handy, and you know it will work with your own actions to. So that's quite a one of them. Of the benefits of using the dashboard to control everything walking dead. Gosh, that's gonna spooky looking now. I don't like it. I don't like it. Go away. All right, Back in light room here. We are really close to being ready to make presentations with this image putting on our blawg batch process, export them slide shows all that cool stuff which we're gonna cover right after the break. E. Yeojun, get your last questions for us for power on. Um, So DBS wanted to know if you move the books after you've created that mass, does the mask move along with it? Uh, it does grand. Great little. Just pop this open quick. Once you have an image that you've worked in its in light room, you could do command e again and I will ask you Do you want to edit that original, or do you want to make another copy to work on in photo shop or what? I want to work on the same one that I worked on. So I say edit original. I just pops that same with all the layers intact. And if we go back to our books layer here, I'm gonna turn off custard cream for a minute. And let's take that top layer book by Select that. My move tool. Here is the book you had. The mask goes with it so I could take it wherever I want. I think that was the question. Right. Okay. Yeah. You save. Appears the copy off in photo shop. Oh, everything that you read it before sending the they photo to live from back to life. Yeah, that's exactly what's happening when I do man w and s, it actually is saving the layered file. Except it's not a PSD because we chose to save it a tiff, but a tip really does. The exact same thing is a PSD. Okay. Says it's the same as a PSD. Really? Yeah. So we actually did that automatically in the background. We kept the PSD. That's why I was able to open it up and all the layers right there. Still so I can re edit if I wanted to, which is a great segue way from what you talked about. Say, you look at this later and you go. You know what? I want that book somewhere else. I don't really like it where it is. Back in light room again. We just open the same file with the command e at it original and boom! They're all layers. All the books. Everything ready for me to fine tune. So old that adjustment said you made in photo show will come back. Exactly. Let's stick with it, okay?
Class Materials
bonus material with purchase
Ratings and Reviews
fbuser 471f6dc7
Amazing.... Amazing.... Amazing
smilies
This course has been more than helpful in the areas of organization and functioning more efficiently with my photography. Thank you for all you do Kevin Kubota and CreativeLive!! :)
a Creativelive Student
This course was really helpful for me to speed up my workflow. It gave me ideas about how to keep things organized and backed up, making me more efficient and my images safe.