Lessons
Day 1
1Class Introduction
24:29 2Lightspeed Workflow Overview
39:04 3Skype Call Testimonials
16:13 4Backup Options and Safety
19:00 5File and Folder Management
16:36 6Job and Client Tracking
31:27 7Enhancing Presets
17:47Lightroom Preferences and Watermarks
32:11 9Renaming and Export Presets
27:54 10Basics of Making Presets
36:49 11Assigning Metadata and DNG Conversion
20:00 12Editing Workflow
24:33 13Overview of GoodSync and Kumu
31:38 14Labels and Quick Enhancing in Lightroom
32:53 15Editing with Lightroom
22:39 16Photoshop Integration
27:53 17Compositing in Photoshop
33:50 18Publish Services
20:11 19Slideshows and Orders
36:38 20Albums and Soft Proofing
19:57 21Portrait Workflow Part 1
32:22 22Portrait Workflow Part 2
24:56 23General Q&A
11:44Day 2
Lesson Info
Job and Client Tracking
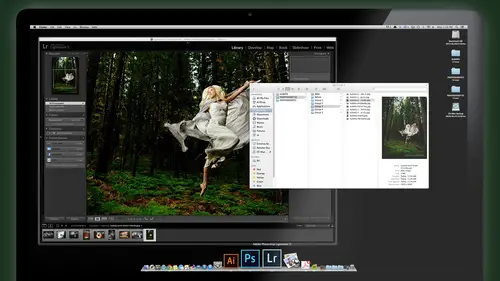
All right. Now, let's look at the very start of the system, which is the managing the clients. And this is the software, um, coup. My studio management software, which is now hidden on the top here. Ah, come back. We just tested this in the resolution now because I changed my resolution to show on TV. It's hiding that it opened under safely. Stop, It may be There we go. Coomer is back. All right, So, Coo Ah, here's the Here's the big picture of Ku Mu. It's a kind of tells you how this thing works. The first thing you do when you get in here would be to set up your company and you put your company information. We have job types, which is already set up for you matching the job. Remember the prefixes on the folders? We talked about their already set up here. So F family portrait, kids and babies, weddings, engagement, pregnancy, business, paella, pretty much everything. And you can edit this list if you want if you have different job types. But I suggest keeping it because these prefixes...
are all unique and they work perfectly with the system that we've got in place here, so this gives you a chance to edit it or change or delete ones you never will use if you want to. All right, there's a little help, things that pops up here and there to help explain what's going on. You can add your logo, your invoice terms, cause this will create invoices for you as well. And once you get your company set up, you want to add products. So this is actually to help you price your products as well. So we go to the start adding products page, and this is a pricing worksheet for your products. Okay, so each time you had a product you want to take into consideration your riel cost of goods sold many photographers, many business owners in general, forget or don't know how to properly calculate what a product really cost to produce, because the cost of product is not. It cost me 2 50 from the lab. It cost me time to prepare and send that print to the lab. I have packaging and put nice folders. My wife puts these beautiful ribbons and Sprinkles glitter and puts lipstick all over perfume. You know, douses it whatever they do to make the thing presentable and have our company logo. We have little stickers they seal of the envelopes with its All that part is part of the product time that you spent on the phone. If you on average, you know, you spend five minutes 10 minutes on the phone when somebody wants to order or you call them to come claim their order than they come down to a studio. And you gotta take time to present and talk story and find out about their kids. I factor that in that I'm gonna spend probably 10 minutes for order with a client or per product, so you factor that it's anyway, let's start a new products. Here's an example of a product that's already in there. They're just random prices. I can just put these in for my demos, and prices may be different, but would you get them from Let's add a product and the Prague name might be, Let's say, a uh 11 by 14 basic print category. I've already set up categories for you. You can change that if you want Standard lab print product notes order from WHC. See, that's my lab. Okay, then here's the cool thing you gotta put in here your admin time and your art time, and I kind of break it up. Admin time is just like like I said, putting it together calling the client may be fetching the file, uploading it. Just busywork to get this thing done. Right. So maybe it's going to take you 0.1 of an hour. 10th of an hour. I'm sorry. That's the rate the rate would be. What do you pay yourself for, assistant? Yeah, Let's just go with 20 bucks an hour 0.1 of an hour. I mean, it has about two bucks. Okay, Our time is Photoshopped. Any creative time that you'd spend on this image. Now for me, is it really? Are you gonna spend less time on a wallet, print a nice wallet print or 11 by 14? Technically, for me? No, there's no real difference. If I'm gonna make a print for somebody, it's gonna get my full retouching and attention. The matter of it's a wallet order led by 14 or wall print. I really wouldn't spend mawr much more time on a wall print than any other size print because I want him all to look just as good. And I think that's one. A mistake that people do in pricing. As they say, Well, it's only a little four by six. I'm not gonna charge very much, but they're still spending 15 minutes tweaking that image to make it nice to print four by six where they sell for five bucks or something. So think about that. What's your art time gonna be? Let's say you pay yourself or somebody 50 bucks an hour. Let's go with minimum 0.1. They'll be retouching potential retouching, tweaking, enhancing whatever you gonna do. Art wise, that might be worth about five bucks. Then you gotta put in the actual hard products. So I'm gonna put in my, um 11 by 14 basic print price from the lab. What's 11 by 14 costs these days? Guys Thermos and numbers. 20 bucks. Here we go. Okay, then I have folder ribbon stickers later. We don't really put glitter about perfume, staples, whatever it is it that cost you in the stuff to make this presentable because we do package everything nicely. We give me just one little print we put in a nice folder. Ribbon sticker. Thank you. Card. Sign it Clear comes and has me signed prints every time she's delivering them. So that's that. Doesn't matter if it's smaller. Big. Okay, so let's say all that baloney cost a buck 50. Can we want one of those? All right, let's pretend that's all that goes into this print down below your cost of goods sold. Meaning what it really costs to get this thing out the door, not profit, not what you're making. Just what it cost is 28 50. Your cost of sales percentage is what you decide is gonna be your markup on that. So, typically a profitable studios generally that I've talked to in serving over the years about 30% cost of goods is nice. That means that 30% of the cost of what you're selling it for, what it actually cost to produce it. So the 30% cost of goods you should be selling this sucker for bucks. You can change that. If you're saying Hey, I can't I can't do it. 30%. Most you should be doing is 50%. Okay, So if I put 50% cost. The lower the number, the better. More profitable for you. So if you're doing 50% which is absolutely the minimum. Unless you're like a wholesaler type person, 50% markup retail is always at least 50% markup because it's on sale. Right? Okay, so at the minimum, you should be charging 57 books for this out of 50% cost of sales. Nice. If I type in 50% that's my target. It's gonna say you should be selling this sucker 57. What you're gonna do then is put in the price. You're actually going to sell it. All right, I'm gonna go with that. I'm gonna sell it for 57 bucks. Um, it says your cost of sales is 50% and there's a little button below. This is alert for the thing. Price Too low. And that's just me telling you. Think about that, Okay. If I change this to maybe 30% cost of sales, he says I'm gonna charge 95 I say Yep. That's good. I'm gonna charge rounded up 200 bucks. Then this goes down to 28.5 and it says pricing. OK, right. So it's just to help you. Price. There's no hard. You can put whatever you want in here. You can price they want. But this has been really effective for people because you look at this from a standard business perspective. There's markup. You have to pay your time. You have to pay your workshop fees, your education, your insurance, your electricity, your rent, your car, your camera. All that stuff is not factored into the cost of an 11 by 14. That's not enough to be in business. You've gotta pay yourself in your bills, and that comes from marking up products or your service is OK, So you got your price. Good. Everything looks nice. Click on this button right here for Explain this lang and this gives you a little run down of what all this stuff means. Cost of goods, retail, price bottle, what the percentages and all that. So you can read that if you want. If you have a photo of this product, say it's like a wooden presentation box or something like that you're selling. You can click this field here on download. In a photo of it, we put a photo something in here. I'm scared to browse through my photos and just pick something randomly because you never know what's going to show up when you do that. You don't look at that folder. No. Uh, OK, we're gonna take a chance with you guys. Who? Oh, there is something safe. Okay. Monkeys are good. We're gonna sell this monkey here. Our lab print. That's what it looks like. Okay. And you're good to go. So then you go to you can add more products, you have more products. This is the first thing going to do is sit down at all the products that you sell in your studio into here, and then you're gonna have a list of all the products. And this will tell you in a quick view what your cost of goods sold your cost of sales, your retail price. And then also the alerts to tell you which prices you might want to re look at because they're kind of off. So this is it isn't priced too low. That was the 20 by 30. I'll go back there. I can see that I'm charging to 10. Or it should be to 10. I'm only charging 1 on this sucker. So you know what? Turning over a new leaf gonna charge what I'm worth while charge to 10. Boom changes to price. Okay. And if I go back now, like all my prices were OK, All right, so that's the first thing to do. You said your company set up all your products in here. Now you're ready to start job. Really simple workflow. You go to your contacts, and here's all the contacts and you currently have in there and you'll create a new contact. It is a new person and plop in their information. So let's say this is gonna be for oh, give me a bogus names. Somebody. Anita. Super sweet. This, um, we'll put in my email for Anita address. Okay. My address. This has a nice feature in it to where? If you put clients in here, you can map it and it will pull it up on a Google map inside the window to show us if you're trying to plan your shoot, where we're gonna go visit something or whatever, it pops it right in that In that window, it sends email directly. So if I clicked on the sent email button. So we got that. That's what Basically news your contact information. And if you want the same weekend at a client photo here, So what she after you do this client, you might want to add a photo of them here. That's great. Then we're gonna basically start a job for this client so that the always the workflow is you gotta have a client first. That client has jobs, and they could have multiple jobs attached to them. And then each job will have the invoice, your invoicing, a job, not a client directly. All the client would be listed on there. But you think of it that way. It makes sense because you could have one client. You shot a wedding portrait, baby pregnancy at five jobs that one client and each one of those jobs get invoiced separately, but still connected to the client. And that's how this thing thinks. Okay, So each time you created shoot, you just create a job and link it to an existing client or put in a new client for it. So once you have a client, just a new job goes to the job Details page and same thing here. You can say this exactly. You do. It's a This is a, um, portrait. Uh, any job notes? Bohemian shoot in the desert with rain and fun stuff. Okay, Um, whatever. So filling was much information. As you want. You can have an image from the job. So addition to your clients photo, you gonna sample image from the job so you can remember what you actually shot on the job going. Put it. You don't have to. You're doing weddings. I like to list all the vendors that I worked with because this is great from marketing. Gonna know if you want to connect with vendors And what jobs where I just list all the vendors that I worked with. And as soon as I'm done of the job and I make an invoice, the invoices for this job all be listed here, and this one's part here. And here's the other cool thing is there's a catalogue link. So once you create your light room catalog for this client, which we're gonna do right now, I can link it right to this job. So any time I want to find that catalogue which we're talking about the very beginning. Like how you have all these Kellogg's like, No, you have to worry about that. You just go through this little database and quickly search for a client or a job or whatever. Open it up and click the link and boom that Kellogg pops open. Super. You don't even know where the catalog is anymore because of this. Remember where you put the catalogue? Okay, so we have a job. Here's my list of all jobs. Okay, so So let's say we're gonna take this and need a super sweet, and that's when the highlight of here and now we're going to start the folder for her. How would that work? So the first thing I do is I click this button Copy info button. All right. Right there. So copy info. Button right there. Click on that. It's gonna copy the job number in the client name into your clipboard for you. So I switched to my finder, and I'm gonna create the client folder by duplicating the template over that. So say duplicate selected Paste it, Man V, there is a need a super sweet, her client name and job number. Okay, I'll create a catalog for her duplicate. Select it, Paste it. I need a super sweet. It's like the template catalogue, which is right there. Oops. Paste it. So I renamed her catalogue template holder and her images holder. I need a super sweet and it's just pacing. That's And I remember the information retyped anything I just pasted Kumin gave me that. My clipboard? Yeah, I just want to make sure I'm tryingto figure out where you found the what Did you copy to get the ah, job number and her name? I can't remember. Yep. Just little button right here. This is a copy in full. And you can do that from here or the job details. If I clicked on, um, I need a little details page. There's two views. Everything. There's a details page, which is all the information and then a list which shows you every job. So those contacts details contact list job job list invoices in voiceless product product list. So from either page here, I can click on copy info as well, and I would do the same thing. Just click on that and it basically con captain eights. The job number and her full client name and copies it to your clipboard, ready for you to paste it somewhere. Okay, Accent does. Okay, so that's what I paste onto here. So now she's pretty much ready to go. Um, I need to start dumping images into that folder and build her light room catalog with her images. I have all the details for the information here. The only thing I don't need have yet is a link to that catalogue. So here's what you can do. You choose Catalogue link. Where the catalogs. Where My catalogs on your on the Cloud Station folder. Right in my light from catalogs. Here's a need a super sweet and here's her catalogue. So I just point to it and say Insert. And now there's a link right here. Little Life catalogue link to a need. A super sweet. So anytime in the future I can double click this link from this coup, and I'll just pop open her catalogue. So we're easy. I can forget where it is. Okay, if you move it, don't move it. Not don't tell the program. If you move it to another driving or drag things around, you start going crazy and mention that this is one of the biggest pain points for people. If they do something like this and outside of light room in their own crazy world, maybe they're drinking too much. One night and they start. I'm gonna reorganize my hard dry and these are copying this. I move this. Hold over here. I'm gonna rename this client folder and what you're doing. You're screwing up your system Light room now. Doesn't know where your stuff is. Cool. Doesn't know where your stuff is. So create a system and stick to it. Don't go outside the system and start starting something driving a different road. Do you know what I mean? So that screw people, lot of times they go rename files outside a light room where the rename the folders of stuff like I can't find it anymore. All right. Okay. You're okay. So we're good. So let's go over here and let's get those images in there. So I've already downloaded some images that we're gonna play with today, and so let's pretend this is your card. You guys can use you imagination a little bit, right? This is your media card. Your images role in there we're gonna do is copy those images from the card, and this is it brings up a good point. The safest way to get images from card to computer. It's just plug in the card, select him copy or drag into the straight to the hard drive bypass. Don't use software that opens up trying to help you import the images. That's where you can have corruption in that process is when 1/3 party software gets in the way and tries to import images for. You know, I'm not saying it's gonna be bad every time, but that's where I've seen the most problems. Is your using a software to import? There's like an automatic thing that pops up sometimes. Do you put in a car? Would you like me to help you import that People go? Oh, yeah, I think, and they click it and then it goes. Sometimes it works occasionally. It doesn't, but you want to eliminate is much third party software and just copy Paste Dragon. Drop straight from your media card into your clients images folder, and then we'll import them into light room. Once they're safely on the hard drive. Then we know there's no issue with the copy. Part of it makes sense. Okay, so let's pretend this is a card, and I would take this from my card, drag it over to Anita's folder into our original cards folder, and I just throw in card. One could be only used one card down the road and take a little longer from the car. But I did it a home downloaded. Okay, cool. So now we have a new a new super sweet images in her card. And if I want a double check, what's going on here? I can look here at, uh, good sink to make sure that it's keeping track of things. And if I want a double check again, I'll look a special K image backup. There's a need a super sweet, original cards. Look, the images were all there. Hey, happened in the background, so I want to stop messing with it. I don't need to worry about it. We want to show you guys what's happening. So need a super suites, images, air ready to go, her folders ready to go. We just need to get her catalogue open and throw the images in there, and it's really easy to do. We open the catalogue, I need a super sweet. Here's her catalogue. Okay, This is a what? A template Looks like and why I create templates. Make this window a little bigger here for you guys to see Good. Um, I have on the left side some collections that I've preset in light room that I will use to help me organize my job collections like I s O finders. Explain this once we get into the nitty gritty and a little bit here, but I have so finder's will automatically find images within certain eso ranges so that I could put noise reduction to those based on the I S O. So, as soon as I import those images, this thing will start populating automatically based on what range it's in. And then I have a preset that I just apply whom select all those images apply to preset five seconds. It's done. So I have more noise reduction for the high I so less for the medium than less and less and less like that. So that's just one thing you can uses this little preset eso finders and I'll show you how to create those we get, get into a little bit and orders collections. If you're using light room to take orders from your client, which we could definitely do, you'll set that up and maybe have by person. You have client name, maybe for the studio. Yeah, by size you can. Organizing This is all preset made these all ahead of time, so I have to do this again. It's all part of the template for the album. The main album, the Parents Album Parent on 12 It's difficult to make it three albums for the bride and Groom, one for each parent. Okay, smart collections, Air kind of built in the light room. And then I have these which are kind of important ones. A master sort folder master sort means once I put the images in them, I put them in the master sword and I just work on there because in massive sort, you can actually change the order of the images to say you think you know this. Actually, I'd like it to be more over here and listen over there. So regardless of how they were on the hard drive you can arrange them however you want, and the massive short helps you keep that order separately from just looking at the mall in regular chronological order so you can set that up. However, you want the master sorts kind of nice place to do your actual work. Okay, you guys know what collections are in my room. We haven't talked about that yet, but collections are think of collections as a virtual folder that lives in light room on Lee. In other words, you can create as many collections as you want. You could put the same image and as many different collections as you want, so the same image can go in the orders as well as the PS images of the portfolio. And it doesn't duplicate it like it would if you did on your hard drive. If you try to drag that same image to multiple folders and hard drive, were actually duping the image and then they have no connection to each other anymore. This is just one image that virtually lives in as many different places as you want in a collection. That's what's cool about it. So if I go in a just that one image in the main list of images, it will be adjusted exactly the same and all the others. It's linked to the same image. Okay, makes sense. It's kind of like a playlist playlist. Exactly. It's a really good analogy. Think of is your ITunes or whatever playlist. And you could have 10 play last ones and they all have the same song. But you're not duplicating the song. You're just putting in a different playlist. Yeah, I like that analogy. Good. Alrighty, then. So you have your collections, all setups, anything. While the last thing here is published services. I use published services to get my images onto SmugMug and to get him onto my blawg. Or you can have published services for WordPress. Different things. Facebook. You can set that up as well, but once you set it up to put in your account information, it's now remembered. So my SmugMug galleries for client viewing size on SmugMug These all the folders that have on SmugMug are already here linked up so soon as I'm done with a job, I just drag those images into the client folder and SmugMug and let it populate, and I could just send a link to the client. They go in, they view him in order, whatever they want to do. Okay, so it's super simple. Don't have to go outside a light room to get those images online and get him ready for my clients to order. Just happens right here. So all that if you preset that once in a blank catalogue, that becomes your template. And now you just duke that. And every time you start a new job, all that stuff is gonna be there for you, ready to start populating it. Okay, That makes sense. Okay, Cool. All right. So we don't have images in here yet, so we can do it a couple different ways. One way is, of course, just click the import button and then navigate to the folder. If you have the folder easily accessible to you, here's I need a super sweet. You could actually just drag this folder to your light room icon, and we'll start an import into that catalogue that's already open for you. Okay, what we're gonna do is to set up a import presets. I've got portrait jobs, wedding jobs, import presets already made. How do you do that? Well, first of all, you go through the settings that you want, so I want to add That's the first option on the top ad. Which means it's just gonna take the images from where they are because they already in the right place on my go flex drive and just catalogued them. That's gently what you want to do. We have the option to move them from one place to another. The original images copy them, copy them as a DMG as we import. Some people always ask why we just copied DMG now because we're gonna do that later. And I'll tell you why. And I'll tell you why right now, because we have more options for how it converts the DMG. If we do it later, If you do it now, you have just the basic D and G conversion. It doesn't give you the option to downsize and some other things. So do it later. We have full options available to us. Okay, so right now we just add, um, on the right here we wanna build previews. Standard standard preview means that whatever settings I cepa's my defaults in light room will be applied to those images right away, and the thumbnails will be built. And what you see is what you get. All right, so we want to make sure we do. We set that up and we're gonna talk about building those those presets a swell and the defaults because one of the biggest questions I get from people is imported manages to light room. They don't look like they did in my camera where they look too. This or too that are not enough. This none of that. I'm gonna show you how to get the images to look the way you want and set that as a default. So you don't have to worry about that in the future. It just comes in that way. Okay, He has experienced that before. You can pour things and go. That's not what I thought. I look like where you see you come in, and then it changes everything that it comes in light of the thumbnail, and then it changes slightly. The color changes, whatever the tone changes slightly. That's because light room is now saying, I don't care what your camera said. This is how I'm interpreting that raw file. And this is what it should look like. The light room has. Adobe has its way of interpreting that file like a lab would, and that's fine. We just need to understand what it's thinking and how toe twist its arm if we need to. Which will dio. Okay. All right. I'm gonna finish this last part here before we import them. Just explain smart previews. This is really cool. I'm gonna talk about this a little bit more. This is kind of the reason why our cloud folder system having the catalogue separate on my cloud drive works well. Um, and I'll explain this, but smart previews lets you work offline, separate from your original images and do almost everything you can without having them connected and then come back later. Connect the drive and it'll synch automatically, which every changes you made. So we'll talk anymore. Developed settings. If you have a default preset that you want apply when you import those have ah KHD high definition. I've got some edgy one's somewhat basic things right here are just a automatic or a default kind of thing and we find out where it went. Okay, so cagey import might choose that. Okay, we're gonna cover all this how to make these presets. But you have a preset so that immediately it applies a cool look to it. If that's what you want, metadata, we'll throw in a copyright How you set that up as you go at it. Presets always gonna throw a copyright in there. And in this section here, you want to in these red sections for a copyright at least put this much information in there. Copyright 2014 Your name? I put kimbo dot com so that I could see my website. If you know, you know, if you don't have a date, the copyrights not valid. So you always get a copyright and a date on a Mac. It's option G, the copyright symbol on a PC. It's, um, all control 0169 or something like that. I can't remember. Sorry you had on top my head, but PC, it's a slightly different to get the copyright symbol. Look it up. Google it and creator, that's you. If you want creator email and your website. If you didn't already put in there, that's the basics. That's all you need to have in their this gets embedded in the file. And then if you upload this to the Internet or whatever, it's always still there. So you can always trace your images unless somebody strips this information. But you gently won't happen. So all right, so this is good, because we're gonna use this information later. So make sure you put in at least these of this basic information into a metadata preset save it as a new preset. This is my copyright with me, and now it's available to use next time. All right, so if there's any keywords that apply to this entire job, you would put them in here. So this could be portrait Mustang. Um, bohemian, whatever. So I've already built a preset. So once you put it, all these settings, you don't want to redo this next time, cause that's too slow. That's not the light speedway lightspeed ways you automate as much as you can see down below on the bottom. Here is an import preset, and you can save this as a new preset. It's all this information you just entered on. The right hand side could be saved which I've done so just pulled us in a portrait settings. And now everything's populated it in here and the keywords already started from a portrait. And then I can ADM or might add, Bohemian because I was kind of clothing style of Here was a bohemian style and shoots. We did that all right with me. Next step would just be to click import and images to be in the catalogue.
Class Materials
bonus material with purchase
Ratings and Reviews
fbuser 471f6dc7
Amazing.... Amazing.... Amazing
smilies
This course has been more than helpful in the areas of organization and functioning more efficiently with my photography. Thank you for all you do Kevin Kubota and CreativeLive!! :)
a Creativelive Student
This course was really helpful for me to speed up my workflow. It gave me ideas about how to keep things organized and backed up, making me more efficient and my images safe.