Lessons
Day 1
1Class Introduction
24:29 2Lightspeed Workflow Overview
39:04 3Skype Call Testimonials
16:13 4Backup Options and Safety
19:00 5File and Folder Management
16:36 6Job and Client Tracking
31:27 7Enhancing Presets
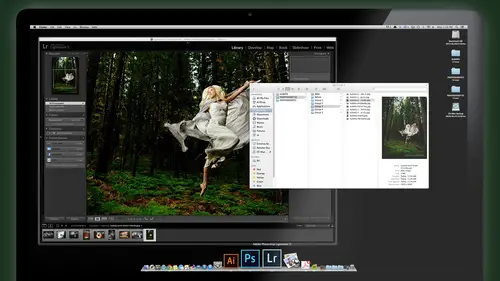
17:47Lightroom Preferences and Watermarks
32:11 9Renaming and Export Presets
27:54 10Basics of Making Presets
36:49 11Assigning Metadata and DNG Conversion
20:00 12Editing Workflow
24:33 13Overview of GoodSync and Kumu
31:38 14Labels and Quick Enhancing in Lightroom
32:53 15Editing with Lightroom
22:39 16Photoshop Integration
27:53 17Compositing in Photoshop
33:50 18Publish Services
20:11 19Slideshows and Orders
36:38 20Albums and Soft Proofing
19:57 21Portrait Workflow Part 1
32:22 22Portrait Workflow Part 2
24:56 23General Q&A
11:44Day 2
Lesson Info
Lightroom Preferences and Watermarks
before you were about to start light room. There's a short cuts, and I want to just show you that in the handout that you guys download, there are a list of shortcuts that are the very basic, essential shortcuts that I think everybody should commit to memory, and there's a lot more of them. But here's the basic ones, all right, and we'll go over all these two. So when you download this thing, make sure you take this outpost it up and go over them to when you're when you're starting your workflow. Remember the beginning? I said, One of the big things you to help yourself. It's just remember, shortcuts start to use shortcuts. And here's Here's a simple, simple, simple way to help yourself train to member shortcuts whenever you go to a menu to do something. So if you don't know the shortcut and I'm gonna go to a menu for something like Find, which will know his command F. But you may not know that or enable filters. Soon as you go to that menu and you see what that shortcut is, our tenden...
cy is to go. Oh, I got remember that next time but you don't. You just kind of turn that on and you choose it, right? Instead of doing that, go there. Look at the shortcut. Command l back out of the menu and use the shortcut. Okay, Now you've started to remember it the second time You go. I can't. Quite remote. It was. What was it? You go back up there. Library. It was command l to enable the filters back out of the men. You don't allow yourself to pick it from the menu and use the shortcut. Command l turns the filters on and off. Once you've done that, two or three times, you'll know the shortcut. And you want to have to go on the menu anymore. And that's that's a huge part of time saving light room. It's just no shortcuts for the things that you do every day. You should know a shortcut. If there is one for it, you should know it. Okay? Going to the menu and digging around for things. There's a huge time suck. Okay, so the next short cut is always very important. Command or I'm sorry. Shift tab. We'll hide and show the windows in the side and bottom to clean up your view. This is important. You start to edit because you want have thumbnails and just look at only thumbnails. So shift tab will toggle all your window view why you're looking at thumbnails. Just plus and minus will shrink and grow thumbnails so you can see more or less of them Help you get it better. Okay, Shift tab minus plus space bar. Pull it up into view Fill the window in front of you space bar again. We'll zoom in something and load the 1 to 1 or the full resolution, Um, version of the image that you can see every little detail and then space bar toggles it back. Remember that the zoom key will do that as well. We'll talk back and forth the zoom levels Z for zoom. So Ozeki zoom is the window and library mode. What we're looking at now, g for grid takes you to the grid view and D is for developed. It takes you to develop mood for whatever it is you're looking at. And those are the moments that we use obviously the most is library mode and develop mode back and forth. Okay, so make sure you got those committed to your memory shift. Tabbing. In any mode, you can shift tabs even in developed mood. I want to clean out everything. Just look at the image shift tab. Boom. There's your full image. Okay, All right. Other shortcuts will cover as we go through them, but for the basics. Starting to edit navigate Those are the ones that you should be paying attention to, right? Let's look at some preferences now in light room, So does he want to hear, have any preferences, any kind of preferences? That's a topic for another conversation. So we're going to the preferences here up in light room, and I'm gonna go through just the ones that you should change. So if I don't mention a preference for I'm not gonna cover isn't one. That'll be tedious. If you guys you have a question about a specific preference or there's one out of the studio audience live all over the world. But I just got to know what this preferences you can ask it, but I'm not gonna cover all them just the important ones. So in the general panel, these are general light room overall preferences I'm gonna turn off this button, which I think is on by default, show important dialogue when a memory cards detected. This is where light room would jump in and try to import images. As soon as you plug a card into your card reader. If light rooms open and it pops up in the window to import it, just say no. So turn that off because we're gonna do it the other way, which is dragging dropping them on to your hard drive first. Little safer way to do it. All right. The other things, you can leave them at their their defaults, whatever you want. The most important thing here is to change the sound to a kitty cat purr. When you import your images, just getting it's not important at all. And that's all good for here. All right, Next one, let's go to I'm sorry. One more when they wanted to change yours when starting up used this catalog. Prompt me when starting light room because we're using us the separate catalogue system. So we're not gonna open the same catalogue every time we open light when we're gonna choose a specific client. So you want lie room to ask you which catalogue when you start it. So change that normally it's loading the most recent. But we're gonna go to prompt me. That way you can pick the catalogue whenever you load up light room that you want to work with. All right, let's look under presets. Okay, so right here, we're going to go and turn all of these off for now. Um, but it's kind of cool to know that you can do this when we make defaults, which I'll show you how to do it just a little bit here. Default settings for your look, your personal look for images. You might want that to be specific to a camera serial number, not just a camera, but the actual camera. That camera. So say you have here is a wild example. You got to Nikon and defeat he three yeses, and one tends to be a little warmer than the other one. For some reason, when you compare the images and you don't know why you're shooting wrong, the same settings, all that, but just the sense of the way it is, you could actually make a correction for that and save it as a default for this d three s to be slightly cooler and this one to leave it alone. And you can bet it remembers that anytime you bring images in it automatically gets that correction, that camera. And this is also when we talk about the default somebody was mentioning earlier. I bring my images in there always a little cool. Always have to warm them up or always need to punch the color up. Are always need just I don't like the way they come in automatically, but we can fix that and make it do what we want. Do our bidding because I like him will be your genie. All right. These others again, we'll leave them off. Um, we don't need to have these specific to the I S o. Rating. We want to make sure that this is not on. This is a big problem. People sometimes turn this on by mistake, storing your presets with the catalogue. No need to do that. I think the default is to be off, so but just make sure it is off, okay? Next, we're gonna go to external editing, and this is kind of a cool Ah, way for you to tell light room. If I pass an image to photo shop, what format should I use? What format should you use? And we're gonna tell light room if I go to photo shop? I wanted to pass a tiff file layered tiff file. I wanted to be an adobe rgb color space because that's how we're gonna edit in Photoshop. I'm gonna use eight bits when I pass that over and 300 is my resolution without any compression on the tiff file. But it's nice to know you can if you want to make smaller, layered Photoshopped files, you could actually compress them when you're using tiff. If use PSD, you have no compression option. So you can't really save any file size with PSD. But you can with a tiff if you want to. Just good to know if you're trying to keep your hard drives as compact as possible, you can turn on this compression for the tip and doesn't hurt the quality one bit. This type of compression. Okay, we'll leave it off. It's a little slower to save, so we'll keep it off for now. Down below. We have external editors. So additionally, if I want different settings, so say this is my normal settings for passing. This is a photo shop, but once in a while I'm gonna do super high quality. This is gonna be a wall print. This is gonna be my artsy fartsy creme de la creme of my portfolio Images on the wall. And I want every little bit of qualities I want to work on a 16 bit high resolution file and that's what I have the 2nd 1 set up for. This is my highest quality bam setting right here and this one. I'm gonna send it as a tiff again using pro photo RGB, which is a broader color space. And we talked about photo shopping tomorrow. If you guys air have questions on color space and which ones the user, why weaken address that? But for now, let's just know that Pro Photo gives you the broadest color space to work in. And Photoshopped and 16 Bits maintains all the bit depth information and, of course, no compression. And that's our highest quality file. Weaken. Send to photo shop from light room right there and once you plug those in of course, you'll see. This is familiar and every of, ah, almost every light room settings page. There's a way to save these settings as a preset again. That's something we want to be getting in. The habit of doing is always making presets for common settings that you use. You never have to plug them in again so we can save if we want to say this is highest quality Bam. Just save it as a new preset. Call it that and save it. That's how I got this one to make sense. Okay, down below. There's an option to stack with original. And that means when I send it to photo shop, don't want, like, robbed, automatically connect that file to the original raw file in light room. Yes, we do, Yes. Say it with me, folks. Yes. Yes, we do. Yes. Yes, we do. Thank you very much. Make sure we're all on the same page. And ah, the last part here is when I send an image to photo shop, not the bottom. I'm telling light room to upend the letter t to the end, musing that upload before you can see it. That looks like so the file naming will be whatever the image was boom, Suffolk STI. And that's just I like to have that so that I can identify quickly the images that are t for meetings. Tweaks means I've enhanced have done stuff to that. Uh, no. If there's no tea on it, it means it's just a normal file. So I had a t to the end view this renaming schemo graphical. And how will do that? Let's go to the edit menu at the bottom. And you just simply created renaming thing like this that says I raced this or do you go file name insert and then you type of tea so far only means that uses the original file name, whatever it was at a tea. And this only happens when you pass an image from light room as a raw to photo shop. You edit it in photo shop, and then you save that Photoshopped filed back toe light room. It's gonna have the same file name plus a T on the end and PSD or tiff. Okay. And thats safety and same familiar dialogue. Save it as a preset call it add t for tweaks. All right, questions on this dialog box here. This is a pretty big one because we're going to be sending images to photo shop all the time. We're gonna make sure they're in the right format. Okay. Okay. Cool. Next one file handling the import DMG creation. We're gonna skip most of that because we're not converting on import. We're gonna convert later TNG, and I'll give you all those settings later. So if you want to use the import and convert the same time, this lets you decide what settings to use. Okay, down below. There's a cash setting here, and the default is one gigabyte. When you get light room started up. If you have space on your hard drive, bumped this up because that will speed up your working how things happen in light room. You're switching and adjusting images. Things get a little faster as you bump that cash size up. But it's the that's going to use that space temporarily on your hard drive every time you work on the catalogue. So if your hard drive with very limited space, that might not work out for you to have. But I suggest having trying to keep you know hard drive, with 100 minimum megabytes free at all times more than that's even better. And these days, it's easier to get a hard drive. It's large enough to give you that extra space. In which case, um, I mean 100. Yeah, 100 gigabytes that you could You could give this to 34 20 gigabytes. Give it 20. You're gonna is a big, snappy nous increase in your light room workflow. If you have that space, I'm gonna go just bump into two. For now, my hard drive is starting to get full, but that's a little better than the default of one. You can bite. All right, question Quick question with a score is like using that maximum set. Are you? Do you recommend leaving are not necessarily filling up an entire hard drive, but leaving possibly 20 gigs. I mean, being that, you know, you can literally go out and buy. You know, the one gate, uh, hard die for, you know, 1100 bucks. But even that much space so that you can maximize the amount of speed and yeah. Yep. And this refers to the hard drive that's actually your computer. Okay, So that you don't necessarily have to have a much space left free on these drive. We shouldn't leave a little bit of overhead space, but this is your because it uses cash is a temporary storage, and it uses your hard drive on your computer. So that's where you want to keep that extra space of at least 100 gigs free, if you can. Hardly. Okay, on the hard drive on your computer. Okay? Yeah, Like I said, I've got kind of a tangent here, but people always want to know. Everybody's got their own steps for the computer. So this laptop, it's kind of groovy cause I pimped it out a little bit. So I've got 16 gigs around plenty of Ramblin here. I put a one terabyte SSD solid state drive, and I took out the DVD drive and replaced it with another one terabyte hard drive. I don't ever use DVDs anymore. Never came in the last time I needed to you the DVD, so I just replaced it, and you could do that with little kids. It's pops it out. So inside my laptop I've got a one terabyte SSD and a one terabyte hard drive and I've got my SYNC software set up so that it's mirroring, just like with a good thing we married. That's marrying everything off my SSD to the regular hard drive as a backup. So this SSD crashes. Aiken reboot my computer from the other hard drive, and everything is exactly the way it was until I can replace that drive. So I've got it backed up that way. And then I've got a backed up so that if I lose my entire computer, then all the stuffs backed up on my cloud the same way, so that that gives me a fast SSD for all my work and then a backup regular hard drive for backing up of that, a mirror of that entire drive inside this laptop. So I think it's pretty sweet, pretty see set up. It's worked well for me or keeping things safe. Okay, that was a tangent. But let's continue right interface, uh, really important that you have a cool icon on your light room like a dragon right here, and you can choose that right here. You can have a small flourish which is dumb or a drag. Yeah, all right. Every is like, how do I put a dragon in mind? We go to panel and marks folder, and it's all seriousness. You may want to put your logo because if using light room for a sales tool which we're gonna talk about doing, it's very, very realistic that you would. It's nice to have your logo and make it look like professional studio software. When you sit with your clients like looking logo Here, look a there. It just kind of brands you better. So to do that real simple, you go to panel end Mark's folder, you click that it jumps to this folder buried deep in your system. You didn't really know where it is. It doesn't matter. But all you need to know is you throw a PNG file in there. Any kind of PNG graphic here is my little dragon. And then whatever you throw in there is available for you to pick here to show on your panel. Your ends. Okay. And those panels air at the end of ah, here and on that side too. Feel fancy? That is, we a okay, they're mine. I get excited about stupid things. Sometimes the other things in here. We don't need to really change much. Just make sure these air all checked off down here. These are just things that you'll see on the filmstrip of thumbnails and the icons that you'll see. And, um, just just turn him on the last one here. Ah, light room mobile. This is fairly new with the light room. Somebody asked about that on the brake light room for IPad. And I'm not gonna talk about it is really not ready for prime time. There's too many bugs with it right now. As far as I've heard, it could be. You know, maybe I'm hearing only the bad stuff, but I think a lot of potential. I'm just not ready to commit to it yet. But I think I'm glad there. They're trying on their starting this out. So this is where you would connect your IPad light room to the rial light room here. So, in the future, I think that will be a really cool feature, but I'm not ready to trust it yet. All right. Any questions on these settings in here? Anything on the internet before I move on to next section, hop them your way problem. Um, all right, I'm going to start with, um PX Chick wants to know, Is it possible to have different import presets? Auto apply for different camera types. I shoot canon, but my second shoots Nikon. Yes, you can not not import presets, but you can create defaults, camera defense, which we're gonna touch on, actually, in just a couple minutes and you can have a default for any different camera, Like I said, even by the serial numbers. So if you both shoot canon, But you want your images more Poppy and she wants her image is not so, Poppy. And they both have a dese. Whatever. The cannons are the 65 900. You both have the same camera, but they're gonna have separate serial numbers. You can say my serial number gets a poppy, your serial number get some sucky, and we're all happy, right? And everybody gets to have what they want when you bring it in. So, yes, you can do that via defaults, but not presets. Presets won't automatically know what camera, but the defaults will. Okay, and Donald would like to know. Could you go a little bit more into white tiff and not PSD. Yeah, um, Tiff really gives you everything that a PSD gives you but preserves mawr of the metadata. It's a little better about metadata updates its little more standardized format. But you can still have layered files just like you do in a PSD layered photo shop. Um, it's really the same, but it does give you a little more access to deeper metadata information. But sometimes we use because we're trying to tap into much metadata. Is we? Can these files cool? And Donald would like to know, Can you explain why it isn't a good idea to store presets with the catalogue? Yeah, that's great, Because I want generally, you want all your presets available to all of the jobs. And if you store them with the catalog, what happens as soon as you close out this job and you open up your next client job catalogue? Uh, the same presets won't be there because you store them with only with that catalogue. So all your favorite presets I've had that. Sometimes people say I had all these presets that I got from you, and I love them and I use them and then I open my next job and they're gone. And I say, Well, let's go. The preference and see is that button check? Yeah. Oh, turn off. That's what it is. So basically says, instead of making your presets available to everything you do in light room on Lee, make him available to this one catalogue, which I don't really know of any good reason to do that. Okay. All right. Let's bring it around guys and girls to the very first panel, general, or we can go to catalog settings. And now we're gonna change some settings that are specific to catalogs. And you can get to it here or this little button on the first panel of preferences. Here. Go to catalog settings and you do want to back up your catalog. You can choose to do that once a week, once a month, once a day, every time. Whatever, Um, generally a good idea to back it up once a day when editing or once a week at the most. I wouldn't go once a month. Pride too long to go without a backup. So I'm gonna set mine just the once a week so we don't have to deal with it backing up while we're working this class, but normally would probably use once a day. Okay, The next section is file handling and just a little tip for you guys. If you ever get confused. Like, where is this catalog actually stored on which hard drive? And you don't remember? Um, there's a quick way to get to it. If you just go here, it says Location. Uh, it's a show, and that will same thing. It'll jump to that catalog right away in your computer hard drive. Okay, there's a good little shortcut to know it's there if you get lost file handling. This one's kind of important, because this will determine how how quickly you can browse through full screen images when you're editing. And that's important because a lot of people say Go to the next image and it has little spinny time. We don't have to wait a few seconds and then the images there. Then I go the next one and I spending time wheel and I wait in the next one, and that gets tedious and going through 1000 images waiting for each one like that. Generally, it's because you didn't build the initial preview with the right size because light room has to build that full screen preview based on the monitor that you're using. So if you have a low resolution screen, you want to build those previews to match that resolution. If you have high rez screen, you're gonna want to build a bigger preview. My screen's more around this range 16 80 you can find that if you go to your settings for your computer. This isn't a different cause. We are on a connected to a projector here. But if you look at your resolutions here for your screen, um, the largest one when you're on your normal laptop screen is right here the top 16 80 by 10 10 50 So you look for the biggest number, which in this case, is what I'm gonna make you jump out of your seats again if you can't. This is a simple question. All right, so what's what's the biggest four digit number you see right here in this window? Good. You win, you get an IPad. Okay, you guys are over. Everybody's like, this is a trick question. There really are no What's the biggest number? I most queen. Okay, 16. 80. We'll go back to light room and plug that number. And right here, that's it. All right. That's how you optimize your working view for your screen that you're working on. That's all you gotta do. If the number doesn't appear the exact number, choose the next bigger number. All right, if you choose the next smaller number, what happens is the same thing is it'll bring it up smaller. But it says, Oh, he wants it bigger. But he only built it of this big. So I've got to rebuild it now a little bigger. And then you see the little spinning wheel that happens, okay, to make sense. So we're 16 80. Preview qualities medium just just fine. And this automatically discard 1 to 1 Previews. Do you know what a 1 to 1 preview is? When do you get 1 to 1 Previews? That's when I get a 1 to 1 preview. When I zoom in and this little icon appear says to 1. You notice it did take a second. This one was already built. But if I go to another image that haven't built a 1 to 1, and I zoom in notice. There's a few seconds delay there because light room has two, then generate that so I could theoretically build them all ahead of time. But I find that kind of wasteful. It takes a lot of space. Instead, I'll build them on the fly because not every image don't need to see 1 to 1. Personally, I don't I don't need to see every single one at that resolution, only ones in retouching. So back at the settings, if I did generate a 1 to 1 preview, I want to compact the catalogue and get rid of those. After 30 days or so, we've in a week, and that is part of consolidation of your catalog. Keeping it smaller. All right, that makes sense, and 11 so you can you can build a Wonder Point preview, throw it away. Soon as you assume the image again, it will rebuild it on the fly. You can throw it away and then you zoom it and it will rebuild. It takes a few seconds. Um, so it's It's no big deal to throw away. It's not like you're losing anything. And lastly, metadata panel. We want to usually include developed settings in metadata for Jay picked. If ping and PSD files what this means if you use light room to adjust a J peg file, do you want to include that and create a metadata file for that? To clear the adjustments, just like just like with you did with the D and G or the raw with X and P sidecar file, you can make light room adjustments on top of a PSD and save that by using the pill option. And it includes all those settings inside of those files as well. Just like the piano the D and G does for raw files season confused faces. But you guys okay with that? It's not a very exciting feature, so we'll just turn it on. This one you want to make sure is off. This is the one thing that can slow down. Your editing noticeably is automatically writing changes. Turn that off because we're gonna use the command s to save our changes when we're ready. Not every time you touch your stinking keyboard, then that's annoying because you see this, you make one adjustment saving adjustment. It's saving you know, just like Stop, stop, stop. Let me work. Let me be me. Let me run naked through the fields Grass sweet around my toes. All right, Lastly, here, the bottom. Turn this on. Right. Date or time Changes into proprietary raw files, Ziese. We'll make sure if you fix the date that you caught that image like if we shot with two cameras and one was off, I'm gonna show you how to fix that problem. You can synchronize them really easily. This will make sure that those changes are put back into the raw file. Okay. So that that image is now permanently correctly dated and timed. All right. And those are the settings that you need to know questions on those particular settings. Okay, good. I know preferences Air. Not very exciting, But some of them are important to make sure that you can flow as quickly as possible through what you need to do. So that's why we cover them. All right. Next thing you want to set up is watermarks. Watermarks is a great feature that was added in recent versions of light room that, uh needed a lot of help. And now it's really pretty great the way it works. And we'll use watermarks a lot when we export images for a blogger for online viewing. If you're gonna give them to clients for sharing, you want having watermarked with your logo. Copyright information. So you set that up in your watermark editor and I've got custom ones already set up. So there is a 2014 faded to ST text. I've got one with my logo, and that logo has a little bit of a white clouds of black logo with transparency. And so I had a little bit of glow, and it looks kind of low rise here because it's just a preview. But when you print it out or put it in a final filed, it's clear and so you can load any PNG, and that's what I suggest. You guys save this as if you do a graphic of your logo. Don't put a J peg on there because you can't have the transparent areas in the JP. You need a P and G. Okay, so choose a JPEG or PNG, but P and G definitely works better and all you would do. For example, let's say we want to choose a logo, so search for a logo. And here's a logo right here. It's ah, watermark with a glow with my copyright date. So this is one thing again, a tip. I suggest if you build a graphic with the copyright date and your logo, and each year you have to change that, but allowing you to know have a graphic with also the copyright text all in one. So this is that the entire graphic looks like right here. I'll select that Pops it in there. Okay, then I can change the opacity. I want to make it kind of faded. I can change the stars of it. I'm more important than she is. Just look at my logo or keep it more more settled down here. Um And then, of course, the anchor point left right, center, top bottom, whatever you want or rotation, how much inset from the edges, This little thing. So you want to try to use something that's kind of gonna work for a lot of different images and you can step through the images if you use the buttons up at the top. Hope I only have one image selected That's why can't If you have 10 images selected, you could actually step through and see what it looks like on all 10. Just to kind of verify this is going to the right spot, and then you save it. Familiar dialogue. Save your preset. Okay. My 2014 logo faded. Go. No, it's saved. All right. If you just want text, then just choose text type in what you want. Change the opacity. At the very least, you should. It should use some sort of a text watermark like this on all your images. It's just so important that people I d and its marketing to have your website on there. So I said, just putting not just your name, but maybe your website every should have. Their name is a website as well as whatever you're fancy name is if you have one. But also have your name is website thing is a good idea. All right, that's watermarks. Uh, when you export copyright is a little different than watermarks. You guys understand different copyright settings and watermark sitting Copyright is the copyright 2014 watermark is anything that's just over laid on the image. So your copyright can be your watermark, but it's not the same thing. I get that question sometimes, too. So watermark just means it's late over the image. It could be anything graphic or the copyright actual symbol, which is this 2014.
Class Materials
bonus material with purchase
Ratings and Reviews
fbuser 471f6dc7
Amazing.... Amazing.... Amazing
smilies
This course has been more than helpful in the areas of organization and functioning more efficiently with my photography. Thank you for all you do Kevin Kubota and CreativeLive!! :)
a Creativelive Student
This course was really helpful for me to speed up my workflow. It gave me ideas about how to keep things organized and backed up, making me more efficient and my images safe.