Lessons
Day 1
1Class Introduction
24:29 2Lightspeed Workflow Overview
39:04 3Skype Call Testimonials
16:13 4Backup Options and Safety
19:00 5File and Folder Management
16:36 6Job and Client Tracking
31:27 7Enhancing Presets
17:47Lightroom Preferences and Watermarks
32:11 9Renaming and Export Presets
27:54 10Basics of Making Presets
36:49 11Assigning Metadata and DNG Conversion
20:00 12Editing Workflow
24:33 13Overview of GoodSync and Kumu
31:38 14Labels and Quick Enhancing in Lightroom
32:53 15Editing with Lightroom
22:39 16Photoshop Integration
27:53 17Compositing in Photoshop
33:50 18Publish Services
20:11 19Slideshows and Orders
36:38 20Albums and Soft Proofing
19:57 21Portrait Workflow Part 1
32:22 22Portrait Workflow Part 2
24:56 23General Q&A
11:44Day 2
Lesson Info
Overview of GoodSync and Kumu
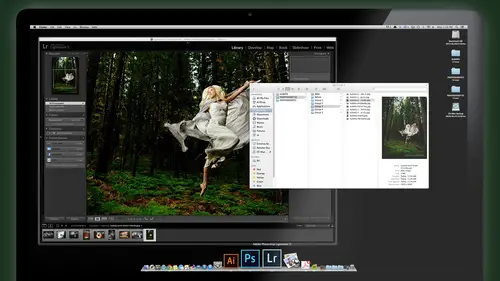
Let's do a quick overview of the things we did yesterday. We can pull up on our screen here for the the home audience. This is our workflow flow chart that we talked about yesterday. We kind of gone through these steps and we're about halfway through it, which is exactly where we should be. And just to re kind of quick review what we did yesterday, we brought our jobs in. We started our jobs in Ku Mu, the studio management software. What you getting you guys have access to? And we duplicated our template folders, and that was a big part of our time savings, having template folders so that you don't have to replicate setting up those folders every time. So we have our template, Fuller's We just dupe, um, rename. Um, boom, they're ready to go. We set up our images onto an external drive and set up good sink to back it up, and I did have some questions. After yesterday's class, people would message me saying, We love the good saying, Can you show us how to set that up with the drives? I'l...
l do that real quick at the meeting. This class will just walk you through a few simple steps to get good sink actually working for you and good things going to do a backup automatically in the background of all of our main images to our second drive, which is our backup of the main images that's gonna happen while we're working. Is it in the background? Don't have to worry about it. Then we're gonna bring images into light room. We set up the metadata for those images so that we can rename them and also set ourselves up for easy retrieval and use of the images. Later, we did a battery name of the images there fixing the capture time. That's an optional. If you have two cameras and the time sink is off, you can fix that and I'll do a little sidebar and show you how to do that today with a little wedding job. Okay, we converted images two D and G, which for a lot of you is probably, ah, new step, and it's not a required step, but that's why I put it. There is kind of an optional thing, but I think it's a good idea, especially if you're doing with big large raw files that you really don't need that much resolution in size. You can compress them and and still maintain almost all of the original quality. That's a big space saver, and it makes you a little simpler and more efficient down the line because you never have to worry about those extra sidecar files. It's always just one single DMG file, no matter where it goes, that's that keeps saying simple or in the long run. Then we started to edit, marking our favorites or the ones that we possibly will keep with a flag or P for preference. And we're gonna work on finishing that up today. We need to mark some favorites and labels, and we started doing so fast fixing. And then we're going to get into, uh, doing some really fun enhancing and setting up our own cool custom presets in light room and also Photoshopped. But these are all things coming up today. We're gonna photoshopped that fun job that we're talking about a threesome, compositing tricks and, um, get onto the presentation on taking these images from your computer to your client and actually making sales with them. So that's that's all all could be done with envy. A light room that's we're gonna dio. And then, of course, finish it up the day. What I'm gonna do at the end of the day today is actually run through this whole system without stopping to explain every step so you guys can see again start to finish how it actually comes together because I think it's it's a little easier when you just see someone just do it all the way through without stopping. And that kind of helps to bring it all together for people when they see it. So we'll all kind of rewind and then walk you through. And then you can see exactly how much time it really takes to go start to finish without the blabbering in the middle. All right, so shall we go get started? You guys got a good peak of this flow chart. This flow chart, by the way, comes in the pdf when you get the course. If you buy the course, there's a pdf with a bunch of information. The flow chart, more detailed flow chart as well. So this is really helpful. Lorenzo said he's gonna print this out like a 40 by 60 on his wall with my picture, Of course, right there, Right? And put that up behind his computer so we can reference this in, which is a really great idea. And when I was starting out, that's what I did to I put a flow chart right there, taped it to the my monitor so that I could just kind of, you know, if I ever get off track like Boom, stay on track. This is busy. There's steps I'm gonna follow, and that helped me make the system ingrained in my mind to where it just happens, automatically know that's That's a big part of when you learn a workflow. It's making it second nature. It's one thing to know it, but then, if you have to keep referring to a manual and back and forth, and it takes you a while to do it, uh, it's not saving you as much time as it could. So make it second nature by repeating it. If you remember, the first thing I said yesterday was to give the system a try whether you already have a system in place and you're probably a lot of people do this. They make the mistake of saying I have a system in place and I love the things that you're teaching. So I'm gonna try toe mix and match what you're showing with what already have, and then they get more confused in their finger. Well, how can I then convert these images? Move them here so that they match, and that tends to make people more confused. So what I suggest is that you just try this. You can do just a fake job or sample job or duplicated old job that you already have. Take the images over and, you know, the day after the workshop set aside some time Sit down and just try this whole thing. Exactly how I've shown you step by step with this sample job. If you're afraid to work on a real job and see how it works and when you're done, then think about how did that compare to what I was doing before? And then maybe you can mix and match in a way that makes sense to you, but trying to take little pieces of it at a time is not always as effective, because I've really built this this whole thing as a whole system. In other words, if I don't do something in the beginning than what I'm doing later may not work like they're naming. For example, if I don't enter that metadata and those images with the name of the job number, the client name into the metadata, then if I do the battery dame later, it's not gonna pull the right information, and I have to then manually type in what I want to rename it, which I don't want to do. I want to just click a button, let it do its thing. It's already knows what to do. All right, Okay. With that said, Let's get back here. So let me first set up the good sink for you guys, so you'll see how to set that up. So here's the good sync program that I talked about yesterday. And if you're just tuning in for some reason today and don't remember yesterday, we have this little program, uh, that I recommend it's not one that I own or use or get anything from, but I just I've tried a lot of different synchronization backup software, and this one tends to do what I want very, very efficiently, and it's very affordable, too. So it's called good sink. And when you start a good thing, the main thing you want to do is you want a link. You're too hard drives, which we did yesterday. So I have my main image hard drive, which is this Go flex here that has client images on it. That's what needs to get backed up everything in the client images folder, which has the job folders for all my clients for that. And I'm gonna put the copy onto Special K my second hard drive. This one here and that's going to go into this folder called Image Backup and client Image Go flex back up. So have the folder labeled what it is. It's a backup. So I know I'm not gonna go in here and start messing with stuff because this is a backups. Only time I'm gonna go in here is if this Dr fails and I need to retrieve something, then I'll go back in here and restore it. All right, so this should always be a mirror of the other folder. So to set that up in good sink when you open the program. First thing you do, you get down to the bottom of your window and there's a little plus button and you're gonna start a new job. So let's call this my, uh, go flicks jobs back up and really important to choose the second option here, the backup versus synchronized synchronized means files or changed both directions. It just keeps those folders and sink. No matter what's a few mess with the backup folder and accidentally delete something. It'll delete it also on the first folder and vice versa. Really, just whatever you do it, it makes them the same. And we don't want that. We want to only work in one and copy those changes over to the backup, right? So that's what we're calling it. A backup. Once you've chosen that, you have to just choose the two different folders. The one on the left is where it's coming from. One on the right is where it's going to. So click the folder on the left. Here are the places which air your hard drive basically, and then you're portable. Drive will be listed on the bottom here, so the go flex thunder open that up. And this is my client Images folder. Right, So that's the folder I slept. Client images. That's the folder. So it's gonna back up everything in that folder so I can choose the entire drive if that's what I wanted to do, and it would back up everything on that drive and every folder inside of it. But this case, I really just want to back up the client images folder, that one there. So choose that. That's my source than on the right Here. I'll choose that folder And where is it going to go? It's gonna go down to this special K into the image backup, and we're going to set up a new folder because I don't want to overwrite the one that I already started yesterday. So, for example, I would create a new folder here and call this go flicks back up to, and you can do that as well. You can have actually two backups and maybe say one happens 30 minutes later, whereas one happens immediately. When you think of a good reason why you'd want to do that, I'll tell you one of them say, for example, you're working on your main drive and you accidentally delete a very valuable file like an original file and you go, Oh, crap and I empty the trash. I deleted it. Can't get it back well in the background immediately. Good thing is going to sink that deletion so that it's gone off your back up to because it's trying to make it the same, right? So if you have a second backup that's going it later, then you could go back 30 minutes in time before backed up and retrieve it before you deleted it. In other words, it was already backed up, and it's only backing of every 30 minutes rather than backing up immediately. So you have one that's immediate and one that's every 30 minutes, giving you a timeframe of 30 minutes toe. Correct a mistake he might have made just made time traveling. Yeah, so anyway, there's a lot of different ways to do this, But just so you know, you can have multiple backups going on, so I'll set this one up. Go fix black up, back up to choose that folder, and then you need to choose the options. And that's the simple. There's a lot of options. Don't get scared. If you click this options button right here, the only thing we really need to do is to look here. This actually has an option to save your deleted files for a certain number of days, and that's kind of cool. You could say Just save deleted files for 10 days if you want, or no days or 30 days that we can actually retrieve them that way as well. This should all already be set for you, and then the only option you need to do is go to the automatic. And here's where you tell good sink when to back up, and I choose sink on file change. Analyze means that just compares and looks, And it will tell you this is what needs to be changed but won't actually do it. Sink means that does both checks it and then changes it. All right, so that's all you need to do is here's the periodically thing. If you wanted to check periodically and sink every two hours and five minutes, whatever you could do that as well, and you can have both. You can have it do it on file change and just go and do it every hour as well. But this is really all you need. And then you get OK. And once you hit, OK, you give it a moment, toe figure itself out on, then it's going to start looking. And now from this point on and watching it now, it's starting to go toe work here. You can see it's analyzing one folder and on the right, you see, the equal signs means it's comparing and copying and putting those images into the other. Get a folder, right? And that's all you need to do. Then you just let that sucker go in the background and you're all set. So I'm gonna actually just stop this back up. But I don't really need two copies of the same thing we had going yesterday. And then we'll continue on back to our workflow. Any questions on that, guys? All right, so let's go back and also re touch on where we started our job, which was in the coup move software. This is our job management software. I got a lot of great feedback from people yesterday. Thank you. You were excited to have something like this and again it's available if you buy the course for free for you guys. So that's something that I want is many photographers. Is it possible to have just make your work a little better a little easier? Keep you managed? It's a simple program. It doesn't do everything that a student management possible software possibly could do. And that's not what it's designed for. It's really designed to be a simple, straightforward but effective studio management client management program. All right, so yesterday we did is we created a contact in our contact section of Coup and the contact was, I need a super sweet and we created a job for her and the job. Now you'll see it listed here in the bottom of the window that we created a Zittel list. Jobs and invoices you create will be linked here. You can create notes for her whatever, but the jobs are here, so I click on that. It brings up the actual job detail page, and if remember, we entered in the job information, it was a family portrait, um, some notes about it, and then we linked the catalogue right here by just choosing the light room catalogue, and this is what it really helps you keep track of the where if you have those separate catalogues like we talk about for a system which is kind of a key part of the system is having a fresh catalogue for each client. It's easy to keep track of them if you just linked them to their job form job page. That way, you never even worry about where that catalog was stored as long as you don't move it. Uh, this Kumail remember it and link to it here so you can always get to it by just clicking on this link and open up that catalogue which will do that in a second. We also entered in products because when we create an invoice, we're gonna be basing that off of products in our studio system. So these air some products we created that we can use, and if you click on it, it shows you the costs of the goods involved in making that product. And it calculates a suggested retail price for you based on a 30% cost of sales. One of the questions I did get from somebody offline yesterday they said. Love this, I want to use it. It's helping me. I don't know how to price and this has actually been awesome And they said, Well, my my question is in my area I feel like I need to price myself lower because that's sort of the nature of my clientele and I have a lower overhead was her thing because she lives home office and she says I don't have many expenses of a low overhead. My feeling on that this is up to you can certainly change your cost of sales. I wouldn't go any higher than 50% he said yesterday. I don't think that's Ah good price pricing model. To begin with, 50% is not enough. You should be 40 ideally 30 and a lot of drivers even down. A 20% cost of sales, which is even better, means more profit. But her thing was, well, my my overhead is lower. So can I lower my my percentage on the cost of good to raise that percentage up to 50% or mawr and surely you can. But does that mean that you have to charge less just because your costs are less we're not charging us for dog. We're not charging for goods in particular, charging for our time, our talents, our creativity. Uh, if I'm charging for an image, I'm not going to tell them I'm selling you paper and print, right? I'm selling. I'm selling you this image, and by the way, it's gonna be audited by 10 print. So if you think about selling images morsel in selling a commodity, which is paper, you know, canvas, plastic, whatever you put your images on, it helps you price it better when you think of it that way, and not so much by just stuff, because we don't want to be commodity photographers who want to be selling art and priceless things images that we capture. And I think that's a big mind shift. If you can make that mind shift, it helps you to price yourself. Just because you're overhead is lower doesn't necessarily mean you have to charge less. You can still serve high end clients and have a very low overhead, and that makes you have a bigger profit margin. So if you're if you're a talented photographer, you charge for what you are worth and what your customer service and everything else you do is worth not just because you're buying prints cheaper than the photographer next door. I don't think that's a valid way to price yourself as a photographer. So my two cents worth on that. Take it or leave it anyway. Used the product pricing worksheet. Help you figure out your products, all the products air here. So let's kind of just jump ahead a little bit. Let's go back to our client that we were just working on, which was need a super sweet. And if I click on her job number, that's the job details. And let's say the job's done and we want to invoice her. So you go to create invoice at the top. It starts a new invoice, and this invoice is linked already to that job, because the way this works is you have a client and each client can have multiple jobs and each job will have its own invoices. So I can have five invoices for this job because maybe one's gonna be for this order that she orders another order the next week. Whatever. But it's all from this job. The other job, same thing okay, will have its own invoice because you're actually ordering pictures from the job. Not necessarily for the client. Right, But they're late, so they had products. It's super easy now because you've already put them into your system. Here, you just click. And all the products you entered will just show up right here, and you just choose one. So this is gonna be a 2030 metallic notes. He could say retouch face out. The next print they're gonna buy is an eight by 10. Basic. Then they're gonna buy five by seven. And this is, uh let's just say it's for Mom. Do it right, Okay. All the prices pop in there. You just change the qualities. If you want your sub totals everything here. If you're taxing or not taxing, you can add that if you're applying a discount of some sort at that shipping cost, that's gonna ship this to them for 10 bucks. If they once they make the invoice in the apply payment, you can enter the payment in here. So the partial payment, maybe their deposit they put onto it so that they deposit $100 on this order their mountain dew is to 10 on the invoices set. Uh, when they pay it, you can click on the little calendar here. And she was a paid date, which should be today, maybe Okay, or they didn't pay it yet. And then you print it out for them. So I go to print invoice, and I want to print just this one. Not all men voices its spell, checks it for you to skip the spell check, and it's ready to print. Printer's not hooked up. So there is kind of what your invoice looks like. Ready to print the logo that you enter when you first set up. The program is right there on the page, Pops it in for you or your company. Information is here. Boom. We just printed out order notes that print are there and that's it. OK, so let's to go to the job and finish take up, pick up where we left off yesterday. So I'm gonna go to this job, and if I just click on the job number, that's the quickest, easiest way and you notice in Cuba there's a lot of shortcuts by just clicking like you see a job number and you want to go to that job number, just click on it and that goes to the job. Here's the job details and then I'll click on her catalog right here for the one we were working on yesterday. And as long as you didn't change anything in the process, boom there. Her light room catalogue opens up. You ready to start working on that job or pulled images or price in order or whatever you want to do? OK, there's what we are yesterday. OK, any questions on that? We're kind of back up to where we were yesterday. Tied those things together. Good runs on no questions way. Have one up here. Okay. From Donald. Does the Ku Mu software have any type of CRM features like quotes, client lists, lead prospects? No. Maybe in version two, maybe. Yeah, yeah, it's again just to mention coup. It's something that I viewed in my studio for over 10 years. I built it for myself and we were just now publicly releasing it as it actually started to do it for creative Live because it's a perfect way toe. Introduce it to people. And so we welcome your feedback. If you download it and try it out and you have some suggestions. Just let me know. And that is definitely something that we take into consideration you could add for future versions so way. Just want to make it useful for you guys for the most people. Most useful. All right, So yesterday we did some editing. We picked some of our images by using the flag tool, or P, for this is a preference image. I picked this one and then we narrowed down that selection so that we're looking at, um, the ones that have potential. But we still want to narrow it down a little more because I can see just from looking at this right here, they're already up these two or similar right camera, but doing little selfie got a shot we don't want to have or even that one that many of the same. We talked about showing your Mona Lisa, and that means finding similar from the same pose and showing the best. And then when you switch to different pose, pick the best of that set, etcetera. Don't not usually a good idea to show so many variations of a very, very similar pose because it devalues it. So let's kind of do that now. So one of the ways that I quickly compare images So these these five images looking down at this distance here are similar ish. So an easy way to do that is just shift click to select across those images and use the compare or not compared with the multi up survey mode, which is short cut in on your keyboard for let me see a bunch of, um okay. And that will clear everything out and just show you just those images. And that's an easy way to scroll through. If you come to one, you want to see a bigger just select it, hit the space bar, okay? And then it end to go back to where you were. And that lets you kind of visually compare them. Um, and I'm thinking that one is the one I want that someone will flag with a pick. Okay, Go back to the have my auto sync on by the way again. I forgot to tell you about that. We did talk about that yesterday. I believe. Right. Auto sinking a little bit. Yeah. So auto sync We've used that yesterday when we're sinking our metadata and that simply means if you have several images selected, whatever you do to the one you're looking at will happen to all of them selected. And that goes for flagging picking. When you're in library mode changing metadata when you're in developed mode, it goes for any adjustments. If I did the brightness on this one, but they were 51 were selected, all five would be adjusted. The brightness and auto ST lets you choose that option. So down the bottom right here you can see Auto Sync has turned on a little switch. We'll just switch it off right now because that's what we don't want to happen now. We wanna be ableto choose from these images and flag only the one we want. I'm gonna you for unflagging you means on Flay. Send it back to its normal state. Then we can use our compare mode. Clear that out. And so if I decide to choose this one now, uh, E jumped the gun here as I was thinking about that what I'm not supposed to say. So grab those four images again. All right, so un when I turn off my auto sync, make sure I turned off the auto Sync. Then I can clear and hit the ones that have potential with a flag. Orpik. All right, so now the others don't get flag, just the one with the potential. Now then it's It's questionable because these air all selfie pictures, whether it would also include maybe this one. That's kind of cool for looking up the other direction. There's the one that she smelling her armpit don't like that. So that one has potential, that's all. Keep that one and just got those two. Then I go back and gather to the next group. Okay, so here's my next group of images in to bring those all up. And then I decide which one, like off the bat, this one grabs me. I like that natural kind of looking down, laughing looks. So I'm gonna just take that one. Okay? Go back. Go to my next Siri's here. There's just those two is there, one that I like better that would I love her hair going with this one. Her face is a little different on I think I can, even though I don't have the light. I can do something. That's I'm gonna go with a P on that one. And then we have our next group of images, which is right there and looking for kind of the best of the Siri's here. And I'm thinking that one has a nice little expression. Fairly natural on maybe this one. Okay, they're different enough that I can keep them both. Go back then We're onto the next group. So next group of images would be those. Compare those four. Uh, I'm gonna digging. Maybe this one or that one. So I need to decide. Need to make a decision which I'm going to go with, or should I go with something like that? Let's go with. I think I can play with that one. Actually, about this so unflagging, you go back for good. All right. These are all close up shots. I can compare those easily close ups. Which one do I want? I like that one. Nice and clean for sure. Uh, this one is a vertical. It's different. Pose this one. She's got her glasses on its cute, different pose. These three or two. Similar. So I need to pick the one that I want. That's the cleanest one, even though I kind of like the sultry on that one. But I think the model is gonna want some without hair interface. And I don't wanna retouch all that. This one's nice and clean, so I'm gonna go with that back to my grid. Now we're going to go to our fun little, uh, composite shot. And for sure, I need to keep the background for my composite. You'll see why later, if you don't know. So I'm gonna just pick that one, and then I need to pick the one of these jump ease. That was my favorite position. And this one, the light didn't go off, even though I do like the the way her body is everything. But this was the closest in the late action. Often the suitcases in the right spot. Everything's good. That's gonna be our hero shot for that. Go back and then I need to choose some books to go along with it. So, flying books, How can you compare flying books? Some of these The light didn't go off, so I just hit the little X. I'm gonna get him out of your view. There's a little X right here in the bottom. I just takes it out of your group that you're looking at, narrows it down. So all these lights actually went off. And then I'm just gonna look for the ones that look the most like birdies to use for my composite. I like that one for sure. Okay. Wanna go? That one's too similar. That one might be nice. Keep that one. That was nice. That one's nice. That one's great that we don't really care for. Don't care for that. That wouldn't potentially. That was cool. No, it's too similar to one of the same book, obviously, and that one's already been picked. So let's see what we at now. So I've got 12345 books, six books. Maybe two composite, not be good. Fly away, all right, and we'll roll it on down here, go to the next group. These air are cruising images, and again, we want to find maybe one or two from the Siri's because it's not doesn't really make sense to have a ton from the same basic pose. So finds the one find the ones that you like, um, I'm kind of like in the way her bodies swaying on that one. And, um, I actually like the look of that one there. Okay? And back to go in the next few here to compare with these with Spinney ones. And I'm gonna go with, uh, with that one, and then we have one more different pose. This is straight up on a sultry thing. Which one do we want here? I'm gonna go with that one. That one grabs me right away. We're back. And then finally, we're going down to the the overhead lighting shot, The first ones I know. We're a few test shots. We don't really care about those I want to start with, uh, these last four, Um, that pose I like. Like where she's at, like, the lighting quality. Picked that one. And this is gonna be my background to drop out the light. Pick that one, and we're set. Okay, So now that I've narrowed down my final collection, I'm gonna go to the library refined photos, and we did this yesterday. Refined the display. Basically, it will take all the ones that you picked has a preference shot. It'll unflagging those, but take the other ones and then x them out. So you don't have to look at them anymore as long as you have this filter hide rejects on. And if you don't have that filter made, all you have to do is go to your attributes panel here and turn off the filter. If you guys haven't used filters, this is what filters are all about. The filter here will tell light room to show you on lee these things and hide the others. So if I was to click on the filter for the white flags, I would see flag and unflagging photos. Uh, which I pretty much that's what I'm looking at without my rejects. If I turn on the other one there, rejects would see only my reject photos. So that's where you can see the ones that you in tow flag before. So I set up a filter for hiding rejects, and that leaves me with my final images that I'm gonna work on
Class Materials
bonus material with purchase
Ratings and Reviews
fbuser 471f6dc7
Amazing.... Amazing.... Amazing
smilies
This course has been more than helpful in the areas of organization and functioning more efficiently with my photography. Thank you for all you do Kevin Kubota and CreativeLive!! :)
a Creativelive Student
This course was really helpful for me to speed up my workflow. It gave me ideas about how to keep things organized and backed up, making me more efficient and my images safe.