Lessons
Day 1
1Class Introduction
24:29 2Lightspeed Workflow Overview
39:04 3Skype Call Testimonials
16:13 4Backup Options and Safety
19:00 5File and Folder Management
16:36 6Job and Client Tracking
31:27 7Enhancing Presets
17:47Lightroom Preferences and Watermarks
32:11 9Renaming and Export Presets
27:54 10Basics of Making Presets
36:49 11Assigning Metadata and DNG Conversion
20:00 12Editing Workflow
24:33 13Overview of GoodSync and Kumu
31:38 14Labels and Quick Enhancing in Lightroom
32:53 15Editing with Lightroom
22:39 16Photoshop Integration
27:53 17Compositing in Photoshop
33:50 18Publish Services
20:11 19Slideshows and Orders
36:38 20Albums and Soft Proofing
19:57 21Portrait Workflow Part 1
32:22 22Portrait Workflow Part 2
24:56 23General Q&A
11:44Day 2
Lesson Info
Publish Services
before we continue on now with our light room post processing Because we've already worked these things in voter shop, we're gonna bring him back to light room and start working on him. I want to share with you guys one of my actually most powerful actions that we could possibly have. And I've been working on this for a few years and, um, it's available for free to anybody out there. I just want to show you real quick because it's such an important action to have and to be able to use. So let's pull up. Let's pull up an image in photo shop. Something really disgusting. Like like this. This is a picture of my dog. Not really my dog, my friend's dog here. And, um, it needs some help. So what we're gonna do, Let's try the super bitch in action on this thing and so run the action and kind of it's gonna go through some very, very high tech particular steps here to create the look. But it's gonna make an amazing difference to this dog, which is what I really like. Bam! There you go. What? Yo...
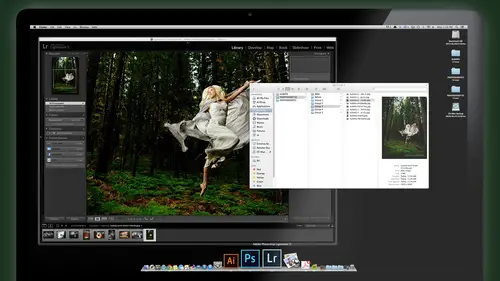
u guys think that what you guys think that was Hey, that was the best action ever. You guys wake up new. You know, some things just don't get appreciated for what they should be. Let's go back to light room, then. Maybe that's a little more exciting for you guys, So Okay, wake up. Wake up. Wake. You guys missed the whole action to Did you? You really You really missed it, Jeffrey. Still asleep, actually. Wake him up. Okay, We're back on track for real this time. And we did just process these images, and we've got them ready to now show and tell to our client, and we talked about several ways to do that. Number one is to throw on your blawg, which is obviously important. First step off, and then we've got to make them ready for slide shows. We can upload into her IPhone. We talk about that with the IPhone photo sync the other day yesterday. Um And then, if you want 1/3 full raz images to your lab for printing and then start preparing images that you want for an album, well, that's going to go to the first process. Say this is a wedding or most jobs a kind of a cool thing to do is to get a few key images. Your favorite images up on a blogger Posts are like a teaser to the job and in the client. We'll check those out, but they know that the rest of them are coming and they can log in and see those later. So a quick way to get them to your blog's to set up in export preset for your blog's, which we did yesterday and just email him straight to the block. So what I want to do? First of all, it's just to kind of pick out from me. What are the image that I would like to show to kind of represent this shoot and put them up on the blawg so we'll take a few so much. Hit these with some stars. This is what I use my star ratings for, So I'll hit that with a three star this one. We spend a little tricky time. It'll kind of instagram refund vintage print from that 13 star and maybe take one of the close up images. Three star definitely our tree. Beautiful light shot and our composite shot that sort of represents. It may be one mawr This one here that we did of ah, hanging out rock star kind of shot will hit that a three star. So now we have the images with three stars that we're going to use for a blogger or any sort of key. These, whereby key images from this group of the shoot. And what I'll do is just click on the three star filter top of the bar here again, If you don't see this filter bar, I'm gonna make it more common looking here. My sidebar is the filter bar. If you don't see it, the backslash key on your keyboard when you're in library mode will hide and show that filter bar. Just, ah, again, a good trick to know just a good shortcut. Take time to commit to memory. So now we know we're looking at Onley those key images that represent the variety in the shoot they want to put onto the blawg cell, select those those six images and we'll use our export preset that we already created. And you can jump to it quickly from the file export with preset jump down here to the main section of presets that we created yesterday, and I'll say email to Blawg 800 pixels because 800 is about all I need. Size wise, I don't need them to blow him up and see them big. It's just show to share on the block. Right? So what, you know to blawg 800? You remember this preset that we set up yesterday? Lorenzo? Yes. Now, the 800 is that it doesn't matter which way the shot is over in a way, this vertical or horizontal. Yeah, great question. And it doesn't matter. It it's gonna go 800 on the long end. So if it's horizontal, it'll be entered. Why? It's vertical. It's 100 tall. And that keeps them all the same. Same side. Yep. Very good question. He's a thinker. This guy thinks through stuff. Yeah, export with preset. He melted blogger at 800 so that will convert them. It's choosing the folder, which we already have a folder. I'm going to just say, use the same one that images were actually already there, and we'll just say overwrite them. We're just doing the same exact images all over again, and then it starts a brand new email with those images already attached. All right, so once you set up your blawg, all you have to do is put into this email what you want to say on your blog's and put the blawg address. If I type in here Blawg, I have a test one set up. This is not my real blawg. We're not going to send it to my real blawg right now, but this is a good example of your WordPress because it's a popular one with a lot of people. WordPress. I use square space for my blawg hosting, which is a great one, but what everyone you have. You can email to it if you just set the settings correctly. So the subject becomes your blawg title. And that's called this a cool bohemian shoot with my Mustang Sally and then in the body. Here we put the message. This is my Balog post hidden because it's up there. It's about the images. And then if you kind of call this block here, if you have one image, it puts it by itself. If you have several images, it automatically puts it into a gallery. So to get that, uh, the top image by itself. I just need to add some text after it and then say here, arm or images just to give you an idea what's going on? So this one has that said, Here's Mawr images here, arm or images and then I have three images in a row, four minutes and rose to make sense. So texts. That means I want my blawg to have a little text. One main image. Vince More text, and then the rest images will be in a little slideshow gallery type thing. So then I hit. Send fire this sucker off and ways it goes to my log and then let's go and open up and go to our blawg sample. Blow safer online yet? Where? This on the block. Okay, so there's the first image. Then here's a little text and then the rest of images in a nice little gallery. So if you click on any one of those, it pops up in when these little slideshow galleries that you could scroll through the whole quick is that Is there any faster way to get images on your blog's in that? I doubt it. I doubt it. And you got to start blogging pretty soon. Right? So now you got some tricks to use. Yes, I have to start blogging for class and which was something I did not want to start doing. But now that so bad, two clicks and I'm pretty much done. Yeah, just sending a little email to yourself is all it's all about. So this is this is ah again, This is not my real blawg. This is just a funny one. I put up for testing with classic showing examples. But WordPress is really easy. This is a free world, plus press blawg that I set up in about 10 minutes to get ready for demonstration purposes and things like that. So if you're looking for a new blawg or you need a blogger even started one. You know, check out something like WordPress or squarespace. Maybe, but I like the way that the WordPress works where you can do what I did here and have a key image. And then any time there's no text between, um, it groups them into little slide show. So that's a nice way to have one key and then show some others in a little slide show format. Balloon it like that. That's all there is to it. All right, So now you got him on blog's. So then you send your client a little happy email. Hey, you've got some images upon the blogger for you. Send a link to all your friends. Check it out. And the restroom ages. Air coming soon, so stay tuned. Right. So now we come back to light room, and we're going to now decide whether we want to upload all of the images. I'm gonna turn off TheStreet flags here. So these air all the images in the collection that we're keeping and perhaps you are using a lab for fulfillment. We talked about that yesterday. How do you then, handle that? You're gonna send these off to your lab for fulfillment. Simple. You just go back to selecting all these images that are gonna be available for order. All right, girl down. Make sure they're all selected 18 images again. Go to your export. Use the preset that we made yesterday or we showed you yesterday. Which is print ready, J pegs or in my case, White House. Custom color print. Ready. Okay. If you use SmugMug for just your galleries, they can actually do fulfillment from SmugMug. And they will use White House if you tell them to, which is kind of cool. So if you love White House as your lab and you want to make sure they're printing your images, they do a good job. But you want a host on SmugMug and have your gallery and SmugMug. Then you could send them to SmugMug, um, and tell her to print through White House for you automatically. When somebody orders that those images Okay, so a couple ways to do it first, I'll show you just export the images to print. Ready? Basically, use the preset that we already created. It's gonna ask you, where do you want him to go? Put him into that clients print folder. Export the images and the emitter to you'll have them ready. You upload them to your lab. Now, if you are using SmugMug, then we're going to use another feature here called Publish Services, because this puts it into SmugMug Gallery and makes it available already for them to purchased this full rez. So I've set up a SmugMug published service right here. And let's just talk about how to do that. You have your publishing manager, and you may need to download from adobes published services site the SmugMug plug in this. Just show me that it exported. Here's all those images We just exported high res J pigs. So if you're not using SmugMug or using different lab boom, here's all your images. You just shoot him over to your lab and they're all ready to go If you are going to use SmugMug and White House for printing SmugMug actual print to other Bay Photo or White House. So I know Jim likes base. If you guys were using bay, that's another great option. They're a great lab to love a photo as well. Uh, so we set up SmugMug, I set up. You set up a different, um, parameters for different resolutions. How you in images posted so you can have one setting to SmugMug for medium resolution with watermarks for people just to view. And you could have another one that's full resolution with no watermark that they can actually order from and when they order it, SmugMug handles everything for you. They take the order, they take the money, Send the parental White House. They can even send it directly to the client. And they just send you a check. Basically, is all you do again? I don't do it that way cause I prefer a little more interaction with my clients. And I like to see the prince before I send him off with my custom branding on it. But a lot of people think that's that's the way to go. So it's something worth thinking about. Alright, so I've set this up called Flores for ordering you link it to your SmugMug account. Once you have one gallery settings here, I turned on my again advanced gallery dialogue. That just shows me more options when I'm ready to upload this, um, you could just copy these settings here, change them as you need to. Main thing is, you don't want to rename these and you want to make sure that you have J peg in a high enough print. Quality 85 is perfect for that. You're not re sizing it, so you're sending a full size image and whether you want to include all the metadata or just the copyright information, I just include all metadata because maybe that's helpful for the organization. SmugMug will actually read some of your tags like your keywords and stuff like that if you tell it to. So it could actually use the metadata and have categories on the website and I turn off the water mark. Okay, so once you set that up, uh, here we have full rest for awarding. I'm gonna just create a gallery and the gallery is going to be our client's name. Was she also sweet? Super sweet. That's right. And then we'll scroll through, make sure things we want it to be. You have these options here to make it public, make it unlisted. Private meeting. Nobody else can see it. Just you. Anybody, the link unlisted. If you want this to be kind of private, only people you give the link, people just browsing smugmug can't find them and see them. Just random people that make this an unlisted one with so that people, you have to give him a link to see it. And if you want a password, you can have a password. Um, a lot of other options. So I'm not gonna go through all these options here. But just talk about what you can do and see right click protecting them so they can't download them directly from the site. Turn that on. Um, blah, blah, blah, blah. We got enough options in there. The only thing I can do is get to the bottom of my windows, Are too small, went up. So we set up the gallery. Here's Anita's thing. So what we gotta do is publish it. So from light room directly, with all these images still selected that I want to put up there, I just dragged them to Anita Super sweet and my SmugMug full rez. Okay. And once I've done that, you'll see we click on this gallery here inside of the SmugMug. Published new photos to publish and at the very top, right? It just has published I click publish. And now what it's going to do is start uploading these images one at a time to smugmug. And then there were ready to just send the client a link to it again, almost azizia putting it to the blawg. So this is a really important for you to create galleries and stuff like that so that you can show and share and sell directly on your SmugMug site as their published You'll see below its has published photos, and the cool thing about the published services is, if you make a change to a photo, say, Oh, that one's not bright enough, I forgot. You make a change to it in light room. You can synchronize that, so that happens. Back up to your SmugMug site as well. Not image gets synchronized and fixed a swell, so it always keeps those images as long as he republish it, synchronize it with whatever you have in your current light room. So really powerful tool. Really great way to get those images. I use that all the time. Whenever I'm done with a shoot, I get my favorites. And I just put him on my SmugMug gallery so that I, whether I'm gonna share him or not, they're there and always backs is I put all my images that I can onto SmugMug just for long term storage, just to have my favorites, and it's a good backup. You know, when my my computer was stolen to find and collect all my favorite images again would have been a pain. But I know that I've already posted those to SmugMug at some point there because the storage is is massive. They have Okay, so in a couple of minutes, we'll see this public services working. And since it's sending high res images, it does take a little bit longer. But again, I don't have to wait. I can go on and start doing something else, and then I'll get a little notice when it's done. So in the meantime, was there any other questions on those two things the blawg and the publish services there, Very powerful tools again. And to get you from point a to point, they quickly just a quick thing with the blawg. How you had, like, a little bit of tight between each image. What were you just bringing the cursor down between the two images? Or I just use my arrow keys to kind of jump forward and head of the picture and tablet and type and then return And okay, Yeah, like if you're typing up a regular email and dropping in a picture in the email and that sort of thing, Yeah, and of course you can do that. You don't have to use light room. If you're just writing an email to your blogging, you can do that and then drag and drop an image off your computer from somewhere and pop it in and send it off to your blog's same way. It's like it just makes you a little quicker because you're already in light room. Just let it talk to the other programs you use. That's what we're trying to do here is connected in a meaningful way. Okay, okay. And one from Maui. Photo a moto Hello in light room published services. Is it possible? Set up two separate Facebook publishing options. One for personal and one for your photography page. You should be able to Yeah, just like with the SmugMug. See, I've got two different SmugMug set up, both linked to the same account, but one is called client viewing, meaning it's a lower resolution. So if I right click it and go edit settings here, all the settings for that, including re sizing it down to 1800 pixels. So this is the ah lower resolution published service to SmugMug. My same account, The other one that I set up was the one we just use which is the full rez and fight right click and go edit settings on Scroll down. This is the one that we didn't resize it. We're keeping the full resolution. So this is I use this on on Lee when I want to send high resolution image. I used the other one when I want a low resolution, but both go to my same SmugMug account and I believe I haven't used the Facebook one that way. But I don't see why you wouldn't be able to do the same with the Facebook one as well. Cool. I think the shot It probably will work if the SmugMug does. I don't see why Facebook wouldn't. Sometimes when I send my images from light room to an Emoto, I, um I can't find the photos in the Anna Motto gallery, and I have to do it few times. I don't know if that's ah light from set up or there's something that needs to be known within an emoto. The once you get into the an emoto website, you don't say do light from transfer off my photos resized 1200 pixels on the longest side and then I go to my an emoto account because I get the notice from light room that my images have been transported or imported or exported are using the Enomoto publish services were published over That's right using okay and there's a chance each time that I can't find my photos and on a Moto and I have to do it few times. Yeah, that I'm I am not sure I'm not familiar with that. I haven't used the an emoto published service because I just used the export preset, put him in a folder and upload them directly through the website with their up loader on the website. So I haven't actually used the public service. I be honest, I need another one public service for an emoto. But it's good to know, but that would probably a question for either animados tech. Um, adobes Tech probably won't help you with that one, but I would not ask Anna motives tech on that. They're pretty good about that. Yeah,
Class Materials
bonus material with purchase
Ratings and Reviews
fbuser 471f6dc7
Amazing.... Amazing.... Amazing
smilies
This course has been more than helpful in the areas of organization and functioning more efficiently with my photography. Thank you for all you do Kevin Kubota and CreativeLive!! :)
a Creativelive Student
This course was really helpful for me to speed up my workflow. It gave me ideas about how to keep things organized and backed up, making me more efficient and my images safe.