Lessons
Day 1
1Lighting 101
49:48 2Lighting Gear
22:13 3Speedlights
10:38 4Creating Your Own Window Light
38:15 5Lighting Kits
16:29 6Additional Lighting Gear
19:44 7Shoot: Window Light, Reflector, Softbox, and Flashligh
40:17Postprocessing and Q&A
20:27 9Shoot: DIY Scrim and Hair Light
27:26 10End of Day Q&A
14:39 11Reviewing Yesterday's Images
20:24 12Shoot: First Dance
29:49 13Shoot: Candle Lit Dinner
31:55 14Shoot: Couple Portrait
31:44 15Shoot: Groups
31:06 16Shoot: Styled Engagement Shoot
28:22 17General Q&A
24:21 18Shoot: 50s Housewife
32:20 19Student Shoot: 50s Housewife (with Attitude)
26:24 20Shoot: 50s Beauty & Image Review
21:56 21Yesterday's Image Review
20:50 22Shoot: Classic Bridals (Lightbox Setup)
51:43 23Shoot: Steampunk (Mecca)
37:15 24Student Shoot: Steampunk (Mecca)
15:58 25Shoot: Alley Steampunk (Group)
36:47 26Shoot: Rooftop Steampunk (Mecca & Melissa)
39:13 27Rooftop Shoot Q&A
23:57 28BONUS: Step-by-Step Instructions for a DIY Scrim
12:21Day 2
Day 3
Lesson Info
Lighting Kits
so here's my first little kit recommendation this is my little killer combo most of what you saw there was all of this simple combo one speed light in an octo or a small box and then another speed light with a grid spot like a road grid put it on a pole so you can move one of them around or a little light stand if you prefer and that combo you could do so many different things with I briefly go through this this is the double mouth I talked about this earlier mounting to flash is in that ring for the octa dome if you want to make that double picture in order an extra bracket when it's assembled it looks like that here's one we talked about that too one speed light or one trigger for three lights by this headphone splitters and here's an example of that and you know this was actually using the lens baby edge eighty for that tilt shift effect not done in photoshopped gives you a little different look really fun lens we use this during our shoots this week to this edge eighties a really a...
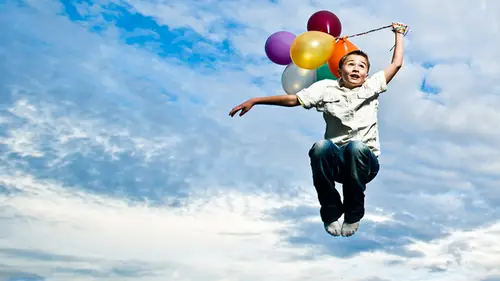
wesome linz I love it because I can create one I totally sharp and then from there just boom goes out and goes out and I love that really kind of dreamy feel to it so that's one octo right here the speed light and the edge light hair light coming in from that corner totally change the look now by flaring into the lens and then putting across process action my actions set on they're giving more of a seventies funk feel to it same set up though and a couple other different options same two lights just moving them in different places around the model this is a fun shoot we did have a bride she was a professional boxer in real life and we wanted to do something of course that plays off what she did so we actually asked her what you think about setting a boxing ring up park I ran ben knows her it was like one of his bride and you like we can do that we can set it up so he had her ask her coach and he agreed for free to bring out and set up a full boxing ring in the middle of parking lot at this park for us to do the shoot was crazy so we did some fun stuff and this light right here is not the son that the speed light that I had two photo shop out the light stand which was right here just photoshopped that out but that's a speed light a flare in the lens tio control my light and then there's an octo over here casting that nice soft light across her body to bring our muscles and another one buying her body shining onto his face three lights you know that was again this is the there's another speed light or just sitting on the stand which I photoshopped out the stand that was all and it was all one shot deal we did several variations here to get it get it just right and uh so much fun she was still into it like that hey hey jump wait did have a little mat right here pad from plan and basically he one two three and slide back and do it again do it again and then I had an assistant throwing these pedals right here and see this the spray of water right here so figure out how to get this spray of water everywhere you know like it's blasting sweat off his face and way tried you know like sprinkling water than finals like I don't have time to mess with us we're going to unleash is like it's a big streak of water it's alicia self set spitting water the word is laughing so I could barely shoot his laughing her spitting on they didn't care it worked out great so otherwise it would have been a little more complicated get the water all right so here's a nice starter kit is outlined three kids and right after that we'll take a little lunch break and after lunch we'll start digging into gear and start setting up to shoot started kit I think for those of you out there you guys here if you're looking for a way to start with off camera lighting and some tools I think this is a really great basic kid uh not too expensive and it covers a little bit everything's we have our scream you can make your own or by one of the photo flex uh disc five in one or multi disk I think actually essential this is the impact box just pops right up whom we have it here somewhere don't we alicia okay we'll find that I've got it somewhere the lunch and sticky filters a road grid to speed lights to start and you need three pocket wizards to activate all those two speed lights and one on the camera so that you've got it you've got your directly you've got your medium diffuse light you've got your large window light and you've got pieces to fill in so you can really do just about any style of lighting with those minimal pieces one step up from there we're just going to add a few more things my indy filter to me this is essential a lot of people you know I understand that when you use that hopefully you guys will get it and b stoked on nd filters because he's going to set you apart by the end of this workshop so I think it's essential so this for me this is what I call it essential this is where if I had the money this is not a lot but if I had somebody this is where I would start and basically we're adding one more speed light one more wizard and one more little gadget and then we go yeah baby I gotta go on I got like three jobs coming up this year so I'm all hooked up so I can do uh uh one more speed light maybe go to the flex system now but I might have tl control but maybe like I don't want to deal with this wireless radio control whatever just get the plus get the simple ones and we're adding now a nice little flash bender another girl a gorilla we have two places the whole lights um and then maybe little face mask this is kind of cool I use this on top of the box to make it look like a beauty dish if you like look a beauty dish if you pull the inter diffuser off of this on the inside and put the face mask and a circle it looks just like a beauty dish and it's actually a little bit cheaper and pretty pretty quick to set up and it's more versatile because you can use there's a beauty dish or really nice soft bucks so it's a very versatile way to go so that's our yeah baby kid all right one more thing to talk about before we go to lunch then you start shooting okay building your scene this is really simple sometimes you're doing a complex shoot saturday we're going to a little bit more complex shoot we're gonna build up to something kind of flown on saturday but it's always stepped the same step by step process number one is the posing composition to answer your question earlier I would oppose my people figure out the background the composition where everybody's gonna be get that dial ok then we're going to think about the ambien exposure if I'm gonna be mixing lifes were outside I want the mountains to be exposed I gotta bring that down ambiente to be my fill light so it's probably all one stop less than the flash so set that on my camera minus one stop ambien I miss one and a half maybe minus two stops if you want to really make a dramatic background right said the ambien then in comes the main light all that stiff it main thing is going illuminate your subject position set the power all right whether you're meeting and we're not talking about we'll talk about this later to where you're going to use a meter or just do it in camera my preference is to measure in camera what you see is what you get okay it's faster for me to just measure in camera estimate my first lighting exposure look at the camera make an adjustment in its dial ok so main light then your secondary lights I have a kicker there's an edge light boom boom boom from the back like that throw those in there to the scene balance them the kicker's overpowering the main dial it down to stop have stopped whatever okay goddamn balanced and then I decide is there now I need a little bit of phil shadows to dark on the main no ads and phil maybe a reflector maybe a second flash with very low power what happens if I add flash to the dark areas of an image first is the hut brighter is an image I lightened dark what happens if they both like the same you decrease the shadows yeah you can open up the shadows muchmore than it's already bright light as much you're not gonna affect the bright areas right so there's a little flash to fill so here's here's a little complex shoot which is about nine lights in this one but it was built step by step very simply compos first thing and I don't even think about lighting all I said okay where is everybody going to be what you gonna do you I want you in the air like rockin saying and screaming I want everybody in the air at the same times my goal drummer couldn't get him in the butt like vision is everybody's in the air you know we're freezing this moment so this guy's like ready to step up like okay he's safe just insurance people out there I'm very safe he's got a bar holding him and it was his idea uh everybody's gonna jump so he figured out if you jump you jump you jump this is where you're gonna be perfect okay main light comes right up here it's a small dr dome with speed light lighting him and then the accent lights this one right here is really important to me that I got that flare to edge light getting it perfectly right there was have to admit a little bit of luck you know take several shots to get it but I knew I wanted that light in the back flaring looking like this stage light and then there is a speed light with a grid on each one of the members so he had a light on his face he had a light he had light and live in his face he had a one with my grill a pod clamped up here to the middle shining on his face there was a light on the ground shining on the equipment so each still starr had their own little piece here a little late but I just built it one little step at a time that was a behind the scenes there you're sorry yes your speed lights do this helpful thing where they turn off yes that's a great question and simple solution is you go into the custom settings and turn the auto time off off plan yes I know it drives me crazy because you're like perfect everything set for fifty fire it like one lights off sleep there is a custom setting and all the speed lights most every speed like you go into menus and you can set the auto time off tow never just don't forget it's on when you pack up for the day um so you you don't want to three there's actually three lights on this one stand one of the ground photoshopped out in the final image actually photoshopped that there's no way to hide it well I understand gorilla potted up here shoot him that one shooting him that one's on him another fun cookie shot this is the craig strong the adventure of the lens baby I want teo mad scientist portrait of him so we went into his laboratory and uh that's not craig by the way that's alicia and I use a ring like this this something different haven't talked about it use it once in a while but when I do it's really really cool it's a fluorescent bring light and that was my main and it was perfect for that fish island shot we wanted craig and uh this bowl is where we're gonna put the dry ice put dry ice and this bowl here with some warm water to make it mobile mobile mobile and a speed light underneath it to add the glow and then a pro photo heading back this is one light here to illuminate the whole room and we had extra lights once we got craig in there appear speed light with road grid shining to the bag speed light with a flash bender turned into a grid shape skim across hit the edges speed like directly in back for this edge light there's one behind there so again several lights but really just built one step at a time and not that hard if you just think about it in that process building one step at a time I see you gorka you're you're thinking I'm reading your mind it's uh it's not as hard as you think and the and the key thing is by the end of week what I want you guys were doing is like going out there doing your own chutes in fact I would love to see a project from you guys I just thought of this I'm gonna hold you to it your own lighting dream scene that you're going to shoot plan and shoot and posted back for us to see what you did well maybe I'll do pride maybe I will but I wanna see each one of you create your own project and make it happen and show us the results okay last one want to share with you a boon in chess my my favorite personal project shot was I love ninjas I love ah all that kind of stuff so planned so I got this ninja enemy a ninja shot I want to do in the forest and I want it to look like a cartoon and crazy stuff going on and it just flying all over the place so I actually asked the guy I take karate is my sense say and I said can you guys come down and just like yeah she'll there was we're there we're there everybody's like we're coming down so they came down and we plan this shoot in the middle of the forest in middle of night know before I got milly night and just built it piece by piece so here's the main light wanna boom shining I'm a ninja behind the scene we have a light into a panel for a little fill little mini trampoline for him to jump up and down on I kind of pushed down into the ground a lot speed light taped to this lantern the dissonance is carrying there's a light behind here a light trek blasting through the smoke which was a fog machine that we rented note to self fog machines don't always cooperate like the fog I wanted with his low lying fog creeping to the forest and instead of just kind of little puffs come out like we got our blower battery blow over like blowing the fog all over the place in the forest fanning in trying to get it and finally get dissipating and we had one shot and it would have disappear but do it all over again so then they start to rain and the fog machine says do not get wet under any conditions and started to rain uh then there's a little light on the grill a pot a hanging in a tree a little edge light going on to one of the other ninjas there so really was just built the same process one step at a time and to me it was kind of like one of those things I didn't think about how hard it's gonna be I just said this is what I want that's got to figure a way to do it and that's what I really want you guys to do is to say this is what I want start with the vision and then piece it together and the pieces don't have to be that hard there's another another variation when they really liked a lot too and uh sorry speed lights and flashlight for this shot no this is all speed lights of your speed lights and battery powered strokes cousins of the shots and lights around us that just cause they're being caught firing yeah yeah yeah just being caught firing for the set up shop all right question with tempered quick question we're gonna break for lunch before we do break I wanna remind you guys if you were here this morning we're going to start tweaking images after we shoot them throughout the rest of the week and if you want to download our dashboard for photoshopped plugin it's free there's a free set of basic tools that are pretty awesome effects and things so really is totally free if you want to get more you can but good and download it so that you could fall along and play with us later on floozy at home
Class Materials
bonus material with purchase
Ratings and Reviews
Karen Witter
I LOVED this class and I don't hesitate to recommend it! Kevin did a great job explaining how to incorporate additional lighting for on-location shoots and what those items would be. Then he illustrated those ideas for the class in various types of shoots. I loved the gear he recommended and especially his DIY suggestions. He has a great sense of humor and I felt like I was right there in the class. I would highly recommend this class to anyone who shoots on location and wants to make sure they're not only using the best lighting options but also the best lightweight lighting options.
Renata
I am enjoying this course so much!!! I am 100% happy with it. I just became a big fan of Kevin ! Great personality! Makes the use of flash a breeze. I just want to go outside with my gear and have fun now! thank you.
Maxx Walske
This workshop is fantastic! Kevin goes over every little detail you need to know for Lightweight Location Lighting. He shoots during the workshop, instantly shows the image and talks through how to see the light and make the proper adjustments for a fantastic image. He includes details about all his gear and post-processing tips, too! Kevin is incredibly inspiring! The course is easy to follow, fun and worth every penny!
Student Work
Related Classes
Lighting