Lesson Info
10. Posing Principles Discussion
Summary (Generated from Transcript)
The topic of the lesson is location, posing, and execution in photography.
Q&A:
How can you ensure that the background doesn't distract from the subject in a photo?
Make sure that the background is evenly lit and not brighter than the subject. If the background is brighter, make it evenly bright.
Do photographers touch models when posing them?
Yes, photographers often touch models to adjust their poses. However, it is important to ask for permission and ensure that hands are clean and smell good.
How can you avoid blowing out the background when using the apex approach in photography?
Change the angle to not include the sky or the source of the light. Crop tighter to eliminate the light source.
Should you look for traps in a location when you are photographing?
It is important to look for things that might be cliche or obvious in a location and try to find unique elements that make the photo stand out.
How can you enhance the lighting in a location?
Use additional lighting tools, such as flash or reflectors, to enhance the lighting and create a professional look.
What should you consider when posing men versus women?
For men, creating tension in the pose can look cooler and more dominant. For women, creating a more harmonious and beautiful pose may be preferable.
How can you use frames and objects in the environment to enhance a photo?
Use doors, windows, and other objects as frames to create a voyeuristic feel or to add visual interest to the photo.
How can you incorporate patterns and repetitions in the background to create a visually pleasing photo?
Look for patterns and repetitions in the background and use them to enhance the composition of the photo.
How can you create subject emphasis in a photo?
Ensure that the subject is the brightest part of the photo and use elements like eye contact and body language to draw attention to the subject.
How can you add a twist to the lighting in a photo?
Use reflectors, diffusers, ice lights, or flashes to add a touch of unique lighting to the photo.
Lessons
Day 1
1Class Introduction
49:22 2Location Vocabulary
28:42 3Posing Anchor Points
23:46 4Student Photo Review and Demo
43:36 5Student Shoot: Library
51:19 6Student Shoot: Patio
17:32 7Shoot: Outdoor Location
20:27Student Shoot: Outdoor Location
42:17Day 2
9Roberto's Wedding Evolution
12:15 10Posing Principles Discussion
23:55 11Image Review
14:27 12Posing Example Images
25:12 13More Posing Examples
41:38 14The Posing Chart
34:04 15Student Shoot: Individual Portraits
33:11 16Student Shoot: Facing Each Other; Him Behind Her
22:59 17Student Shoot: T Pose; Foreground/Background
22:54 18Student Shoot: Photojournalistic Style
24:49 19Student Shoot: Kiss Anticipation
09:06Day 3
20Roberto's First Photos
14:29 21Image Review
21:46 22Morning Q&A
13:28 23Light & Shadow
23:26 24Self Dialogue Game
15:51 25Beauty Through Angles
14:36 26Shoot: Creative Lighting
36:41 27Student Shoot: From Bad to Good
09:54 28Student Shoot: Portrait with Lens Flare
18:01 29Student Shoot: Perspective Through Angles
13:35 30Student Shoot: Transforming a Location
21:13 31Practice & Application
29:17Lesson Info
Posing Principles Discussion
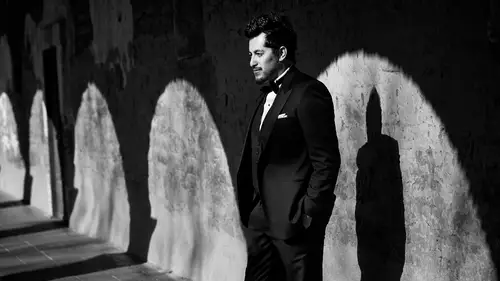
now this is the follow that idea with you david right and we were going for contrast and you nailed it I mean contrast photo turned out really nice as soon as I said contrast they went straight to the window because the other side of the room was a little dark and that window I was gonna dominate so good job on that also the angle you chose was good um one thing I wanted to go over when you photograph the first one there was a piece of sun hitting the chair behind the guy you remember that these are the kinds of things we need to look at when you're shooting this has a little details like you are under pressure right now but you were always going to be under pressure when you're shooting so if you have that little song stripping the chair you're gonna have to move the diffuser on do you have to call it again neutralize the background neutralize it or if it's going to be brighter than your subjects make it bright all the way like don't have one spot right and then another spot that's ki...
nd of dark it needs to be cleaned even so it's not distract into your eye okay that looks like a pretty cool photo composition is quite good is he the biggest yes is he do you have any doubt that he is the star of a photograph no no doesn't have an element off professional photographic techniques because he looks like shaping with john that you're shaping with light our way that's what you should be able to do all the time okay look at this next one ker p who would like to know if you usually touch models when you post them oh sure I do of course I do all the time of course I asked him but sometimes if you sit there you try to explain look I don't know if this is common sense or not but I wash my hands and I make sure they smell good before a photo shoot you know I know that sounds rethink those I have bean I have post for I have I have been like the male model whatever for other photographers when they ask me sometimes for fun on dhe names like you know saying like you have to have that common sense like I have clean hands they have cologne andi andi I ask permission heavily you know do you mind if I don't know if you noticed yesterday I said do you mind if I just move arms around and so fine she said of course you can so I moved things around no problem but I you know I don't eat like indian curry and then post people in touch you hear um yeah plus not to mention if you try to explain no no no your arm another two inches to the left two point five more inches you know your finger your middle one is a little bit to the right you know that you will take you in our alright so all right next question is from daisy photo in reno roberto can you talk a little bit about the background might be blown out when using the apex approach how would you avoid this by changing the angle to not include the sky okay that's what I said multiple level question okay and I'll go through every level off that caution first one is I mentioned already that if the background is brighter than your subjects at least it used to be all the way even the brighter remember we talked about that so you don't put something dark and in bright and dark and in rikers just like polka dots in your background and your eye just goes right to it so if you do have to have a brighter background like in the example off the ap for the shadow you you're going to be going against the son you're gonna blow it out that's okay it's even makes sense on the second level list second level off that question if you do show the backlight if you do a backlit photograph my suggestion and this is what I do and what works for me doesn't necessarily have to work for you or for you I don't show the light source okay so I crop tighter so I don't show where the sun is I don't show that the flash I don't show whatever tool I'm using to create a backlight situation I don't show where the light is coming from so you get the benefit of the light without the source of the light okay um okay good you taught us to look for the gifts in any location yeah um this is really this is a big eye opener for me but I'd like to ask is there the converse to that when you go to a location should you also look at things that might be traps uh well that's an interesting question traps to me traps that's an interesting word to me the fountain is a traffic okay sometimes like it's too cliche okay like when you when you look at a lot of photographs you can see I have spent literally probably years looking at photographers websites and studying photography to no end and what I got out of a wes not going for the obvious shot because I want to get hired like I can't get higher with a kissing photo in front of in front of the castle or the kiss in foreign from to the fountain no matter how good the kiss maybe cline's I have seen that one hundred one hundred times I tried to show them that I'm a photographer I know just I don't let the scene do the talking for me I do the talking for the scene make sense that's a good quote there's another one right there people don't let the fountain so I come to me photograph the fountain no forget that fountain unless a fountain is just incredible then use it you know I look for the stuff that's not the obvious thing you can you can see yesterday from the photos I want to show you that the light it's good if you change the light in that location you can make any room whatever maybe mean there's some exceptions to that limits but most rooms uh turn him into a really cool photo so there's a black and white version that you khun trying an album if you wanted to I can assure you no bride is going to say hate is fought off my husband people think that that will look really need now look at this one here this is the different approach with no the reason why I cropped it this way when I took the photograph is because he's looking in the short side of the frame on according to photography rules you're supposed to look into the frame not into the outside of the frame right and that's all cool and everything but you don't have to follow all the rules you don't even have to follow mine either you know these are just suggestions bye you put in the ice in the short side it creates visual tension like you can look at this and he has this tension to it you don't know where it is looking at now when I'm photographing men I think it looks cooler to create the tension in the photograph when I photograph women I might do this or I might equally say I'm making more harmonious so whatever that word is pronounced I'll put her looking that way and it looks more harmonious you mean when I put two people together I usually cropped with them looking at the short side which is kind of going against the old school of photography okay here's the black and white version of that look at the lighting on this I mean her eyes are a little bit like almost in between the close close or whatever but let's just pretend their eyes are open a little bit more that photo is a winner it's gonna get you noticed I mean that lighting between the between the ice light and that tungsten light because that langston like west one of the gifts that we saw remember I said there is a little tungsten light we can use it that's a little lamp let's use it on I didn't use it in an obvious way like she wasn't holding it and going like this or something like that right she was I used it to illuminate her and create a dual white balance going on you have the warmer tone looks like a cataloged magazine shot or something you know where the window like going here okay this is the other photo I took there you notice the background was very noisy so I used the background gives which is the tungsten light and then I used my own ice light on my crop tight this gets rid of the background if the background is not gonna help you then why put it in the photo right just crop tight but we did use the room to have her sit down on the floor we did use the chair tohave a lean against it and then we brought our photography skills to get the lighting toe look like this you see what I mean this is a cool photo with a duel ice lights going on now you can use whatever lights you once you could have done is with two flashes pointing at him okay but here's the well it gets going crazy without tv there you can see the pattern kind of goes continuously around and also this is not as bright as him so he definitely sticks out they see the biggest you see the brightest is they're selected focussing that's why the photos successful this is subject emphasis at its best I'm delighting it's not the lighting on average photographer would do it's taken to the next level of artistry it's like yes I'm gonna I can just deal with what I have or I can bring in a little something something from me to give it a little bit of a crisp tow it okay when you shoot today ask yourself can I enhance the lights home how can I just give it a little touch off what a professional photographer should bring to the table you know female not that I wouldn't do that without lighting because like it's completely straight to do shoot pictures like that maybe river what I said if you have the collarbone straight to you can open a symmetrical pose it's it's a strong image like if you if you say I want a photograph gallery in strong post what she looks dominant and like a leader I'll probably have her more straight on it's more like in your face that kind of thing when you're when you turn the collar bones is to finance a photograph is to make it more natural and more more fluid okay so you have to decide you want strength or you want beautiful okay thank you yeah point remember I switched my lends to the eighty five that's because he wasn't that far away from those books I don't know if you remember that the books were not that far from him that's seventy two hundred two point eight wouldn't have done the job because I couldn't go far back enough so what I did is you have to kind of think ahead on this one thing I want to talk to you guys today and everyone watching is to visualize the photo before you actually take the photo I visualized the two ice lights going on and I visualized the really cool blur in the background and I thought well give me the kubler that eighty five one point two if there was two people in this picture I would have never gone for that lens because then one of them will be out of focus unless that's what I was going for ok you notice huh when I was doing this yesterday I don't know if you saw it on the video I had him lean forward a little bit and then bring his chin down on his eyes look more like I am a leader I am dominant right but he still looks friendly and that's a crispy crispy like take a look at that this is when we used the door as a bit of a frame on it looks a little bit uh what's that word who you are who you are wait no no no no where you're not supposed to be there but you can flex yes how do you say voyeur yeah wear it's very voyeuristic yes voyeuristic like you were not supposed to capture this but whenever you use windows frames doors closing halfway or like the doors close just a tad and you cannot sneak a photo in between and you see that girl there the guy or whatever you're shooting he gives it that voyeuristic field to the photo if this wasn't here it's just there's nothing withdrawing your right to the middle there's nothing no framing okay now remember guys this was not an obvious situation we could have gone outside and photographed there outside and that's it but that's what normal people would do we went outside and then you went back inside to take the photo from the inside out and now you can include the frame so these little gifts to you right now are kind of sick sick obscured but the more you practice these things like when you were when you go back home if you look at a door you could be like if I opened this halfway I can sneak a little in between this door has wind little windows frames those are little frames I could use I could put two three people I could do whatever if you start to do a five minutes review every day you say I'm gonna do five minutes off looking at locations gift not the obvious ones like the weird ones here your photography will just surpass anybody else that doesn't do that the every photographer out there will continue to do that case hold case in front of the mountain the fountain and that's how what their base their business out ofthe you see what I mean take a look at this uh this is the black and white version of that I don't even know what's coming up because I don't have a computer take a look at this craziness why's this background working uh friend kiss it's all the same pattern the same call family the same color family same back there's something else about this background that's working can you guess it that too but look at the luminous level of the background the record is brighter than your subjects but the whole thing is exactly the same way see there's this background is evenly bright this is like that lady asking online on the children what happens if your back lining you know this's by sliding I put the flash behind them remember that to make a background light up so it would be evenly lit all the way across okay that light was enough to wrap around them and that's the feel of the light now take a look at the expressions is the post believable look at her since she just looks like she's totally in the moment even though she was actually totally embarrassed but like I said yesterday it's okay to be silly for two seconds to create a picture the lasts a lifetime okay I don't even remember what I said but look at the body language here look at the nose is they're not crossed they're not facing each other I think you guys and everybody watching online is going to start to pick up on those tiny little beady little pieces that make a photo just shine they have contact in multiple places on memory we talked about multiple contacts now contact in multiple places of window together obviously like if you have opposed but they're not together you're not gonna have contact in multiple places right look at the way her finger is it she's caressing the face but it's her armpits showing you know I could have done don't do this and then her armpit would have gone up or at least a little bit and this would have been but because the invisible plane would have hit that elbow first and I would have been about twelve inches from the ice that makes sense when you shoot that invisible plane here paul and you shoot this way boom boom boom boom boom boom boom boom boom what hits first right in their face okay so it draws you in this place looks like hearing from jungle off trees isn't it it was a tiny little square with nothing it was just a tiny little portion ofthe patterns and repetitions patterns and repetitions so when we went outside I said there's a frame behind me the door that little bitty little bit off trees is patterns and repetitions I can use it I can backlight it because I'm going to add a little something something off my lighting to the photo you don't have to accept the light for what it is you can always try to do something to enhance it okay I put my flash here and he gave me a really good look had I not done that that photo wouldn't have looked nearly the same even though you use patterns and repetitions okay okay this photo's pretty meat because it's a totally different feel and we used a little bitty tiny spot off branches that was open in this tree to creating this tree on those trees look like they're at the same play now remember that although this tree was about fifteen feet in front of the other trees and I post a bride facing the sun so she would have cleaned lit she would be the brightest person in the photograph so let me ask you again are they the biggest no but I have a lesson focus on that day the brightest two out of three is a winner so what I mean because from what I said if you include a little little subjects in a big scene you're incorporating the scene into your subjects right so they don't have to be the biggest then but you really should probably have the other two okay you notice every photo I'm showing you there is no doubt in your mind who's the star of the show it's them okay and it's them in different flavors like one is close up one is contrasted with a black and white one is through the framing of the door the other one is through the background that with the trees in the butt with leaves in the back with patterson repetitions in that picture I don't remember how close you are to the little tree far with a seventy two hundred when you assume in you contract the scene right so it didn't matter where I wass all I wanted was to be a two hundred millimeters the reason why is because two hundred I would not I will crop out any part of the building that may show up remember what I said I liked the tree on the and the trees in the background but there was a building in the back of the other trees you don't include it because that's not part of the gift they give us the trees and the color color elements were a part of the same family so stick to that in your background don't add any more okay this is when I was tell him to look at the yellow car and she needs to whatever she's there still react to that remember that now remember I said don't make your joke with your camera on your hip make your joke ready to go you put your camera here and then make the joke because when they react you want to snap okay so this is an example of foreground background playing with foreground background on it's a totally different feel so not all your photos are people just cuddling together every single time you don't want to do show your branding room or show you whatever fifty photos of them and they're all coming together in the same post right put that girl in front put him in the end it like this the sun is right behind them because I used the apex of the shadow that was when I was using the apex remember that I look he looks clean because I had him turned this way right so he's looking at the yellow car he's laughing hysterically because I told you he really likes that yellow car it was just him in the yellow car get a load of that car really go out that yellow car and he's just like so ridiculous you laugh and she's responding to his laughter which is like a suspected okay the computer for the sun hits her in the back and he just really likes her I can assure you no one's going to get angry with you for giving this to your class no one is no one's going to say no I'm not gonna pay you for your photography you know I mean if you show these photos to your plans will be like I need her because she could make it she can make it happen no matter where no matter what okay there's a crazy grass shot remember friend the reflector writes the gold reflect ron look at the quality of the light in this picture look on architect's job is to build a building that one collapse and people and kill them all right I talk of his job is to create the best quality of light on your subjects every single time an architect's job is to be a master of structure your job is to be a master of quality of life I don't know if you've noticed in almost every photo I'm always adding a little something something for me it's always a reflector at the fuser on ice light a flash I'm always doing something to give it a little twist of light okay this world had a lot to do has a lot of good things going for it so nikki according to the seven seven seven what do you see here um there the brightest good job so subject emphasis there the brightest okay and their noses or not uh there's an ex creating an x x factor of the noses and their eyes are opposed actually that's an important thing remember that I told her to look at a certain spot I said to look at a certain bush and then I said you need to look at the lower bush but your bush is funnier why did I say the bottom of the bush was funnier than the top of the first why did I say that because it changed how much lead you see how much I let me see okay I'm going to spend a few minutes on this point because it's crucial for everyone watching online and it's crucial for you this is one of those little details that makes a difference it's great for us and just mediocre okay man I just spend some time even though I shouldn't she's sitting down right ok so she's sitting like this right she's in this moment with the groom so obviously it's a moment off tenderness tenderness those tenderness look like this like that like you're standing in it right but those tenderness mean you closure I lied a little bit
Class Materials
bonus material with purchase
Ratings and Reviews
a Creativelive Student
Im a freelancer and have studied photo school several years ago and also been working as an assistant for a few years. I think you always have things to learn and keep you from getting stagnant in photography, and i find creative live is a great source for that. Been taking some of Lindseys classes and watched several others from Sue Bryce as well as other classes for equipment and about shooting people in general. I always read what others have said before to avoid any classes that are not informative etc or have a teacher that leave out too much, i was drawn to what people said about Roberto walking the students through the shoots and that he had this great system you could use and take with you when you go forward. I actually never heard of Roberto before but were mainly interested cause of what he was teaching here. I have now watched almost the whole course and first of all let me say i do recommend it a lot. Its a great system to use in my opinion, and i have learned some great stuff to think about that will enhance my own photography, and its a great reference to go back to when you need it. Roberto as a teacher is relaxed, intelligent and has great humor that i can relate to. So you you are not "bored" which is also very important, he keeps it interesting. Some things that i did not like about his way of teaching was that he was a little too impatient at times when the students tried shooting themselves , he reminded me of other photographers i have worked with in past. They were also very impatient sometimes when people around them were moving to slow for the shot to get done etc. I understand during the course the students had limited time to get every shoot done. But many times i was frustrated with that Roberto almost always stepped in too early to "help" them out but instead kind of took over telling them what angle would work best or what light that should be used. It was almost as he wanted his system to show up as flawless and felt as he was scared letting the students try it out on their own because that would somehow show a flaw in his system. I would rather have had him let them try first and later he could come in and suggest the different angles and light. But now many times he would take over and also take his own picture and pointed to the strengths of that picture and why it worked. Still, you learn because he explains at the same time, and walk you through everything. I just find that you would learn even more letting the students fail first or do it right on their own. Also sometimes he would choose a location and say: You can use this wall and these props etc, then when the student would start he would suddenly limit them and instead tell them what to use and how they should crop so that the location itself would not make much difference. Otherwise though, great course. I think i would buy another course from Roberto as well if it was something i needed from it.
a Creativelive Student
I have seen many of the creative live workshops, and attended many great workshops by photographers, including Jerry Ghionis. It was Jerry's wife - Meliisa Ghionis who suggested that Roberto's course on creative live should be a must see. This course was by far the best on creative live for improving your photography of couples, it is just brilliant and has improved my photography in leaps and bounds. There are many great photographers, but most do not know how to pass on their knowledge to others - Roberto is the exception I would consider this course a must see for any wedding photographer, no matter what your experience.
user-334342
Love Love Love this class!! The way Roberto integrates class participation into his teaching is such an amazing teaching technique! CreativeLIVE has some amazing teachers, I have learned so much from many of them, but Roberto's "hands-on" approach put's the on-line audience in the moment. Very captivating teacher! By far I would say this is one of the, if not the best photography class I have watched!! Thank you!!
Student Work
Related Classes
Wedding Photography