Lesson Info
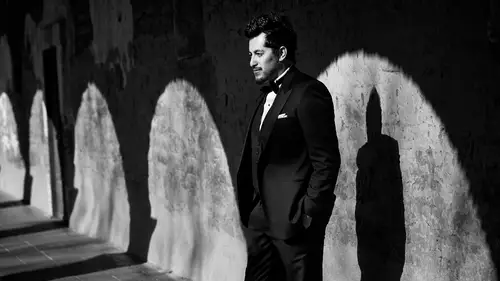
24. Self Dialogue Game
Summary (Generated from Transcript)
The topic of this lesson is location, posing, and execution in photography.
Q&A:
What are the five questions to ask yourself when walking into a room for a photoshoot?
- Where is the best light?
- Where are the chart elements?
- What is the obvious shot?
- Which elements are the most dominant?
- Is it possible to combine chart elements with the light?
How do you find the best light in a room?
Look at the shadows and test the softness of the shadow and elements.
What should you do if the best chart elements are happening in one place but the best light is in another place?
You can direct the light using tools to fix the light, or you can go for a less interesting shot with good light.
What are some chart elements that can be used in a photo?
Reflections, patterns, repetition, frames, and geometry.
How can translucent surfaces add mystery to a photograph?
They can create interesting effects and add depth to the image.
What is the technique for bouncing flash off a white wall or ceiling?
Use a wide-angle zoom and point the flash towards the wall or ceiling to bounce the light back onto the subject.
What is the importance of practicing and experimenting with different techniques before a photoshoot?
It allows you to find the best solutions and create more interesting and successful photographs.
Lessons
Day 1
1Class Introduction
49:22 2Location Vocabulary
28:42 3Posing Anchor Points
23:46 4Student Photo Review and Demo
43:36 5Student Shoot: Library
51:19 6Student Shoot: Patio
17:32 7Shoot: Outdoor Location
20:27Student Shoot: Outdoor Location
42:17Day 2
9Roberto's Wedding Evolution
12:15 10Posing Principles Discussion
23:55 11Image Review
14:27 12Posing Example Images
25:12 13More Posing Examples
41:38 14The Posing Chart
34:04 15Student Shoot: Individual Portraits
33:11 16Student Shoot: Facing Each Other; Him Behind Her
22:59 17Student Shoot: T Pose; Foreground/Background
22:54 18Student Shoot: Photojournalistic Style
24:49 19Student Shoot: Kiss Anticipation
09:06Day 3
20Roberto's First Photos
14:29 21Image Review
21:46 22Morning Q&A
13:28 23Light & Shadow
23:26 24Self Dialogue Game
15:51 25Beauty Through Angles
14:36 26Shoot: Creative Lighting
36:41 27Student Shoot: From Bad to Good
09:54 28Student Shoot: Portrait with Lens Flare
18:01 29Student Shoot: Perspective Through Angles
13:35 30Student Shoot: Transforming a Location
21:13 31Practice & Application
29:17Lesson Info
Self Dialogue Game
when you walk into the into a room ask yourself this five small little questions where is the best light and where are the chart elements the next one is with the obvious shot do you see a fountain is that the obvious shot right if you see a bed what is the obvious shot having her lay on the bed right if you see a wall what is the obvious shot put her against the wall so think west the obvious shots when you don't do that shot right third which elements are the most dominance dominant on when I'm talking about elements I'm talking about that location gives every place gives you which of the most dominant so you can concentrate your frame when just dose right the next one is is it possible to combine chart to combine chart elements with the light what does that mean it means this you have a chart element number one seamless collar right one single color known distracting good chart element number two it could be let's say there's their say there's there's a frame I can use the the frame...
of that stool thing and I can put it and I can use that as a frame right so now we have two elements on those two elements are happening in the best light in this room which happens to be right there so the question is can you combine different chart elements where the best like this that's where the first question is where is the best light when you walk into a room searched the room where is the best light where's the best light how do you find the best light by looking at the shadows you test the softness of the shadow of elements some accents so everybody always asks me and workshops how do you find you always talk about finding the best light well how do you do that well I just told you like find the shadow if the shadow looks like that plant that's the best let right sit let's he had in the last one is fix the light and shoot like if the best if the best elements are happening here but the best life is happening there what do you do with mallory sorry sorry say that again if the best chart elements are happening right here but the light is not good here that the best light is over there what are your options um you could direct the light using tools correct you can fix the light yeah or you can go for the less interesting for about with a really good light right you can do this light photo which will be awesome or you can grab all the chart elements and bring that quality of light over here you fix it on we have been fixing for us with light all three days okay let's put that to the test let's play the game here is your room pay attention to the room ask yourself where is the best light the best light is here true yes okay you're shooting a job you walk into this room you start to go through the five questions the best light is here you already know that wes the obvious shot put her on the bed or lay her or something right you have laid out on the bed you have the reading room sit down there and kiss right where do you see location chart elements in this room reflection okay okay nikki element number one way have a meter which can do what could be a reflector for light or it can reflect on actual person so that's first thing second thing what else do you see out of the chart elements here's your chart elements if you don't have it it's right here my friend I see a pattern so repetitions on the bed here exactly the back of the frame board passed squares so you're seeing geometry patterns and repetitions right here so that could be a cool backdrop for something right not distracting what's another element that you see if you're online watching this ask yourself this question to go ahead and play the same game and if you want to go in the chat room and just type what you see go for a refund exactly go for it well there's a there's a crazy glare from our end but it looks like there's contrast on artwork on the wall oh yup yup yup wei have meaner we have pattern repetition in the bed you people see anything online they saying something or not really a coal miner twenty two says pillow as a reflector oh it's mac that's good it's not a pillow is a reflector lovett way see painting and repetition we see painting we see meter we see bad which is the obvious choice we see patterns and squares right there for the frame you see reflection what else do you see in this meter besides the reflection of the way things look at the mirror carefully look at the meter carefully huh yeah but what can you do with that look at that mirror look at it we can use it as a reflector we can use it as a reflective device but what else was giving geometry yes but the frame this is a frame isn't it so basically this is a fun game because this stuff happens in every room I was teaching a workshop in mexico in playa del carmen which is near cancun I'm this is where we were going to shoot the bride or whatever or the model because she wasn't uprising which is the model andi I asked the students who take their photo all the students went straight to the painting and put her behind in front of the bathing and took the picture right but we're trying to challenge ourselves to think in multi level photography multi level thinking when I saw the room I thought we have a mirror way have painting the best light is here I like the painting a lot but the light is not there the light is here so that's messing me up the wind american be reflection a reflector or a framing device weii do have a reflective here what else is there and then we have the geometry in the squares so how do you combine it all anybody else in the chat room having a tedious yes there was uh the blind striped lines too we talked about that the blanks here okay there is blinds what can you do it to put with the blinds you can close them and you can create all that sunlight coming into the darkroom and it becomes a contrasting opportunity right let's see what we did this is what people did but which by the way this is not not a bad idea that painting is pretty cool and they put the model in the works right but that's fine the photo successful but right we're trying to make it recession proof right which one to make it so people have tohave you most photographers would think of this and if you show this to your clients will be like that's cool and then move on here's another one pretty cool right it's showing some cool elements and so forth another studio decided you see how the student made the ice cold towards the short side of the photo to create tension so that's kind of working for the photo right they also post the arms in a really cool way it's working out let's look at another another person's had to use the meter and that's pretty good because now using the mirror after as a reflection on dh he's also framing her on dh the patterns are in the background so it creates a sense off it's not like it's crazy red or blue is like a seamless nice creamy color right then I I came in on I do what I thought was the best use of the room so let's see how we can transform this elements and make the best photograph this is why this is called posting locations on execution that execution part was this you can see that I'm moving the mirror do you know why emir I wanted remember I say only show the gifts don't show anything else well the mirror was actually by the bathroom the bathroom is it's like a knell ament ofthe darkness that I don't want in the photograph I don't want this extra weirdness going on so I moved I like the painting a lot that was the thing that resounded to me so I moved the mirror this way so when I take the photo it will be stuck on lee on the painting and the mirror will be in the middle and then I sat right down so I could I could reflect the squares off them off the the bed the bed in the background so you see how you're putting it all together and then the last start I had to fix the light the last part I had to fix the light the light was not good there especially the bright facing away from the light was a bad idea right but we have this thing called a flash and you can use it and it's like a window so here's this here's what came out of that there is moving the mirror the brightest already sitter where I told her I have this is the background there's a flash that guy's holding directing it on her and there's a photo cool this is cool but if you start to break it down little by little it becomes very doable makes sense you want teo is that cool different right multi layer multi layer photography is where you thinking in different layers okay which is kind of what we did yesterday by the way okay do you guys have ah I'm learning I'm learning one more real quick and then we'll move on to do you see that glass door next the way it's a little frosted glass door do you see that this is the glass door this is a frosted glass door if you look at your location chart one of the things says uh transfer translucent surfaces okay why did I even put that there I found some pretty awesome photograph session translucent surfaces like the veils going through the face and all these different things so when I saw that I said who translation surface that can add mystery toe a photograph it could be cool looking but the lighting is terrible I have to fix it right so I did my practice sessions beforehand on translation services on I ask my students so put the bride behind or the model behind the transition surface and they started going at it I did that to see how long it will take for them to see to fix the flashlight to see how it would hit the bride you see what I'm saying I mean the model this is what they had it's too much right this is what happens when we show up at a wedding we tried to be creative without practicing prior this is what happens when you're like well I tried to be created but it took me half an hour and everybody got mad and the photo didn't even come out well just what you doing beforehand see this is what came out of it there's another one is that working can you imagine our real wedding like that or a model shoot or a fashion shoot you're like doing this here's another one and then I took the camera I adjusted the flash head river the zoom of the head I made a more wide angle I pointed up towards the roof I used my mackerel ins because of the way behaves and this is what I got out of it pretty crazy right it looks a lot more interesting so if this is the solution of it there is the little glass door that's what came out of it so it's just this constant reinforcement off looking around for these things flash behind the motto and glass between on the model this's what I had you conceal right there why're this flash bands for softness there was ah white ceiling here on a white wall here so I thought if I direct flash is going to give me what student with a crazy stuff but I can bounce the light open the think twenty four millimeter like do a wide angle zoom point of flash this way the flash would pound against the war and it will bounce the light back into her face you see that hair like and you see the arm it's late very nicely because it's going against the roof right so you have to think of it this way comes down it comes down and he created also don't let up the face or arms torched the glass because then you have this like smushed going on right so they were all smashing the arms on the windows like you cannot appreciate the four of this where you have to back up and try to get it this way by the way this little charge that you're seeing it's what I keep track of when I'm doing my practice sessions I'm like this is the result what did I do to get there this is this is like the ingredients for this you know the cover of my book he's got the veil over it that was pretty much eighty percent the same technique is this the same exact technique I just I used the macro the macro that picture of that girl's face was taken with a hundred million one hundred millimeter macro it wasn't thinking with a seventy two hundred of the eighty five it was thinking with the macro because I know how he behaves becomes of these sessions right
Class Materials
bonus material with purchase
Ratings and Reviews
a Creativelive Student
Im a freelancer and have studied photo school several years ago and also been working as an assistant for a few years. I think you always have things to learn and keep you from getting stagnant in photography, and i find creative live is a great source for that. Been taking some of Lindseys classes and watched several others from Sue Bryce as well as other classes for equipment and about shooting people in general. I always read what others have said before to avoid any classes that are not informative etc or have a teacher that leave out too much, i was drawn to what people said about Roberto walking the students through the shoots and that he had this great system you could use and take with you when you go forward. I actually never heard of Roberto before but were mainly interested cause of what he was teaching here. I have now watched almost the whole course and first of all let me say i do recommend it a lot. Its a great system to use in my opinion, and i have learned some great stuff to think about that will enhance my own photography, and its a great reference to go back to when you need it. Roberto as a teacher is relaxed, intelligent and has great humor that i can relate to. So you you are not "bored" which is also very important, he keeps it interesting. Some things that i did not like about his way of teaching was that he was a little too impatient at times when the students tried shooting themselves , he reminded me of other photographers i have worked with in past. They were also very impatient sometimes when people around them were moving to slow for the shot to get done etc. I understand during the course the students had limited time to get every shoot done. But many times i was frustrated with that Roberto almost always stepped in too early to "help" them out but instead kind of took over telling them what angle would work best or what light that should be used. It was almost as he wanted his system to show up as flawless and felt as he was scared letting the students try it out on their own because that would somehow show a flaw in his system. I would rather have had him let them try first and later he could come in and suggest the different angles and light. But now many times he would take over and also take his own picture and pointed to the strengths of that picture and why it worked. Still, you learn because he explains at the same time, and walk you through everything. I just find that you would learn even more letting the students fail first or do it right on their own. Also sometimes he would choose a location and say: You can use this wall and these props etc, then when the student would start he would suddenly limit them and instead tell them what to use and how they should crop so that the location itself would not make much difference. Otherwise though, great course. I think i would buy another course from Roberto as well if it was something i needed from it.
a Creativelive Student
I have seen many of the creative live workshops, and attended many great workshops by photographers, including Jerry Ghionis. It was Jerry's wife - Meliisa Ghionis who suggested that Roberto's course on creative live should be a must see. This course was by far the best on creative live for improving your photography of couples, it is just brilliant and has improved my photography in leaps and bounds. There are many great photographers, but most do not know how to pass on their knowledge to others - Roberto is the exception I would consider this course a must see for any wedding photographer, no matter what your experience.
user-334342
Love Love Love this class!! The way Roberto integrates class participation into his teaching is such an amazing teaching technique! CreativeLIVE has some amazing teachers, I have learned so much from many of them, but Roberto's "hands-on" approach put's the on-line audience in the moment. Very captivating teacher! By far I would say this is one of the, if not the best photography class I have watched!! Thank you!!
Student Work
Related Classes
Wedding Photography