Student Shoot: Perspective Through Angles
Lesson 29 from: Location, Posing, ExecutionRoberto Valenzuela
Student Shoot: Perspective Through Angles
Lesson 29 from: Location, Posing, ExecutionRoberto Valenzuela
Lesson Info
29. Student Shoot: Perspective Through Angles
Summary (Generated from Transcript)
The topic of the lesson is location, posing, and execution in photography, specifically focusing on perspective through angles and cropping.
Q&A:
- Why is it important to be cautious of the position of the face when cropping a photo?
- When cropping a photo, what feature of a person's face should be emphasized?
- How can raising the chin create a more fashion-forward look in a photo?
- What items can be used to enhance a photo shoot?
- How should the hands of a female model be posed in a standing position?
- What can be done to add movement and avoid a static look in a photo?
Lessons
Day 1
1Class Introduction
49:22 2Location Vocabulary
28:42 3Posing Anchor Points
23:46 4Student Photo Review and Demo
43:36 5Student Shoot: Library
51:19 6Student Shoot: Patio
17:32 7Shoot: Outdoor Location
20:27Student Shoot: Outdoor Location
42:17Day 2
9Roberto's Wedding Evolution
12:15 10Posing Principles Discussion
23:55 11Image Review
14:27 12Posing Example Images
25:12 13More Posing Examples
41:38 14The Posing Chart
34:04 15Student Shoot: Individual Portraits
33:11 16Student Shoot: Facing Each Other; Him Behind Her
22:59 17Student Shoot: T Pose; Foreground/Background
22:54 18Student Shoot: Photojournalistic Style
24:49 19Student Shoot: Kiss Anticipation
09:06Day 3
20Roberto's First Photos
14:29 21Image Review
21:46 22Morning Q&A
13:28 23Light & Shadow
23:26 24Self Dialogue Game
15:51 25Beauty Through Angles
14:36 26Shoot: Creative Lighting
36:41 27Student Shoot: From Bad to Good
09:54 28Student Shoot: Portrait with Lens Flare
18:01 29Student Shoot: Perspective Through Angles
13:35 30Student Shoot: Transforming a Location
21:13 31Practice & Application
29:17Lesson Info
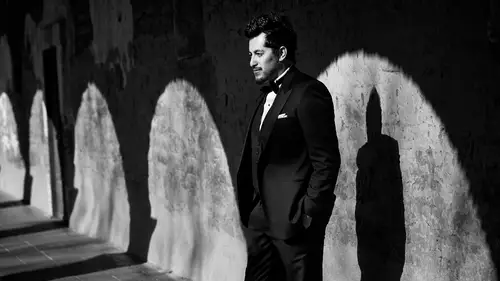
Student Shoot: Perspective Through Angles
we're not going to show their ice we're going crop we're gonna crop down we're going to make a local fashion e were not going to show their ice you're gonna go you're gonna crop from the nose down and I don't care what style you do it let me see something kind of where my camera for isn't your chin up bring your chin down I don't know if this I'm going to just do a quick shot and then I'm going to show them on the internet something and then you'll do it okay just one I'm not going to care about the background right now when you crop when you crop not when you don't crop the new crop the ice out you have to be very cautious off the position of the face let me show you why this is not a good crop let's take a look and tell me why what's going on I'm glad you're laughing because that means you're recognizing things that are wrong right away some people would be like that's perfect you know it's not what's wrong with this photograph the nose we emphasize that what else is straight on ther...
e's nothing cool about it right all right now watch this bring your chin down more now I moved her chin down and drop the nose out it's still not a great angle it's not still not there's something missing about it think about this photo you're you're you're not dropping the ice western next most beautiful feature of a person's face the lips look at her lips right so show the lives you have to raise the chin so now let's try that again ok bring your chin up tilt your head a little to the left little to the right straight on to not more stop right there okay now take a look at this now we featured her lips in a much more beautiful way looks more fashion right away they make sense I probably shouldn't have cropped that high so we tried again okay that's better so where where is your attention go ryan took her lips right so that's better so let's try no I want you to create a different look maybe try uh try this chair okay you guys we also have a listen we can start to play with some of these items we have the chair and we have the mirror we have way have all of this stuff going on right so let's try to come up with something you're gonna go ahead and take your photo with the red chair against use it somehow that blue wall okay okay yeah I didn't start out with tyson would you yeah complacent I say because with tyson you have to bring the children down it's a tricky proposition with guys you don't want to be like you're saying you need to be more so she needs to visually yeah like close but you're not that e put your arms on top of here so just crap well I wantedto we're doing execution chart okay so we're doing perspective through lends perspective through angles so what angle what angle do you think looks better for you can I just just things okay move your head up you you think that looks go ahead and look through the camera look through the camera yeah just crop his eyes out just show from from the bottom of his nose down okay now what angle looks better too you chain up more going bring yeah does that look like to you know bring your chin down now chin up okay your stake it and see what you think make sure your uh settings alright uh you wanna focus on his lips your focus can you focus on the steps that was one on this jacket you're on the jack into me right I'm gonna put the focus and put in the middle okay now trying on his lips and then recompose yeah doesn't that look a little feminine just a tad feminine so let's try different angles that's what we're doing waiting it's hard and go to stay okay now try it with a chain down which looks better guys the second one right now let's for fun and for the viewers remember all I'm doing right now it's messing with angles right there is what were cropping the ice out to new levels distract us from the fort from the angles let's tow the chain down unless have him turn his chin to the left and then see adding a better father it left angle see if that helps the photograph any better good job on the cropping by the way it's looking good off smack right now this is what happens this is how you practice some incense now let's try another one go ahead and stay just like that because we like it right now let's mess up the angle ofthe attack from their lands to the subject leslie knew back against the chair now do the same thing on the side now try keep everything as similar as possible that's not working okay now let me ask you something now that we went through this five minutes cropping the eyes out practice session if you were to photograph a fashion model or a groom what angle would you choose down on so if I looked the best can we put together the photo in the screen again where his chin was down on it was to the left I love this weapon this happen every single day where I just say things I love creative live you have to say you have to stay here with me at all you can okay guys what I do is I go to my computer I opened this on bridge and I make a print out off these little sections and then I circle with photo shop or I print a mountain I circle with a sharpie what's the best on what's not working friend if I asked you to take a photo off tyson cropping his eyes out to put the attention more like let's say on the clothing or something right what angle would you go for the face probably fall on the side what he should be down or up his chin would be down to see how you set that right away you wouldn't have said that twenty minutes ago no twenty minutes ago I promise you you would have gone how am I supposed to know what's best right kids pretty again if you were photographing him on your cropping his ice out probably the best angle of attack for his face right there huh now you do that you do that a bunch of times like once a week to a little new technique and then everybody think you are the one that's talented because you know they think that's talent they don't know that you just put in the work let's take another photo off katie on let's try another experiment let me see what would be fun I go oh I was gonna say we have some suggestions if you want it come please I was gonna have her lay on the couch because it's complicated but let's try it what anderson suggestions would see suggestion wass from carolina strada could you show us a little more tricks on opposing the hands of the female model on a standing position may be the one um hands on the female model on a standing position and I don't know if that was um like just when she's standing how to pose the hands okay well but we don't have to do that kind position yeah we can just explain I mean they already know you're not gonna do what are you not going to do you're not gonna meet her you're not gonna do it on the french will be waiting you go there you go you're all you gotta do watch it let's just do it let's not just talk about it let's put it when you put your hands and just going to go like this in front of your belly button what is this like a like a monastery or something right doesn't work now let's give the hands something to do remember that was one of the twenty one items on that's changed the level so david go ahead and just a hands my friend shift your weight to that hip like that intern your shoulders this way more chin this way so it's your eyes that way now let's grab the hands this grab the left the left hand and because it's just kind of steady let's bend it so let's move it so grab your dress on open in a little bit now soft in the hands you see I starts to look more natural now let's go back to the bad hand going like a guy like this again see that's not what we want rights we want that's good and it's good because the fingers are totally soft right on the elbows bent a little bit on the side so you can see the waistline but this is kind of static okay so just like we did the photo yesterday where you add movement I'm movinto the hand if he look static to you when you go home after this experience remember oh it's static add motion to wait watch this can you just grab your hand was moving out slower in slow motion now the necklace on a just now soft and more promotion and now that the dress pull it back and then pull if I can and now the hair again and now you're facing the same don't even do it and just just don't do it again look over here and stop that make sense yeah do it again you're going necklace and stop some exams so you just keep doing this movement pay attention see what flows if it looks then you're not it's not working
Class Materials
bonus material with purchase
Ratings and Reviews
a Creativelive Student
Im a freelancer and have studied photo school several years ago and also been working as an assistant for a few years. I think you always have things to learn and keep you from getting stagnant in photography, and i find creative live is a great source for that. Been taking some of Lindseys classes and watched several others from Sue Bryce as well as other classes for equipment and about shooting people in general. I always read what others have said before to avoid any classes that are not informative etc or have a teacher that leave out too much, i was drawn to what people said about Roberto walking the students through the shoots and that he had this great system you could use and take with you when you go forward. I actually never heard of Roberto before but were mainly interested cause of what he was teaching here. I have now watched almost the whole course and first of all let me say i do recommend it a lot. Its a great system to use in my opinion, and i have learned some great stuff to think about that will enhance my own photography, and its a great reference to go back to when you need it. Roberto as a teacher is relaxed, intelligent and has great humor that i can relate to. So you you are not "bored" which is also very important, he keeps it interesting. Some things that i did not like about his way of teaching was that he was a little too impatient at times when the students tried shooting themselves , he reminded me of other photographers i have worked with in past. They were also very impatient sometimes when people around them were moving to slow for the shot to get done etc. I understand during the course the students had limited time to get every shoot done. But many times i was frustrated with that Roberto almost always stepped in too early to "help" them out but instead kind of took over telling them what angle would work best or what light that should be used. It was almost as he wanted his system to show up as flawless and felt as he was scared letting the students try it out on their own because that would somehow show a flaw in his system. I would rather have had him let them try first and later he could come in and suggest the different angles and light. But now many times he would take over and also take his own picture and pointed to the strengths of that picture and why it worked. Still, you learn because he explains at the same time, and walk you through everything. I just find that you would learn even more letting the students fail first or do it right on their own. Also sometimes he would choose a location and say: You can use this wall and these props etc, then when the student would start he would suddenly limit them and instead tell them what to use and how they should crop so that the location itself would not make much difference. Otherwise though, great course. I think i would buy another course from Roberto as well if it was something i needed from it.
a Creativelive Student
I have seen many of the creative live workshops, and attended many great workshops by photographers, including Jerry Ghionis. It was Jerry's wife - Meliisa Ghionis who suggested that Roberto's course on creative live should be a must see. This course was by far the best on creative live for improving your photography of couples, it is just brilliant and has improved my photography in leaps and bounds. There are many great photographers, but most do not know how to pass on their knowledge to others - Roberto is the exception I would consider this course a must see for any wedding photographer, no matter what your experience.
user-334342
Love Love Love this class!! The way Roberto integrates class participation into his teaching is such an amazing teaching technique! CreativeLIVE has some amazing teachers, I have learned so much from many of them, but Roberto's "hands-on" approach put's the on-line audience in the moment. Very captivating teacher! By far I would say this is one of the, if not the best photography class I have watched!! Thank you!!
Student Work
Related Classes
Wedding Photography