Lesson Info
22. Shoot: Interview Set Up
Lessons
Class Introduction
13:55 2How Did We Start Making Documentaries?
12:08 3Universal Themes Through First-Person Storytelling
32:10 4Use Visual Language to Tackle a Theme
07:26 5Issue Driven & Non-English Story Development
27:05 6Translate a Theme Into a Film **Warning: This lesson contains scenes of graphic violence**
24:41 7Turn Failures Into Lessons
13:46 8Finding Your Subjects
15:07What is Your Motivation?
02:10 10Follow Your Passion & Invest in Yourself
05:22 11Client Work Vs Legacy Work
17:51 12Translate the Idea to Reality
16:25 13Create Multiple Products from One Idea
22:17 14Pre-Production Plan
09:32 15You Just Have to Dive In
30:40 16Time & Cost for Projects
28:21 17Writing a Strong Pitch
11:38 18Develop a Fundraising Trailer
12:28 19Identify & Approach Partners
06:35 20Define Your Desired Impact
21:21 21Introduction to Working in the Field
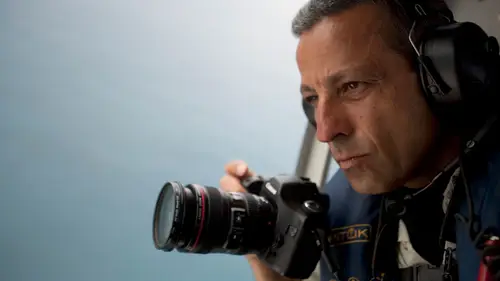
06:19 22Shoot: Interview Set Up
34:38 23Shoot: The Interview
32:08 24Different Types of Interviews
13:35 25Shoot: Capturing B-Roll
21:54 26Shoot: Detail Shots
18:09 27Shoot: Capturing a Scene
27:02 28Shoot: A Set Up Shot
24:03 29What Video to Keep in The Edit?
16:06 30Identify Strongest Audio as Starting Point for Edit
30:01 31Use Audio to Guide Narrative
09:33 32Transform Raw Content Into Finished Piece
23:49 33Building Scenes in Your Edit
03:41 34Short Doc Created from Pre Shoot: Resonant
46:21 35Final Thoughts
03:01Lesson Info
Shoot: Interview Set Up
We're about to watch a pre-shoot video, so you're gonna get to see us actually in the field, and some of the questions that were raised in that moment, and how we're interacting with each other, as well as the subject. So, we do typically like to do an interview first, unless, for some reason, there's some activity going on and we have to postpone the interview. Getting that information straight up from the person so they don't have to repeat their stories, they can be more natural in telling a story for the first time. It also means that it leads to potentially things we might shoot. So, we learn a lot in that interview, and we start to visualize, and we're listening for script. So, the interview is really, really critical, because it is your roadmap for the rest of what you're gonna shoot. So, step one is figuring out what is that interview going to look like? So, we got into his shop, and now we have to work with what exists. So, we came prepared, not knowing if we're gonna use natu...
ral light, artificial light, we came prepared for any possibility. You're going to see a number of things going on in this pre-shoot video, and what I'd like you to do is look for how we're trying to determine how we can best capture a sense of place, because we've decided to do an interview that has to very, very clearly show what he does. So, one of the hardest things is when you walk into an environment where there is really nothing visually compelling in the room, and so this is a bit of a disembodied voice from the activity or the story you're trying to tell. So, in this instance, we're lucky, because he has a very visual setting where he does his job. So, look at how we worked with sense of place. Creating that sense of place in the interview shot. Light sources. This is probably your biggest challenge as a shooter. It's all about light. So, can we use natural light? Natural light is always preferable on many levels. One, because it's beautiful, but secondly because people are much more comfortable in natural light. The minute you pop a light on somebody, and we all feel this way. The minute there's a light on me, I am suddenly on camera, like today. Right? (all laughing) If you were in my living room near the window, I would feel way more kick-backed and relaxed. I'd be more me, probably. So, natural light is always preferable, but it also presents all kinds of challenges, and especially in a place like Seattle, where the clouds are coming and going, on a regular basis, so you're also mindful, like, are we gonna be able to have consistent light based on the natural light in this space. We also decided to do a two-camera shoot for the interview. We usually do two-camera shoots. Once you're setting up an interview, you're already in. You controlled the lighting. You've set up the shot. It's an unnatural stop in time for this person. You've already done all that heavy lift. So, if you set up a second camera, it's minimal effort, but you get a lot of bang for that buck. Because wherever you don't have enough B roll or visual cover for your video, you're gonna need to see this person on-camera, on-screen. And when you're editing people, very few people speak in tidy sound bytes. Very few people are able to deliver gems that you would like to have in your edit. The two-camera interview allows you to crunch somebody's long talking point into a short talking point, and the viewer will never notice your cut because you're jumping from wide to tight. Tight to wide. So having that two-camera is your insurance policy. If you can manage a two-camera. Now, when you're a one-man band, and you're conducting the interview and shooting the interview, two cameras is not an option, right? It's too distracting. If you are two people, one person can man two cameras, and the other can do the interview. So that would be the optimal, if you have somebody else in the field with you. And I was just gonna say, two other points related to doing a two-camera interview. One is that it creates a little more dynamism in the edit in that you can shift from these angles, but the other is, and there's different philosophies, and different approaches with the two camera setup, is to make sure that the eyes are in the same place in the frame. And this is maybe something we can talk about. And you know, I'm not into dogma. I mean, rules are important to learn, and then it's great to break them. But there's certain things that just work on a subconscious level. That if you don't abide by them, they can be rather disruptive for the viewer, even if they don't realize it. And maybe there's times where you might want to do that. You might want to create tension by not having the eyes in the same place. But for most of the interviews we do, that is our goal. Right. Alright, so let's play. Is there anything else you wanna add? No, I think, let's watch. Alright, so we're in David's violin repair shop in Seattle. And not a big space. So, we're setting up for the A roll interview with him. So, Julia, what I was thinking was, if I set up both cameras here tight and wide, you'll be able to sit there. We'll have David sit there. Then on the wide shot, I can get a nice, broad view of his shot, with all the violins hanging, and then the tight should be a really nice shot with the violins sort of out of focus in the background. And then I'll set up a light right here, main light. And then, yeah, how's that sound? So what we're looking at, because this space is really small, and we'd like to do a two-camera, what we're trying to figure out is what is the optimal background. So we're looking around the shop, and if you look over here at this wall, this is the most visual portion of David's shop. So, we definitely wanna figure out how do we get the violins in, so we set him in some sort of a context that's related to his work. We wanna get some distance away from those violins, so that we can separate him from the background, and so, that's why Ed's planning out the whole shot on this side of the shop. And then we have to think about the light that's coming in from these windows. So we've got a lot of bright light coming in at the moment, but I can see that there's a lot of cloud cover, so it means that we're gonna have to deal with light variations throughout the interview. So we're gonna have to pull these blinds down in order to control the light, so that we're not beholden to having to shift our aperture throughout the interview. And we can use this light as a kind of backlight as well. Quite often, I would set up a second light from behind on the subject, but because of this light source, we'll try to use this light source as the back light. Good. Alright? Great. Okay, ready to make this happen? Let's do it. So, now, I wanna have David come in to our set here. But we are gonna have to problem solve a few things. Because of David's height, because of the background and making sure that we actually compose the shot properly. So, David, if you would join me here. Thanks. So, we were thinking about having you sit. I don't know, yet, though, if sitting or standing's gonna be better. So let's get David here. And Julia, angle it a little bit more. This way? Perfect. So, David, if you would sit down, please. Okay. Oh, is that chair okay? Yeah, it's this thing. Ah. Okay, so. You could repair it, though? The chair, yeah, the audio thing I can't repair. (laughing.) Alright, so, Ed, are we liking David sitting? What's happening in the framing? So, for the wide, this would be okay, but for the tight, for the tight, what's gonna happen is we'll lose a lot of the violins. But you know what, I think this might work, Julie. I think it might work. I don't think we need him to stand. Once I raise the angle, once I raise the cameras, I think we'll actually be in good shape. And the wide here, take a look. I don't have the exposure and framing exact. But we get a lot of the. Right, so that's your wide. It's unrefined, but it gives me a ball park idea. And we get so much window as well. A lot of window. So what happens if you shift. How much latitude do you have on the right? 'Cause there's all those bows on the right. Can we shift his angle, have him face more that way? Because those bows are nice. I like that. Yes. So you know what we're gonna do? Let's totally rework it. I'm gonna move the light here. Kay. And you're gonna move here, and so instead of him looking camera left, he'll look camera right. Beautiful. And then that way his head can be against the blinds, and then we take full advantage of the violins in the background. Okay? Alright. Alright. Actually, David, I would like you to move your chair straight in that direction, about six inches. Okay, go back, go back. Keep on going, keep on going. Perfect. Perfect. Okay, see what we have now? So, now his head is right in the window. Right. You like how that's trim? And then it's clean and it's separated from the violins. And that's not a violin, that's a cello, right? A small cello? A small cello, yeah. I'm having trouble seeing because I'm actually in my shot, so I get my head more than anything. And then I just need to sort out the type. Isn't that nice? Yep. I think you need to-- And the only thing that really needs to be moved is that parcel that's sort of resting vertically. Otherwise everything else feels pretty clean. Alright, so. Actually, if you just stick it in the corner there. Okay, so one of the things. There's a lot going on in this scene, because there are a lot of visual elements. So we've kinda got that big picture of the graphics of framing David up in the window. There's that beautiful line of the violins and cellos. So, the one thing you often forget to do is turn your display off completely, and when you turn your display off, I would like Ed to actually, because he's gonna see what I'm seeing. So, I turn my display off. And what you discover when you turn the display off, because there's so many numbers on your display that are telling you, obviously your aperture, your time code, et cetera, et cetera, that you lose sight of what's actually happening all around the edges of that frame. So we have the tiny bit of a violin hanging in the top of the frame that you wouldn't want in your finished frame. So when you get into editing, you'd have to blow that shot up to get rid of it. So if you think about it in advance, you would actually clean your shot up ever so slightly more than that. You'd kind refine it at this point. So it's the importance of turning display info off to get a really true view of what you're capturing. Oh, the tight's gonna be really nice. But we still might need to move him a bit. I think I might even be too high on this camera. Yeah, well, and there's too much head room. Especially when you're doing a two-camera shot, usually you'll get one shot that's perfect. The wide or the tight, and then the other one isn't living up to your expectation. So we're still trying to jigger and figure out what can deliver on both shots. Julie, can I have you sit there so we can make sure the eye line is right. Yeah. And this is something you might wanna talk about. The line of sight of the subject. The light of sight. So, one thing that we're trying to do is have David look as much as possible on camera. So he's not skewed looking off camera. So I'm gonna be as close as I possibly can to Ed's lens without actually having any-- You are out now. I'm out. Now, the problem I have is I'm short, I'm five foot two, and how tall are you, David? Six feet. Yeah, so, you're looking down at me, because we have an appreciable difference in height. So, is there anything I can sit on to get a little bit taller? And if not, I'll just sit on my leg. If you wanna, you can maybe switch chairs. You can raise that chair up a little bit. You know what, I think that would be more problematic. You can sit on this thing. I don't know how comfortable that would be. Is this alright, height-wise? I bent my leg underneath me. I have a little blanket you could fold up, that might help. We're right in the zone when you're at that height, Julie. I'm okay? Right in the zone. That's okay. Do you want the blanket? No, I'll be alright. Because we don't have to go too, too long talking. So, I'm trying to get eye level, so that you and I can talk. And also, during the interview, you're gonna actually talk to me, and you're gonna ignore Ed completely. And if not, what happens, like if you're trying to talk to both of us, which would be normal. If we were having a conversation, and you'd want to acknowledge him, but if you imagine what that looks like, you and I are having a conversation and on-camera, as you're talking, you're doing this. I see. Right? So that's why it helps. If you just talk to me and forget about him completely. And then we'll just be conversational. Okay. We hate when people do that at parties. Where they've seen someone else that's more interesting at you. They're looking over your shoulder. So, there's a lot of headroom on the wide. But the background is nice and clean. Actually, this is beautiful. And then nothing else has to be moved? No, we have nailed this. This is beautiful. Cool. I just need to do an audio check now. Always gotta use good headphones for that. So, David, what did you have for breakfast today? Coffee. Only coffee? I may have had a donut as well, yeah. That's the breakfast of champions, okay. You're on a power diet. That's right. So, I just need you to talk for a bit. You can either count to 10. Count to 10. One, two, three, four, five, six, seven, eight, nine, 10. Alright, we're good to go, Julie. Great. Audio levels are set. Framing is set. Light is set. Exposure is set. Alright, so there are two things I wanted to point out watching this. One is, if you noticed, I originally set him up on one side of the frame, and then this is an example of where we collaborated well together instead of fighting. And then she looked at it, and I can't remember how it evolved, but ultimately it was like, no, we actually have to completely flop him. So this idea of problem solving, and listening if you do have the opportunity to work with someone else, to listen to their ideas. Because I find it quite helpful, especially when I'm operating the cameras, so I'm thinking about all these other things. The other thing that is super important, is that we would rarely, if ever, do all of that monkeying around with the subject there. I just wanna make that clear. It would make me uptight, but basically, you've already sort of destroyed a lot of the potential good vibe when he or she has to sit through that and be adjusted and listen to us, and sometimes we'll bicker over it. Because, whatever. I'm annoyed because I thought it was a really great idea, or whatever. It's just human nature. Bickering might not be the right word, but you know, where we're having creative differences, and it's really bad to do that in front of the subject. Yeah. That sets a really bad tone if you want them to be comfortable and open. 'Cause in general with photography, with film making, when you are confident and smooth in your process, you make your subjects feel confident and relaxed. But when you're nervous, or you're angry, or you're bickering with the person you're with, it doesn't set a good tone. Right, right. And the initial setup, it was interesting, because there were a couple things. There was too much headroom. The window was taking up too much of the frame, so it becomes this dominant element, and the window isn't really helping us narratively, it's not placing me anywhere. It's just distracting. So it's that thing where you know you have a great resource, which is this light, but you don't want this light to become a distraction. So the other thing is when Ed had initially set his shot up, the violins are such a strong graphic line as well, that those were then coming out of his head. So then you're competing with the very thing that's the strength of the shot. And so, you're trying to figure out, well, how do we strike that balance. So it's interesting, when you set up an interview, it takes so long to do it and get it right, but it's worth it. Because if and when you do need to see that on screen, it should not be distracting. It should be sort of the anchor point of your edit. Now, the irony to me is we spent so much time setting up an interview, and my goal as an editor is to have that on camera as little as possible. Honestly, if I could do without ever having to see the talking head, I would do it. Often, I will show it once early in an edit, just you know who's talking, and we can get that out of the way. But my goal in editing is to have to see it as little as possible, because it's the least dynamic of your footage. But thank God you have it, because there's times where you just don't have the right footage to cover what's being said, so then somebody on screen is essential. I'm gonna jump a little between as we're shooting, talking about editing, because these decisions make sense also in context with this setup. The other thing is when I do an edit. When somebody says something I want the viewer to really be able to absorb, I wanna see that person on camera. Often when people spew numbers, that's a time when I kinda wanna see them on screen. Because it's a lot to concentrate on if somebody's gonna deliver a piece of information, that the information itself can't be processed simultaneous to the visual. So, I'm very conscious about wanting somebody on screen. This is really important with issue-driven, where you need to communicate these kinds of nuts and bolts facts, and it's especially important in client work. So, setting up an interview on a job, you really, really need to have the visual spot-on. So, just in terms of takeaways. There was a lot of engaging the subject in this process. He is part of us getting ready. He understand what we have on camera, what we're looking for. He has been involved in it. And then, also, I take that time where I talk to him about, alright, we're gonna be having a conversation, and here's what's going to help you be part of this process. I think about it a lot like a doctor visit. So, how many of us go to a doctor, and all of a sudden, they just start doing what they need to do? The stethoscope's on you, or they're lifting up your gown, or who knows what. A really great doctor says to you, okay, so here's what's gonna happen. I'm gonna first listen to your heart. It's a little cold. I'm gonna place it right here, first. And then you feel at ease. You feel like, oh, okay. I know what's going to happen. Because it's a little intimidating to be in front of the camera. The irony for me is everybody who gets behind a camera hates being in front of a camera, so we all know how bad it is to be on the other side. So to have somebody talk you through and be like, okay, here's what we're gonna do. It really makes that person feel like, oh, good. Now I'm in control. This isn't being done to me, we're doing this. So it helps a lot. So, I talk people through. Here's what's going to happen. Talk to me, we're gonna have a conversation. I will always say to them that you don't need to speak in poetry. This doesn't have to come out of your mouth in perfect prose. We are going to edit the Hell out of this. We are gonna make you sound great. If you wanna stop and repeat yourself, start again. We've got time. Do what you need to do. I'll probably ask you things a few times, then we'll have the options for editing. I really involve them in understanding that everything isn't on the line every time sound comes out of your mouth. So it gives them a lot more. It relaxes them and helps them know. I got this. I'm gonna be okay. Audio, we didn't show you in terms of talking through how we set up our audio. We had laved him in advance. He's wearing two lavs, in fact. Our camera has a lav, and then the Creative Live crew also had him laved. It is a very well documented, well recorded shoot. And we had a lot of issue with, because we had so many lavs running. I was laved, Ed was laved. We're all wearing lavs. You would have thought there was some major celebrity on site. We did have to do a lot on the technical end of things, to make sure our lavs were not competing with each other. You got a whole lot of signals going back and forth, so there was a lot of having to find independent channels for all of the lavs so there wasn't interference. So there was that whole part of the setup. Audio is king. I don't care how great a shooter you are. Audio is king. So you can mask mediocre shooting. You can not mask crappy audio. Do not let audio be the afterthought. And as an editor, you know that if you don't have the audio, you kind of don't have anything. So, I know we did not go over that, I'm sure there's a CreativeLive workshop you can do on audio. Take it seriously. Audio is king. You can always also go back and get a cover shot, or fudge something, or slow a shot down to cover more time. You can not replace crappy audio. So then, we took all of these elements. We took a long time to setup. I always feel like that is the slowest part of the entire process, and then from there, it's off to the races. So, I'm wondering about your decisions for shaping light. You said you come prepared for just about anything. So my question would be that entire world. What do you bring for blocking out light if you need to? If there's not blinds. How many lights do you typically bring with you? What makes your decision to. Because I noticed in yesterday's shots that you had some back light on some subjects at points and the difference between using colors for it when you have a red highlight and just a normal tone on the front. What shapes those decisions? So, we're going to go into this with examples later, but happy to answer that now. I tend to work very simply and I'm pretty low key. It depends on the kinds of shoot. Like some of the client work we do. We'll show up with two big diva lights and C stands and three or four lights, even. Where we're lighting the subject with two lights at front and some sort of backlight. We tend to not do any color, any gels on our lighting. I don't think we've ever done that. Way back, as a still photographer, I used to do that when I was shooting in Silicon Valley. You'd make really crappy scenes look cool, because you made the background red. But in this case, because we're working in a documentary style, I always look for the natural light first. And a lot of the interviews, and again, we will show examples of this later in the session. I will try to work with natural light. But in this situation, I show up with one small light panel with a little soft box on it, so that I know that if we do not have good ambient light, or a good light source, I've got a beautiful, soft, direct light source for my subject. Now, if we were interviewing two people, it might be a little tough to use that light. I could probably get away with it. And then I'd bring a small LED light panel, as a background light, but in this case, I did not need it, because I used the window light. So, I am someone who works pretty light with equipment. I do not like showing up with cases and cases of gear. But there are, as I say, some situations, like with client work, where we have to come in with the full force of lighting, because it's the expectation, and it's the look that we know the client wants. Does that satisfy your question? It's great. Okay, cool. And I'm of the mindset, too, you wanna know how to work with minimal artificial lighting. Because we work all over the world. And you are not gonna carry light kits out into the world. It's one thing when you can load up your car. The minute an airplane is involved, you wanna minimize your gear. The minute you are going into rougher, tougher settings, you wanna try to have no artificial light, if you can manage that. So, we've done things sometimes in the field, where we're just utilizing lights in somebody's house, and kind of pulling lamps in. We are very resourceful. Or window light, of course that's always beautiful. But I mean, if you needed some sort of additional. And making a reflector out of something you can find. You're looking around just thinking, where's a poster board? Anything you can use. And also, take advantage, assuming you're working with a good, high-quality, current video camera. The sensors are so amazing now. It's the same for still photography. But the game's been changed, because these sensors are not only very sensitive to light, but they capture light, often in such a beautiful way. You might look at a scene and think, this isn't very interesting, but you look at it through the viewfinder, and it's just gorgeous. And another thing is working with the angles of light. Light etches form. And so, that is also very important. Do you want the light blunt and flat, do you want it very dramatic. I just finished a film where I had to work in Benin in West Africa and in Columbia and Latin America. And kind of a situation that Julie described. We had to be in and out of lots of scenes. I think we did 25 interviews for this film in the course of the six weeks I worked. And so I had to be fleet-footed, I had to be able to walk into a minister's office, or the head of DEA, or an inspector in Benin who didn't wanna be seen on a street. So I try to outfit myself so that I can go into any situation, and come out with a great image. And that's gonna be different for everyone, but that's my MO. In the spirit of working light, and not having too much gear. I noticed you had the cameras fairly close together, and I know it's good if you can get a different angle when you switch between closeup and whatever, but with the cameras that close, I wondered if you could just go with a higher resolution shot and then just digitally do your cuts to closeup. I've tried that sometimes, and I just wonder, as an editor, do you find that can sometimes work for you? So, if we were shooting 4K, yes. But we're not shooting 4K. So the shift between a wide or medium shot to a tight would be too dramatic. You can pump in, but at some point, the footage is gonna start to break down. Unless you're shooting 4K, I wouldn't take that gamble, personally, because you can't vary it enough. And the difference between a proper cut versus what feels like a jump cut is a world of difference to the eye. And the reason, as Ed mentioned before, we got the cameras very close so the position of the head in frame and the eye line, it cuts seamlessly between. Yes, if you wanted to be a little bit more arty, or disruptive with it, you could decide, we're gonna take one and do a profile shot, but they don't cut together seamlessly when you do that. They're interesting, but the eye then has to adjust, and it takes a moment. So, you'd have to do that very consciously, if you wanted that kind of value from two cameras. But your question does reflect. That's one of the great things about shooting 4K, is that you can use just one camera for your interviews, and the quality allows for that kind of cropping, if you like. Another thing that I did in this film I recently worked on with this director, where I was the only camera person, so we only did one-camera interviews, and what she would do, which I had never experienced, and it was an investigative piece, so the questioning was very intense, and very tough. She would map out which questions she wanted wide, and which questions she wanted tight. And that was fascinating as a DP, as a director of photography, to experience that. Where we would preset, okay, I would say, here's the wide, here's the tight. She'd okay it, and then she's start her interview, and then she would just say, wide. And then she'd do a few questions. Tight. And I thought, that's kind of an efficient way to work, if you're not shooting 4K. And that was for broadcast, so the quality had to be very good. So there's different ways to do this. I would look at, like what we're showing you here, as a a kind of basic starter kit of how you do it, and I would say go to town and play. And there was the, what was it called? Errol Morris, the Interrotron or something, where he had his face-- On the lens. On the lens. So in this case, the subject was talking directly into the camera. And that can be very powerful, and we've done that as well. And we've played around, also, where one camera. You wanna make sure one locks down. So that if you need the solid shot, you've got the solid shot. So at mid-range, lock down. That could be the camera you don't man very much. But we've played around where we'll have one camera that's floating where it's just throughout the talking, it's doing this. Sometimes it's phenomenal, and you get it to land right on the tight shot of the eyes as somebody is tearing up. You know, that kind of thing. And sometimes, when you're editing, the emotion gets heightened, and the camera's drifting away. And you're like, dammit! So, you can absolutely play. It's harder to play if you're alone in the field. So, a lot of this is about understanding your own limitations. Because the last thing you wanna do while interviewing is worrying about your framing. Because a successful interview depends completely on relating to somebody. So if I'm like this while they're talking, and I'm like, oh, yeah, good, great, great. I'm not gonna get them to open up. Because I'm not present. So, it's knowing what suits you in the circumstance that you're in. And also, we have don't a lot of interviews, separately. Of course, where I'm manning the camera, or Julie's manning the camera and conducting the interview. And I think you just touched on that, but that is a different challenge. Because many of us, often, it's just us alone. So to be practical here and give you practical guidance or advice, in that case, I might be sort of straddling the camera, so that you're not looking. Unless you want them to look in the lens, they're not looking in the lens, and you're sort of monitoring. But it's sort of schizoid, especially for focus and all that, it makes it much harder to do more than one shot.
Class Materials
Bonus Materials with Purchase
Ratings and Reviews
Elisa Correa
wow, wow, wow! what a amazing course! I learned so much, I was inspired so much... congratulations, Julia and Ed, you are excellent teachers and do a really wonderful and powerful work. thank you!
a Creativelive Student
OUSTANDIING COURSE, congratulations creative live for bring Julie and Ed in teach about documentary filmmaking. I have watched and bought a fair few courses on this subject and not one of them comes close to this. You can see the amount of work Julie and Ed have done to make this course amazing. The best bits for me are the real teaching opportunities when Ed and Julie are making their violin documentary. I have never seen this before in any course. Thanks Ed and Julie for an amazing course and letting us see inside there work that you do and sharing all your experience with us. I've never really written any feedback for most courses, so this must be a good one :)
a Creativelive Student
Ed & Julie provide so much insight & knowledge into the documentary making process. This is a high-level class that gives you a wonderful overview of what goes into making a powerful and interesting documentary film. It was so helpful to watch them work on an actual short film from start to finish, and to hear their workflow. You'll need to learn the technical nitty gritty elsewhere, but this course will help you dive into how to tell stories on video. I particularly loved the segment on doing interviews, and Julie is an absolute pro at this! Also really nice to see Ed & Julie working/teaching together and how their different skills complement each other. It was a pleasure to learn from them!