Lightroom Mobile Organization, Sharing, Exporting
Lesson 16 from: Master Mobile Photography BootcampLisa Carney
Lightroom Mobile Organization, Sharing, Exporting
Lesson 16 from: Master Mobile Photography BootcampLisa Carney
Lesson Info
16. Lightroom Mobile Organization, Sharing, Exporting
Lessons
Class Introduction
06:11 2Equipment
10:44 3Shoot Differently
10:59 4Capture Apps
03:01 5iPhone Capture
07:20 6Lightroom Mobile Capture
11:59 7Post Production:Editing/Processing
06:10 8Lightroom Mobile Modules Overview
11:29Lightroom Color Module
16:04 10Lightroom Light Module
06:15 11Lightroom Geometry Module
05:46 12Lightroom Effects Module
03:41 13Lightroom Versions Module
04:01 14Lightroom Profiles and Presets Modules
05:43 15Lightroom Selective Edits Module
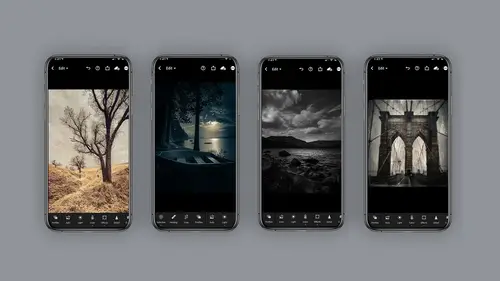
17:13 16Lightroom Mobile Organization, Sharing, Exporting
08:43 173rd Party Apps
14:52 18Wrap Up
00:51 19BONUS: Premiere Live Kickoff
27:43Lesson Info
Lightroom Mobile Organization, Sharing, Exporting
Now that you've made all these fantastic images, you need to organize and figure out how to export and share these images. So on the organization, the very first thing I like to dio once I have a setting a set of images, I like to create an album. How you do that is you click on while you're in your library. You click on the plus sign for the albums, and then down here you'll see you get the option to create an album or a folder. Oh, an album or a folder. Which do you choose? So I use albums to organize my images, and then you can organize your albums inside folders. I have to tell you, I can get by with just albums. I don't do the folders, but if you have a lot of imagery, you might want a second tier of organization. So how it works, Um, like I said is you just click on the button for the albums. However, on the handout, you'll see these other options of what to dio. So let's take a look. We're gonna add this image to the handout. I mean, pardon me to the album. What do we dio? We ju...
st click and long hold and I have selected one image at this point, or I can click another image and another and another. So now I've got four images selected, and then I'm gonna now have to make a decision. So what is my decision? Do I want to add it to an album? Do I want to share or do I want to remove? So this is where you get your choice when you click on add toe album, then you just have to go to your destination. So you scroll through the albums that you have and you find whichever destination you want it. So I'm gonna put it under Martin test and I'm gonna click at. And now I'm still in my original area where I found my photos. And if I have to want to go back, then I could go back to my albums. I'm going to school. Do you see? I use a lot of albums. It's crazy, isn't it? Martin test. And now I have all these images inside my Martin test. It's really quite easy now, managing within an album. So let me go out here for just a second. And let's see if I go to my print album. I have an album for printing. I only have two images there. And let's say this image of Jack I want to delete out of the album all you do is click on the image and then do you see the three dots on the upper right there? You have a choice to organize view options. Copy settings create preset lots of options. I'm gonna click on organized, and then once I'm in the organized window, I could make more decisions. Do I want to add to it to another album? Do I want to move it? Do I want to remove it? Delete or set as the album cover lots of lots of under the hood stuff here, but this is pretty basic. You just got to remember that for almost every item in light room. If you see a little arrow, there's more choices underneath there. Alright, searching. I cannot live without searching. I've got to tell you this is one of my favorite things. That's why I sing, and unfortunately this is not available in the free version. But let's say I'm in my all photos and I want to search for dog. I can click on dog type and dog, and it's gonna find every picture of a dog that I have. And right now I've 1103 images of dogs. My goodness, I should love dogs. So this is worth its weight in gold. Definitely worth e 4 99 a month, If you ask me now, you can also flag photos and raped photos. I do not do this. This will be on the handout for you. But if you need to make some decisions and editing and you wanna kind of go through and make select, this is a great way of doing it again. It's flagging and rating photos not available in the free version. Sorry. All right, let's talk about exporting and sharing. So again, you made all this great stuff. How you gonna get it out of your phone or your Web app or your desktop version? All right, so let's take a minute to look at this window here. Sharing the sharing icon has, As I said, Ah, lot under the hood. You've got Get a link invite open export camera roll export the files share edit and export as Let's take a look at this. All right, so the first one is get a link. I use this all the time to send to clients. I will say, Hey, do you wanna look at the 25 or the 50 or the 100 images I shot for you and it will give you a title. You show your author you can put a theme and appearance. It looks really, really professional. I think you'll enjoy this a lot. Get a link. All right. You can invite people. Now, this is great for clients and collaborators. And the only thing I'm going to suggest you watch out for is that you wanna know if they could just view it or they can actually contribute to it. So just be a little careful here. Some of these items you're gonna see your little redundant, but that's all right. So the share to how to do the share to you click on the little sending icon like sending an email kind of thing. I just wanted to point that out. Um, that's how you get to the share to menu. Now open in. I use open in all the time. This is how I post directly to Facebook or to instagram share. Edit. You can actually share your own personal edits in the light room discovery and learn platform. It's a pretty cool area where you can see how other people are doing their work, and if you choose to, you can save your presets so other people can use them. It's really a fun way to learn and get discovered by other artists. Export as this is super important, choose which file type to export Really important. You can export JPEG tiff or a dog, and depending on which one you choose, you're gonna have different options. And what do I mean by that? What I mean is, for example, if you're using a tiff, you're out putting a tiff. You can choose small or large eight bit, 16 bit compression. You can also include a watermark. How cool is that? You can also because they just have to give you more choices. Here. You can also choose which color space you'd like to use, so that's if you choose a tiff. Now, if you choose a d N G, you will not have these options. Now the watermark. Here's a groovy cool thing about the watermark. You can add text like a copyright symbol if you'd like. But now you can also add quite literally, a graphic, uh, logo, whatever you like. And you can using the controls here in the middle, you could decide its size and its opacity and its position. The key is you have to have access to this graphic so that graphic needs to be saved on your phone. I like to save a PNG with a transparent backdrop and use that. All right. Hey, did I mention things are a little redundant? Yeah, Things are a little redundant in light room. So when you happen to be in your album and you see that little plus sign with the portrait that gives you a kind of a shortcut window to the share and invite window in case you want to use that. So as you work in light room, you're going to see a lot of the same options appear in different areas. Okay, One last thing I'd like to mention is, do you know that you can share directly to Photoshop if you are on your IPad. I love this feature. I use it all the time when I'm working on my IPad. So the light room works seamlessly with your phone to your IPad, and you can click on the share button and go directly to edit in Photoshop. If you are on on IPad, that will show up. Now you can send a file back to light room from Photoshop on your IPad. However, I need to be 100% clear about that. That will be a flat file because light room does not support layers. So ultimately you could go back and forth between light room and Photoshop on your IPad. However, you will lose all the editing because it'll be a flat file when it sends back. So you don't actually lose the edits you've done. You just can't undo them. Hopefully, that makes sense. So get organizing and get sharing
Class Materials
Bonus Materials with Purchase
Ratings and Reviews
Tiffany
I LOVED this class sooo much! Lisa did an amazing job of supplying a large amount of information balanced with a pace and teaching style so it wasn't overwhelming and so FUN to learn! Lisa helped me unlock so much potential in my device I didn't know was there. Everyone can learn from this class! Lisa is fun and real and you feel like you can connect with her. I am having so much fun with photos and have taken my images up a level with the education Lisa provided. TAKE HER CLASS, you will be so happy you did!!
Amy Vaughn
Lisa, your classes are wonderful and inspiring. Even though I already have a fancy DSLR, I love experimenting with mobile photography and have just been getting into using Lightroom a lot on my mobile devices. There were many cool ideas in this course that I wasn't aware of. I'd highly recommend it to others interested interested in creative mobile photography. Thank you so much for providing the slides as a pdf download - they are thorough, well organized and easy to reference when it isn't convenient to open a video file.
Thomas Hübinger
This course is a step-by-step guide on how to create better, more impressive photos with Adobe Lightroom. In her charming and unique way, the lecturer explains the content in an easy-to-understand way so that people like me who have never used Adobe Lightroom before can achieve very good results. The course is rounded off by a very extensive and detailed workbook. Thanks to the lecturer for this wonderful course!