Lessons
Introduction: Discussion On New Masking Module
14:50 2Editing Modules Overview
15:59 3Masking Module: Introduction To Masking
03:49 4Masking Module: Select Subject
05:51 5Masking Module: Select Sky
07:11 6Masking Module: Brush
04:48 7Masking Module: Linear Gradient
02:10 8Masking Module: Radial Gradient
04:01Masking Module: Color Range
05:09 10Masking Module: Luminance Range
04:12 11Masking Module: Depth Range using Depth Capture
04:49 12Combining Mask: Adding / Subtracting To A Mask
10:31 13Organizing Mask: Naming, Mask Order
03:44 14Creating Rimlights With Mask (All On Your Phone)
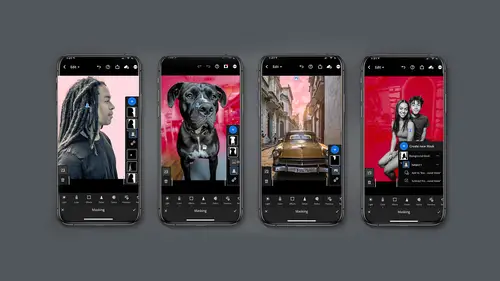
05:06 15Creating Great Social Post Directly From Lightroom Mobile
10:43 16Class Wrap Up
00:49Lesson Info
Masking Module: Brush
let's take a look at the next section, select sky. And as you can see this is an awesome choice for selecting the sky and to make edits on the fire truck. Does a beautiful job selecting around the trees on that initial landscape image. You can see, you can easily select the sky where it couldn't select the subject. And then here on this shot in north Carolina, you can see that. It does an amazing job selecting around the trees and the leaves. This is one of those situations where you might want to consider switching your overlay to black and white for example. So you can really see the mask very handy. All right, let's look at some of the fun you can have with the select sky feature. So go to the mask, add new mask, select sky and there the sensor is gonna do its business, which is awesome. The minute you start editing, that's when you'll start to see the effect. So let's say I want to d haze this guy a bit, I'm gonna overdo it just a minute and then I want to show you something kind o...
f fun. I'm gonna say okay to that and then I'm gonna make this a black and white image by going to the color module and then we'll go back to the masking, click on the mask for that item. So I've got to activate it and then look at this, you can make the sky disappear or you can make it more intense. And why this is interesting to me is I can actually make this guy disappear whether it's black and white or not and take this into Photoshop and do the sky replacement really beautifully. I'm going to show you that in just a second but I just want to show you the versatility of the sky and my goodness, it really does a great job selecting the Ai technology is just brilliant. All right. It's time to talk about another difference between the phone mobile version and the desktop version and what you'll see here on the right in the desktop version of lightroom masking is this preset window? Is there check this out. You've got light and darker and warmer, cooler enhance eyes, smooth skin, whitened teeth, copy slider settings. Okay, so clearly they're gearing that for skin color correction but it will pop up with the masking on the desktop so it doesn't matter that it's a sky. The precept will still show. So this is another one of those quirky things you just want to pay attention to. I'd like to take a moment to talk about the difference between lightroom and Photoshop because this is kind of a good point to do this at. I want to remind us that this is lightroom, this is not Photoshop. So while the sky filter mask is amazing and you can select the sky and do a lot of effects. You cannot replace the sky in lightroom And so sometimes the deal is you select it, you mask it out especially can in lightroom and you adjust it. But it doesn't come home to where you need it to be. And in that case you switch over to Photoshop and just do a real simple sky replace. I think it's important to be clear about the strength of each program and look how easy adobe makes it for you. Just click here on the home button in Photoshop and then do you see here, you can actually have your lightroom photos show up, and then when you're in the lightroom photos you can see your albums, any current work and then you can dig down deeper into your actually edited it images. So, very easy. One of the aspects I love about using the sky Masking feature is I can control the sky independent of the main scene. And in the old select and edit, you had to edit the whole picture as one and it often caused problems. So here on this scene here, I'm gonna go ahead and up the D. A's to get some more detail and I can see the highlights are super blown out. So I'm gonna go ahead and bring down the highlights, look at that, It's getting really dramatic. Now, I got to say for this image, the sky is a little too blue for me. So I'm gonna go ahead and go to the saturation under the colors menu and bring down the saturation of the sky. And now I'm done with masking, I can do that overall edits to the entire image and then I can make my decision like, oh that's guys looking a little a little crazy now, a little too stormy for me, No big deal. Go back to the masking, click on lights, bring the exposure down a little bit, maybe go to the effects and pull that D haze back just a wee bit and now I can go back and overall edit Once again, I love adding vignette to my overall image, I'm just moving the midpoint and the feather and this is looking pretty cool. And again, what I love about this feature is I can control the sky separate from the main image. Have fun experimenting.
Class Materials
Bonus Materials with Purchase
Ratings and Reviews
Christian Alsider
This was a great class! easy to follow and the teacher was excited about what she was teaching