Lessons
Introduction: Discussion On New Masking Module
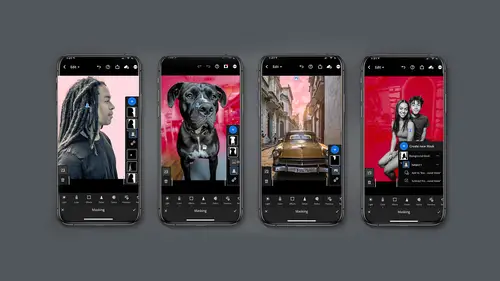
14:50 2Editing Modules Overview
15:59 3Masking Module: Introduction To Masking
03:49 4Masking Module: Select Subject
05:51 5Masking Module: Select Sky
07:11 6Masking Module: Brush
04:48 7Masking Module: Linear Gradient
02:10 8Masking Module: Radial Gradient
04:01Masking Module: Color Range
05:09 10Masking Module: Luminance Range
04:12 11Masking Module: Depth Range using Depth Capture
04:49 12Combining Mask: Adding / Subtracting To A Mask
10:31 13Organizing Mask: Naming, Mask Order
03:44 14Creating Rimlights With Mask (All On Your Phone)
05:06 15Creating Great Social Post Directly From Lightroom Mobile
10:43 16Class Wrap Up
00:49Lesson Info
Masking Module: Select Sky
now we're going to get into the brush mask and this offers a bunch of more moving parts, let's just say. So let's take a look to add a brush mask. You click on the plus sign, just like the other mass modules and then you'll notice you have in blue a brush and you have another option here which is the eraser. And if you select that that will turn blue. So this is your first view of having an add or subtract within a mask element. The next thing you'll notice here on the left are your brush controls. So you'll notice under the eraser the first thing you're going to see is size that will control the diameter of the brush. Next you will see feather and that will control the softness of the brush. Then you get to flow which really controls the opacity of the brush and then the bottom two are like the other mass invert or delete this slider here which will let you control the sizing of the feather size of the brush or the flow. It's pretty handy. Let's take a quick look at using the mask wit...
h the brush. I'm going to click at a new mask. Select the brush now as you can see here. I've got 55 I've got as a brush size and I can click and drag, I've got my feather and look at the top of the monitor. I'll show you how much you have and then of course I have the flow which is basically opacity. So I'm gonna go ahead and give my little click a brush now, please notice what has now appeared on the screen now, you see the eraser, you see the brush sizes, you see the invert and you see the trash, you didn't see that before. Let me delete this mask and let's do that all over again because this is a little confusing new mask, brush look here. All I see are size, um, opacity or feather. Excuse me. And then opacity. Right, so it's a little different and then once you let go then you get the chance of the racer. So with the eraser, please note it's using the brush at the exact same size and opacity that I had the original brush on and that is super handy for continuity so that your edges look similar and then remember you can invert it if you like, which is again oh, so handy and or you can throw it up, throw it out. Excuse me now let's call this for what it is. This is challenging on a phone. So you might want to do this really on an ipad or on a desktop if you're doing fine detail for large brush areas like this, the phone's fine. So, and in fact I'm going to go ahead and do a little clarity here and then I'm gonna slide over to the light and I'm going to bring up those shadows because remember when you do clarity the shadows tend to block up a little bit and yeah, I think that looks pretty good for now and I'm just gonna hit confirm, let's look at masking on the ipad. So if I'm in lightroom on my ipad and I click on my image, I can get the controls here on the right, the top button or the edit buttons. Then down here the little circle with the marching ants, That means masking. If I click on that, you'll see just like with the phone you do plus to make a new mask and I'm going to click on brush and this is where you might want to consider using the apple pen to maybe make your brush again. You might just, if something has to be a little tighter. And I want to remind you you have the eraser which will come the same way and it's just a little, I don't know a little easier now and something as broad as this, maybe you don't need the real estate of the ipad, but for some fine brushing you probably do. And then when you've done that you can click on the modes here to actually do your, you know, your edits very much like the phone. Just, it looks a little different. That's all. And you have the button on the top here to turn the mask off or on for visibility and again for the color overlay, let's say we want that green instead. So you have some choices here and and nothing. It's pretty straightforward. It works very much like the phone. The biggest difference is you have more real estate to working, we're going to jump over to the desktop here and I'm going to take a second to remind you that it's really imperative that you consider lightroom as an ecosystem and that the image will dictate which device you're going to use. So is the mobile enough? Do you need to go to an ipad for more space or do you even need to go another step and go to the desktop and I'm gonna show you a few controls on the desktop version that is not available on the mobile world. Let's go to the desktop version of lightroom and check this out. So I'm going to click on the mask icon just like with the ipad and here comes our create new mask selection looks a little different. But you get the gist, I'm going to click on the brush icon and I'm gonna come over here and look Alright so over here on the right, I have my size control feather flow so I can paint that's a little big but oh on the desktop you can actually use your keyboard shortcuts of brackets to make it smaller or larger. That's kind of fun. And so I'm gonna paint looks kind of similar. Right? But hold your horses Ladies and gentlemen look over here to the right this button called auto mask and what that is going to try to do is try to select similar colors. Now it doesn't look that different here. But if I go up to the little overly button on the camera right side here and I look at this as a white and black look, it's trying to mask out some areas so let me go ahead and turn that on for a second so we can see it and maybe that kind of precision is something you'd like to have. So this is why I really, really, really like you to consider the flexibility and functionality if you will of going from desktop to phone or ipad and here are the erasers here so I can erase if I want to just like, so it works very similarly, it just looks a little different because the controls are different. So what are the big takeaways? The ipad has more real estate. The desktop has this auto mask feature that the mobile devices absolutely do not have. And then again there's the exposure in the shadows, like everything else is pretty similar and uniform. There is another thing, however, I'm going to talk about more, which is a desktop has presets so you can make things warmer if you like. I'm gonna turn that over, lay off, you can darken, you can smooth skin, which isn't gonna do anything for here. You can make something cooler. Again, the mobile devices do not have that. The preset is definitely only on the desktop and all it's doing, by the way, is moving the sliders for you. Okay? We'll get more into this later. What you want to concentrate on is which device is the best tool for your image and it might be multiple.
Class Materials
Bonus Materials with Purchase
Ratings and Reviews
Christian Alsider
This was a great class! easy to follow and the teacher was excited about what she was teaching