Lessons
DAY 1
1Course Overview
02:36 2What is Mixing?
15:56 3Mixing Fundamentals
06:10 4What is EQ?
38:36 5Saturation
24:08 6Tonal Balance and Frequency Response
13:37 7Volume Balance
15:25Dynamics Basics
16:23 9Dynamics Q&A
17:26 10Limiters
15:20 11Spatial Balance
39:57 12Delay, Echo and Reverb
26:29 13Recap and Order of Inserts
20:31 14Replacement Mixing - Kick
24:34 15Replacement Mixing - Snare
31:20 16Replacement Mixing - Kick and Snare
27:18 17Replacement Mixing - Toms and Cymbals
22:10 18Replacement Mixing - Guitars and Bass
15:00 19Replacement Mixing - Mastering Chain
43:43 20Creative Mixing
28:10 21Creative Mixing - Vocals
22:34 22Production Mixing - Prep and Drums
29:45 23Production Mixing - Guitars
18:59 24Production Mixing - Bass
15:41 25Production Mixing - Vocals
23:34 26Translating Artist Notes
28:32 27Bonus Video: Cubase Mixing Tips and Tricks
51:02DAY 2
Lesson Info
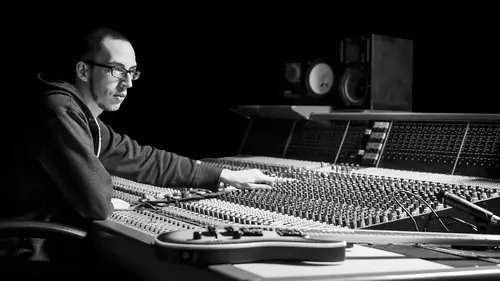
Spatial Balance
The next section is spatial, and this is a big one, this is basically, you know, the width or the space of your mix. Now there's different tools that I think fit in this category. So you have you panning, and you know, that's which speaker does the sound come out of, left, right, or any combination in between. Then you have this next concern, which is the balance of the space, so, you know, do you have a lot of elements on one side? Does it create a lean? You know, you have to create a balance with your spatial. You know, you wanna have equal amounts of elements on different sides. And sometimes you play around where the right side, there's something interesting on the right side, that's not in the left side. Things that make it interesting. And that's all part of the balance as well. And then you have your size perception, so size perception would be like making like a drum sound sound bigger than it really is. Making it sound wider, making it sound, almost like you're surrounded by i...
t. How do we do that? Tone panning, you know, using like a mid side processor. Changing the EQ of your side channels and not changing the EQ of your mono, or vice versa, how can that be used in various ways. And then widening. You know, there's various forms to widen different sounds. And to change the, change how narrow or how wide, I guess, your overall sound, like your sonic of your mix is. And sometimes, you can do that using stereo wideners, you can do it using mid side EQ. These are all different ways of basically affecting the spatial energy, or the spatialness of the mix. And then we're also gonna talk about mono compatibility, so you know, making sure that these spatial changes that you make to the song, they don't effect the mono portion of your mix. Which is very important because, in fact, a lot of the music that you hear, like when you're walking around in a mall, or even when you're driving a car, you are hearing stereo, but you're kind of hearing mono too because you're leaning to one side. Or when you're in a grocery store and there's music playing over the speaker. You're hearing a mono version of the song, so, it is important to maintain the mono compatibility so that your guitars don't disappear when the song's played at Hot Topic or something like that. Alright, so lets talk a little bit about panning 'cause I know there's probably a lot of people out there that wonder, like, how do you pan stuff? How do I pan stuff? I kind of have three modes of panning. Left, center, and right. I don't really put stuff in between, I know there's people who will do their guitars like 50% left and 50% right. I like to do 100%. To me that just sounds the best. Now with like, toms. I try to position the toms, and I'll try to pan them as they are set up in the room. So you know, the high tom might be right here, so that might be like a left 35, if I'm doing drummers perspective. And then the forward tom, I'd be like a right 50%. I don't wanna put it 100% in the right side, but to have it like half way. Now with leads, you know lead guitars, for example, you might want to not pan those 100% because they can start to sound a little bit distracting when it's a high lead focus part and it's all the way on one speaker. It gets a little bit distracting I think, because it starts to become hard to focus on, because it's spread to thin on the one side. I like to keep the leads a little bit in a tighter range. I like to keep my kick and my snare completely mono, and then have the rooms of the kick and the snare fill out the rest of the space. And I like to keep all of my base content, like, the low end of the bass, low end of the kick, all of that stuff, I like that to remain dead center, mono. The reason why all those things matter, is they will contribute to the power and the clarity of your mix. If you have your bass wide, for example, you can create these really weird imbalances in the low end. For example, if you have rhythm guitars that have a lot of low end, and they aren't, they're playing, let's say, they're playing the same part, even though both guitars are playing the same part, and they both have a ton of low end, the low end has the tendency to fluctuate wildly. You can get these inconsistencies in that low end energy that create heavy imbalances that can cause one speaker to be favored for low end versus the other. You can also create phase and balances. So the only way to make the low end super defined and super focused, is to keep it mono. 'Cause then both speakers will have the same amount of low end relation and it will make your mix sound more clear. You can achieve a better balance of space by utilizing these fundamental ways of panning things. So I know, based on my work, I know that panning my guitars 100% left and 100% right, leaves me a pretty good spot for the vocal in the middle. Same thing for kick and snare. Now the more you pan your guitars towards the center, the narrower your ability to make kick, snares, and vocals stand out becomes. That range will shrink like this, as you pan things in. Now you can achieve, there's various ways of achieving wideness, without actually having to have a wide sound. So, I wanna demonstrate one way of creating size perception. With a mono source. So for example, this guitar part, let's see what it sounds like. (electric guitar music) Okay, so that's just a mono guitar part. There's no stereo information at all. The same sound is coming out of both speakers. Now, we could increase the size perception of this sound, using this plug in here. This is called side widener. Now, what's cool about this is this is mono compatible. So, no matter what we do with this plug in, that mono signal, that original mono signal that we listened to, is untouched. Which is important, because if this mix gets played somewhere, that guitar parts not gonna disappear, as soon as we start to make it wide. If you were using a stereo widener, that wasn't mono compatible, the sound could disappear, you'll hear it on your system because you're hearing both speakers, perfectly aligned in equal distance from your ears, but as you walk around the room and the sound starts to bounce off of different surfaces, It can disappear because that mono compatibility gets removed, or you could be hearing the song only coming out of one speaker, and it will be completely disappeared. So, I'll show you, I mean, even just having this plug in on, creates wideness. (electric guitar music) And you have three different modes, so this plug in in particular allows you to kind of, interact with drums, vocals, guitars. Different instruments have different needs for being wide. It's various methods of widening the sound, but all three modes are mono compatible. And then you have your tone knob, which can adjust the high end or the low end that comes through on the wideness. (electric guitar music) So we can create more size, we can make this guitar part sound bigger, more huge, using a mono compatible side widener. You know, spatial widener. Now you could use like, let's say you have, here's a good one. Okay, mono to stereo, this is like a stock, Q bass plug in. (electric guitar music) So that increases the width of the sound and we haven't changed anything, we still have the original guitar part, we didn't add any guitar parts, we just changed the width of it. And what's interesting about this is that you could use this as a way of making certain sounds more audible in your mix. 'Cause here's the thing, during this section of the song, there's gonna be vocals, which are in the center. There's gonna be drums that are in the center. And then you have lead guitar part that's in the center, so it's fighting, right? So how do you make it so you can hear that guitar lead with the vocal lead at the same time, and not have them fight each other? And one way to do that is widening, because you can start to move that sound sorta to the sides to make space for that vocal in the center. And I can show you what the difference is with and without that kind of processing on it. So, let's just turn this off, and hear the part. ♪ You can break me in every way, ♪ ♪ You can bring me right to my knees, ♪ ♪ By the time you count to three, ♪ ♪ I'll be standing on my own two feet, ♪ ♪ You're the nightmare that's chasin' me, ♪ ♪ You could tear away all my dreams, ♪ ♪ I'll show you what it means to scream, ♪ ♪ When I'm stand-- ♪ So, every time I turn the widener on, you can kinda hear that part jump out. And it kinda gets out of the way of the vocals. And if you're listening really intently, you can almost hear how it sort of helps it blend into the song as well. The other thing that I like to do with this same concept, is I like to make vocals in a certain way. I kind of have like this method where I'll take a lead vocal, and I'll make sure that it's almost completely unprocessed, and just very very true to what the part was. So that the vocal becomes very understandable in the mix. You can understand the lyrics, you can hear the character of the voice. You know, all these things. And underneath of that, I will mix in a double of the vocal, but I'll make that one really wide, tons of effects on it, and the combination of having that bare, dry vocal with the super super effected vocal, allows you to create a very big vocal size. The size perception changes. So, I'll show you the chorus. So we have a little bit of reverb on this chorus. ♪ You can break me in every way, ♪ ♪ You can bring me right to my knees, ♪ ♪ By the time you count to three, ♪ So it's a pretty basic vocal sound, but then you throw in these doubles, which have different effects on them. Originally I had a plug in called Avox Duvo on there, but we don't have that installed on this computer so I'm gonna use like a chorus, which will be a similar effect. So if you have a chorus on these two. It's gonna sound pretty gnarly, I'll show you. ♪ You can break me in every way, ♪ ♪ You can bring me right to my knees, ♪ So we have chorus, which is modulating the pitch and making it sound bigger because it's going in and out of pitch. And when you combine that with the original you create a really huge vocal. ♪ You can break me in every way, ♪ ♪ You can bring me right to my knees, ♪ ♪ By the time you count to three, ♪ ♪ I'll by standing on my own two feet ♪ ♪ You're the nightmare ♪ It almost sounds like a crowd of people. Versus just having one voice, and we're doing that with only, I mean you could do that with just two takes, I'm using three, But I have the main vocal that's unprocessed and the two doubles that have that extra chorus, that extra delay, and then those two tracks are hard panned left and right so that creates this size of the vocal. Just by adding different effects on different tracks. Also we're using a quarter note delay, which is echoing out the doubles, where as the main vocal does not echo. So that's also another way of kind of creating additional width by having the echos on the sides, but no echos in the center. And in the mix, it's just night and day with and without. So here's just the one vocal. ♪ You can break me any way, ♪ ♪ You can bring me right to my knees, ♪ ♪ By the time you count to three, ♪ ♪ I'll be standing on my own two feet. ♪ ♪ You're the nightmare that's chasin' me, ♪ ♪ You could tear away all my dreams, ♪ ♪ I'll show you what it means to scream, ♪ ♪ When I'm standing on my own two feet ♪ So the width and the size perception in the vocals is basically just created by those doubles that are hard pad, and also by adding the chorus effect and putting some delay on there. Also have some reverb on those as well. And I think, I ended up, yeah. I even have different reverb settings on those. So on the main vocal I have less reverb, it's kind of dialed back a little bit with more pre-delay, and if you're not familiar, we'll go over delay and reverb here in a minute, but if you're not familiar, pre-delay is like how long it waits until the reverb kicks in. It's kind of like a one echo delay. That come in your signal. So the more pre-delay you have, the bigger your reverb will sound like. And also, the width comes a little bit from these harmonies too, which are the same, but doubled. So I had the same harmony, just one single harmony but doubled, and I have those panned as well. And I panned them 100% left and right too. ♪ Break me in every way, ♪ ♪ You can bring me to right my knees, ♪ ♪ By the time you count to three, ♪ ♪ I'll be standing on my own two feet. ♪ So you could see the layers of spatial changing, like changing the sounds. You can create this nice big vocal that surrounds you. I try to accomplish the same thing with guitars, if I have a guitar part that has a harmony, I'll tend to try and make the harmony have more width, and then turn that down. And that width allows you to hear it, 'cause it will stick out in the mix more 'cause it goes out towards the sides. And the original melody line stays in the center, and then that allows me to turn that harmony down, so it doesn't take up a ton of space. But you can still hear it, and it blends nicely with the original guitar sound. And then, when you get into sections like this where you have three guitar parts at the same time. (electric guitar music) It's good to play around with some panning, you know you can take, like I'll take this guitar part here, and I can pan this a little bit to the right, just a tiny bit, and I can take this guitar part here. I can pan this one a little bit to the left, and I'll keep this one in the center. (electric guitar music) So that's what it sounds like, you know it sounds, it's like you can hear all the parts in the different spaces. Now watch when I remove all that. (electric guitar music) It's just a nice little way of getting those parts to kind of get out of the way of the center 'cause the more information, everything kind of defaults to the center. So the more information you have in the center, the harder it is to discern the differences of the sounds and what's happening. So as you move things towards the side, you create clarity and you create more space. And also, if you're using just straight up pans, you will stay mono compatible. But you must know that the typical mono mix comes from just the left speaker. So if you take a guitar part and you pad it to the right, chances are, it's not gonna end up in the mono mix. Depends though, 'cause there's also mono mix that sums the left and right side together. And in those mono mixes, that's where mono compatibility really matters because if you're using a bunch of stereo wideners, they typically aren't mono compatible, and as soon as you sum those two signals together, it'll disappear. There's actually a rap song on YouTube that went viral, I can't remember the name of it. One of my friends, Brandon S. Higher posted it, and I checked it out and what happened was they made the vocals so wide, that when you put your mix in mono, the vocals completely disappeared and the song became instrumental. And that's an example of when the left and right speakers are completely out of phase with each other, and so when you put them together, it cancels out the sound. So, when you're dealing with the spatial stuff and the widening, just make sure that you understand what kind of processor you're using and make sure that you, if you're not comfortable with it I would say make sure you use mono compatible processors. 'Cause then you don't have to worry about it. My plug in here is called SideWidener is mono compatible so it's kind of like easy mode. You can just change the width however much you want. And no matter what you do, it'll stay mono compatible. Do we have any, yeah. Vocal tracks, are those just copies of the exact performance? Or are those actual doubles? They're actually performed doubles, and that's an important point because with the way that we're processing these, you can create, if you're using the same vocal, it will not create the same effect. So it is the fact that each performance is unique enough to be a different soundwave that isn't moving up and down in amplitude at the exact same time. The difference in sound waves causes an additional effect of wideness. And we just accent that with additional, chorus, delay, or accenting the differences even more. Which allows you to create a huge space. So you have the main one in the center, and then the two other performances off to the sides, and then I guess, four and five being the harmonies, are also separate performances doing the same thing? Kinda the same thing with the guitars too being different doubles and stuff like that? Yep, and with guitars, you know, I try to approach it from, I try to use the least amount of guitar tracks possible. But if I still have a goal of creating a space for them, I'll use a widener. Because I prefer to have a cleaner more defined performance, as opposed to trying to double leads and stuff. Because it gets a little dirty, you know, you introduce more noise into the signal, because you have two guitars that are distorted, where as you could just have one, and then you can use a mono compatible widener to create the space. So, yeah. And then the other thing too is if you have tons of vocal harmonies, more than one, and you wanna double them and you want all your harmonies to be wide, you can pick various degrees of wideness. So you're highest octaves, for example, could be a 100% left, a 100% right, and then your thirds can be like 50% left and 50% right. And by utilizing different zones you can have more clarity. Rather than pushing everything out to the sides. Do we have any questions from the chat? We sure do! The first question we have is, do you prefer having symbols recorded in mono, and then panning them slash mixing the reverb afterwards? And do you EQ symbols and process them, or just pretty much leave them alone after you track 'em? So, the way that I would prefer, and this is an important part about drum spatial, you know, drum size and drum spatialness. You need to have your mics set up in the room properly. To capture that wide stereo sound of the drums naturally because you can create it, yeah you can put a mic on each symbol and you can pan them in different directions and you can create a space that way. But the problem that you face is that instrument is being hit, and it's not coming through just one microphone, it's coming through bunch of microphones. And there's a phase relationship between all of the microphones and you'll create cone filtering if you don't, the more mics you add, the more complex it becomes to capture the signal properly, to have it be phase coherent. So, I prefer just straight up two space pair microphones, put in good position. And then when I'm mixing, I'll keep those hard panned. I'll pan the left microphone all the way to the left and the right microphone all the way to the right. And for me, I've found that works pretty well, and sometimes I'll also have a center microphone that I will automate the fader of and bring up and down as I want symbols to have more or less focus. So you can have a center mic that gets louder when certain crashes are hit. Or gets louder during certain sections of songs, to make the symbols come forward or backward. You can create almost like a stereo effect, like this, by turning one microphone up and down. It's a cool setup that you can try next time you're setting up the microphones for your drums. And then for EQ-ing that stuff, I like to have my left and right microphone combined into a stereo channel, and then I'll just EQ that channel. I don't like to have a bunch of spot mics to have to EQ, and then combine that with a set of overheads that I have to EQ and then combine. Like I try to keep it really simple. But a lot of the size perception of my drum sound comes from the rooms basically being abused. To take those two very very widespread microphones and you compress the crap out of 'em and it creates a huge like, a really wide like, sounds that you can like, tuck in underneath of your drum sound. It gives you all the depth and the width of your drums by doing that. Great. A question we have here, are you down to take another one? Yeah. Cool, an inanimate object says, how do you deal with the volume increases with multiple guitar harmonies, and trying to maintain the width and brightness without losing any perceived volume? So as you add parts, especially guitar parts, the volume gets more and more. Like you said. So in order to combat that you have to do some automation. I mean you have to keep in mind, that if you were to take 80 things and have them all play back at the same time and then go from that to two things, the volume different would be massive. So the goal is to keep everything within a certain range, you know, a pleasant range of volume difference. And defining that range is gonna just come with time. Like with experimentation. The more and more you mix you'll kind of get a feel for what that range is based on what kind of music you're working on. And like I said earlier with the expectation of different styles of music, you know, there are some kinds of music that have really loud moments and then really quite moments. But then there's other kinds of music where that's not acceptable. So it just depends. But I use automation, lots of EQ automation, and lots of volume automation on guitars. And one thing that you can do, for example, let's say you have a group of guitar parts that are all performing kind of different parts, and you want to be able to hear all of them. You might have to make sacrifices, you might have to take the guitar part that's playing the lower notes and put a high shelf on it and automate the high shelf down so that the overtones and the harmonics of the high sounds kind of get carved out, but you're still keeping those notes there. You're keeping that low end of the signal in the mix, and then you're having another guitar part that's playing higher notes come in and take place of where that was and have the low sucked out of that. So you're doing like, you might have like one track where it's perfectly flat, and then when the other guitar part comes in, the highs get sucked out a little bit to create some space for that new guitar part to come in. And then a third guitar part comes in and now you dip out the mid range or something. You just have to find what those frequency zones are in those parts, and figure out which ones are the ones that are most important to being able to discern what's being played. So, one way you could do it is by, let's take this guitar part for example. (electric guitar music) You could look at the frequency spectrum and kind of get an idea for, you know, what kind of overtones and notes are coming out of the guitar. And you could also just do some kind of frequency sweeping to get an idea of what's strong, so if I hit play, and take a frequency band and just kinda sweep across the frequencies, I could start to figure out what's strong about this part. (electric guitar music) So there's a lot of information around 500 hertz, so if that guitar part was getting lost, to make it more audible I would just increase 500 hertz. So I could show you if I hit play, and I'll actually just turn it down to make it like falsely inaudible. ♪ Nightmares chasin' me, ♪ ♪ You could tear away all my dreams ♪ ♪ I'll show you what it-- ♪ Whoops. That EQ's on the master post. I gotta restart this computer soon. Okay. But let me, I can use a different plug in real quick. I think. No, that's not a good one. Oh, I know how I'll do it, I'll just do it like this. Okay, so let me show you. ♪ Nightmares chasin' me, ♪ ♪ You can tear all my way dreams, ♪ ♪ I'll show you what it means to scream, ♪ ♪ When I'm standing on my own t-- ♪ So like yeah, as I increased in range, that guitar part starts to jump out. But if you were to play that by itself, it would probably sound really weird. (electric guitar music) Right, this sounds silly. But like in a full mix. ♪ Nightmares chasin' me, ♪ ♪ You can tear away all my dreams, ♪ ♪ I'll show you what it means to-- ♪ Like all the difference in the world. And of course, you would wanna play with that. The shape of that EQ and you know, spend a bunch of time making sure that that adjustment was perfect. Like, defined perfectly. But one way of making it stick out would be automating an EQ to come in. So, yeah. Alright, so another question we have is do you keep the low end of the guitars as center as well, or panned center as well? And if so, how do you achieve that? Keep the low end of the guitar panned center, and how do you achieve it? So, the thing is, about the wideness of your low end comes from the difference of the audio signals in each speaker. So in order to make the low end more mono compatible, for the guitars there's two ways to do it. So one way would be to use mid side processing so that the sides, what you would do is, I'm not sure what processor you would use. I'm trying to think. There's a plug in called Ozone that has a multi-band widener built into it. And one trick that you can do, actually I'll show you in a second, is you can grab the low end band, and you can make it mono. Now I don't know exactly what's happening to make it possible, so I don't know how to explain what's happening other than the fact that if you have that plug in you can do it. So I'll show you. So you would go into stereo imaging, and then you would take your low band. (electric guitar music) So if you watch this wedge here, you're gonna see the wideness information. So if I put this on zero, you can see the wideness is all over the place. Now, I'm not sure if you can hear this, if you're streaming this, but, (muted music) it's like-- (muted music) So as I turn this band width down, it goes mono. (muted music) And the thing that's really weird about this is that the first time, if you have this plug in, and you try that for the first time, it's gonna sound cool to you. It has like a cool effect when the bass is wide, but I promise you that that doesn't translate all over the world and all over different speaker systems. It starts to get really weird, so the best way to treat base is to have it just be mono compatible as much as possible. Another way of doing that is to make sure that you use a high passed filter on each guitar track so that you are controlling the amount of low end differences. You're basically decreasing the low end differences between all of the different tracks by filtering it out. Okay, do you wanna take one more question before we keep going? Yes. Alright, so this one's from an unknown user. How do you assure that the panned vocals and the panned guitars aren't fighting for the same space. And I'm assuming that that means the stereo space, not necessarily frequency space. Yeah, so the, I think just by virtue of them being different, helps a lot, 'cause they're different instruments and also, you're doing the panning on those two things for different reasons. So, you're panning the guitars because if I had to take, let me, I'm gonna make these guitars mono and show you what it would sound like. So if I had these guitars as mono this is what the song would sound like. ♪ You could bring me right to my knees ♪ ♪ Oh oh, oh oh ♪ ♪ Oh oh ♪ ♪ Wanna believe, ♪ ♪ You're so insane and misguided, ♪ ♪ You won't get the best-- ♪ So now as I've brought the width back up, it sounds like the song just kind of came to life. So the purpose of panning the guitars left and right is really to just create space in the middle, and also to make those guitars audible. 'Cause if you take that information which is usually extremely saturated, and put it all in the center, it basically is really hard to hear. You can't, I mean that's why people started panning guitars into different speakers, because if you can hear things better, you can understand what's going on. And with the vocals, the reason you're doing that size perception that sounds, you're just panning things out and making it sound wide, is because a vocal by itself in the center channel sounds really thin, sounds really weak. So it needs support. The guitar tracks don't need support because they're huge. It's like a wall of sound and they take up tons of space. Where as the vocals, they don't take up a lot of space. And so you have to add lots of layers of vocals and pan them out to make them sound as big as the guitars. So I don't find that there's a lot of fighting going on. I think it's just the method that I come up with to make guitars and vocals more clear and understandable. In this type of music. There's definitely other types of music where, like for example, what's the band that Jack White's in? Recount Tours? What's that? Recount Tours? No, the a White Stripes? White Stripes I think it's called. That band has one guitar, one drum, and one vocal. And how do you do that? Everything that's in that band is center focused. Right? (laughing) So I'm sure the engineers are doing all kinds of crazy tricks of, throw the guitar this way, and then send it to a delay, and then send the delay to the other speaker. You know, interesting things to get the guitars out of the way for the vocals and the drums. So these are all just tools for accomplishing mixing goals and spatial tools are useful for creating your space, creating your size perception, and also making different elements of your mix easier to understand by moving them into different spaces and different sides.
Ratings and Reviews
Spiv
I don't work exclusively in the same genre as Joey but I always make sure to clear my schedule when he's on CreativeLive. This class definitely didn't disappoint and it was awesome getting to see Joey work on a track from start to finish and what his approaches and thought processes are. And not only that, but I appreciate that he briefly touches on client communication in regards to production, mixing, etc, and the business side to the mixing process as this is an area I'm just now dipping my toes in. Even though I often find myself on the rock, indie or post-rock side of things, a lot of these ideas can apply to anything you're working on and I definitely picked up some ideas to try and work on myself. Joey gives you enough to inspire you and make that light bulb click and does it with an admirable humility that I respect. He gives you more than enough on how and why he does what he does, but I never feel like he reveals all his secrets or magic; I honestly prefer it that way as it leaves a fun challenge of taking the ideas you've learned and figuring out how, when and where you're going to use them in your own mixes. Especially if you're not doing predominantly metal, like I am. The ideas are inspiring. This class isn't about those perfect settings to that phenomenal mix or tone; it's about why you do this and how you do that. It's cool to be able to watch his process and pick his brain, start to finish and all in the box. Joey definitely doesn't need to do these classes for us, but the more I see him getting active on social media the more I get this vibe that he genuinely wants to help make the creative and mixing processes easier and help us expand our knowledge and skills. I get that it's smart business, but I respect and appreciate the hell out of him for taking time to do these classes and answer our questions... Even if there are shameless plugs here and there. I love when these great engineers take time to show us you don't need school, you don't need thousands of dollars of outboard gear, etc. It's your ear, not your gear. We live in an amazing day and age with the Internet and awesome resources like CreativeLive. I love it and these are great classes to watch and get in their heads. It set gets the hamster wheel in my head spinning and I always keep CreativeLive classes on my calendar. They're motivating and inspiring. Looking forward to the next one!
Drummer91
I’ll start off by saying this a amazing class not just for those looking for or interested in “The Sturg” production, but for anyone interested in mixing or mastering. You get everything from the must have fundamentals and basics of mixing and production, to the more advance technical aspects, and of course Joey’s personal approach and method to mixing. Everything from EQ, to compressors, multiband compressors, automation and chain signals. If you ever wondered whether you should place delay in front of your reverb, or reverb in front of delay, or other common chain effects, chances are they get answered in this class. The class is organized in several lessons following a logical order, each covering different topics. All the techniques are shown with examples and Joey does a great job of making it easy to understand and follow as well as explain the reasoning behind the techniques. And it’s not just mixing or production that is covered, but the importance of good songwriting, good communication with artists and good workflow. I highly recommend this for anyone looking to take their mixing or production to the next level. Regardless of skillset, if you’re a noob, intermediate or advanced mixer or producer, you’ll find very helpful and informative lessons, regardless of what style or genre you do.
a Creativelive Student
I own both of Joey`s courses. While both are full of useful information to get you started in the audio production world with lots of good technical explanation and awesome concepts for a fast and individual workflow, Joey actually comes up with average or "mediocre" mixes and tones. If you want some really detailed information about how Joey works, this class is for you. If you want to know what plugins Joey likes to use and wanna see him promote his own plugins, this class is for you! If you expect to learn how to create or come up with outstanding guitar and bass tones (which Joey is famous for) you won`t learn much and won`t hear anything in this particular regard, unfortunately. However, I`d still recomment them, especially the first course he did but again, if you expect to hear a typical Joey Sturgis mix quality, you won`t find what you`re looking for.