Lessons
Lesson Info
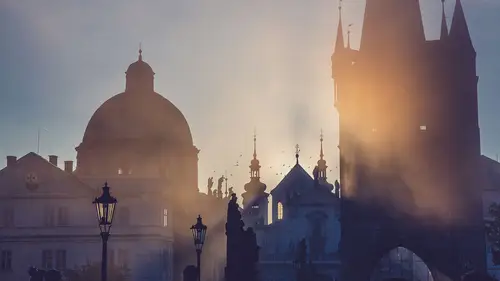
Adjustment Tools
Let's just start with just working on some basic images. So first off this is the structure, you look, you come in here, here's all photos and then you have a bunch of collections or what we call albums inside of Lightroom CC. I can make folders so if I click this little plus button over here, I can make either a new album or I can make a folder and I've made the folder called Creative Live and inside it, I've got different lessons that I'm teaching. And if I go to mobile editing, there I've got my collections, right? I keep calling 'em collections 'cause they come from Lightroom classic. If I say collections, I mean albums. Okay so here I am looking at my albums and I'm going to start working on something so if I click on, say, this color work here, you can see I've got all these images that I can work on but actually, I want to work on... Let's do this one first 'cause it's, there's a brand new feature inside of Lightroom that we'll work on first so I'm looking at these images and I ...
can sort through 'em and I can star 'em and flag 'em so when I click on a particular image, say, this image here, you can see that I've got a bunch of tools over here. This is all the adjustment tools on the right hand side and then down at the bottom is like starring and commenting and keywording and also info so I can look at that and you can see that this is a RAW photo and this is the actual CR2 but it's a smart preview. Okay, so that means that I added it from home and it sent a smart preview up into the cloud and it sent that smart preview down here so I'm working on a very small RAW version of this photo but if I go back to my images and go to this traveling one and I go down to that one that we just looked at there, look at this, it's the original. So it took the original, it's the full 30 megapixel file and it's sending the full 30 up and the full 30 down. So now there's 30 megapixel files here, there and at home. So now I want to start working on this file. I can keyword it so I can add keywords up here. I can also see if someone's commented on it if it's being shared somewhere like, say, to a website or to Facebook or something like that and then I can also see stars so when you're in the rating system, you kind of scan through like this and look at your images one at a time and if you like it, you just slide up on the right hand side and it will either flag it, not flag it or reject it. See that? And if you're on the left hand side, it'll star it or one star, two, depending on how far you go up or if you're kind of holding your thumbs like this, then you flick up, flick up, flick up, flick, see that? One flick gives you a one star up or down but you can also just hold and drag and kind of decide. So I'm gonna give that three stars. All right, so that's how easy that system is. Very, very simple to get through all of the selection process. So now we're gonna go up here and start adjusting. So I'm gonna take this image, I'm gonna go right to the main adjustments. Notice over here, you've got a histogram. If you use two fingers, you can go like this and you can cycle through either information about the photo, the histogram or nothing. And that's true even if you just one, tap it with one finger, it gives you a full screen, and then you can double tap and go back and look for the information again. So I like to keep my histogram available. And then I'm going to go, first thing, the auto. The auto feature here inside of Lightroom CC for your mobile applications is actually doing something really quite cool. Because all of your photos are in the cloud and because Adobe owns that cloud, they have a computer they call Sensai and it is a machine learning computer that's also using you and your slides and adjustments to figure out what you're doing to images that it knows what they look like. It's so intelligent that it can tell, if I were to search for something, it could find chapels or it could find women in dresses or men with hats because it knows what they look like based on your input. So when people keyword something and say this is a cowboy hat, then it knows it's a cowboy hat and then it starts seeing patterns and it goes, oh, these are all cowboy hats and so it's constantly learning. Every day of Sensai's life, it's learning a billion things that you didn't even know in the first place and it's just constantly learning. And every time you slide a slider, it's learning what do people do to fix a photo that looks like this? And so now, if you hit the auto button, usually auto screws everything up, like that's normally what we expect of auto, like if you put your camera in auto mode, you expect the photos are gonna be poor because it just, it's just trying to mix everything into middle gray. Auto here is not trying to mix things into middle gray, it's actually going to intelligently figure out what this photo is and then it's going to adjust accordingly. So watch, I'm gonna click on auto here, so it lightened up the shadows, it brought down that highlight and made it nice and even. Now I may want to do stuff to it but that's a pretty impressive auto so it's doing automatic work and then, at that point, I have something under it called profile and profile is, it's not new to Lightroom but it's brand new in the way that they're using it. So it used to be, profile used to be a thing that was down at the bottom buried inside of Lightroom classic but now it's right up top. What a profile is, is it's kind of the definitional understanding of the color of that photograph and the contrast of that photograph and so a profile can be built to mimic film types, to mimic contrast, to give you a flatter photo or a richer photo, more saturation, less saturation, more saturation in the red and less saturation in the blue. So we can create these profiles that are amazing and the cool thing is that they're not a preset. Presets slide sliders, you know that right? So you click a preset in Lightroom and it slides the slider to the right and this one to the left. A profile doesn't slide sliders, it actually works on the underlying data behind the photograph before it ever hits the sliders and so you can click on a profile and then you can work on the sliders on top of it so now you have multiple layers of adjustments going on. So I'm gonna go into the profile browser and this is the profile browser and you can see, this is all vintage effects, these are the original Adobe RAW type effects so if I want to go to a black and white, this is like Adobe's standard monochrome effect but Adobe also has some black and white effects here. See how they have black and white one, two, three, four, five, six, seven, eight, nine, 10, those are really original names, right? Super cool names. But if I like, so, but the beauty is that I can see it. It doesn't really matter what the name is 'cause I see exactly what it's gonna do and so I just kind of scroll through and decide what do I want that sky to look like, I'm gonna go for black and white ten If I don't like it, just undo it or even just go to another type so I can go to the artistic ones, oh I like that one, right? Oh, this one's even better so I'm gonna click on that one. That's beautiful, okay so I'm good. So I found the right profile so once I've found the profile, then I'm gonna go into my lights and colors and stuff like that but look at this, if I click on that, these haven't changed, these are the sliders that I had before so they're all set. The profile didn't do that, those stayed the same so look at those closely, look at the way they are, 'cause I already adjusted this image but you look at those exactly the way they are and our auto did it, too, look, see the auto? That's what the auto wants to do to this image. And notice that the auto changed it again after I added a profile because remember, the sliders are on top of the profile so the profile's underlying it. If I change the profile and click auto again, it's gonna recalculate based on the underlying information. So I look at this image, if I were to go to the browser and choose a different profile, like that one, and go back to, nothing changed. And if I went to the color, nothing would change because the profile is underneath, it has nothing to do with the sliders, so I can change profiles all day long after I've done my adjustments and it won't do anything critically different to the image. It'll just change colors and contrast levels and stuff like that. Okay so now let's go, I don't like that, the one I just did so I'm gonna back off to that one. Okay, so I like this profile and now you have just your standard adjustments, your exposure and things of that nature so I'm just gonna make sure that I get this exactly the way I want it to look. I think those shadows could be a little darker. And then I'm gonna go to the color and I'm gonna just take the saturation down just a little bit and I'm actually gonna bring the vibrance up, I like to bring vibrance up because it's more intelligent than saturation and so I bring saturation down and vibrance up and that makes the blues and reds quite beautiful without overpowering the orange 'cause it kind of protects the orange and keeps the orange from going crazy. But here's what I want you to see, I want you to see some very important tools. Number one, in the light area, if you click right here next to the actual light heading, there is a curve and it's over the top of the photo so you actually can look at the curve while you're looking at the photo which is brilliant. You can't do that inside of Lightroom, Lightroom classic, you can't do that. So you're looking at the curve and you're not looking at the photo and I find myself looking at the curve and thinking, what am I doing? I should be looking at the photo to see what the, and I can't see both, right? But this way, I can actually look at both of these and say okay, I want the highlights to come down just a little bit and the shadows to come up and see I'm looking at the photo itself and then I'm gonna bring the shadows down like this, like that but I'm looking at the photo while I'm doing it so I've got my perfect curve and I can go to the red curve, the green curve, the blue curve so now I can say I want blue to be deeper in the highlights, see, so, if I go this way, I'm removing blue, I want the blue to be a little bit high, like more prevalent in the highlights and a little less prevalent in the shadows and then I want red to be a little bit less prevalent altogether in the midtones but in the highlights, I should let it kind of brighten up a little bit 'cause that's where that is so now I've got a real nice subtle curve to my image. Then, I can close that up and go to color and now I want you to notice this little dial. This little dial is every individual color so when I do that, now I've got this color mixer here and I can either choose hue, saturation or luminance so I'm gonna click on blue and if I take the luminance of blue down, look what happens to that sky, see that? So I can richen up that sky by just bringing that blue down just a little bit. If I don't know what the color is, I can grab on to this little joystick looking thing and then choose hue, saturation or luminance, I'll choose luminance and then click in the sky and just drag it down and it's choosing that exact color so notice that the color is made up of cyan and blue, not just blue so it's actually affecting the correct color by doing that. And keep in mind, it's not just locating it to that one segments, it's actually doing all blues of that nature across the whole thing so blues down here were changing as well. If you want to do color adjustments everywhere, which you probably will, then you're gonna go, instead of being in these basic areas, you're gonna go to the local adjustments, which is this little circle right here and then there's a plus button here. I'm gonna take that plus button and I can either do a brush or I can do a radial filter or I can do a gradient so in this case, let's say a gradient 'cause we want to darken up this side of the sky a little bit. So I'm gonna, and I can do it two ways, I can either draw the gradient first and then decide what's gonna happen or I can decide what's gonna happen and then draw the gradient so let's do it this way. I'm gonna go in here and I'm gonna say, well let's take the exposure down and see how I'm choosing, I can see what it's doing over here to this area. So I'm pulling it down until I think I like what I'm gonna see and I'm gonna bring the highlights down a little bit, too, and I'm also gonna go into the color and bring the temperature down just a little bit but see how it keeps going back to its normal after I let go of the slider? Now, I simply grab my gradient and it's gonna apply whatever I was just doing into the gradient. So I grab here and I'm just gonna drag that gradient across that portion of the sky and now you can see, let me just make that smaller so you can see past that, now you can see that that, you see that? And then I can re-effect it after the fact. Do a little re-effecting, there. So now that corner of the sky looks a little bit more in keeping with the rest of the sky and then I can hit done and then I can always go in and make more, I can come in and hit a brush and then when I'm in the brush, I can change the size of the brush here, I can change the feathering of the brush there and then I can change the opacity of the brush with that little tool. So then once I do that, I can then come back in here and let's just brush this one in. So I'm just gonna say, okay I wanna brush this one in so I'm gonna just kind of do a little brushing like this, like that and then I'm going to go into the light area and I'm going to bring up the shadows just a little bit and then I'm gonna go into my effects area and add clarity because I want those stones to really pop in the shadows so I'm gonna add some clarity but also because it's kind of dark in there, I'm gonna go into the details and I'm gonna give it a little noise reduction 'cause it's in the shadows and I'm brightening it up so I'm gonna do that. And so now you can see that I've got, that it's a little bit brighter and probably, I could either go in and either cool it down more so that it's kind of intensify the effect of that shadow, that blue in the shadows, or I could bring it up and kind of help it to unify a little bit better. I don't know which is better. Do you guys have an opinion? Bring it up? All right, there. So it's got a little bit more warmth in there and then I can always come back in here and keep painting into those shadows a little bit more and I'm gonna change the size of that brush and then come back in here and paint a little bit more there and then I can go to the eraser and erase out of that and really make that brush smaller, zoom in here like this and then I can just come in and I'm just erasing out that edge there so it's not quite as... There. And we'll hit done. By the way, you have to remember to hit done. Otherwise, you'll try to use tools and you'll be like, what the heck's going on? Hit done, now you're back to the main area.
Ratings and Reviews
Steve61861
Jared is my favorite instructor on Creative Live. He is a great instructor, super knowledgeable, and fun to to watch. I ALWAYS learn a lot from his classes. Highly recommended!
user-ca78ef
Glad to see a Mobile LR class now based on the updates. Great job Jared!
Esther Beaton
Just brilliant. I was worried that it wouldn't be relevant to today, April 2020, but it is. It's still valid for use with Lightroom 2020 (for mobile) and for the latest iPad Pro (2020). There is much much more to using both of these tools, but Jared covered the most relevant bits, those most suited to professional travelling photographers. I particularly enjoyed his demonstrations with Adobe Mix and Fix and Spark, tools which I have been under-utlizing.