Lessons
Class Introduction
08:53 2Camera Settings on Location
06:08 3Take Notes & Edit in Camera
05:58 4Mobile Gear Review
18:42 5Location Shooting Guidelines
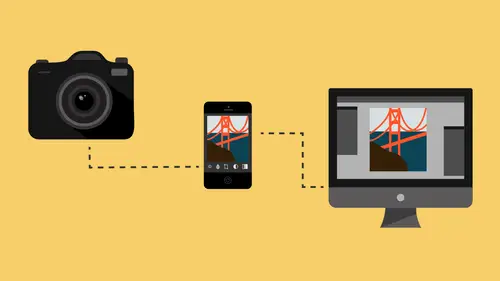
03:51 6Adobe Creative Cloud® Mobile Framework Overview
24:46 7Adobe Creative Cloud® Tools
09:50 8Lightroom Mobile® Settings
16:26Use Collections for Your Photos
23:58 10Select & Organize in Lightroom Mobile®
15:23 11Edit in Lightroom Mobile®
23:30 12Dehaze Filters & HDR in Lightroom Mobile®
40:44 13Edit Images in Lightroom® on the Desktop
23:51 14Edit Images & Basic Searches in Lightroom® Web
13:14 15Create Panoramas in Lightroom®
07:01 16Edit Video in Lightroom®
12:00 17Questions on Lightroom® & Lightroom® Web
14:54 18Workflow: Working with Clients on Location
12:48 19The Mobile Master Workflow Part 1
23:08 20Workflow: Outsource for Professional Photographers
20:36 21The Mobile Master Workflow: Part 2
32:35 22Questions on Mobile Master Workflow
16:29 23Use Feedback & Share Collections in Lightroom Mobile®
03:39 24Comment & Favorite Images
14:18 25Share in Portfolio & BeHance
11:46 26Editing Tips In Lightroom®
18:08 27Workflow: Traveling Photographer Using Geotags
19:38 28Use Easy Trails For Non-Geo Locations
15:03 29Clean up, Organize & Archive your Mobile Photos
38:45 30Collect Images for Sharing
04:45 31Tell Stories with Animoto®
08:17 32Working With Adobe Sparks Post®
10:07 33Using Adobe Sparks Page®
15:38 34Create a Slideshow with Adobe Premiere Clip®
34:27Lesson Info
Edit Video in Lightroom®
Okay, so let's talk a little bit about video. We talked about video being available here on your iPad. I can watch a video on the iPad, but the problem is that I can't edit a video on the iPad, not available to me. The other thing that's not available yet is the synchronization of video through the cloud. So if I edit a video on my laptop or if I put a video on the laptop and I wanna synchronize it to the cloud, the synchronization doesn't happen. But if I put the video into my, remember how I said there are two clouds? There's Lightroom Mobile, which is a cloud, but then there's the Creative Cloud, and that's also kind of in tandem with it, 'cause Lightroom Mobile can reach into the Creative Cloud. So it can reach into it, and I'll show you that in just a second. So what we're gonna do is we're gonna actually edit our video inside of Lightroom, and I'm gonna show you how to do that, show you the controls you have. And then I'm gonna how you how I get videos, 'cause tomorrow, at the en...
d of tomorrow, we're going to do a little segment on making slideshows and videos, and we need to have videos ready for that. So, I'm gonna show you how to make those available to you on your iPad, even though they don't synchronize. We're gonna show you how to do that, okay? So the first thing I need to do is I need to go to a job that has a video. So hang on one second, let me find it. There we go. Okay, so this is a wedding, and I have a couple of little tiny bits of video in it. So when I got done with the wedding, I put my cards into the computer 'cause I'm traveling, and I have my computer with me. I'm at a wedding, I'm there for a week. So I have my computer with me, and I'm at that house that I thought was a church. There, this is, I'm actually staying at this house on the other side of the house. And so, it was awesome, such a cool place. Anyway, so, I am staying at this house, my computer's in the house, so is the bride and groom, so is the family, like where everybody's there. And so, I'm just hanging out with them. But, as soon as the wedding's done, I come into the house, I put all my images into the computer, as well as some little video clips, and the videos were just done on my DSLR. So, just little video clips. And I like to add video when I think about it. I'm not like I do video and photos, I don't advertise that, I just like to throw them in sometimes. And so, these are just little tiny video clips to help make some motion in the slideshow. Okay, so, I'm gonna scan through and find my videos, and the easiest way to find videos is if you go to Attribute. I've just collected everything, I'm gonna go to Attribute, and then, I'm going to go over here to the right-hand side, and on the right-hand side, and then, by the way, if you don't have this library filter open, it's the back slash key, which is right above the Enter key. So how that disappears and comes up? So the back slash key will give you the attributes that you're looking for. And then, you're gonna go over to the right-hand side, and there's three different options. This is an original file, so if you click on that, it will only show you originals. If you click on this, it will only show you virtual copies, ones that aren't real. If you click on this, it will only show you video. So you click on that, and then zoom back out, and you can see, I've got three video clips that I want to use. And if I scrub over, you can see the movement happening here, see that? See that movement happening, you can see this movement happening here, okay? So, I'm gonna double-click a video. And now, I'm looking at the video, and here's the timeline, and I can just scrub through that video, there you go, and there may have been sound to it, but I don't care, we're not listening to the sound, it's gonna be going under a video. But the controls are here over by this little gear. I click on that gear, it allows me to see the entire video, and you can see, I've already cut it. So these are the in and out points, and there's where the bar is, right there, there's the now bar. So I'm gonna grab on to this, and I can basically drag these point out to the very beginnings and the ends, and you can see, it's a much longer clip, starts there, goes all the way to there. So what I'm gonna do is I'm gonna drag it to the point that I think, right there, and then I'm gonna take this, and once it hits that point... So once you get that to where you want it, right, I want it right there. Okay, so once I grab this, if I drag it, I can hit that bar, and it won't move the bar. So I grab this, and I just drag it to the bar, and now I know it's right on that frame. Then I take the bar, and I go to where I want. See, I want her to raise her hand and wave, and then, that's it. And then, it'll go to the next clip or fade. So then, I'll go like that, see I just dragged it and hit that. So now, I've got my clip. Now, the other thing, there are two other things that you can do, and if you click on here, you'll see two options. One is Capture Frame and one is Set Poster Frame. So if you wanna set the poster frame, which is basically, if you were to take this video and export it and put it like somewhere, whatever the thumbnail is that shows you, that's what the poster frame is, the thing that tells a video player what is the hero shot for this frame. So, if you wanna set that, you would put it like right there. And then you would say, I wanna set the poster frame there. So then, from then on out, the poster frame that tells you about this file is there. But the more important thing is capturing the frame. So if you capture the frame, and in our case, let me go, before I do that, let me show you something. I go back to the grid, oh-oh, the spinny wheel. Okay, so if I go back to the grid, and I look at this file, you'll notice right up here, that if I were to go and, oh, I shot this in black and white. Okay, so this was shot in black and white, I didn't change it. But if I had shot it in color and wanted to change it into black and white, I could come in here, and these are the adjustments that I can make. I can change something from color to black and white, I can change the White Balance of it, I can change Temperature, Tint, Exposure, Contrast, White, Blacks, and Vibrance. And that's it. Not really, though. The problem is that if I wanna use any thing in the Develop module, the Develop module doesn't support video. Not really, but kind of. So, if I go back here, and I click on this video, and I go to this, and I say, capture that frame, I just captured a frame, just choose whatever frame. And then, I'm gonna go back to the grid, and instead of looking just for videos, I'm gonna look for everything. And what I'll get is I'll get two pictures. I'll have a... So, here is the video, and here is the JPEG of that same video. Now, if I go to the Develop module, the Develop module does support JPEGs. So there are certain things in the Develop module that I can still use. And to find out what those are, you can highlight the JPEG here, and you can Command Shift over to the video here, and then, you can say, I want to, you go over here and say, Synchronize Settings. See, that's what available. So not only is White Balance and all those exposure things, but also the Tone Curve's available, Treatment, Saturation, Vibrance. So, see how now Saturation is available? So is Split Toning, so you could make your whole movie CPF if you wanted to. Also, Calibration and Process Version are available. Okay, so, those are the things that you can work on. So, let's actually go back into the Develop module then, and let's just look at that JPEG, and we'll go to the Tone Curve, and inside the Tone Curve, we can do a lot of cool stuff to it, so we could make a little bit thinner, black and white, but with a little bit of contrast to it. And then we could go in and do kind of a warming tone to it. So warm it up just a little bit like that, and we could take the blue out a little bit so some yellow gets in there. So if that's what we wanted to do to it, so we could do a lot of tricky stuff inside of there. We could also go down to the Split Toning area. So there's a lot of that stuff that we can do. Once we're done, then we just go back here, we click on here, Command-click over to the video or all the videos that we wanna adjust, and then, we simply go down to the Sync Settings, and we tell it to synchronize all of it or whatever little pieces we want to, and that's synchronized. And now, this video is going to have, see that, now that's got tone, but it still plays very nicely, all right? So, that's how we do it. I don't necessarily want to do that, so I'm gonna undo those changes, but that's how we accomplish editing a video inside of Lightroom. Can't do that on the iPad yet, but you can do it here. Yeah. I notice when you hit Click All, it check marked all the boxes, even though some of them were grayed out. Have you experimented to see if those change? It doesn't, don't get your hopes up there. No, the only ones that actually transfer over to it are those specific ones that were highlighted like open. Yeah. It would be really cool if you could like do a vignette and have that transferred over. If you wanted to get that tricky, you can actually go to Photoshop and work on video now, and so, you can bring a video in and put vignettes and all sorts of stuff on layered over the top of the video in Photoshop, and it'll then export a video with layers galore in it. So, for those of you who do not want to use Premiere, you could use Photoshop.
Class Materials
Free Download
Bonus Materials with Purchase
Ratings and Reviews
JIll C.
I was able to participate in the live taping of this course in the CL San Francisco studios, and it was a great experience. Jared is an enthusiastic, entertaining and very knowledgeable trainer as well as an accomplished photographer. He not only understood every aspect of the Lightroom mobile technology, but was able to advise us on how to adapt it to our needs and develop an efficient workflow to leverage the capabilities of this emerging technology. There are complexities of the interface between your mobile devices, the LR Mobile Cloud, and your primary computer that would be challenging to figure out on your own, and I highly recommend this course as a way to provide a clear picture and help you develop a path to adopt this very useful technology. Whether you're a high volume professional photographer or an avid hobbyist, you will find ways to incorporate LR mobile into your workflow as a result of this very informative course.
Tracey Lee
Great course for those who are new to Adobe mobile products or for those who want to understand how to implement an organised and efficient Adobe Mobile Lightroom Workflow. I was in the live audience and over two days Jared covers everything from beginner to advanced in a logical sequence with clear demonstrations, excellent supporting visual materials, detailed Q and A and a fun and engaging delivery. I'm really excited about what is possible! Definitely worth buying and watching from start to finish.
Rick
This class is ESSENTIAL for anyone in photography. Jared's teaching style, humor and sheer knowledge have me so excited about everything I can do with Lightroom Mobile and all the FREE Adobe CC for products that go along with it. I am currently reorganizing my entire LR catalog in order to utilize these tools for my past, current and future work. I cannot emphasize enough the amazing value of this class. I was lucky enough to be in the audience for this class and had such a fun time. So many aha moments. He really knows how to make a seemingly complex subject simple and easy to use.